

Transplanting Seedlings Outside: Tips for Success
Ah, that special moment when the seedling babies you’ve gingerly raised indoors are finally ready to move out into the big bad world of the garden. Or, is it more like those lanky teenagers have long overstayed their welcome – and you’re ready to kick them out of the house? Either way, nothing is more rewarding than transplanting seedlings outside… except harvest time of course!
Read along to learn when and how to transplant seedlings outside into your garden. We’ll cover how to properly prepare seedlings to be transplanted, steps for planting day, and follow-up care. The process is generally quite straightforward and simple, yet I have several tips to share to help prevent transplant shock – and grow the most healthy and productive plants possible! These tips can be applied to any type of vegetable, herb or flower seedlings that you started from seed, or those you purchased at your local nursery.
At a Glance
This article will cover:
- How to harden off seedlings
- The best time to transplant
- Tips to amend soil
- Best spacing and planting practices
- Benefits of worm castings and mycorrhizae
- Water and mulching tips
- More ways to prevent transplant shock
- How to protect seedlings from pests or harsh weather
BEFORE TRANSPLANTING SEEDLINGS OUTSIDE
Harden off seedlings
A very important step prior to transplanting seedlings outside is to ensure they’ve gone through a process called “hardening off”. Hardening off is when indoor-raised seedlings are gradually exposed to a wider variety of elements than they’ve otherwise received while protected indoors, such as direct sunlight, cooler temperatures, and wind. The process prepares them for the transition to the great outdoors, and greatly reduces the risk of transplant shock or injury during inclimate weather. (Heads up: store-bought seedlings have already been hardened off for you!)
Start hardening off your seedlings about a week prior to transplanting outside. Begin by bringing the seedlings outdoors (on a calm and mild day) for just a few hours at a time and in a mostly shady location at first. Then over the course of the week, gradually increase the time and direct sunlight they receive. By the end of the week, they should be sufficiently hardened off! However, we start strengthening our seedlings far earlier than a week before transplant day. For instance, the movement created by an oscillating fan nearby (used indoors just a couple weeks after sprouting) helps their stems become nice and strong. We also turn their heat mats down and then off a couple weeks earlier.
Related: Learn more step-by-step details about hardening off here, and all our of top indoor seed-starting tips here.

When to transplant seedlings outside? Know your zone
Before transplanting seedlings outdoors, it is important to familiarize yourself with your area’s frost dates and ideal planting times. Young seedlings are particularly susceptible to frost damage or even death (including plants that will grow up to be quite cold-hardy once they mature). Even if there is little-to-no risk of frost, transplanting seedlings too early can make them unhappy and more prone to stalling, stunting, or disease. For example, our area is virtually frost-free… but that doesn’t mean we should plant tomatoes outside in February!
Therefore, plan to transplant seedlings outside at a time that is appropriate both for the plants and your zone. I realize that sounds a bit ambiguous, so check out our Homestead and Chill planting calendars for an easy visual guide! We’ve prepared calendars that illustrate the ideal time to start seeds indoors or out, and when to transplant seedlings outside – for dozens of vegetables and every USDA hardiness zone.

Check the weather forecast
When the target transplant day comes, check your local weather forecast. Avoid transplanting seedlings outside if there is any stormy or extreme weather predicted in the coming days ahead. Check at least 5 to 7 days out for frost, heat waves, high wind, heavy rain, hail, or similar. Even if you’ve already hardened off your seedlings and are otherwise ready to go, it’s best to wait until more favorable conditions are on the horizon. If possible, choose a nice calm, temperate day to transplant seedlings outside.
Amend or fertilize your soil
Finally, prepare your garden soil before you transplant seedlings outside. Plants need ample and diverse nutrients to successfully grow and produce. As they grow, they use up existing nutrients within the soil, which can leave it relatively depleted at the end of each growing season. So, it is important to replenish nutrients by amending your garden bed soil between crops or seasons.
In our no-till style garden, we prefer to use natural, mild, slow-release fertilizers like alfalfa meal, kelp meal, and neem meal – OR something all-in-one, like this organic all-purpose fertilizer. All of these dry fertilizers are sprinkled over the soil, lightly scratched into the surface, and watered in. Additionally, we amend the soil with plenty of aged compost! Learn more about our soil amendment routine in this article.
In preparation for transplant day, it’s best to fertilize soil a week or so in advance (if using dry, meal-type fertilizers). Water it in a couple times to allow the fertilizer to become incorporated into the soil. This helps everything mellow out and prevents ‘burning’ the seedlings. However, we often add fertilizer to our garden soil the same day we transplant seedlings outside! With busy schedules, we can’t always follow best practices. However, we go lighter than the package recommendations to ensure nutrient burn won’t be an issue.
After that, it’s go time!

HOW TO TRANSPLANT SEEDLINGS
How far should I space my seedlings?
Follow the general spacing recommendations for the particular types of plants and varieties you are growing. When plants are overcrowded, they will compete for root space, nutrients, sunlight, and airflow. Crowded plants are also more prone to disease. I’ll admit that I sometimes push the suggested limits a tad, but do my best to give everyone the space they deserve and need. You can also fudge the spacing recommendations a bit by planting seedlings in offset rows, as opposed to a perfectly straight line. Also remember that even if a garden bed full of baby seedlings looks sparse, it WILL fill in.
General plant spacing recommendations:
- Space large bushy plants like tomatoes, summer squash, Brussels sprouts, cauliflower, broccoli and cabbage at least 18 to 24 inches apart.
- Smaller plants such as peppers, eggplant, bush beans, kale and other leafy greens can be planted slightly closer together – around 12 to 18 inches, depending on variety.
- Root crops like radishes, carrots, turnips, or garlic grow only inches apart – yet those are all best to direct-sow and thin in place, rather than transplant.
- If you haven’t already, thin each seedling down to only one plant per space.
Related: Visit the in-depth grow guides for tomatoes, cauliflower, summer squash, carrots, radishes, kale, green beans, or garlic by clicking on their name here.


Where to plant what
The majority of common vegetables, flowers and herbs prefer full sun – or as much as you can give them! This is especially true for heat-loving summer crops like peppers, tomatoes, corn, squash, beans, cucumbers, and more. Most cool-season crops like leafy greens, radishes, cauliflower, fava beans, green onions, or peas can tolerate partial shade, but may also grow less prolifically.
Also be mindful of the height plants may reach as they mature in relation to your gardens sun exposure. Avoid planting tall crops like tomatoes in a spot that would eventually shade out the shorter plants around them. Here in the northern hemisphere, we keep our tallest plants and trellises along the east and northern sides of our garden beds to maximize the southern sun exposure the rest of the bed receives.
Finally, if you’re wondering “what plants should I plant together?” – that’s a great question, and a subject all of it’s own! Intermixing various plants creates a beautiful aesthetic, and may also provide added benefits like natural pest control. On the other hand, some types of plants don’t particularly care for one another – like peppers and beans. Please visit our Companion Planting 101 article to learn more. It includes a free printable companion planting chart too!
Create Planting Holes
Dig a hole about the same size as the seedling root ball (or just larger). If the seedlings have become leggy (tall and stretched out) and you want to bury a portion of the stem, make the planting hole a tad deeper. Tomatoes, tomatillos, peppers, kale, and other brassicas like cabbage, collard greens, or broccoli do not mind their stems being buried a little. That is, as long as the seedlings aren’t super young and tender, and they have been properly hardened off! Otherwise, tiny tender stems have an increased risk of rotting below the soil line. Read more about preventing, fixing, and planting leggy seedlings here.
Optional: worm castings and/or mycorrhizae
Now, you could plant the seedling as-is. However, we like to spoil our transplants and give them a little extra boost of nutrition and love! First, we mix a small handful of worm castings to the bottom of every planting hole. Worm castings, also known as ‘black gold’, are a wonderful microbially-active fertilizer; gentle but potent. The organic matter in worm castings also improves soil structure to increase moisture retention and aeration. We use worm castings from our compost worm bin, but you can also buy them.
In addition, I also highly recommend inoculating the planting hole with mycorrhizae. Mycorrhizae are beneficial fungi that help increase nutrient uptake, root growth, fruit production, and disease-resistance! It can also prevent transplant shock. Mycorrhizae is most beneficial for plants that produce flowers and fruit (tomatoes, peppers, cannabis, squash, eggplant, fruit trees, etc) and it doesn’t make strong associations with the roots of brassicas like cabbage or kale.
Because mycorrhizae need to bind to the plant root system to survive, sprinkle granular mycorrhizae either directly on the root ball itself, or along the inner walls of the planting hole that will soon come in contact with the roots. A little goes a long way! (Follow the instructions on your package.) Don’t have any on hand come transplant day? You can also use a water-soluble mycorrhizae to water the seedlings after planting!
Related: Vermicomposting 101: How to Make and Maintain a Simple Worm Compost Bin


Plant the seedlings
Gently remove the seedling from its container, but avoid pulling on the stem itself. Instead, carefully tip the seedling container on its side and lightly push up from the bottom and/or squeeze the sides of the container to ease the root ball out. Avoid ruffling the roots unless they’re clearly root bound and winding around each other. In that case, gently loosen the roots before planting the seedling.
Place the seedling in the planting hole. Adjust the depth as needed so that the existing root ball will be level or just below the soil surface.
For extra leggy seedlings, it’s okay to bury them up to their first set of branches or leaves, but usually no more than a couple inches deep. An exception is tomatoes. Tomato seedlings (and tomatillos) are known for their tendency to grow fresh roots off of buried stems, so go ahead and plant those suckers up to 6 inches deep if needed. Remove lower side branches that would end up below the soil first. I’ve heard conflicting things about whether or not squash, eggplant, and cucumber seedlings like their stems buried, so play it safe and bury them minimally or not at all.
Once the seedling root ball is settled in it’s planting hole, gently pack soil around it to fill the hole. Be sure to get around the sides, not leaving any voids. However, don’t press down too firmly and compact the soil! Looser soil is better at absorbing water, and also draining away excess standing water.
Related:
- Growing Organic Tomatoes: How to Plant, Feed, Prune, & Grow Tomato Plants
- How to Prevent and Fix Leggy Seedlings


AFTER TRANSPLANTING SEEDLINGS OUTSIDE
Water
Once your seedlings are tucked away in their new bed, give them a good water! In the coming weeks, maintain the soil consistently damp (but not soggy). Keep in mind that young seedlings have very small, concentrated root systems – so be sure to water immediately around the base of the plant. Yet don’t neglect the rest of the bed! Watering the soil between small plants (and also watering deeply) will encourage their roots to spread. The more expansive the root system, the more access to nutrients and water the plants have, and the more robust and healthy they will become.
Related: Garden Irrigation Solutions: DIY, Efficient, and Non-Toxic Watering Options

Mulch
After transplanting seedlings outside, add mulch around them. Mulch is incredibly beneficial, but often overlooked! It reduces evaporation and runoff to keep soil evenly moist, and also buffers soil and plant roots from temperature swings.
Mulch in the spaces between the seedlings, but not directly against the stems. If it’s pressed right against young stems, mulch may increase the risk of rotting or pest issues. Therefore, maintain a few inches of open soil around the base of each plant. We personally love to use compost mixed with a woody ‘soil-building conditioner’ (similar to a very fine bark). Those items double as a slow-release fertilizer and add organic matter to the soil as well!
Related: Pros and Cons of 8 Popular Types of Mulch including compost, bark, straw, leaves, and more.
Protection
After you kick them out of the house, your babies may still need a helping hand. After transplanting seedlings outside, keep an eye on the weather forecast and be prepared to offer them protection if needed. Remember, young seedlings will NOT be happy when exposed to a hard frost. Also, consider their vulnerability to wandering pests such as rabbits, squirrels, or deer. You may not find the need to cover or protect your seedlings; it depends on the conditions in your garden.
We heavily rely on our hoops and insect netting to protect young seedlings from the ravenous beaks of wild birds in our garden – which also blocks pest insects like cabbage moths. We keep leafy greens covered for at least a month or two. The birds don’t seem to bother tomato, pepper, and squash seedlings as much. Hoops can also be used to support various row covers like frost blankets or shade cloth if significant temperature swings roll in. Other frost-protection tools include cold frames, individual cloches, or even bed sheets!
Related: Using Hoops and Row Covers for Pest Control, Shade, and Frost Protection and 7 Ways to Protect Plants from Frost Damage

More ways to reduce transplant shock (and boost growth)
There are a number of very gentle but effective liquid solutions you can ‘feed’ your seedlings with to reduce transplant shock and encourage rapid new root development, including:
- Aloe vera soil drench: We often do this for freshly transplanted seedlings along with new trees or edible shrubs. Essentially, it involves blending up some fresh juicy aloe vera leaves with water, diluting it significantly, and then watering each plant with about a cup of the final solution. Like it does for human skin, aloe vera has potent nourishing and regenerative properties for plants too! Learn how to make homemade aloe vera fertilizer here.
- Seaweed extract: Dilute seaweed extract is another excellent option to provide young seedlings a boost – especially if you don’t have access to fresh aloe vera leaves! We love and use this seaweed extract. Mix it with water per the instructions on the bottle, and feel free to learn more about its benefits in this article.
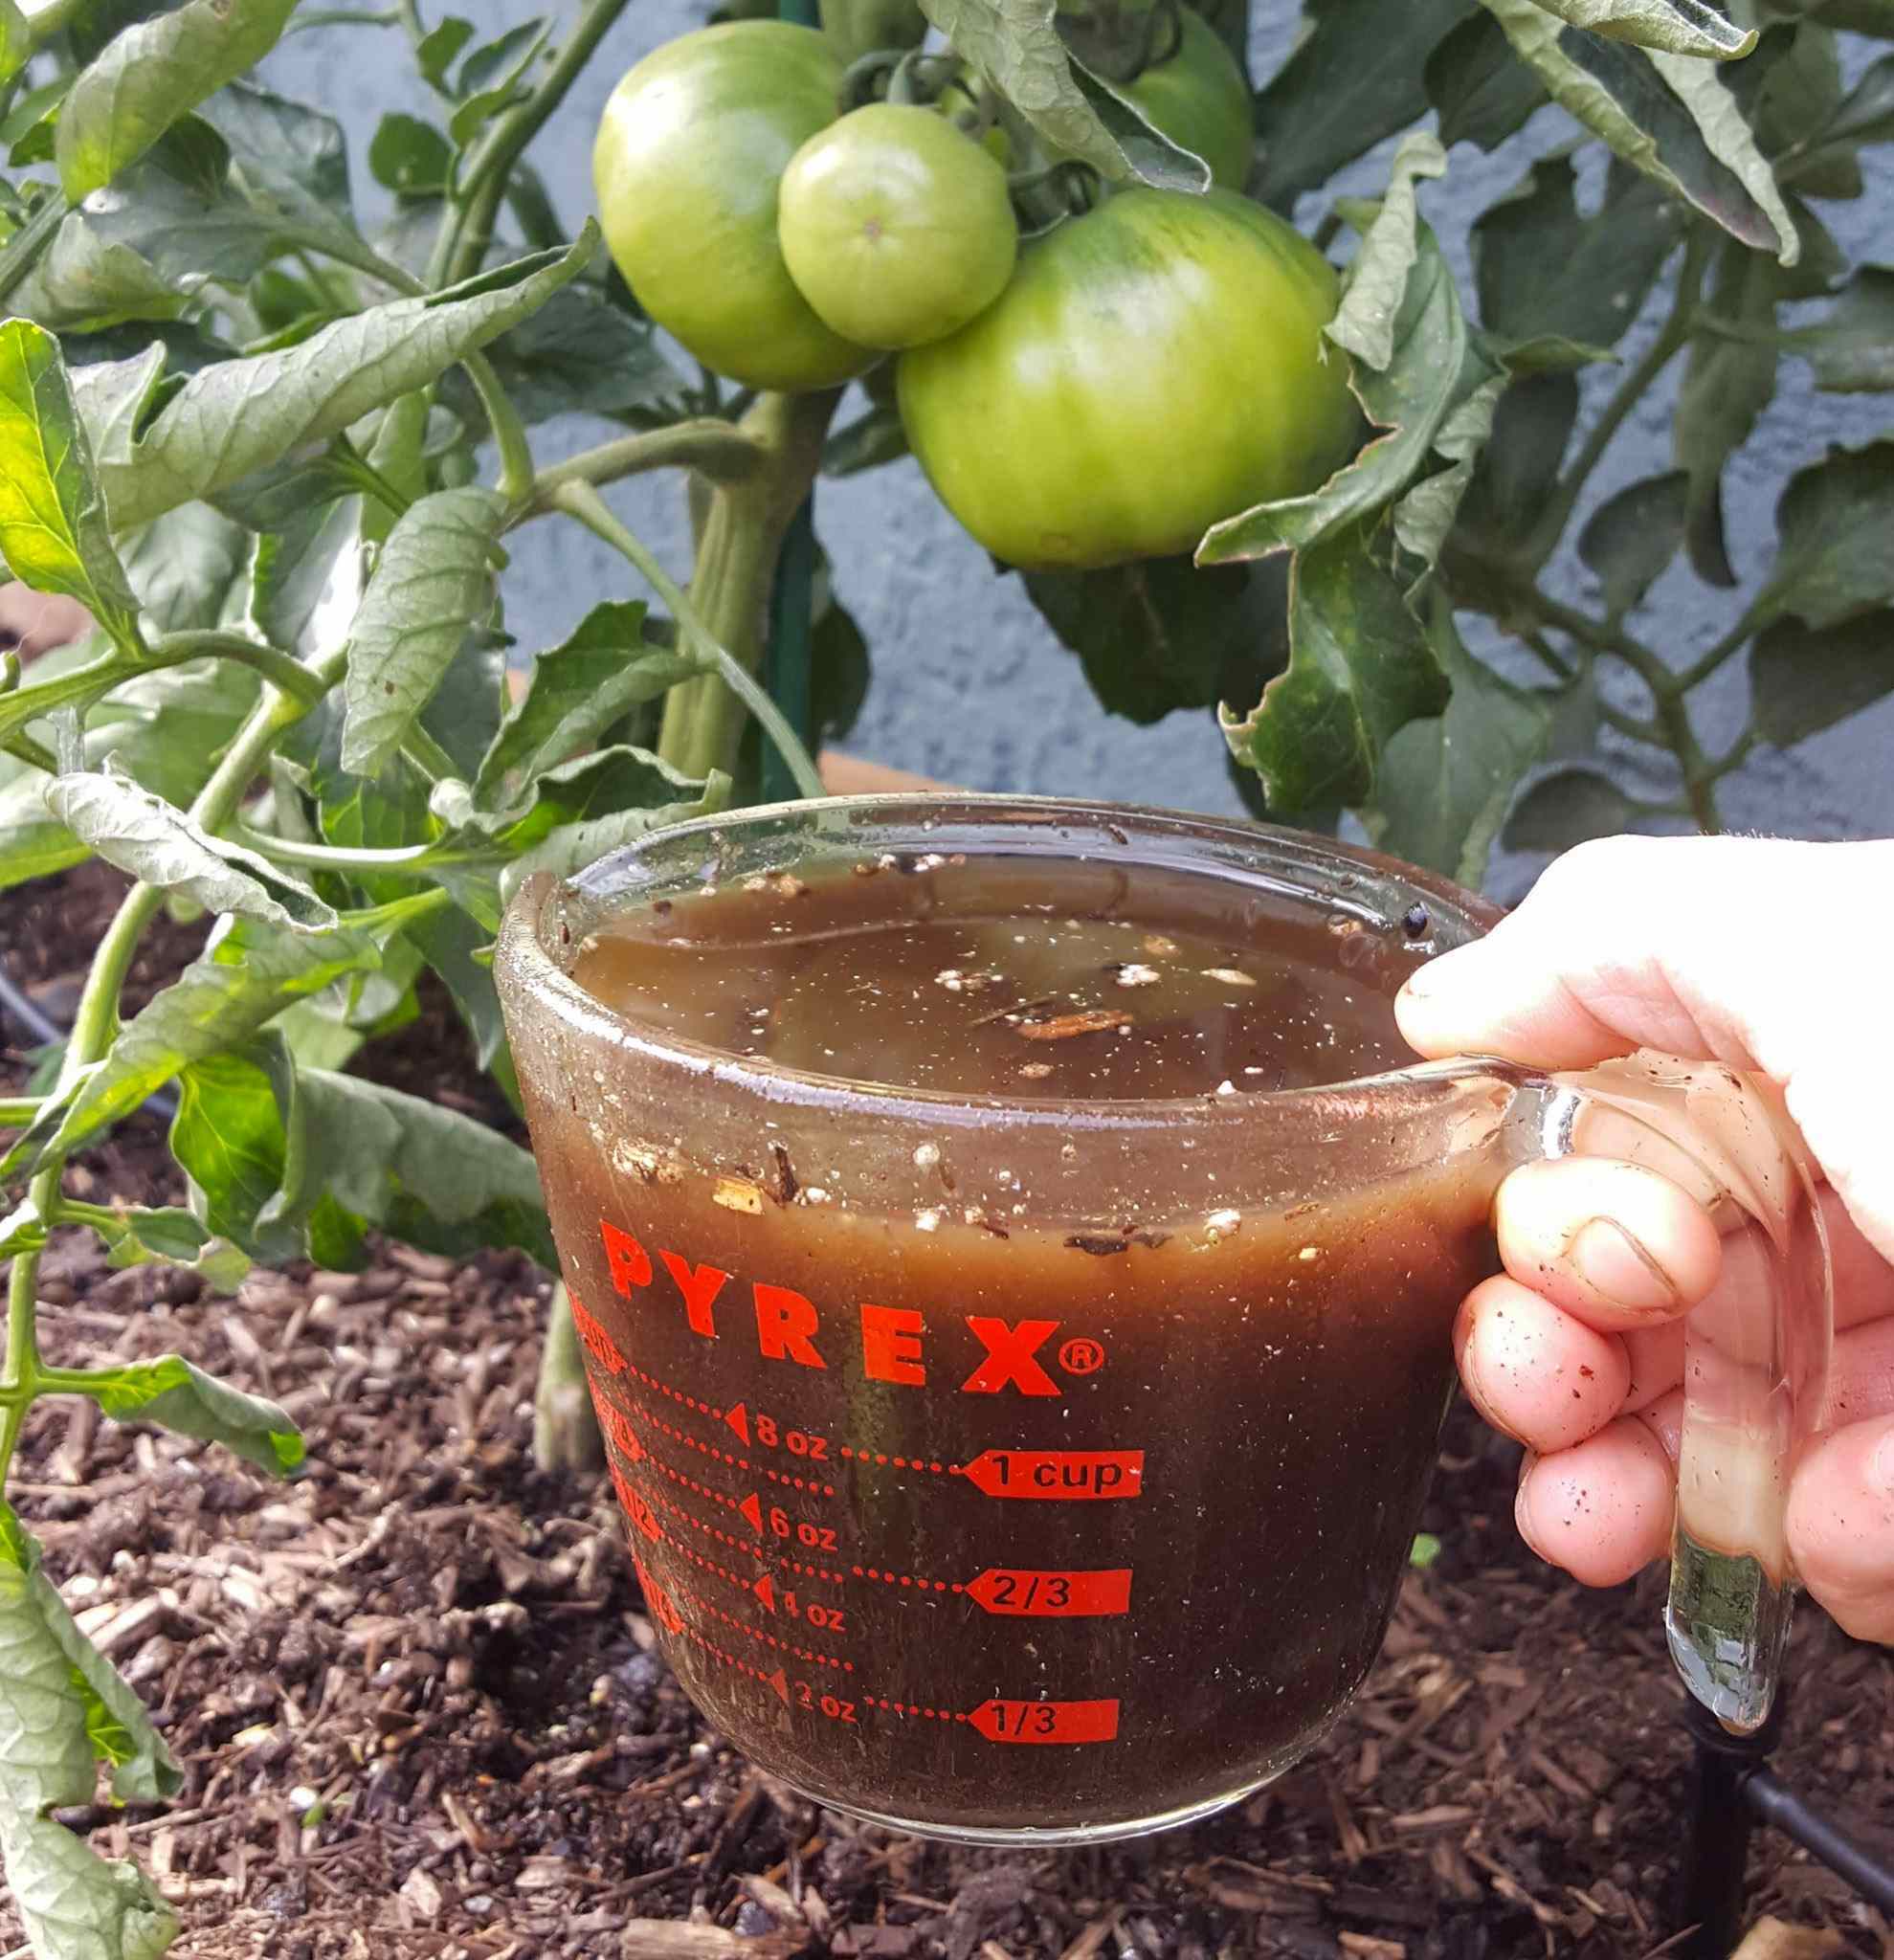
- Compost Tea: This option is my favorite from this list – and something you can do after transplanting seedlings outside, or any time throughout the growing season! We feed our garden actively aerated compost tea (AACT) several times per year. It’s kind of like our ‘secret sauce’. AACT tea is made by brewing compost in water with the addition of an air source (e.g. an air pump and bubbler) and a small amount of sugar (e.g. molasses). The process dramatically increases the number of beneficial bacteria in the brew, and results in highly bioavailable nutrients for your plants. Did you know that plants cannot take up nutrients without the assistance of bacteria and fungi? Check out our tutorial on how to make AACT here – video included!

Now you know all our secrets to success!
Are you ready to get planting? I hope all of these tips for transplanting seedlings outside will help you grow the most healthy, happy plants possible. Remember, you don’t have to do alllll of these things either! If I had to pick just a few key steps, I’d focus on using a mild organic fertilizer before planting, mycorrhizae on transplant day, and mulching thereafter. But don’t skip the hardening off process!
Please let us know if you have any questions in the comments below. If you found this information valuable, please spread the garden love by pinning or sharing this post. Until next time, happy planting!


12 Comments
Gene @The California Table
thanks for the informative and useful article:–) I’ve been growing my own seedlings for years and I still learned from reading your discussion. I’ll be using your method of feeding the soil with aerated compost tea for the first time this year; thanks to your really nice explanations and advice! Appreciate you a lot, Gene
Aaron (Mr. DeannaCat)
Hi Gene, great to hear even an experience gardener can still glean some new information from the article. Compost tea will kick your garden into high gear so you should be off and running this year. Good luck and happy gardening!
Leslie
Hi there! Thank you for sharing your wisdom – you are one of my go to resources! Started a bunch of flower starts inside and have potted them up and moved them outside in a small covered greenhouse. I included a bit of compost when I potted them up and also have fed with kelp. They just aren’t looking super green and lush anymore! Is it time to just put them in the ground and hope for the best? Any other insight as to why they are yellowish? We’re in zone 8 up here in Seattle.
Aaron (Mr. DeannaCat)
Hello Leslie, what size pots do you have them in? If they were slightly root bound before you potted them up they may still be slightly unhappy. Also being in Seattle, the weather may still be a little cool for them outdoors where they will really start to take off once the weather warms some. It is sometimes best to just let the seedlings or plants do their thing as they will usually shape up in time. Good luck and happy gardening!
Kristen
Such a helpful article! I may have missed this tip in the article, but at what size to you recommend transplanting the seedling?
Aaron (Mr. DeannaCat)
Hello Kristen, it really depends on the type of plant that you will be transplanting out and assuming that they have been hardened off properly with fair weather in the forecast. If the weather is going to be cold and rainy, transplanting seedlings out isn’t a great idea because they could become stunted and won’t grow much during this time. At the very least, once you start to see a plants roots emerging from the bottom of the pot or soil, it is likely forming a root ball that has taken up the space that has been offered and can be potted up into a larger size or transplanted out into the garden. We want the plant to be mature enough to withstand pressure from pests or wind and weather. Hope that clarifies that a bit more for you and good luck!
Susan M Jensen
awesome help,senior here in mn and need inside seeding. ty
DeannaCat
Thanks for reading along Susan, and best of luck this growing season!
Jim Quaschnick
Great article! I’m giving seeds a try this year and this really helps me. Thank you!
DeannaCat
Hi Jim! Thanks so much for the feedback! I’m glad you’ve ventured into the seed starting world. It’s so fun and rewarding. Enjoy!
Sara
Hi! Love your articles guys!! I have a question- What’s the best way to use netting set-up to protect transplanted seedlings where you have a vertical trellis? I have cucumbers and peas that the grasshoppers are starting to eat here in Florida (zone 9B) and don’t know the best way to wrap them up. Thanks so much for any advice.
🌱Sara
Aaron (Mr. DeannaCat)
Hello Sara, thank you so much for reading! This is an issue that we have often thought about ourselves although it is difficult to protect the plants without fully covering the entire trellis. I would most likely try and make a sort of triangle with the bottom of the netting spaced a foot or so away from your plants while bringing the netting over the top of the trellis and back down to the ground. You can use clothespins or heavy duty clamps to secure the netting to landscape staples which would be placed into the ground, add additional clamps to the sides to try and close up the openings as best as possible. It may not be the best thing to look at or fully covered as the sides may still be open to the outside but I would imagine it would greatly reduce the amount of pest damage as they have less space to access your plants. Usually once your plants become large enough they won’t be impacted as much by the pests as they are when they are smaller. Hope that helps and good luck!