


Tomato Blossom End Rot: Myths, Prevention and Treatment
Got rot? Blossom end rot is a common issue that affects tomato plants – along with peppers, eggplant, cucumber, squash, and melons to a lesser degree. Yet there are a lot of misconceptions and myths floating around about how to treat or prevent blossom end rot! Add eggshells, use epsom salts, dance a special jig… (Don’t do those things, they won’t work).
Instead, read along to learn all about tomato blossom end rot – including what really works to stop it, and what doesn’t! We’ll explore tips about fertilizer, irrigation, mulch, resistant varieties, growing tomatoes in containers, and more. Then you can sit back and enjoy a bounty of healthy, juicy, rot-free tomatoes this summer.
What is tomato blossom end rot?
Blossom end rot (BER) is a disorder that causes black, leathery, rotten spots on tomatoes. It occurs on the bottom end of the fruit (opposite of the stem) where the blossom was once attached – hence the name. In addition to being unsightly, BER reduces the quality and quantity of fruit grown. As the condition worsens, mold may also start to grow on the sunken black lesions.
Blossom end rot can also affect peppers, eggplant and zucchini, but tomatoes are more susceptible. Plus, the primary cause of end rot in zucchini (or other squash) is usually a lack of pollination, which is not the case for tomatoes, peppers and eggplants. Learn how to hand-pollinate squash to prevent end rot here! Finally, tomatoes, peppers and eggplant are also susceptible to sunburn or sun-scalding – where direct sun during extreme heat causes similar lesions on the fruit – which is sometimes confused with BER.

What causes blossom end rot in tomatoes?
Blossom end rot is a physiological disorder caused by inadequate nutrients, stress and growing conditions – not by a disease, fungus, virus, or bacteria. This can be good news, because it’s often much easier to control and adjust growing conditions than pests or disease!
The primary cause of tomato blossom end rot is the insufficient calcium uptake by the plants, exacerbated by inconsistent water supply, poor irrigation practices, and stress. However, this doesn’t necessarily mean the soil is lacking sufficient calcium! It simply means the plants are not able to utilize it for fruit development as needed. Damage to plant roots (e.g. root pruning) and overly acidic soil can also lead to calcium deficiency and BER.
Consistent, even, deep watering enables tomatoes to uptake and distribute calcium throughout the plant’s vascular system. On the other hand, extreme fluctuations in soil moisture levels from drought conditions, underwatering, heavy rains, or overwatering prevents tomato plants from getting the calcium they need. Meaning, even if soil has adequate calcium (which it often does!) tomatoes may develop blossom end rot if they’re subject to irregular watering or root stress. Even brief changes in water supply can lead to BER.

Myths about tomato blossom end rot
- Crushed eggshells do not prevent blossom end rot. I’m sure you’ve heard the old “put crushed eggshells in your tomato planting hole” hack, right? Truth be told, that won’t help. First of all, the type of calcium found in crushed eggshells (insoluble calcium carbonate) is incredibly difficult for plants to utilize. It’s bound and trapped within the shells. Grinding eggshells into a very fine powder makes the calcium somewhat more available, but still won’t help prevent BER if the other causes aren’t being addressed – such as wonky irrigation practices.
- Epsom salts do not prevent tomato blossom end rot – and can actually make it worse! Like the eggshell hack, I often see recommendations to add epsom salts to the soil when planting tomatoes. Chemically speaking, epsom salts are made of magnesium sulfate and do not contain calcium. According to the University of Hawaii, “the presence of excessive amounts of magnesium, sodium, or potassium in the soil interferes with calcium availability”. Therefore, adding epsom salts to soil can worsen calcium deficiency and BER!

Are tomatoes with blossom end rot still edible?
Yes, it is safe to eat the remaining good portion of a tomato that has blossom end rot. Simply cut off the affected black portion and enjoy the rest! However, if the rot is advanced and mold has infiltrated the center of the tomato, toss it in the compost instead. Since it’s not caused by a disease, tomatoes with blossom end rot do not pose a risk to your compost pile.
7 Ways to Prevent Blossom End Rot in Tomatoes
Now let’s talk about 7 ways to prevent blossom end rot in tomatoes, followed by ways to treat or stop it once it starts. The following tips apply to preventing BER in squash, eggplant, peppers, cucumbers, or melons. Keep reading below for tips on BER and potted tomatoes too!
1) Amend Soil Before Planting
It’s important to grow tomatoes in soil that is both well-draining, but also rich in organic matter and has good moisture retention properties. It’s all about balance! Amend heavy clay soil with bagged potting soil, compost, horticulture sand, small volcanic rock, pumice, or other amendments that promote better drainage. On the other hand, add plenty of well-aged compost, worm castings, and organic matter to sandy soil to improve moisture retention. (Learn about our raised bed soil blend here.)
Before planting tomatoes, amend garden soil with a well-balanced, slow release organic fertilizer like this – which contains plenty of calcium, along with essential macro and micronutrients too. Sprinkle it over the soil surface, lightly scratch it into the top couple inches, and then water it all in.
At the time of planting, we also like to add a small sprinkle of crab meal (high in calcium) directly to the planting hole below the tomato root ball, along with some worm castings and mycorrhizae – explained more below. Both help to support healthy root growth and nutrient uptake!

2) Develop a Consistent Watering Schedule
Watering tomato plants consistently is the best way to prevent blossom end rot. Try to develop a regular watering schedule that will give the plants approximately the same amount of water and at a set interval of time.
That doesn’t mean more water is better though! Nor should you water tomato plants daily. In fact, it’s better to water less often but deeply rather than providing short, shallow, frequent bouts of water. Deep regular water encourages tomato plant roots to grow deep into the soil, where moisture levels stay more consistent naturally!
The amount you water your tomatoes will vary depending on your climate, soil type, and other unique circumstances. The goal is to water often enough to keep the soil evenly and consistently damp, not swinging between sopping wet and very dry. (See tips for watering potted tomato plants below.)
Using an automated drip irrigation system helps tremendously! For instance, we run our raised bed drip irrigation system for 60 minutes twice per week early in the season (when spring weather is fairly cool and the plants are still small) and increase to 75 minutes twice per week as the plants mature and require more water.
If you can’t set up a drip system, I highly recommend looking into GrowOya self-watering clay vessels. Before we had drip, we’d bury a couple ollas in the center of our raised beds to deliver slow, even moisture – and offset the frequency we needed to hand water! Code “deannacat” will save 5% off.


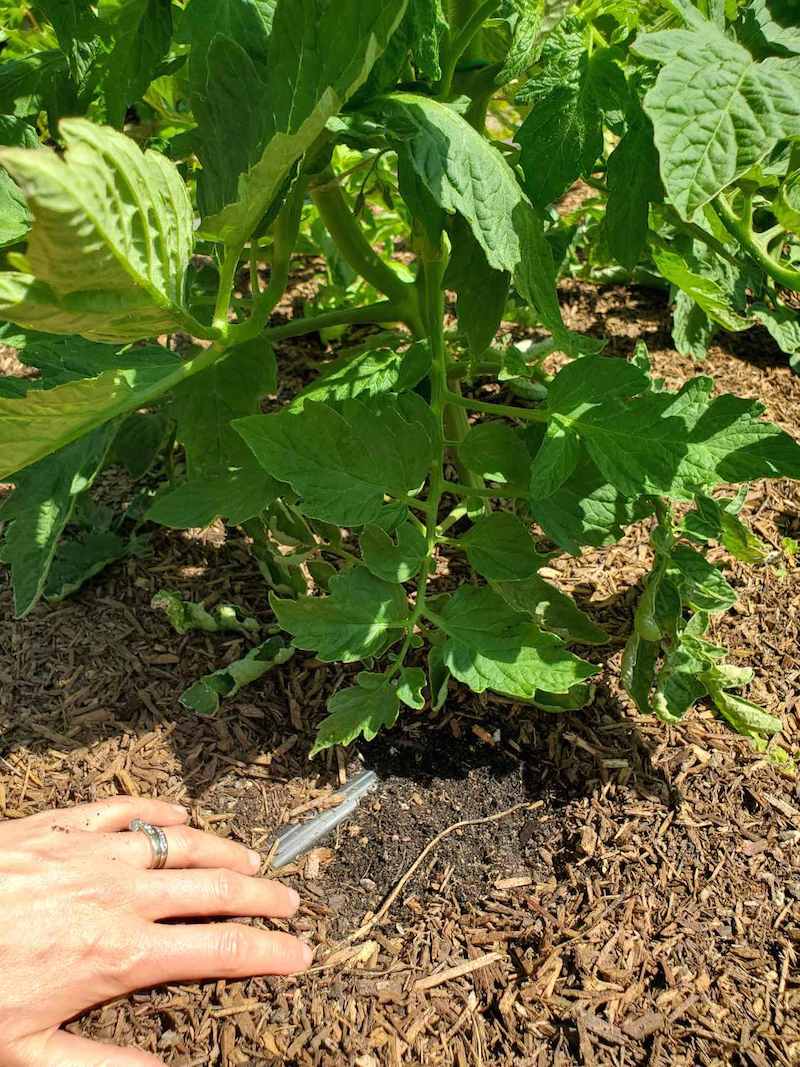
3) Use Mulch
Mulch, mulch, mulch! (Louder for the folks in the back!) Mulch is essential in preventing tomato blossom end rot, especially in hot climates. Along with suppressing weeds and insulating roots against temperature swings, one of the key functions of mulch is to reduce moisture fluctuations. By covering exposed soil, mulch reduces evaporation, prevents the top of the soil from drying out, and keeps soil more evenly damp below. Mulch also reduces the frequency and amount you have to water!
To mulch tomato plants, apply an approximately 2-inch thick layer of mulch in a wide circle around the base of the plant – or mulch the entire bed. But avoid piling mulch up directly around plant stems.
There are a number of organic garden mulch options including straw, wood chips, compost, cardboard, newspaper, pine needles, and more. In vegetable garden beds, we prefer to use a combination of compost mixed with a fine woody “soil building conditioner”. Learn more about the pros and cons of 8 types of mulch here.
4) Use Mycorrhizae
Have you heard of mycorrhizae? It’s amazing stuff! Mycorrhizae is a beneficial fungus that colonizes plant roots. It acts like an extension of the plant’s root system, increasing access and use of valuable resources within the soil – including water, nutrients, and even air. In turn, this helps plants grow larger, healthier, and more productive than ever! Plants with robust root systems are also more resilient to stress and drought. Because mycorrhizae can aid in calcium uptake, it can also help prevent BER.
Use mycorrhizae to prevent tomato blossom end rot by sprinkling granular mycorrhizae in the planting hole (or directly on the root ball) at the time of transplanting. Be sure to apply it in direct contact with the roots and water it in after! Another option is to water tomato plants with water-soluble mycorrhizae after planting.

5) Test Soil pH
Overly acidic soil can impede calcium uptake, leading to calcium deficiency and BER. The ideal soil pH range to grow tomatoes and prevent blossom end rot is 6.2 to 6.8 (slightly acidic). While it’s pretty uncommon for most garden soil to be too acidic for tomatoes, use a pH meter to check soil acidity levels when in doubt. This pH meter also measures moisture levels!
If your soil is below 5.5, consider using an organic lime product to slightly raise the pH and prevent blossom end rot. Wood ash also naturally raises soil pH and contains numerous beneficial nutrients, including calcium.
6) Apply Mid-Season Fertilizer
Young tomato plants won’t need additional fertilizer for a couple months after transplanting, especially if the soil was amended prior to planting. Yet as they begin to mature and bear a lot of fruit, tomato plants will appreciate additional fertilizer to help them keep growing strong later in the season.
For an added boost of nutrients, we typically feed our tomatoes with compost tea and/or alfalfa meal tea once a month (in the later summer months). Another easy alternative is to sprinkle organic alfalfa meal around the base of each plant, water it in, and repeat once per month.

7) Grow BER Resistant Tomato Varieties
A final option is to select and grow tomato varieties that are resistant to blossom end rot. Better Boy, Celebrity, Early Girl, Big Beef, Mountain Pride, Fresh Pak and Jet Star are a few examples of popular BER resistant tomato varieties that may be available at local garden centers. They aren’t 100% immune, but are far less susceptible to developing BER than most heirloom cultivars. If you’re growing from seed, read plant descriptions carefully. Unfortunately, Roma and paste varieties of tomatoes are especially prone to blossom end rot.
Personally, I would focus on getting my soil, nutrients, and water situation figured out first (because there are SO many other fun tomato varieties to grow!) – but this is a great option for folks who consistently struggle with BER despite all other efforts.
Growing Tomatoes in Containers and Blossom End Rot
Growing tomatoes in containers poses a unique challenge for avoiding blossom end rot. Some containers dry out very quickly, while others are prone to staying quite soggy. In general, potted plants typically need more frequent water than those growing in-ground or raised beds. Larger containers are better at retaining even moisture, while smaller pots tend to dry out fast.
First, ensure that your container has holes and good drainage. Next, be sure to use a soil mix that is made for containers (such as potting soil, amended with compost and/or worm castings) to help promote even moisture retention. Then, all of the other tips we’ve explored today also apply to potted tomato plants.
To prevent blossom end rot in potted tomato plants, I highly recommend using a moisture meter to monitor soil and adjust your watering schedule accordingly. Clay self-watering spikes can also help slowly deliver water to potted plants over a longer period of time, reducing undesirable moisture fluctuations. Following the same idea, a small GrowOya self-watering vessel will fit in large containers (such as a 5 to 15 gallon pot, whiskey barrel or half wine barrel) and also offers slow, steady, even water.
You could also consider growing tomatoes in this handy self-watering tomato pot.

Treating Blossom End Rot
Can blossom end rot be stopped or fixed once it starts?
Yes and no. Blossom end rot cannot be reversed in the fruit that have already started to show signs of rot – but the plant itself can be saved! If the plant’s calcium deficiency and irregular irrigation practices are quickly corrected, blossom end rot can be stopped to prevent the next round of fruit from getting it during the same growing season. And after reading this article, you’ll also know how to prevent BER in the future!
How to treat blossom end rot once it starts
To stop and correct blossom end rot, first assess your watering practices. Do your best to develop a more regular irrigation schedule that will reduce extreme moisture fluctuations in the soil (as we already explored above). That alone should help stop blossom end rot significantly. And don’t forget to mulch!
Next, there are a few ways to correct calcium deficiency and reverse blossom end rot.
Options include:
- Amend the soil with a high-calcium organic fertilizer, such as crab meal or crustacean meal. Sprinkle it around the base of the plant, lightly scratch it in, and then water well. You can also create a mild liquid calcium fertilizer by soaking dry finely-ground eggshells in water for several days, then dilute by 50% and water plants with it.
- For an even faster, better boost of calcium, consider using a water soluble calcium foliar spray. Rather than waiting for the nutrients to travel through the soil and root system, foliar sprays absorb right into the leaves and plant’s vascular system. Learn how to make a calcium foliar spray with pulverized eggshells and vinegar here. The acid in the vinegar works to “unlock” the calcium in the eggshells, significantly better than water!
- Water struggling plants with water soluble mycorrhizae to increase overall nutrient availability and uptake.
- Test and adjust soil pH. Since overly acidic soil (below 5.5) can cause calcium deficiency in plants, use an organic lime product to raise pH to the ideal range (6.0 – 6.8) if needed.

Cheers to growing healthy, rot-free tomatoes!
All in all, I hope this was insightful and helps to shed some light on the truth about what really causes and prevents tomato blossom end rot. If you found this article useful, please consider pinning or sharing this post! Also feel free to ask questions in the comments below. Finally, don’t miss out on our other related tomato-growing tips, recipes, and more! Thank you so much for tuning in today, and have a great tomato season.
You may also like:
- How to Make the Best DIY Tomato Trellis (Stake & Weave Hybrid)
- Organic Tomato Grow Guide
- Simple & Delicious Roasted Tomato Sauce Recipe (Freezer Friendly)
- 6 Ways to Train, Support and Prune Tomato Plants
- DIY Tomato Cage Tutorial: Sturdy and Cheap!
- How to Freeze Tomatoes (plus defrost and use)
- Creamy Roasted Tomato Basil Soup (vegan)


2 Comments
Cindy Green
You talk fo using a moisture meter to know when to water. How do you use one for tomatoes? When do you water according to the meter? I grow tomatoes in ground in my garden, in ground in my food forest and in cattle mineral tubs, in raised beds and in my greenhouse so I have lots of different soils and grow conditions.
Aaron (Mr. DeannaCat)
Hi Cindy, you just insert the moisture meter into the soil surrounding your tomato plants. We don’t typically have to use a meter, you can just uncover the mulch in areas and see how moist the top of the soil is which will typically give you a good indication of the soil moisture. Since we use drip irrigation, we just get on a cycle or pattern of watering our beds and with time, we have found the right combination of water days per week (twice) and amount of time per watering. If your tomatoes look healthy and happy, you are likely watering just fine. Hope that helps and good luck!