


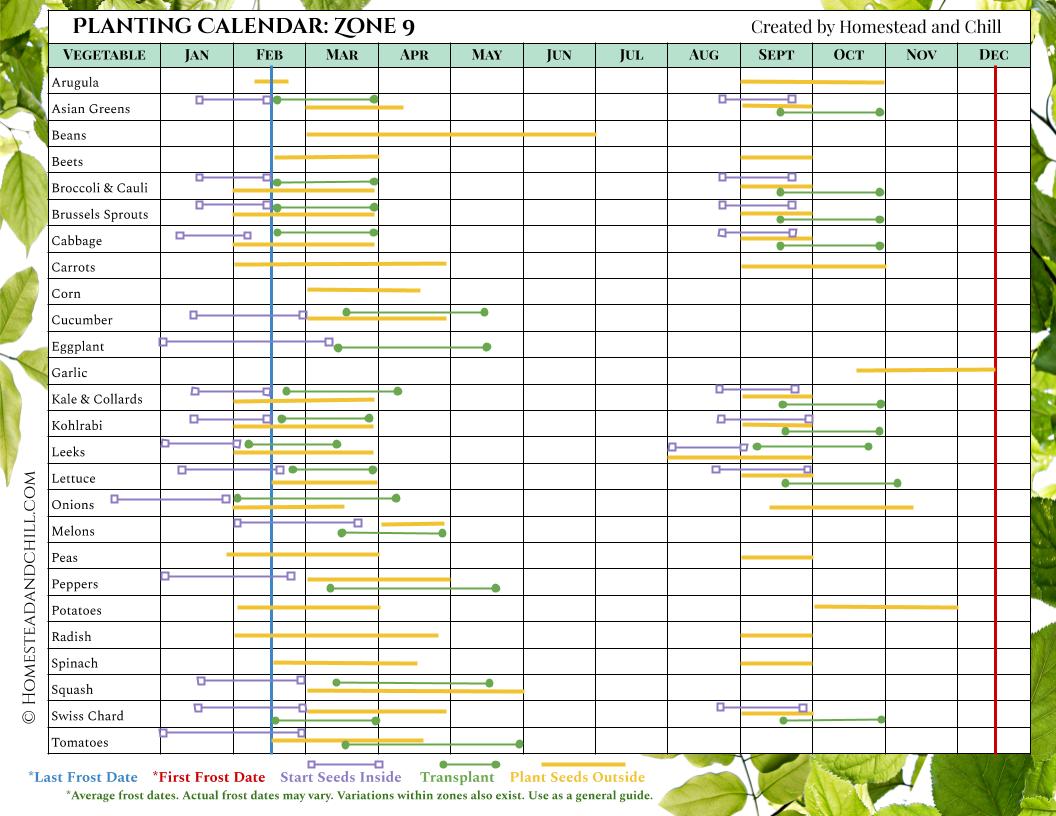
How to Grow Onions: from Seed or Sets to Harvest
As strange as it may sound, onions are one of our favorite crops to grow! They’re highly underrated. It’s easy to grow onions, once you know how! Few pests bother them, and the plants are forgiving and versatile – since you can harvest and use these alliums at many different stages along the way. Not to mention, onions are the ultimate garden-to-table crop. Just about every killer soup, stew, sauce, or stir fry begins with a familiar foundation: sauteed onions and oil (or butter). Toss in some garlic? Now we’re talkin’.
Read along to learn how to grow onions from seed, seedlings, or sets. This article will teach you everything you need to know, including how to choose the varieties that will grow best in your garden, when and how to start onion seeds, plus tips for transplanting and ongoing care. Then we’ll talk about how to harvest, cure, store, and preserve your onions too. Spoiler alert: homegrown onion powder is outstanding!
When to Grow Onions
Onions are generally considered a ‘cool season crop’ because onion seedlings like to start their life when conditions are still cool. Then as the weather warms up, they switch to focus their energy on bulb formation. Therefore, spring is the best time to plant onions in most places. If you hope to grow onions from seed, you’ll need to be prepared to get a jump start and plant seeds during winter. After sprouting onions take three to five months to reach a mature size, depending on climate and variety.
Gardeners with mild winters can also grow onions in the fall for a winter harvest. Here on the temperate Central Coast of California, we can grow onions essentially year-round! In colder climates, it is also possible to plant onion sets in fall but allow them to overwinter and harvest mature onions in the spring to early summer. In that case, plant onions when the soil is still warm – at least a month before your first fall frost date. That gives them time to establish healthy roots before they go dormant for the winter.
All in all, it may take a little experimentation to figure out the best time to grow onions in your particular climate and garden. One very important key to this puzzle is to choose the right type of onions to grow for your area!
TYPES OF ONIONS
The difference between bulbing onions, green onions, scallions or spring onions
Red, yellow, white, sweet… In addition to the various colors and subtle flavor differences, traditional bulbing onions can be enjoyed in a variety of ways – depending on the age they’re harvested! Before forming large bulbs, immature onions may be picked and used as green onions – also known as scallions. If you allow them to mature a little longer and form a modest (but still underdeveloped) bulb, then they’re considered spring onions! Gather up a cluster of young green onions, spring onions, or scallions, and now you have a handful of bunching onions. Note that there are also varieties of slender non-bulbing onions; a true “green onion”.

Short-day, long-day, and day-neutral onions
In addition to size and color, different onion varieties are further classified as either short-day, long-day, or day-neutral onions. They’re grouped by the number of daylight hours required to trigger good bulb formation. It is important to choose and grow onion varieties that are a good fit for your location! Otherwise, the onion bulbs may fail to successfully develop. Non-bulbing green onions aren’t as fussy about exact daylight hours, though all onions like plenty of sun!
- Short-day onion varieties will form bulbs once daylight hours increase to 10 to 12 hours per day. They are ideal for southern gardeners where daylight hours are consistently shorter throughout the growing season compared to the longer days up north. If grown in the north, short-day onions may go to flower too early in the season as the days become increasingly longer – resulting in stunted, small bulbs. Short-day onions are rumored to be sweeter than long-day. Some popular varieties of short day onions include Red Burgundy, Grano, White Bermuda, Southern Belle, and ‘Yellow Granex’ (also known as Vidalia).
- Long-day onions will form bulbs once they’re provided 14 hours of daylight or more. Without sufficiently long days, they will not form bulbs. Long-day onions perform best in the northern half of the US and Canada. Yellow Sweet Spanish, Walla Walla, Calibra, Southport White Globe, Rossa di Milano, Red Baron, Red Carpet, Cortland, and Sweet Spanish White are a few awesome long-day onion varieties.
- Day-neutral or “intermediate day” onion varieties form bulbs with 12 to 14 hours of daylight, and are perfect for folks gardening in the middle of the United States. Check out these intermediate day onions: Cabernet, Gladstone, Sierra Blanca, Talon and Red Amposta.
Not sure which to choose?
As a (very) general rule of thumb, short-day onions grow best south of the 35th parallel, and long-day onions do well north of the 35th parallel. Many onion varieties will specifically state which latitudes they’re best suited for. Ironically, our garden is located almost exactly on the 35th parallel – just a squeak north at 35.1216° N. We grow impressively large Walla Walla onions (a long-day variety) during the early spring to summer. Yet they don’t do as well for us as a fall-planted winter crop when the days get shorter. If you’re also close to the boundary, have fun experimenting with a wide variety!

Where each type of onion grows best. However, see the black star? That’s where we’re located, on the California Central Coast, almost right on the 35th parallel. According to this graphic we should be growing short day onions… but we grow stellar long-day onions here too! So, if you’re close to a latitude border or in the central “intermediate” area, don’t be afraid to experiment. Yet if you’re in the far north or far south, stick to long day or short day onions (respectively). Thanks for the great map, Johnnys Seed!
Should I grow onions from seed, seedlings or “sets”?
There are three main ways to grow onions: from seed, seedlings, or by purchasing onion sets. Every gardener has their preference between the three! We like to grow onions from seed, or from seedlings we buy at a local nursery. Growing onions from seed is easy, and allows you to choose the exact varieties you want to grow! Purchasing started seedlings or sets is also a great option, and will give you a quicker start than seed.
Onion seedlings are like small green onions, recently started from seed (within the last couple months). You can grow your own, or purchase seedlings at your local garden center.
In contrast, onion ‘sets’ are small, dry, immature onion bulbs that were grown from seed the previous year. They were allowed to partially develop, harvested as a tiny bulb, and kept dormant to later sell or plant as “seed” – though they’re not really seed. Because they’re on their second year of life (and onions are biennial), onion sets have the tendency to bolt more readily or result in underdeveloped bulbs. When an onion ‘bolts’, it prematurely sends up a flowering stalk and then forms seed. You can still eat around the tough center of the onion bulb, but it will decline in quality and no longer be good for long-term storage.

HOW TO GROW ONIONS FROM SEED
To grow onions from seed, you can either start seeds indoors, sow seeds directly outside, or use the winter sowing method. Planting seeds directly outside is simple. You won’t need to fuss with an indoor seed-starting set-up, or have to transplant seedlings later. However, starting seeds indoors during winter will put you several weeks (to months) ahead of schedule. You’ll have onion seedlings ready to transplant into the garden right away in spring. For northern gardeners with short growing seasons, this is a critical advantage! There, the direct sow method won’t give the onions enough time to mature – so seeds should be started indoors.
Direct sowing onion seeds outside
Plant onion seeds outside in late winter to early spring, once the ground is no longer frozen and can be worked in your area. Read the soil preparation and site selection tips below before you start. Then, sow onion seeds approximately 1/4 to 1/2″ deep and about 4 inches apart. Cover the seeds lightly with soil, and maintain damp to promote germination. Once they sprout, thin to one onion seedling per 4 inches to avoid crowding. (Note that germination rates will be slower and less consistent with this method, and not recommended for northern climates). Check your zone’s planting calendar to see if you can also direct sow onions in the fall.

Starting onion from seed indoors
Start onion seeds indoors about 8 to 10 weeks before the last spring frost date in your area. Follow the common best practices for indoor seed-starting: use a sterile seedling potting medium, keep the soil damp but not soggy, and provide at least 12 hours of bright light per day after germination. You’ll need a few supplies such as seedling trays, small containers or pots, and a grow light or other supplemental light fixture. Onion seeds will sprout most readily in consistently warm soil (70-75°F, a seedling heat mat will help!) but then can be moved to a cooler spot in the 60s.
The warm, comfy indoor conditions will help onion seeds sprout and grow quickly. Once they reach 5 or 6 inches (or taller), trim the tips of their greens down to 3 or 4 inches. This encourages thickening, stronger root development, and prevents them from flopping over. Eat those trimmed bits as green onions!
I do not thin my onion seedlings until I transplant them outside. I allow a handful of seedlings to grow together in one cell or small pot, and then very gently pull them apart to plant separately come transplant time. Onions do well with this treatment, so don’t be afraid to sow several seeds per container!
Please visit our Seed Starting 101 article for more details about starting seeds indoors, and our favorite supplies.


Winter sowing method
A final option to grow onions from seed is with the ‘winter sowing method’. This is when you sow seeds inside a covered container, but do so outside. As the name suggests, start your onion seeds outdoors during the winter – between late December to February in most locations. The seeds will stay dormant in the chilly outdoor conditions, and sprout in spring once the conditions are right. Then you can transplant the already hardened-off seedlings to their final location in the garden. Winter sowing combines the pros and cons of the other options: you won’t get quite the same early advantage as starting indoors, but it’s almost as low-maintenance as directly sowing seeds outside.
To grow onions with the winter sowing method, select a wide shallow container with drainage holes that can be covered with a clear or opaque dome or lid (or, one that already has one). Add at least a couple inches of seed-starting soil to the bottom, evenly sprinkle or sow onion seeds inside, and then lightly cover the seeds with about ¼ to ½ inch of soil. Add at least one or two air holes for ventilation to the cover.
Set the container in a sunny location, water as needed to maintain the soil damp, and wait for the seeds to germinate. Once the seeds sprout, open the container lid on warm days (but close them back up on cold nights). Keep watered as needed. If snow or a hard frost is a threat, move the container to a protected location or cover it with a blanket for insulation.

Growing Onions from Sets
Plant onion sets in the garden 2 to 4 weeks before the last frost date in your area. Bury them deep enough that the bulb is mostly under the soil, but with the pointed tip level with the soil surface or just poking out. Space onion sets about 4 to 6 inches apart, depending on the expected mature size of the variety you’re planting. Speaking of variety, don’t assume all onion sets you find in local stores will grow well in your area! Big box garden centers are notorious for selling very zone-inappropriate varieties. Small locally-owned nurseries should offer a much better selection.
We haven’t experimented with growing onions from sets, and I’ve heard mixed reviews from fellow gardeners. While this method is certainly easy, it can lead to underdeveloped or flowering bulbs more often than starting from seed or seedlings. If you do opt to grow onions from sets, choose the smallest bulbs you can find. Sets around a half-inch in diameter or smaller are ideal. Contrary to what you may think, bigger isn’t better! Experts say that larger onion sets are more likely to halt bulb development and bolt (go to seed and flower) sooner than more petite bulbs.

How to Plant Onion Seedlings (transplanting)
Before transplanting, indoor-raised seedlings must be gradually acclimated to outdoor conditions through a process called ‘hardening off’. Even though onion seedlings can tolerate chilly temperatures, hardening them off first will prevent shock or damage from the sudden change in environment. Learn more about hardening off here. (You can skip this step if you are growing onions from seedlings you purchased at a nursery, or if you used the winter sowing method.)
- Transplant homegrown or nursery-bought onion seedlings outdoors about 2 to 3 weeks prior to your areas last spring frost date.
- Gently pull apart or separate any clusters of seedlings, taking care to break as few roots as possible.
- Create a slender hole that is deep enough to accommodate the seedling’s roots, and bury the seedling so the base is about a half-inch to an inch deep.
- Space your onions 4 to 5 inches a part, depending on expected mature size for the given variety. Or, plant them closer if you want to harvest them as green onions or small spring onions.
- If you haven’t already, cut off the tips of the greens with clean scissors, which helps focus energy on growing a large onion bulb. Take the seedlings down to about 5 inches tall. It’s also okay to pull off the outermost seedling leaves; those usually end up looking a bit sad by now.
Onion seedlings that have been hardened off can withstand a light frost, but need to be protected from a hard freeze. If needed, shelter young onion transplants with frost cover, cloches, buckets, or other protective insulation. Learn more about protecting crops from frost here.

Planting Location: Sun, Soil, & Amendments
Choose a location in your garden that receives full sun. Some varieties of green onions can handle partial shade, but all onions grow best in ample sun. If your garden is on the shady side, choose short day varieties to encourage bulb development. Onions grow most happily in moderately rich, well-draining soil. Amend clay soil with organic matter (e.g. compost) or potting soil to improve drainage.
Before planting, amend the soil with a balanced, mild, slow-release fertilizer such as this organic all-purpose blend. I also recommend lightly working in well-aged compost and/or worm castings to the top couple inches of soil. Avoid high-nitrogen fertilizers. Excess nitrogen will encourage ample green top growth, but at the expense of the bulb. During the growing season, we water our onions at least once with homemade compost tea.
It’s also a great idea to inoculate the soil with mycorrhizae, either by applying some to the soil or watering with a mycorrhizae solution after transplanting. Mycorrhizae are beneficial fungi that promote healthy root development and nutrient uptake for all plants. However, onions are especially reliant on root-mycorrhizal partnerships to take up phosphorus that’s essential for their growth!

Water
Onions have shallow root systems, so it is important to keep them well-watered. A lack of consistent water will result in smaller onion bulbs. Adding a layer of mulch around the onions is an excellent way to prevent the soil from easily drying out. We love to use compost as mulch! It is dual purpose since it helps feed the soil as well as retain moisture. Remember, good drainage is crucial too! Soggy soil or standing water increases chances of onions rotting.
Related: The Pros and Cons of 8 Popular Types of Garden Mulch

Growing Onions as Companion Plants
Very few pests are attracted to onions. In fact, onions actually repel many pest insects, including aphids, flea beetles, cabbage loopers, ants, carrot rust flies, and more. Therefore, onions make great companion plants in the garden! Onions can be interplanted among other pest-prone crops to help provide natural, organic pest control. Rather than always growing onions in separate designated areas, we’ve had success keeping our Swiss chard plants almost completely aphid-free (usually a big issue) by tucking miscellaneous onions between them. Interested to learn more? Stop by this article, which also includes a handy printable companion planting chart!
Harvesting Onions
To use as green onions or young spring onions, harvest onions any time after they reach the size of a pencil or begin to form bulbs. You can also occasionally cut the tops only to enjoy as green onions, leaving the bulb to continue to grow. To do this, be sure to only harvest a “leaf” or two at time (or just a couple inches from the tips) so there are plenty of greens left behind to photosynthesize and aid in bulb development.
Once the onion bulbs form, you could technically harvest them whenever you’d like to use one. I love popping outside to harvest a fresh onion for dinner as-needed! Yet for maximum storage potential as dry bulbs, you must allow them to grow until they reach full maturity. Onions are mature and ready to harvest once the bulbs reach the expected size for that variety, and the main stalk gets weak, thin, and starts to flop over just above the bulb. The greens will also start to turn yellow or brown, especially at the tips.
If your onion stalks don’t start to fall over on their own but you want to harvest them soon (e.g. if they’ve reached a mature size, freezing weather is in the forecast, etc) you can also manually bend or push the stalks over a few days prior to harvesting to expedite the process.
When the time is right, pull the plants up but leave them lying on top of the soil to dry for a day or two. Onions are susceptible to bruising, so be gentle when you harvest. Avoid accidentally puncturing the skin or flesh – they won’t hold up in storage if damaged.


How to Cure Onions
Properly curing your onions will enable you to store them at room temperature (in dry storage) for many months after harvest. In very hot, dry climates, those couple days onions spend lying and drying in the field after harvest may be sufficient curing time. Yet most gardeners further cure their onions by relocating them to a dry and well-ventilated area for 7 to 10 days. Cure your onions in a drafty garage, carport, patio, shed or even right outside (as long as it isn’t too humid).
Hang onions from a homemade drying rack, or lay them out flat on a wire rack or screen. Curing onions on a solid tabletop can also suffice as long as there is ample air circulation. Again, take care not to ding them up in the process. As onions cure the roots will shrivel up, and the greens will dry and form a seal at the top of the onion. When ready, trim off the roots and tops before tucking them away for long-term storage.


Storing and Preserving Onions
Store cured onions in a cool, dark, dry location. For example, in wire baskets or cardboard boxes in a spare closet or cabinet, root cellar, basement, or similar temperate location. Dry onions that were not cured as well (or at all) should keep at room temperature for several weeks, but they’ll last longer in the fridge. Be sure to use up any dinged or bruised ones first. Store immature onions (green, spring, scallions, etc) in an airtight container in the refrigerator for maximum freshness.
In addition to long-term dry storage, there are a number of ways to preserve onions. We love to make homemade dried onion powder, especially with immature onions or those that have started to flower and thus can’t be cured. Learn how to make onion powder here – and be sure to use the greens too! Onion powder brings the perfect pop of flavor to sautéed veggies, dips, dressings, sauces, soup, sourdough bread, and more.
Another great option for preserving onions is to roast and freeze them. We use these super-flavorful, lightly caramelized onions in future soup, stew, vegetarian chili, or quiche. You can also use this recipe to make easy refrigerator pickled onions!
Hot tip: Do onions make you cry? Try holding a slice of citrus (lemon or lime) in your mouth while you cut them!


And that is all you need to know to successfully grow onions!
Well friends, I hope you learned a few new tips that will enable you to grow big, beautiful, flavorful onions of your own! In all, they’re quite low-maintenance and fun to grow, especially once you figure out what varieties grow best in your area. Let me know if you have any questions in the comments below! If you found this information to be valuable, please spread the love by pinning or sharing this article. See ya next time!


13 Comments
Julie James
Thank you for such good information! We planted our onions in our greenhouse from dried onion bulbs that we purchased from our local farm store. There were MANY of them in the bag, but were not grown locally. They have all sprouted, and quickly! My question is, do I trim the green tops, when and how much/often? We grew them the same way for the last 2 years, following various opinions on trimming, “spooning” and drying/curing, but we never get them to grow as large as they should or keep as well. So, we’re rather confused as to what we need to do! Thanks for any help you can offer!
Aaron (Mr. DeannaCat)
Hello Julie, we have found that planting onions from bulbs isn’t as reliable as growing onions from seeds or started seedlings from the nursery. Onion seedlings from the nursery are a good option because they usually come in 6 cell pack trays and are over seeded, meaning you can lightly separate each onion seedling and plant it directly in the ground. As far as trimming the greens, we usually only do it one time once they are at least 6 inches long. Hope that helps and good luck this year with your onion harvest!
rebekah
I’m just starting out with gardening and growing veggies and herbs this year – your site has been helpful! We built some deep raised garden beds and have planted some goodies, including onions 🙂
But… oh no! When I transplanted the seedlings I picked up from the nursery, I think I trimmed the tops a little too much. There’s still green but I think they are shorted than you recommend. Will they survive?? lol Do they just need some extra love and care? What do I do? haha
Aaron (Mr. DeannaCat)
Hi Rebekah, so glad to hear you’ve started gardening and congrats on building some raised beds. Don’t be too worried about your onion seedlings, they should be just fine and will continue to grow. Just water them and treat them as you would the rest of your garden. Good luck and happy gardening!
Gino Razionale
Hi, I’m in zone 7a outside of Philly and I started a 72 cell indoor 2 varieties onion seed from Territorial Seeds(Amazing). They started popping after 3 days so I took off dome and have them under 2 of the Ferry-Morse 2ft grow lights indoors. I have my main grow stations 4 ft x 2 ft lights in my unheated garage. I don’t think I’ll be able to direct sow until end of March or April. Is it ok to transplant seedlings to a bigger cup and move them to the garage under lights or leave them in the small 72 cell and move them to garage until ready to direct sow? I’m not using my heat mats with the onions. So far in February we are having night time temps in the 20’s. Hopefully when I move them to garage they’ll be ok if it’s still cold at night. I have a cover for the grow station.
BTW, this was my 2nd year making lavender oil and salve from my lavender plants using your amazing guide. Thank you!!!!!
Aaron (Mr. DeannaCat)
Hi Gino, it’s great to hear you are making salve and making good use of your lavender plants. As far as your onions go, we typically sprout close to 6 seeds per cell in a 6 cell pack and when it comes time to transplant outside, we pull apart the seedlings and plant each on individually. Leaving your seedlings in the smaller cells may work depending on how big the cells are and how many seeds are in each one. If there is only one seedling per cell, they may be able to grow for quite awhile in the single cell, transplanting that many seedlings into large containers doesn’t sound like fun but it may be necessary depending on how big they get. If you need to move your seedlings into the garage, hopefully the low temperature stays above freezing but they can handle mid 30’s to 40’s as long as it gets warmer during the day. The colder temperatures will also slow down their growth. We used to start and grow seedlings in our greenhouse which wasn’t insulated and it would routinely dip into the mid 30’s to 40’s overnight and our seedlings never froze or died, however, the seedling growth does slow down with daily temperatures in that range. Hope that helps and reach out if you have any other questions.
Renee Lim
Does everything from this article also represent growing leeks from seed to harvest?
Aaron (Mr. DeannaCat)
Hello Renee, you can more or less apply the same principles to leeks. Leeks are fairly fuss free once they get going (if you start from seed) and are a joy to grow, harvest, and use. Good luck!
Ridzi Arora
This article is very helpful. Thanks for sharing with us.
Daise
Thank you so much for all your helpful information. I love that you give the science and reason behind it all!
My plants have been so much happier since adopting no dig and your pointers!
From zone 5A, this homesteading Mainer appreciates you!
Aaron (Mr. DeannaCat)
Thanks for reading and being a part of the community, we’re glad you have found some of the information useful! Good luck and happy gardening!
Aasm
Happy gardens from Egypt
Aaron (Mr. DeannaCat)
Absolutely Aasm, have fun growing!