


Calming Chamomile: How to Grow, Harvest, Dry and Use Chamomile
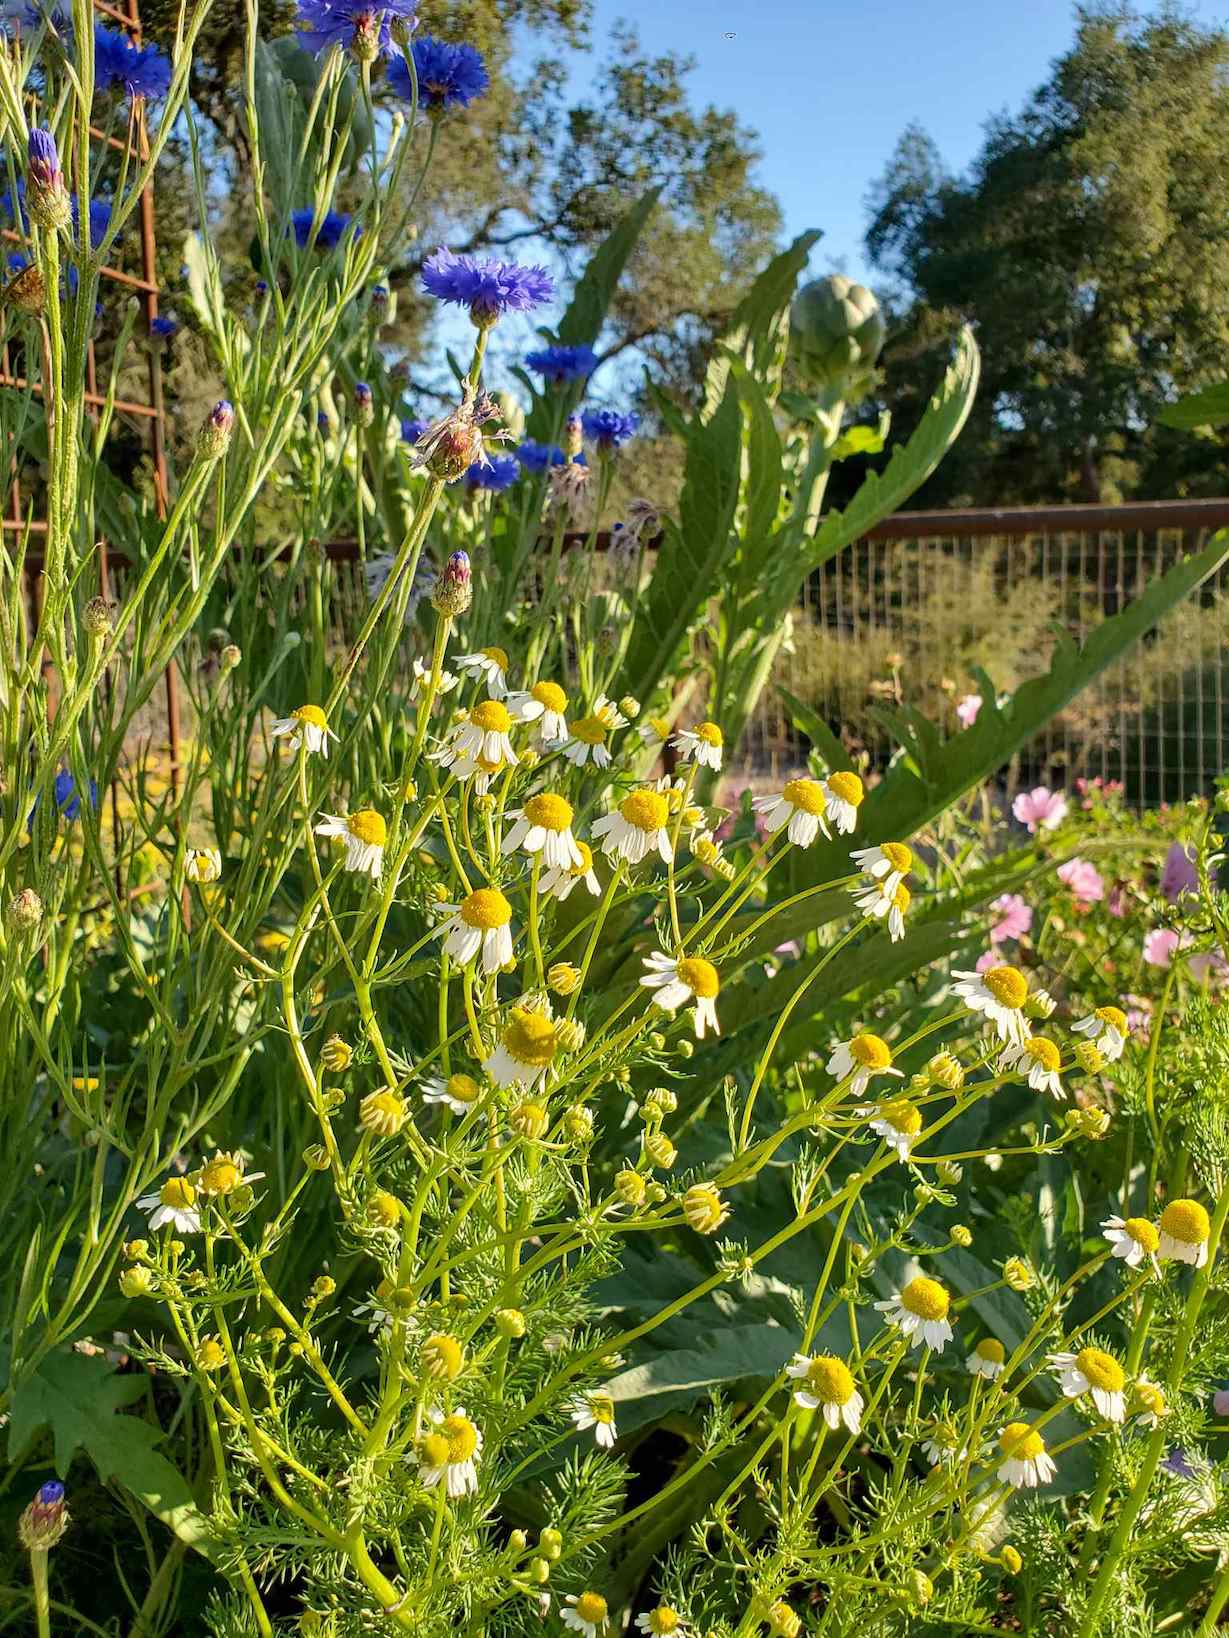
Chamomile is a wonderful little herb. I adore its dainty button flowers, feathery leaves, enchanting sweet musky aroma, and magical medicinal properties – with the ability to calm both inside and out. Even better, it’s easy to grow chamomile in a wide range of climates and gardens, including in containers. It’s one of the most popular herbs for a reason!
Read along to learn how to grow chamomile. We’ll explore the various types of chamomile, its medicinal benefits, how to start from seed or seedlings, tips on how to harvest and dry chamomile, pest control, and plenty of ideas for how to use it! We love to use our homegrown chamomile to make tea, face oil, salves, and more. As a companion plant, chamomile attracts a wide variety of pollinators and beneficial insects to your garden too.
Types of Chamomile
There are many different types of chamomile including Roman, German, Egyptian, and some lesser-known types like Yellow, Dyer’s, Moroccan, and Wild Chamomile. Within each classification, there may be several unique cultivars too! For example, some of our favorite German chamomile varieties include Zloty Lan, Bodegold, and this classic German Chamomile.
Roman, German and Egyptian chamomile are the most common and esteemed types of chamomile used for tea, natural healing remedies, and home gardens. They all offer similar soothing medicinal benefits (known to calm skin, inflammation, digestion and nerves) though they have a few notable differences too, explained below.
What’s the difference between Roman and German chamomile?
Roman chamomile has a light, fresh, sweet apple-like aroma, while German chamomile smells more grassy, like very sweet straw. German chamomile flowers are known to have stronger, more potent aromatic essential oils than their Roman counterparts. While both are used in tea, Roman chamomile has the propensity to get bitter while German chamomile tastes herbaceous and sweet with little-to-no bitterness.
When it comes to growing chamomile at home, it’s also important to know how the different types grow:
- Roman chamomile (Chamaemelum nobile, also known as English chamomile) is a low-growing, sprawling perennial herb. Meaning it will continue to grow in your garden for several years, even after it dies back in the winter. Roman chamomile grows back each year via spreading rhizomes in the soil. Considered a short-lived perennial, many gardeners grow roman chamomile as an annual or for just a couple seasons before starting new plants.
- German chamomile (Matricaria Recutita) is an annual herb, so you’ll need to plant new seeds or seedlings each spring. However, German chamomile may self-seed and grow new plants on its own too! German chamomile plants grow much taller, bloom more profusely, and are less hardy than Roman chamomile.


Benefits of Chamomile
Chamomile is among the most popular and widely-used herbs in natural medicine throughout history and modern times – and for good reason! Its vast healing benefits have been confirmed by dozens of studies throughout the years. This comprehensive review explores chamomile’s ability to help treat everything from eczema and rashes to inflammation and indigestion.
The specific flavonoids and terpenes found in chamomile flowers contribute to its medicinal powers. For instance, a natural blue oil called chamazulene is only found in chamomile, and is shown to have potent anti-inflammatory, anti-bacterial, antioxidant, and anti-allergy properties. German chamomile contains more chamazulene, giving its pure essential oil that distinctive blue color.
Topical use
If you look closely, you’ll regularly find chamomile as a key ingredient in personal care products like face serums, lotions, shampoos, and more. That’s because it works absolute wonders for the skin! Chamomile is known to soothe redness, irritation, swelling, and itching associated with a variety of skin conditions, including but not limited to eczema, psoriasis, acne, allergies, minor wounds, rashes, and burns.
Internal use
Internally, chamomile exudes the same soothing anti-inflammatory benefits. Taken as tea, a tincture, or other supplement form, chamomile can calm the nervous system, reduce insomnia and anxiety, stimulate the immune system, ease inflammation and spasms in the digestive system, lessen symptoms of hay fever, and flush out toxins.

What kind of chamomile is best for tea?
Most tea connoisseurs would likely argue that German chamomile is the best type for tea: it has the highest levels of aromatic medicinal compounds and is also least likely to taste bitter. However, Roman and Egyptian chamomile are often used in tea too! All three offer the calming benefits and flavors quintessential to chamomile.

HOW TO GROW CHAMOMILE
To grow chamomile at home, you can either start from seed or pick up seedlings at your local nursery. We do a bit of both! To grow chamomile from seed, I typically like to start seeds indoors and then transplant seedlings out once the weather is warm enough. Chamomile takes awhile to germinate and the seedlings grow fairly slow, so starting indoors gives us a good head start on the growing season. However, you can directly sow chamomile seeds outdoors too!
Growing chamomile from seed
- Start chamomile seeds indoors 6 weeks before your last spring frost date. Direct-sow chamomile seeds outdoors after the last spring frost has passed, once the soil temperature reaches 55 to 60°F.
- Fill your seed-starting containers of choice with a light, fluffy, sterile seed starting mix.
- Lightly press the tiny chamomile seeds into the surface of the soil, or sprinkle a very light dusting of seedling soil over them (no more than ⅛”). Otherwise, do not bury the seeds.
- Chamomile seeds need light to germinate, so put your indoor seed starting trays under a grow light right away.
- They also sprout most readily in moderately warm soil, around 65-70°F. Depending on the temperature of your growing space, a seedling heat mat may come in handy.
- It is essential to keep the soil and seeds moist (not soggy) during germination. Cover your seedling trays with a clear humidity dome to help keep in moisture until they sprout, then remove the covers. Use a spray bottle to gently mist the top of the soil if it starts to dry out.
- Chamomile seeds germinate slowly (up to 14 days or longer), so be patient!
- To promote quick and healthy growth, thin chamomile seedlings down to just one or two plants per cell or container within a few weeks of sprouting. Crowded seedlings grow more slowly or may get stunted as they compete for water, root space, nutrients and airflow.
- See our favorite seed starting supplies here. For more details and tips on successfully starting seeds indoors, check out this step-by-step guide!


When to plant chamomile outside
Plant chamomile outside in the garden in early spring. Whether you grow chamomile from seed or buy nursery starts, wait to transplant seedlings outside until after the last spring frost has passed. If an unexpected late frost occurs, plan to protect the young tender seedlings to prevent damage – such as with a cloche or hoops and frost cover. Yet don’t wait too long! It’s important for chamomile to get established in the garden before hot weather arrives. Mature plants with deep roots are more tolerant of heat.
Chamomile growing requirements
- Sun: Both German and Roman chamomile grow best in full sun in most regions, though Roman chamomile is more tolerant of partial shade. Both varieties will appreciate some afternoon shade in very hot climates or southern regions.
- Soil: Chamomile isn’t picky about soil quality. In fact, chamomile seems to grow best in poorer quality soil – so fertilizer shouldn’t be necessary. However, it’s important that the soil is well-draining since chamomile doesn’t like wet feet. Average potting soil, sandy soil amended with a little compost, or sandy loam soil works great. Amend clay soil with horticultural sand and/or potting soil to increase drainage.
- Water: While chamomile plants are young, provide moderate water and maintain damp soil (not soggy) at all times. Yet as it matures, established chamomile plants become fairly drought-tolerant and prefer the soil to dry out ever-so-slightly between watering. Don’t let the soil get too dry during hot conditions though.
- Spacing and size: Space German chamomile plants about 6 to 8 inches apart, and Roman chamomile 8 to 12 inches. German chamomile grows 24 to 36 inches tall, though some varieties grow taller or shorter. German chamomile is also usually quite narrow and spindly, and often flopping over unless additional support is provided. In contrast, Roman chamomile plants grow full and dense but only a few inches tall (3 to 6 inches) and sprawl out across 12 inches or wider.
How much chamomile to grow?
Chamomile flowers are tiny, and even smaller once they’re dry! Therefore, it can take a good amount of dried flowers to make just one cup of tea, and significantly more to create infused oils, salves, or other homemade goodies you may have in mind. (That’s why chamomile products are often quite expensive!)
A few chamomile plants will provide the average hobby gardener with a decent amount of chamomile to enjoy, though more plants will enable you to harvest and preserve plenty for storage, projects, and prolonged use. If you only have space for one or two chamomile plants, choose larger chamomile varieties that will provide bountiful flowers – like Zloty Lan.
Is chamomile frost hardy?
German chamomile is less hardy than Roman chamomile. Established German chamomile plants should be able to tolerate a light frost (ours do!) but likely would not survive a hard freeze. On the other hand, Roman chamomile also dies back during freezing winter conditions, but the roots and rhizomes will survive and regrow once the weather warms up again in spring. Provide mulch around the base of the plants to insulate and protect the roots from freezing conditions. Young plants of both varieties are more susceptible to frost damage than mature plants.
Chamomile pests and diseases
Chamomile is inflicted by very few pests or diseases. Instead, it attracts a number of good insects including bees, beneficial wasps, hover flies, and ladybugs! Aphids are the most common pest insect to attack chamomile, and are especially attracted to the tender new growth tips. Aphids cause damage by piercing and sucking on leaves and stems, taking away vital nutrients and moisture. Plus, you probably don’t want aphids all up in your chamomile tea!
Thankfully, aphids are fairly easy to control. First, try blasting them off with a firm stream of water from the hose (supporting the plant with your other hand). If that doesn’t work, use homemade organic soap spray to kill them on contact, and then wash it off afterwards to remove the soapy residue. I recommend doing this when the plant isn’t full of flowers you wish to harvest, such as before the plant starts blooming or right after a thorough harvest. Learn more about organic aphid control here, including our DIY soap spray recipe.
Sometimes our chamomile has some other really tiny bugs on it (smaller than aphids) but they usually “abandon ship” and leave the flowers on their own once harvested.

Growing chamomile in containers
To grow chamomile in a container, choose a pot, fabric grow bag, or other container that is at least 10 inches wide and deep. 12”x12” is ideal. Most importantly, ensure the pot has a drainage hole. Fill the container with a well-draining potting soil or container soil. Place the pot in a sunny location. Chamomile grown in containers will likely need more frequent water than plants in the ground or raised beds, but still prefers moderately damp to slightly dry soil over constant moisture.
When and how to harvest chamomile
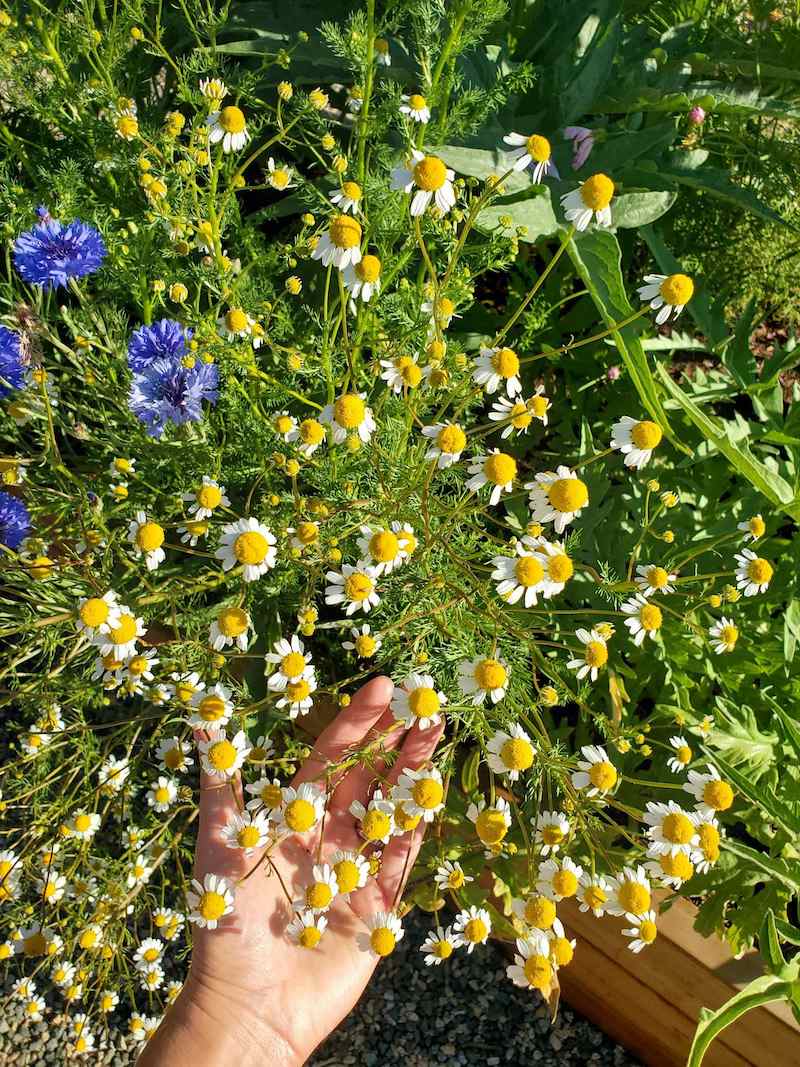
It’s easy to harvest chamomile: simply pluck the small daisy-like flowers off the top of their stems between your fingers. They snap right off with a fun little pop! A specialized picking rake makes harvesting chamomile a breeze, especially if you’re growing a large quantity.
Don’t be shy about harvesting chamomile. The more flowers you harvest, the more will grow! Chamomile will continue to bloom from spring through fall, and even during winter in mild frost-free climates. Though they’ve slowed down a bit, we’re still harvesting chamomile now (in February) from plants we put out last fall.
For the highest quality essential oil content and best flavor for tea, harvest chamomile flowers fairly young – soon after the flowers have fully opened, but before the centers become extra large and the petals droop backwards. Most herbalists prefer to harvest chamomile in the morning hours, before the sun and heat of the day has a chance to dissipate the delicate essential oils.


How to dry and store chamomile after harvest
You can either dry chamomile flowers in a food dehydrator or let them passively air dry. To avoid adding unnecessary moisture and prolong drying time (or increase risk of mold), we do not wash our chamomile post-harvest.
To air dry chamomile, spread the flowers out in a single layer on a screen, in an airy basket, or on an herb drying rack in a warm, dry, arid location. Add a fan to increase air circulation if needed. If not well-spaced or if the air is too humid, the flowers may mold before they can fully dry.
A food dehydrator is a great way to dry chamomile, especially for long-term storage or if you intend to make oil infusions, tinctures, or salves. (Using 100% dry flowers is crucial for oils or salves since any leftover moisture in the flowers can make the final product mold or spoil more easily). Yet it’s best to dry chamomile on a very low temperature setting to retain its beneficial and medicinal compounds. We set our dehydrator to 110°F or below (or use the lowest setting available) for 24 hours or longer. Warmer temperatures will make the flowers dry faster, though I don’t recommend drying chamomile in the oven.
Once fully dry, store dried chamomile in an airtight container (e.g. glass container with a lid) in a cool, dry, dark location. There, it will retain its aroma, flavor, and beneficial properties for up to one year.


8 Ways to Use Homegrown Chamomile
There are dozens of fun ways to use chamomile, both fresh and dried. Here are some ideas:
- The edible flowers can be used fresh (or dried) to garnish drinks, salads, desserts, or added to ice cubes.
- Use fresh or dried chamomile to make hot tea or sun tea! Learn how to safely make herbal sun tea with fresh herbs here. For hot tea, use about 1 tablespoon of dried chamomile per cup of hot water and allow it to steep for 5 to 8 minutes. When using fresh chamomile in tea, use two or three tablespoons per cup of water instead. I love to use this stainless steel infuser to make a single mug of tea, or this adorable loose-leaf glass teapot for tea for two.
- Steep dry chamomile flowers in an oil of choice (e.g. olive oil, jojoba oil, or sweet almond oil) to create chamomile-infused oil. Then you can use the chamomile oil as a face, body, or massage oil. Or, as a culinary oil if you choose an edible carrier oil. Learn more about making herb-infused oils here, including carrier oil options.
- Or, use chamomile-infused oil as an ingredient to create homemade skincare products like healing salves or balms, lip balm, body butter, soap, lotion and more.
- Add dry chamomile flowers to sachets of potpourri or in stovetop potpourri.
- Make a chamomile hydrosol to use as a naturally-scented room spray or linen spray.
- Mix dried chamomile flowers in homemade bath salt blends. Check out our DIY natural bath salts recipe here!
- For stronger internal use, create a chamomile tincture.


And that concludes this lesson on how to grow chamomile.
I hope this article provided you with everything you need to know to successfully grow chamomile at home. And, that you feel excited to do so now! Let me know if you have any questions in the comments below. Also please consider pinning or sharing this article if you found it useful. Enjoy your chamomile bounty!
You may also like:
- DIY Bath Salts Recipe: Beautiful Natural Herbal Bath Salts
- All About Calendula: How to Grow, Harvest, Dry and Use Calendula Flowers
- 11 Best Carrier Oil Options for Skin Care, Salves and Herbal Infusions
- How to Safely Make Sun Tea with Fresh or Dry Herbs
- 10 Best Vegetarian and Vegan Supplements for Improved Health


6 Comments
Kay
Great article! It should be mentioned that many people with allergies (especially to anything else in the daisy family) may be allergic to chamomile. It can manifest differently for everyone though too. (For example you may not be able to use it internally but have no problem with it externally, or not be able to use it either way. I discovered quite by accident that I can’t use it on my skin, after already knowing that I can’t use it internally or inhale it.)
Hoping to get some to grow though for attracting good bugs for the garden. Have Roman and German seeds. I’m just hoping any brushing against it while gardening won’t bother me (too badly…) Brushing past the lavender bush hasn’t bothered me much and I’m allergic to that to. So here’s hoping! Really appreciate all your informative articles! 🙂
Aaron (Mr. DeannaCat)
Hi Kay, thank you so much for the kind words and for mentioning chamomile being in the daisy family, that is something we meant to mention in the article. It will be interesting if you do grow chamomile this year, to see if touching the plants cause much of an allergic reaction for you or not, although I will be hoping not. Thanks for sharing and have fun growing!
Mariangela
Super excited to read this post as I probably spread (and lost) so many chamomile seeds purchased from multiple sources last season only to see very few survive! Finally in late fall emerged chamomile in my citrus pots. I will start some inside as you recommended and follow these tips. Thanks!
Aaron (Mr. DeannaCat)
Good luck Mariangela, starting the chamomile seeds inside will definitely give you a better germination rate. We still haven’t seen any volunteer chamomile seedlings pop up in our garden beds but we try and harvest all of the flowers before they go to seed anyway.
Courtney
How do you always know just what I’m doing in the garden, and publish a corsponding article?!? I think you might be a witch. 🙂 Thank you for this great article. It answered some of the questions I had about growing chamomile. I love tea, and am excited to grow this (and some other herbs) to make my own tea mixes this year.
Aaron (Mr. DeannaCat)
Hi Courtney, thanks for keeping up to date on all our articles, we think you will enjoy growing chamomile a lot, it’s an easy to grow plant that you can easily tuck here and there throughout your garden space. Have fun and enjoy that chamomile tea!