


Simple Fermented Carrots “Pickle” Recipe
It is no secret that we love fermented foods around this homestead. I mean, why wouldn’t we? Fermented foods are delicious, and they improve gut health, inflammation, digestion, overall immunity, and more! Fermented carrots are no different. Fermentation is also an excellent way to preserve food when you have a large harvest or abundance on your hands. Like now, after we just harvested over 20 pounds of carrots from the garden!
Follow along to learn how to make quick-and-easy fermented carrot “pickles”. They’re tasty, tangy, and crunchy – perfect for snacking, on top of salads, and more! Rather than preserving them with vinegar, the process of lacto-fermenting carrots provides a similar end product… but healthier!
Need some tips on growing carrots at home? Check out this post all about how to successfully grow carrots. Even if you don’t have homegrown carrots to use for this fermented carrot recipe, I highly suggest giving it a go anyways! Pick up a bunch of carrots from your farmer’s market or local grocery store. But remember, it is always best to choose organic produce for ferment recipes. Inorganic produce can interfere with a safe fermentation process, and also produce off-flavors.

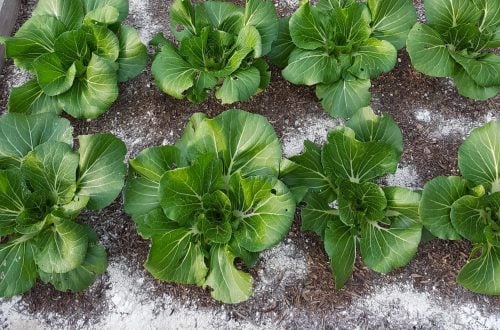
A handful from our most recent homegrown carrot harvest.
FERMENTED CARROTS SUPPLIES
- A fermenting vessel – Some folks use ceramic crocks, but many homesteaders and herbalists these days simply use mason jars of varying sizes. For smaller batches of fermented carrots, you could use a pint or quart jar. We most often use these half-gallon mason jars, as shown in this post. If we are making a big batch of something, we may even fill two at a time and end up with a gallon of fermented goodness total!
- Fermenting lid or air lock device – The use of a lid made for the fermentation process is ideal, which makes the job much easier and pretty foolproof, though a regular jar lid can be used with a few tweaks. Examples of fermenting lids include an all-in-one device like a Kraut Source lid, or the use of a combination of items like a glass or ceramic weight along with another type of air lock lid. A further discussion of their reasoning and use will follow in the directions section below.
- Organic Carrots – We used just under 3 pounds of carrots for the half-gallon jar shown in this recipe. Scale up or down as needed until your ferment vessel of choice is full.
- Salt – Sea salt or kosher pickling salt. Do not use iodized table salt! We love this Celtic sea salt for our ferments.
- Filtered water
- Fresh Dill – 1 bunch
- Optional: Garlic, peppercorns, chili peppers, or red chili flakes
DIRECTIONS
1) Clean your supplies
You want to make sure all of your supplies are clean. No, they don’t need to be insanely clean or “sterile”. You actually never want to use bleach (or even soap) on your fermenting tools! The residual could stick around and really make things taste “off”. We spray ours with plain white vinegar, and then rinse well with hot water. That’s it. I do the same with my hands.
2) Prep the carrots
If they’re still attached, remove the carrot greens. You can eat those greens you know! Towards the end of our “how to grow carrots” post, check out five ideas for how to use carrot greens! Or, at least try to compost them.
Wash the carrots well. Like the other supplies, the carrots don’t need to be crazy sterile-clean. Avoid using soap or produce washes.
Cut the carrots into the shape and size of your liking. We often choose to cut ours into small bite-size round slices, about 1/8 – 1/4 inch thick. This is because we usually eat our fermented carrots on top of salads or other meals. If you hope to snack on your fermented carrots more like pickles, you could cut them into carrot stick spears instead. They’ll ferment well all the same!

3) Add seasonings of choice
In the bottom of your chosen fermenting vessel, add some freshly washed sprigs of dill. I suggest this simple “seasoning” at minimum. As long as you don’t dislike dill, it provides a very mild and delicious addition! The amount of dill doesn’t need to be precise. If you get the smaller plastic clamshell packages, I’d say use half for a quart jar, and the whole thing for a half-gallon jar. If you’re able to get a larger, looser bunch of dill, we generally use about a quarter of those per quart jar, and half a large bunch per half-gallon jar.
We also often times add a couple cloves of fresh garlic at the bottom of the jar. (We happened to be out when we made this batch). If you don’t like dill or garlic, you can totally skip either and keep it super simple! Or if you loooove garlic, you can add more. Personally, we have found that fermented garlic can overpower the flavor of everything else if you go too heavy. We find about 1-2 cloves of garlic in a quart jar, and 3-4 cloves per half-gallon jar is our sweet spot.
You can also get creative here and go beyond what this basic recipe is calling for. For example, add a pinch of peppercorns, a sprinkle of celery seed or mustard seeds, a chunk of fresh ginger or turmeric, a dash of red chili flakes, or even a whole hot chili pepper or two – if you want some heat! That’s the beauty of fermenting. The options for experimentation and creativity are endless. Keep in mind that flavors usually mellow out when fermented too. For example, hot chilis will become much less spicy than when eaten raw or even cooked once they’re fermented.

4) Pack the jar
Start adding the cut carrots to the jar. When fermenting, it’s best to try and fit as many veggies in the jar as possible. If you’re going through this process, you might as well maximize the amount of cultured food you get out of it in the end! This will also reduce the amount of brine needed, and the amount of air that can get trapped inside. So, when you’re putting the carrots into the jar, try not to just throw handfuls in there all haphazardly.
We try to layer them in little by little, packing them down as we go to reduce air pockets. I usually fill half the jar with the sliced veggies, then add another little layer of dill and a clove of garlic about halfway through, then continue layering with more veggies until the jar is totally full. If you cut your carrots into sticks, try to stack and tuck them tightly against one another too.
5) Make a brine
The standard brine ratio for fermented vegetables is 1 tablespoon of sea salt or kosher salt per 2 cups filtered water. Do not use regular table salt or salt that has been otherwise iodized. It will say it on the package if it has been. This messes with the fermentation process, and doesn’t taste as good.
The goal is to dissolve the salt in the filtered water, so it will need to be room temperature or slightly warmer. We make our brine in a pot on the stovetop, but on a very low heat – just until the salt is able to dissolve – and then let it cool a bit. You do not want to add hot brine to your ferment, but warm is okay. Too much heat will kill the beneficial bacteria (lactobacillus) needed to safely ferment your carrots!
We will usually get the brine going on the stove while we are prepping the carrots. This way, if it accidentally gets a little too warm, it has time to cool down before adding it. With a fully-packed jar of veggies, we have found that 2 cups of brine is adequate per quart jar – double everything when using half-gallon jars.
6) Pour it in
Slowly pour the brine into the jar, until the carrots are completely covered. Pockets of air are likely trapped in there, so give the jar a little tap and wiggle to try to get them to come up. You can also use a wooden kraut pounder or tamper to press the carrots down and expel air.

7) Add a weight
Some of the carrots will try to float to the surface, but they do need to stay submerged below the brine level. If they’re allowed to float and be in contact with air, mold can develop! The stainless steel all-in-one Kraut Source fermentation lids we use have a flat plate and spring inside that help to easily accomplish this, acting as a weight to keep everything down. Another option is to use a ceramic or glass weight made for fermenting. Some people get resourceful and use other clean items that fit inside their vessel, like a boiled rock or smaller glass jar.
Helpful tip:
Even if you use a weight or Kraut Source device, sometimes pieces of chopped carrot can still slip around them. To keep the floaters at bay, we often use a large leaf of cabbage, collard green, or other hearty green to make a “cap”. This is placed on top of the veggies, below the weight, and keeps them trapped below. It should also be submerged in the brine as much as possible. The Kraut Source device does a great job keeping floaters down in pint and quart size jars, but we usually add a “cabbage cap” to the larger half-gallon batches.

8) Cover
Next, the jar or container you’re fermenting in needs to be covered with a tight fitting lid. The use of an air-lock lid made for fermenting is preferable. These allow for the release of any excess air and carbon dioxide that is produced during fermentation, without allowing new air or anything else to come in. This is one reason why we really love the Kraut Source lids! They not only have a weight that keeps everything submerged, but also have a little moat on top that you fill with water, thus creating an air lock.
There are a lot of other mason jar fermentation lids out there too! Here are some silicone nipple type. These would need to be used in conjunction with a weight of some sort, like these glass ones. If you’re not using an air lock, you can tightly screw on a regular lid, but then make sure to quickly “burp” your jars every few days to release the built up carbon dioxide.
9) Ferment!
Once it’s all put together, let your concoction sit out at room temperature for 7-14 days to do its thang. The time depends on your personal flavor preference, and the temperature of your house. We let most of our ferments go for about 10-14 days.
Warmer conditions will cause the carrots to ferment more quickly, and cooler does just the opposite. The ideal fermentation temperature is around 70-75 degrees Fahrenheit. If it is summer time and your house is warmer than this, try to find a slightly cooler location for your vessel to hang out. Too hot of conditions can encourage the development of white Kahm yeast. It is not dangerous, but rather stinky and off-putting.
Notes during fermentation:
During fermentation, you will notice the fermented carrots start to undergo change. The lactobacillus is working away to convert the starches in the food into lactic acid, which preserves it. In the process, carbon dioxide is formed, so you’ll probably see some bubbling activity in there!
The fermented carrots will also start to change color. Depending on the color of the carrots you used, they made bleed and turn the brine colors. Our black nebula carrots bled purple and turned the entire batch bright pink. The brine also gets cloudy, and this is totally normal!
If you are using a Kraut Source lid, keep an eye on its little water-filled moat, making sure it always has some clean water in there. It doesn’t dry out easily though. On the other hand, our vessels usually overflow from the lid for the first several days of fermentation. Be forewarned that yours may do the same! So we alway set the jars on a plate or in a bowl to catch the overflow. Once that initial burst of activity subsides (about 5 days later), the moat can dry up and you’ll want to add more water into it.
Another thing you may notice during fermentation may be a slightly odd odor. This is totally normal! To be honest, some ferments can smell pretty farty. I promise they taste better than they smell!

10) Refrigerate
When the time is up, remove the “cabbage cap” and air-lock lid, replace it with a regular lid, and move your finished fermented carrots to the fridge. Because of the acidity of fermented foods, standard mason jar lids have the tendency to rust. To avoid this, we store our ferments with either these stainless steel lids or these BPA-free plastic ones.
Most fermented foods are good for several months in the fridge, if not longer. We have enjoyed kraut nearly a year after it was made – though we always eat it up quicker than that!
11) Enjoy!
Now it is time to feed your belly with probiotic-rich home-fermented food! We love to use these fermented carrots as a salad topping, or on top of sautéed veggies with curry lentils. They could also be used chopped up in egg salad, on sandwiches, like a pickle on an hor d’oeuvre plate with cheese and crackers, or just snacked on plain!
Don’t throw out that brine either! The liquid is also chock full of probiotics and beneficial enzymes, just waiting to make your belly happy. Did you know they actually sell leftover ferment brine, marketed as “gut shots”, at natural food stores? And they aren’t cheap! We like to drizzle some on top of salads with olive oil as a dressing, or even take little shots of it straight!

Now you’re off!
Go make some insanely healthy fermented carrots of your own. Do not be nervous! If you follow these steps, it is really quite difficult to “mess up”. In all our years fermenting, we have NEVER had mold form in a fermenting vessel. Sure, we’ve made some strange concoctions that we didn’t love as much as others, but we have certainly never made ourselves sick. Feel free to ask me any questions!
If you like this recipe, you’ll also love our fermented dilly radish recipe. It’s basically the same process, but with radishes instead of carrots! Curious to learn more about why fermented foods are so great for your health? Check out this post that talks all about the health benefits of fermented foods!


25 Comments
sherice potter
I just pickled radishes, carrots and red onions but didn’t realize that pickling and fermenting are not the same!! so next time fermenting it is!!
Thank you both for all the amazing content you share!! You are my go to for pretty much everything gardening and homesteading related!!
Aaron (Mr. DeannaCat)
We love pickled stuff as well but fermenting will give you some extra nutrition as well as a different tang.
Cindy A
Just wondering if you can use carrots that have been stored all winter. i have fermented carrots before and like them. I have a lot of carrots from last summer. Have cleaned them up, cut out bad spots, ran thru the washer and am ready to process. will be canning some but would like to ferment some. Wondering if they are too old, etc. thanks, Cindy
Aaron (Mr. DeannaCat)
Hi Cindy, yes you can ferment your older carrots! Good luck and hope you enjoy them.
Suzanne Lee
Thank you, this has opened up a whole new world of goodness. I’m obsessed with my fermented carrots, and throw in a fresh habanero from the garden for some heat.
Aaron (Mr. DeannaCat)
Sounds delicious Suzanne, next you’ll have to try fermented radishes or green beans!
Chantal
Hi Deanna!
I just did a large jar full of green beans…blauhilde and rattlesnake with dill and garlic! They turned out yummy…a little salty but since I have rarely had fermented foods, I’m assuming that’s what they will taste like?
Now, if I could JUST get my sourdough starter to work!
LOVE your IG and your blog!
Chantal
DeannaCat
Yes, fermented dilly green beans are SO good! Yes, most ferments are a little salty – since that is what is helping to preserve them. Our recipes are already on the lower end of the suggested range that other folks use too. When you eat them on their own it is most obvious, but we don’t find them too overpowering when added in with other food. Thank you for saying hi!
Lynn
Hi! Using your dilly carrots recipe but with cabbage leaf and weights instead of krautSource. It’s time to begin checking carrots and notice a little grayish cloudy “scum” in bottom of jar. I tossed one jar out of fear but maybe better to check with you before I toss 8 quarts and two pints…what do you think? Is this a normal stage in fermenting process or is this a bad sign? Tah!
Lynn
DeannaCat
Hi Lynn – If it is warm where you are, it could be the development of kahm yeast – which happens when a ferment goes quickly due to high temperatures. However, it is usually white rather than grey. It is also normal for the brine to get cloudy, but not just at the bottom. I can’t say for sure…
Katie
Hi! I just packed a 1Qt jar of carrots/radishes +dill + garlic and then a 1/2 Qt of beets +garlic + peppercorns. I’m really excited to give these a try, I’ve only ever pickled ginger and sauerkraut. Thank you!
DeannaCat
Awesome combo! Yes we often times mix up the goodies in our jars too – adding beets to either radishes or carrots (or both) is another fave! Enjoy!
Katie
They turned out so well!! I snagged a brand new Easy Fermenter Kit on Craigs List today so I don’t have to use rocks anymore… Ha! I’m a pickling machine over here.
DeannaCat
What a great find on Craiglist! Way to be resourceful!
Julia
I love fermenting and your post in inspiring!
Last year I was having trouble with the taste of my ferments. I’m wondering if it could be the water. I have East Bay MUD which is nice glacial water, but is treated with chlorine and chloramine. I can filter about the chlorine, but from what I read, filtering out the chloramine is quite involved. I always wonder about purchased water – how do you know what’s really in it?
DeannaCat
It is tough when you don’t have much control over your water. Our city also uses chloramine. A carbon filter will remove a little of it, but not nearly as much as it does chlorine. We run ours through a basic carbon filter and that is the best we care to do for now. It doesn’t seem to have a negative impact on our ferments. Every water source may vary a little, in many ways – including your chloramine levels. Other things cause off odors/flavors with ferments though too – like kahm yeast when it is too warm during the ferment (e.g. fermenting in a hot summer kitchen) and also the salt type influences flavor too. Celtic is supposed to be best. I hope that helps!
Marissa Nichols
Hey Deanna, quick question. After the 10-14 days of fermentation process, can the carrots be left in a pantry or do they require refrigeration?
DeannaCat
They need to be refrigerated thereafter 🙂
Helen
I use masontops, it’s just a silicon one-way lid that goes under the screwtop lid. They also come with a tamper and glass weights. My carrots turned out amazing. I also tried radishes and red onion sliced thin, they were ok. We are back in veggie season though so I will try again soon!
DeannaCat
I never loved fermented onion… Unless in a hot sauce or salsa. To me they are too overpowering of a flavor with other delicate ones, like radishes. I suggest giving radishes another try on their own! I am glad you loved the carrots!
Lacey Daniels
You’ve converted me! Ever since reading your dilly radish recipe, I’m constantly thinking, “I wonder if I can ferment this?” Lol. I put my fermented carrots in just about everything – from salad, to macaroni and cheese, to tacos, to stir fry. My plum tree is dropping ripe fruit now, so that may be my next experiment!
Tina
This is basically how Korean Radish, aka Mu aka Lobok, is fermented to make “Dong Chi Mi”. No dill but yes garlic and sometimes a couple whole green onions, onions quarters, and chunks of apple or asian pear (this usually isnt consumed – it’s just for seasoning purposes).
We do this in bigger containers with much less Mu (cut into spears or quarters; if cut into quarters it is later cut into more servable pieces at time of serving) and lots more salt water. Let it ferment at room temp for around 5 days or until the liquid starts bubbling and smells farty. Stick in fridge overnight then eat with food as a side cold soup or as a popular dish called “Dong Chi Mi Guksu”. The “Guksu” part means a certain type of noodles. Prepare these Korean noodles according to package instructions, place in bowl, and pour a good amount of the liquid and some pieces of cut Mu. Eat as a cold noodle soup!
Although my favorite way to eat Dong Chi Mi is to pour myself a large serving of the liquid in a medium size bowl with just a few pieces of Mu. Drink the liquid in one go and munch on Mu. The MOST refreshing, invigorating, and Delicious drink, ever. I’d make this more often but Mu is a seasonal veggie – it is available year round but best in late Fall – Winter. We also do this same thing with cabbage pieces. And well, Korean people ferment ALL the veggies.
This is a long ass comment. ;D I’ve always wanted to post this recipe on my blog but I haven’t been doing much maintaining there so thought I’d share here since it’s basically the same principle as your recipe, just diff veggies and more liquid to veggie ratio. If you ever want to mix it up and try the Korean way. 🙂
DeannaCat
Awesome! Thank you for sharing! We grow several types of daikon radish and also love fermenting them in this manner. We will definitely try some with green onion – that sounds great! And yes, drink that brine! It is full of probiotics, and delicious. Long comments welcome 🙂
Lola
Kombucha, hot pickles and sauerkraut have successful in this household.
I’m inspired to try something different now.
Off to farmers market on Saturday.
Thank you for all you do.
DeannaCat
Then this should fit right in! You should definitely try the fermented radish recipe too. It just may be our favorite. 🙂 Thanks for stopping in!