


Preserving Garlic: How to Make Homemade Garlic Powder
If you find yourself blessed with an excess amount of fresh garlic, either from a homegrown harvest or somehow stocked up from a farmer friend, I highly suggest making your own dried garlic powder! This is our favorite and most versatile way to preserve garlic. Garlic powder is easily incorporated into everyday meals, or other fun seasoning blends like garlic salt or garlic pepper.
Let me tell you this: fresh homegrown garlic powder makes store-bought powder seem just about as tasty and interesting as chalk. This flavor is unreal! Follow these 7 easy steps to make your own garlic powder in a dehydrator or in the oven – and you’ll soon see what I mean!
If you need tips on how to grow your own garlic, check out this article! It includes information on where to source garlic, how to choose between softneck and hardneck varieties, instructions for planting, general care, and how to harvest, cure, and store it.

What kind of garlic should I use?
You can use any kind of garlic to make garlic powder! But there are some things to consider if you’re growing your own and hope to preserve it. Pictured above is a bowl of our homegrown Moroccan Creole garlic, which is a hardneck variety. Hardneck varieties have a shorter shelf life than soft neck varieties. They’ll usually start to go soft or rot within a few months after harvest, whereas soft neck types can last up to 10 months if cured and stored properly.
We usually grow both types, but primarily use hardneck garlic varieties for preserving – since it needs to be used quicker before going downhill. We can enjoy our softneck fresh for months to come. That said, feel free to use either! Whatever you have available. Both just-harvested or aged/cured garlic can be used. We often use up as much fresh as possible for a couple months after harvest, then collect the remaining hardneck and any other bulbs from storage that are starting to go soft to make garlic powder.
Another type of garlic that we have used many times to make garlic powder is green garlic. Green garlic is simply young garlic, harvested early before the classic paper-wrapped cloves form. It doesn’t have the same curing and long-term storage capabilities that mature garlic does. It needs to be used or otherwise preserved within a week or so of harvest. Therefore, green garlic is a perfect contender for garlic powder preserves! The stalks are also still tender enough to use in the powder, as you’ll see in the photos below. If you’re curious to learn more about green garlic, including other ways to use it, check out this article all about.

HOW TO MAKE GARLIC POWDER
Supplies Needed
- Garlic
- A good blender, food processor, or coffee grinder. We use a Vitamix.
- Food dehydrator or oven. The use of a dehydrator may be preferred for optimal quality and health benefits, explained below.
- Airtight storage containers, such as mason jars.
- Optional: garlic peeler and/or gloves
Oven-Drying Versus Using a Dehydrator
We choose to dry our garlic in a food dehydrator instead of the oven, but that doesn’t mean it isn’t possible! I will include instructions for both ways below.
Why do we prefer using a food dehydrator, you ask? Well, for a few reasons. First, using a dehydrator allows us to “set it and forget it”. No stirring and fussing over the hot oven needed. There is also zero risk of burning it, and ensures even and consistent drying.
Most importantly (for us), is that a dehydrator allows us to dry the garlic while also preserving its nutritional value. While we do not follow a raw food diet, we try to avoid exposing our food to excessively hot temperatures when we can. Especially healing foods like garlic! If you read our Fire Cider recipe, you’ll remember that garlic has stellar anti-bacterial, anti-fungal, immune-boosting properties. When food is exposed to heat over 118°F, it will reduce beneficial nutritional properties, antioxidants, and active enzymes. Therefore, we dry our garlic around 100-110°F.
Low, and slow.

A note about our dehydrator experiences:
You will see photos of two different styles of dehydrators below. The white round trays are from when we still had a basic, affordable Nesco machine. It got the job done! However, as time went on, I became more and more concerned about heating food and plastic together. We bought it years ago, before the days of BPA-free plastic. Also, it didn’t dry super evenly, so I needed to rotate the trays around occasionally. Not a huge deal, but just something to note. It was also quite noisy, and took a longer time to fully dry things than most recipes quoted.
Wanting to upgrade to something more modern, safe, and efficient, I queried our amazing Instagram community about dehydrator recommendations. The resounding answer from other homesteaders and gardeners was to invest in an Excalibur. So this winter, we upgraded – and have no regrets! It is quiet, gets the job done faster, has a larger capacity, and more settings – including a timer, which is a huge plus. Being that we dry everything from chili peppers to calendula to lemon rinds, we keep it busy. We opted to get the stainless steel tray option (or you can buy stainless replacement trays), but all of their materials are BPA-free. They’re also made in the USA! We are stoked to support this California-based company.
INSTRUCTIONS
1) Peel the Garlic
Remove the individual cloves from the head of garlic. Next, remove the papery skins from each clove.
This can be a tedious pain in the ass, and literal pain in the fingers! Your fingertips can actually get slightly burned from the garlic’s natural oils, so use caution if you’re working with a large amount. I learned this the hard way! Consider wearing food prep gloves if you have sensitive skin. Or, if you don’t want your fingers to smell like garlic for days.
One huge perk of working with green garlic is that there are no papery bits to worry about peeling. Simply slice and dry!
Here are some recommended tips to make peeling garlic easier:
- Use one of these silicone garlic peeling tube things. People swear by them!
- Peel them under running water
- Using 2 similar size bowls, put them together to make a dome around the garlic. Shake the crap out of the cloves to loosen their skins, and then peel. A large jar would also work for smaller amounts.
- Gently crush the cloves with the flat side of a wide knife before peeling them. However, note that if they become too smashed, it will be a bit more difficult to cut thin even slices.
2) Thinly Slice the Garlic
Once the garlic is all peeled, cut the cloves into thin slices. The thinner you go, the quicker they will dry. Furthermore, the more consistent the cuts, the more evenly they’ll finish drying together. We typically aim for about ⅛” thick, if I had to measure – which I don’t!
When working with green garlic, they can be cut a tad thicker since it is more tender and will usually dry faster. For green garlic stems, you can either cut them into rounds or long slender pieces.
As you go, lay the slices of garlic out evenly on your food dehydrator trays. You can pack a large amount on to each tray! The pieces can touch side to side, but make sure they aren’t overlapping or on top of each other. We need space for good air flow between them.

Alternative Method: Food Processor + Tray Liners
Thinly slicing all the cloves can be laborious and time-consuming. Over the years, we’ve switched to chopping our garlic in a food processor. Then use silicone dehydrator tray liners or parchment paper to line your dehydrator trays, dump the chopped garlic onto them, spread it into a single layer, and dry them that way.

3) Dehydrate the Garlic
Load up your food dehydrator with its trays full of garlic, and turn that puppy on! We choose to dry ours on about 100-110°F. Again, this is because we don’t want to overheat and essentially “cook” the garlic, denaturing its beneficial enzymes and antioxidants. If you aren’t overly concerned about that, you can use a warmer setting (around 130°F) to get it done much faster. It will taste just as good!
The time it takes to fully dry will vary. It depends on your dehydrator or oven, how you prepared and organized the garlic, and the temperature you use. When we used our old Nesco dehydrator, it took almost 3 days on 110°F to completely dry. Our Excalibur dries it nicely in about half that time, and could easily do it in less than 12 hours on a higher setting than we use.
Keep reading to know how to tell when it’s ready!

Drying Garlic in the Oven
To make garlic powder in the oven, follow the same prep steps outlined above – and then spread the garlic out in a thin layer on a baking pan covered with parchment paper. Bake at 140°F until it is completely crunchy dry, stirring and re-spreading the garlic bits every 30 minutes as you go. We have never done this, but read that this method takes several hours hours.
4) Check Doneness
Before removing the garlic from the dehydrator or oven, check to make sure they are totally dry! If you try to break them, the thin dry slices should snap and crack crisply in half, and not bend or be malleable at all. The texture tells you if all the excess moisture has been removed. If they’re still bendy or soft instead of crunchy, keep on drying!
If any moisture is left, your powder will clump up later in the storage container.
You may find that some are done and some are not. In that case, you could either pull out the crispy ones and continue to dry the others, or just keep drying it all. We only separate them partway through like this when we’re making green garlic powder, because the stalks tend to dry much faster than the bulb portion.

5) Time to Grind!
Next, it is time to grind your now bone-dry garlic into a fine powder. This can be done in a good blender, food processor, or coffee grinder. I say “good” blender, because some may not be able to work it into a fine powder very well. In a Vitamix, the result is a super fine, fluffy powder. Pulse and grind it until all chunks seem to be broken up.


6) Sift
Even the best machines may not be able to successfully grind every last hard bit of dried garlic. Our Vitamix leaves behind a few little “rocks” behind sometimes. I call them this because they can be damn hard, so I wouldn’t want to accidentally bite into a bit like this. Therefore, we usually sift our garlic powder before putting it in its final storage container.
Position a fine-mesh strainer over a bowl. Next, gently pour your ground garlic powder into it, a little at a time if needed. Make sure to scrape and collect any powder that has collected in the lid or sides! That is valuable tasty stuff too. Shimmy and shake the sifter, separating out any leftover hard rocks.
I usually run the collected garlic rocks back through the Vitamix once or twice again, and get a surprising amount more powder out of very few of them! Sift and repeat until you’re satisfied. We skip this step for green garlic because it is so tender in the first place (shown in the photo above).
Here are some brief videos of the whole process, including sifting! Swipe through the slides by clicking the arrows on the right.
7) Storing Garlic Powder
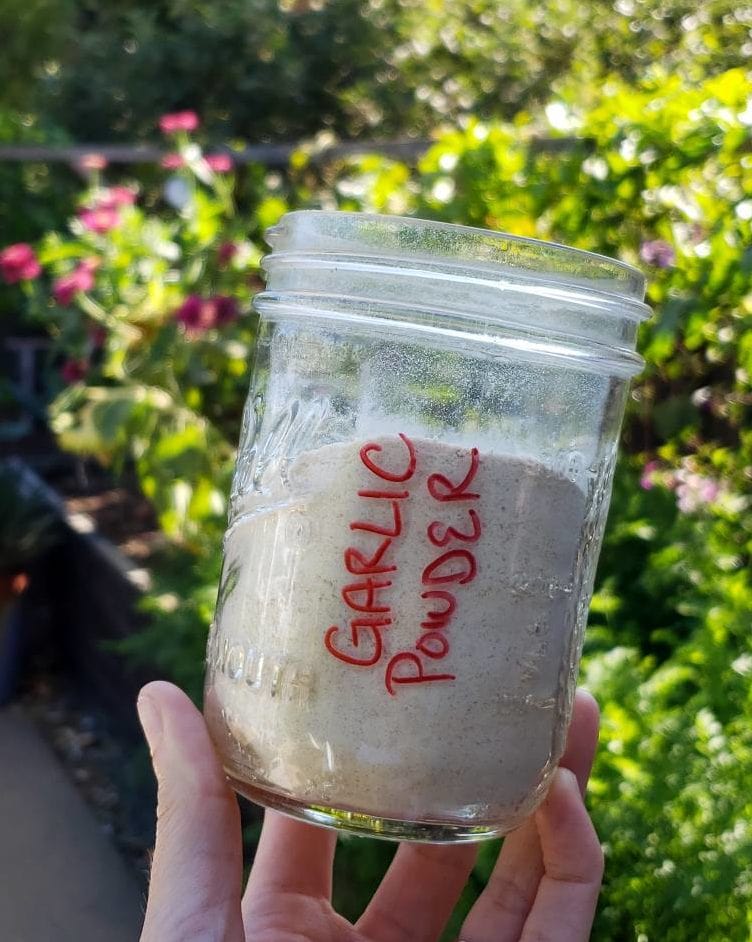
Finally, transfer the sifted garlic powder into an airtight storage container. We typically use mason jars, either half-pint or pint-sized, depending on how much we make. Repurposing old spice containers would work well too! You’ll probably want the assistance of a funnel here, so you don’t spill your precious goods. Our canning funnel is our best friend when we’re working with mason jars.
When stored in an airtight container, it is good for up to a year! And hot dang, is it good… Our year-old garlic powder has no obvious degradation in quality or taste. It is perfect timing, until next seasons harvest and round of preservation!
8) Enjoy!
I’m sure you can all figure out a million wonderful ways to use your homemade garlic powder, right? Well, just in case you need some ideas: Add it to fresh salsa, guacamole, sautéed veggies, in tomato and pasta sauce, soups, curry lentils, hummus, salad dressing, egg dishes, sprinkled in with cooking rice or pasta, or added to homemade sourdough… The options are seriously endless!
Additionally, you can also use garlic powder to replace fresh garlic in any recipe. Approximately ⅛ of a teaspoon of garlic powder will provide the equivalent flavor of one clove of garlic.
Ta da!
You have successfully made your own garlic powder! That wasn’t too hard, was it? I am willing to bet you’ll think it was totally worth it, too. I’ve said it before, and I will say it again: homemade garlic powder can’t be beat. That fresh pungent flavor is unreal.
I hope you have enjoyed this article, and feel empowered and excited to go make your own. If you need tips on How to Grow Garlic, check out this article. Please feel free to ask questions, and spread the love by sharing this with all your garlic-loving friends!
If you liked this one, you’ll probably also love:
- Preserving Onions: How to Make Homemade Onion Powder
- How to Make Homemade Chili Powder in 4 Easy Steps
- How to Make Herb Sun-Dried Tomatoes

How to Make Homemade Dried Garlic Powder
Equipment
- Food Dehydrator, or Oven
- Blender, Food Processor, or other appliance for grinding
- An air-tight glass storage container, such as a mason jar with lid
Ingredients
- Fresh Garlic
Instructions
- Peel and thinly slice the garlic into ⅛ inch pieces.
- Place garlic slices onto dehydrator racks without overlapping pieces.
- Dry garlic in a food dehydrator from 100 to 130 degrees Fahrenheit until slices are bone dry. They should snap crisply in half rather than bending. (See notes for oven instructions below)
- Once fully dried, place the garlic in a blender or food processor and blend until a fine powder is achieved.
- Use a fine mesh strainer to sift the blended powder before placing in storage container. If there are leftover hard bits remaining, return these to the blender or food processor and grind further into a powder.
- Store garlic powder in an airtight container and use within one year.
Notes


26 Comments
Willow W
When I first started dehydrating herbs & things, I used my oven instead of purchasing a unit (in case I didn’t like dehydrating).
But the best advice I got was:
Turn the oven LIGHT on but leave the oven temperature OFF.
Worked like a charm every time!😉
(I’ve since purchased a small Nesco, but I’ve used it SO much I’m now considering a larger unit, but haven’t investigated brands yet…)
Thank you so much for ALL the information you share with us!!!💝