


How to Make Homemade Dried Turmeric Powder
Of all the things we grow and dehydrate, homemade turmeric powder is among the most unique – and one of the most healthy! Curcumin, the active ingredient in turmeric, is arguably one of the most beneficial and healing herb compounds in existence. Not to mention, turmeric powder is really tasty! While it is commonly used in curry powder, turmeric powder itself is not spicy. Rather, it has an earthy, slightly bitter, and mildly sweet flavor. Fresh homemade turmeric powder has the best flavor of them all.
Read along to learn how to make turmeric powder at home. The process is quite easy, and very rewarding! To make homemade turmeric powder, all you need is a decent helping of fresh turmeric rhizomes, a food dehydrator, and a blender or food processor. An oven can also be used to dry the turmeric in a pinch, if a dehydrator is not available.
To make turmeric powder, you can use store-bought or farmers market rhizomes. I suggest sourcing organic turmeric rhizomes if possible. However, the most cost-effective way to create a substantial supply of turmeric powder is to grow and dry your own turmeric! Learn how to grow turmeric in any climate here. With our homegrown turmeric, we have enough to enjoy some rhizomes fresh, freeze a few, keep some as seed to re-plant, and make turmeric powder from the rest.

Health Benefits of Turmeric Powder
Curcumin is known to have very strong anti-inflammatory and antioxidant properties. In fact, thousands of scientific studies have shown that curcumin is effective at reducing inflammation, improving memory, preventing and slowing cancer development, boosting the immune system, regulating blood pressure, and more. It is truly phenomenal stuff! Curcumin is also what gives turmeric powder its lovely orange pigment.
Because of all this awesomeness, we consume as much turmeric as we can! This includes adding homemade turmeric powder to many meals, as well as taking a whole raw turmeric supplement daily.
However, note that raw curcumin and turmeric isn’t easily absorbed by the body. To get the most benefit from curcumin, it is suggested to consume it with black pepper and/or a healthy fat (such as olive oil, coconut oil, coconut milk). Both of which increase the bioavailability and thus uptake in your body. Prolonged high heat destroys some of the beneficial properties of turmeric, but a small exposure to heat also helps increase turmeric’s solubility and absorption. Therefore, cooking with turmeric powder may be more beneficial than consuming it raw.
We’ll talk more about the ways we use turmeric powder at the end of this article. But now, how to make turmeric powder…
SUPPLIES NEEDED
- Fresh turmeric rhizomes
- A food dehydrator (preferred method)
- Oven (if you don’t have a food dehydrator)
- Vitamix, blender, or food processor for grinding
- Fine-mesh strainer for sifting, optional but recommended
INSTRUCTIONS
Step 1: Wash & Slice Turmeric
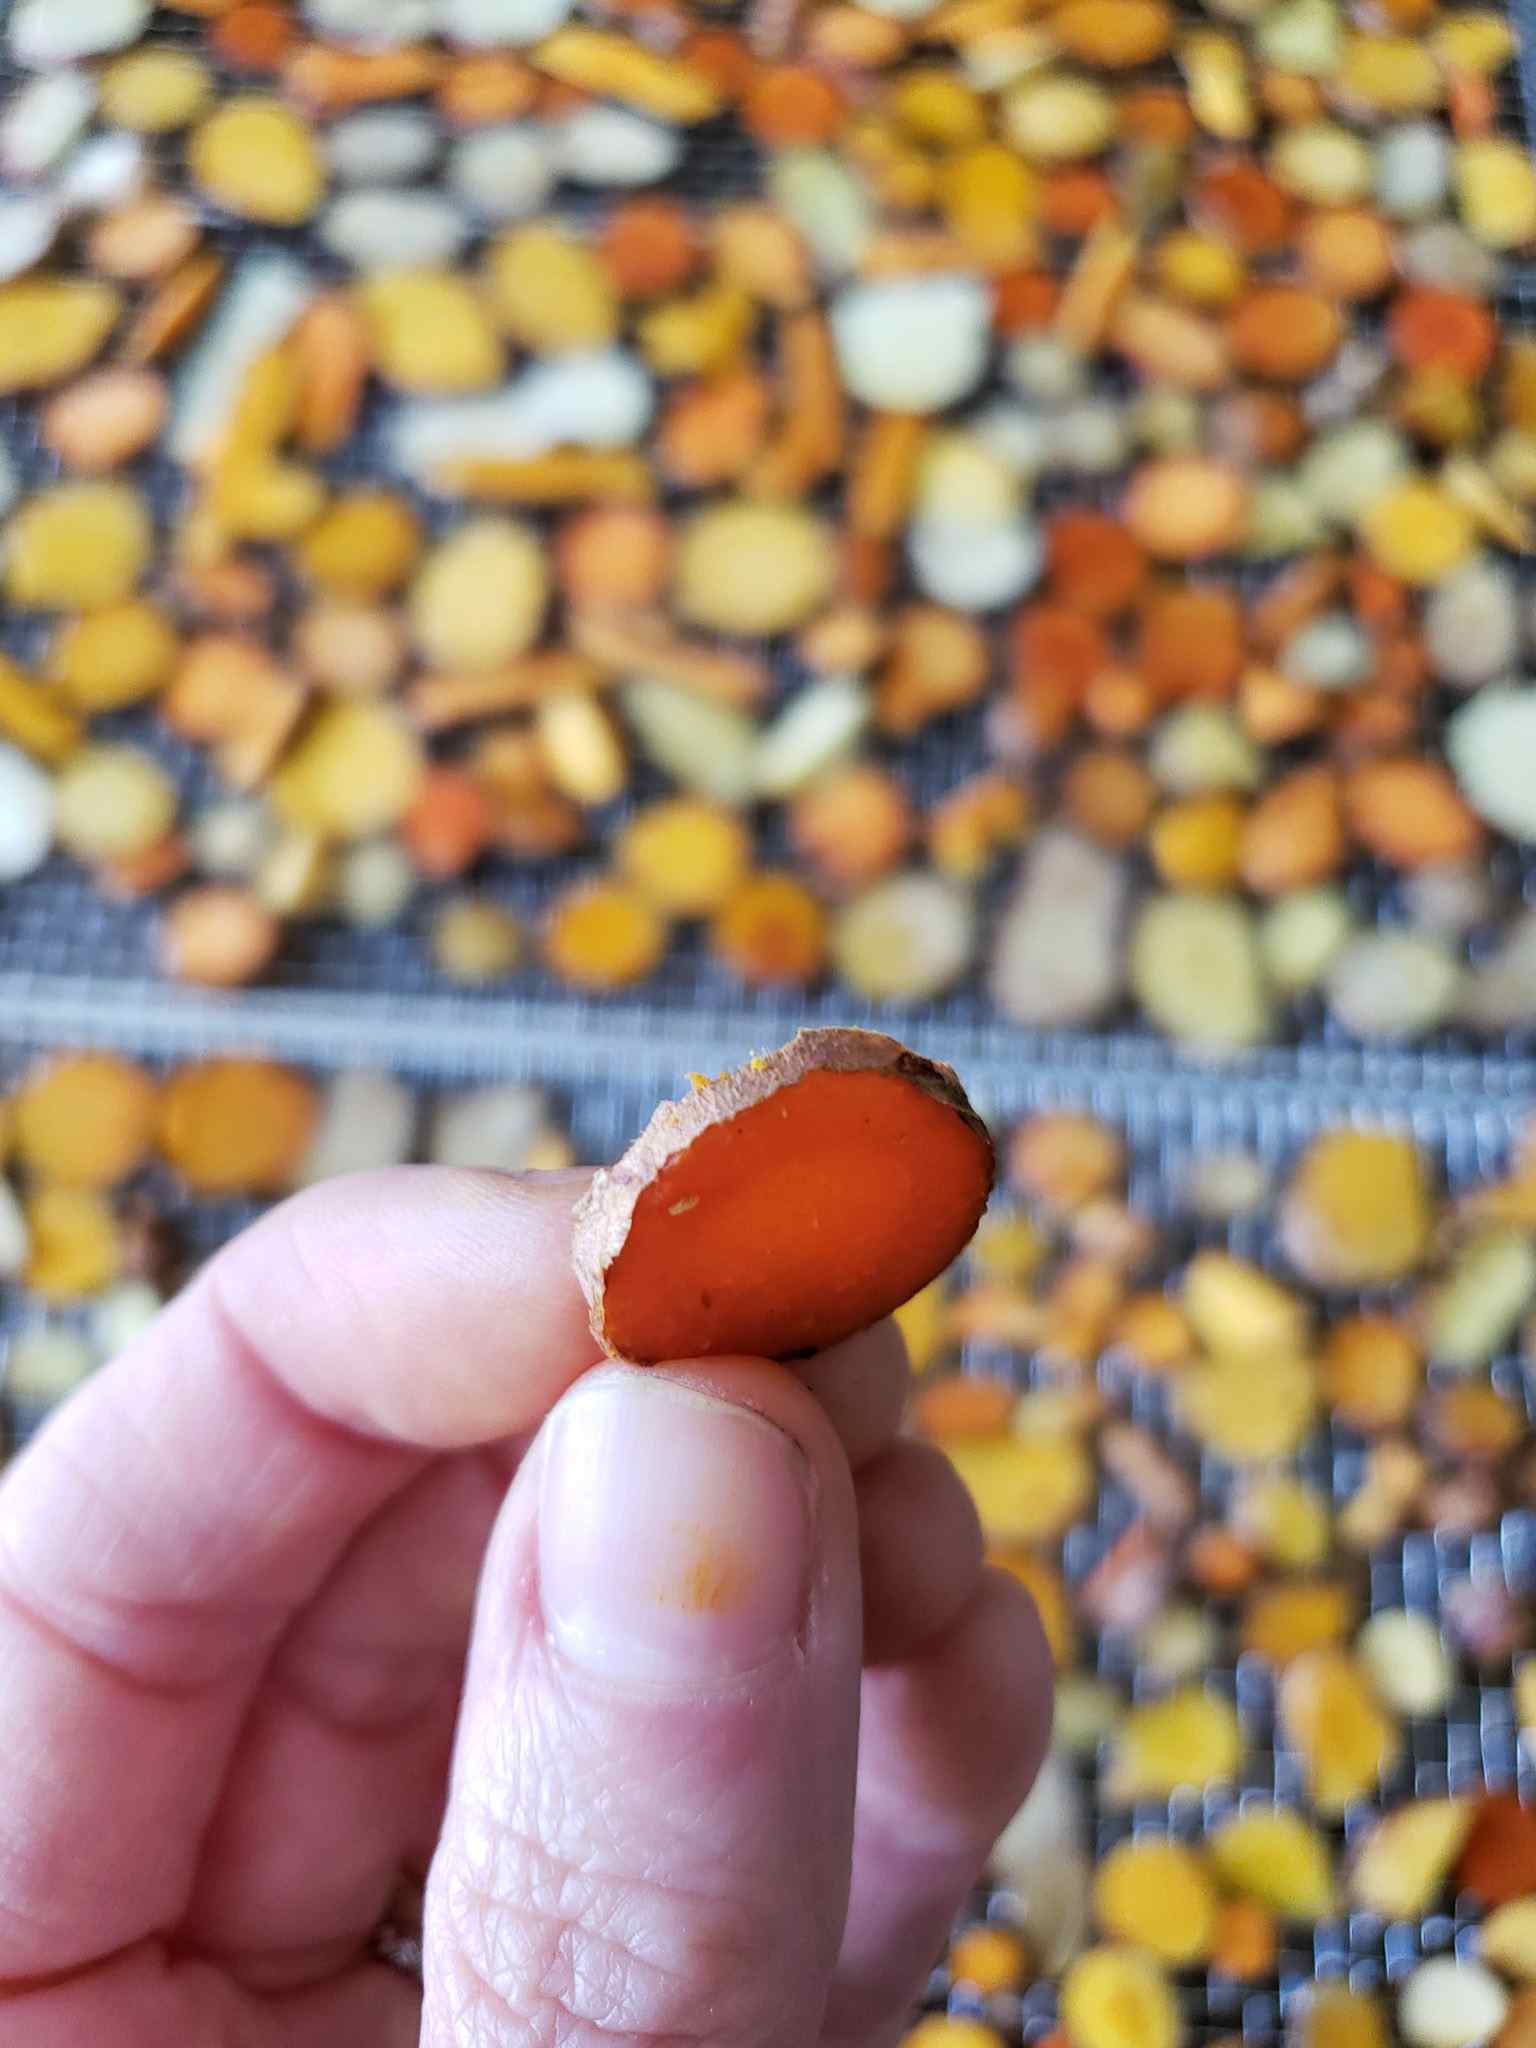
Before you get started, wash the turmeric rhizomes. You don’t need to bother peeling off the outer skin though. It will simply get dried, ground, and incorporated into the powder. Next, cut the turmeric into thin slices. The thinner you go, the quicker they will dry. Furthermore, the more consistent the cuts, the more evenly they’ll finish drying together. We typically aim for about 1/8” to 1/4″ thick, if I had to measure – which I don’t!
Fair warning: turmeric can stain your equipment, including the cutting boards, blender, and your fingers.
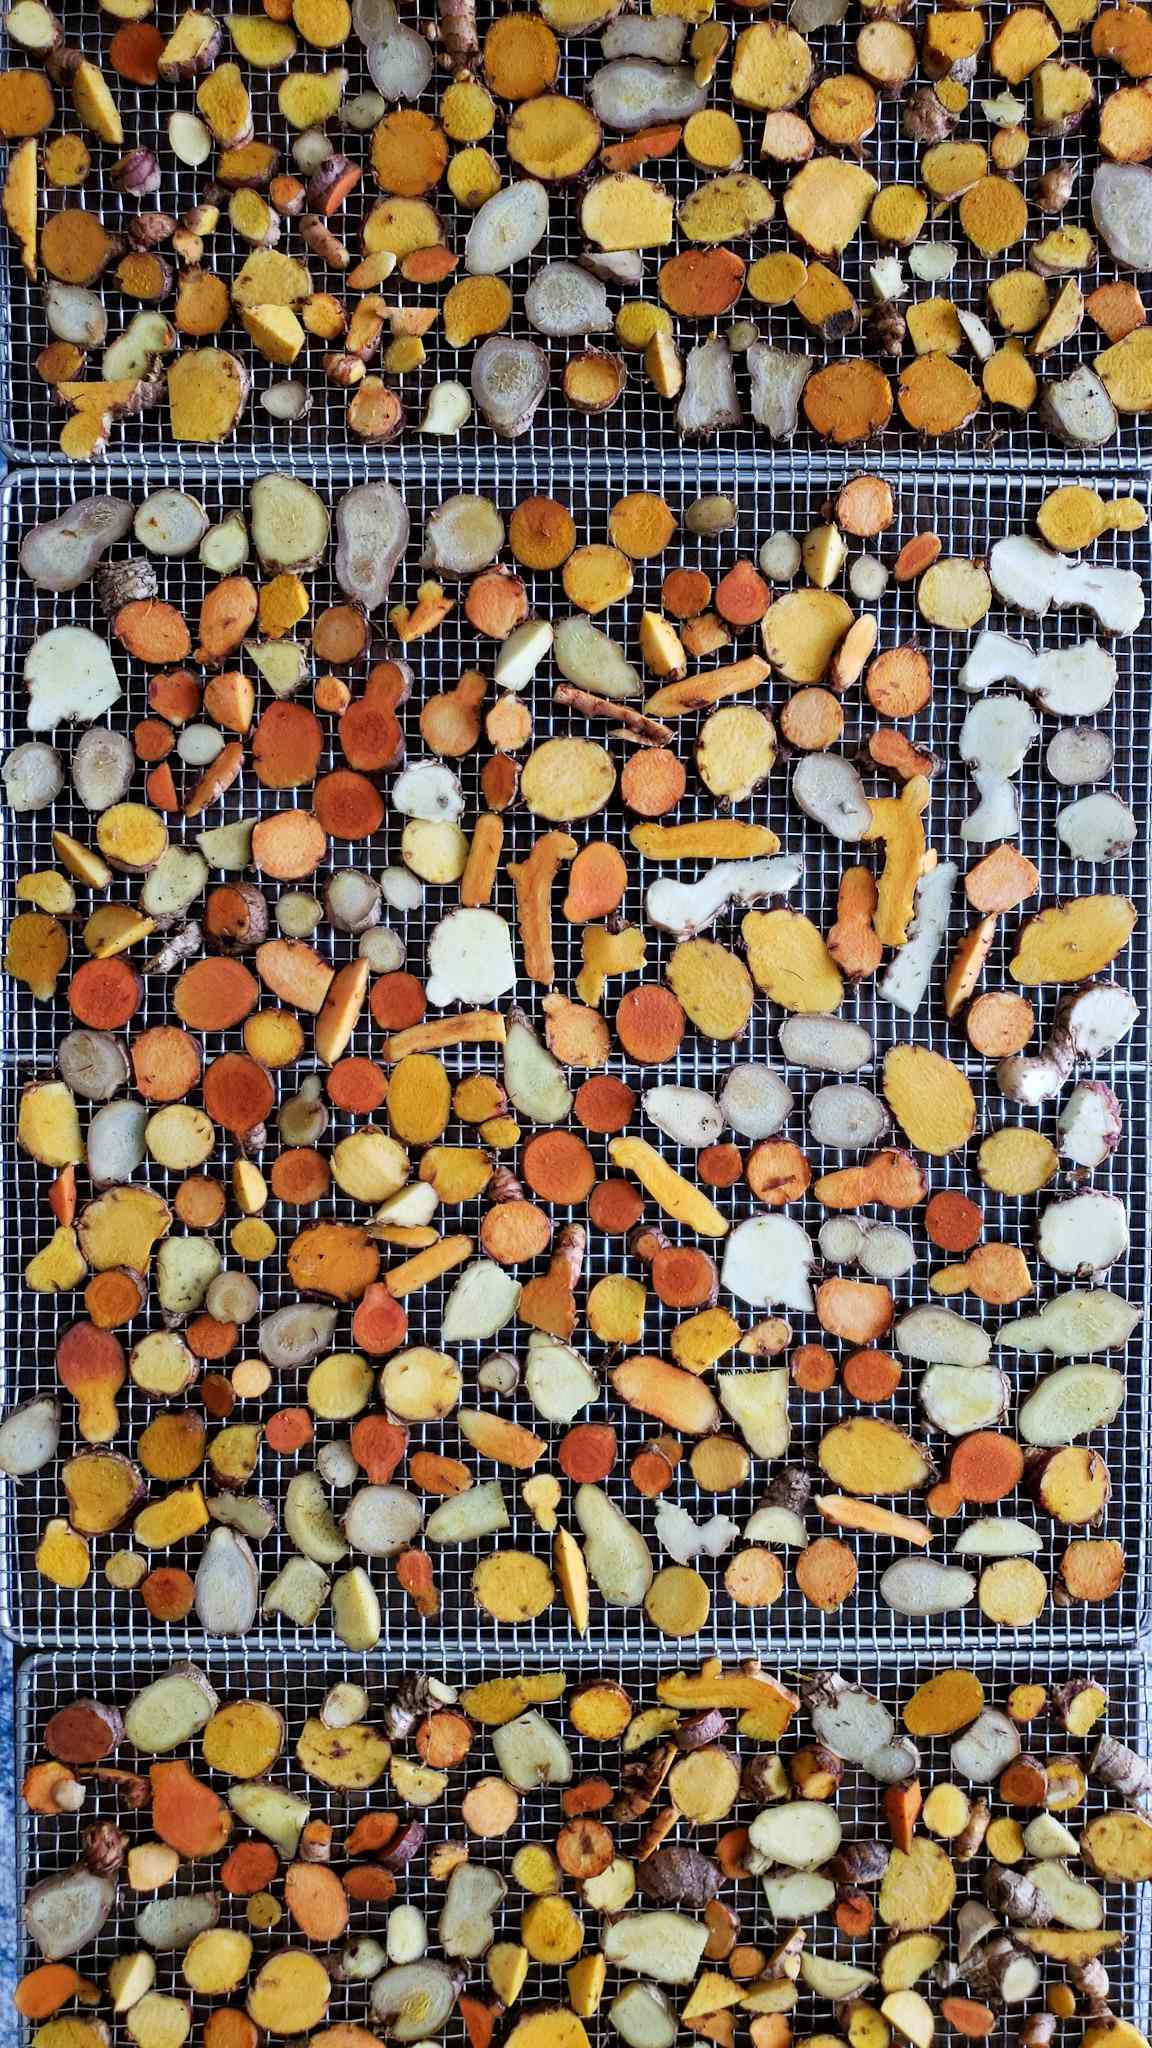
Lay the slices of turmeric out evenly on your food dehydrator trays as you go. You can pack a large amount on to each tray! The pieces can touch side to side, but make sure they aren’t piled on top of each other. We want space for good air flow between them.
Do you need to boil turmeric before dehydrating it?
If you have done any research into how to make turmeric powder, you may have noticed some conflicting information about whether or not you should boil the turmeric before dehydrating it. Some instructions suggest this helps to soften the rhizomes for preparation and reduce drying time. Others give no reason for the additional step.
We have made turmeric powder both ways in the past – boiled before drying, and not. Truth be told, I do not see the need to boil it first – and we no longer do when we make turmeric powder. The turmeric dries just as well without boiling. Plus, I worry that valuable nutrients are lost in the water or destroyed by heat during the boiling process!
Step 2: Dehydrate the Turmeric
Load your food dehydrator with the trays of sliced turmeric. To retain as much nutritional value as possible, we choose to dry ours on about 100-110°F – which is considered the “raw foods” setting on our dehydrator. If you aren’t overly concerned about that, you can use a warmer setting (around 130°F) and it will dry a bit faster.
The time it takes to fully dry will vary. It depends on your dehydrator or oven, how you prepared and organized the turmeric, and the temperature you use. When we used our old Nesco dehydrator, it took several days on a low setting to completely dry. Our Excalibur dries it nicely in about half that time, and could easily do it in less than 12 hours on a higher temperature setting than we choose to use.

Drying Turmeric in the Oven:
If you want to use the oven, prepare your turmeric in a the same fashion as described above. Next, spread them in a thin layer on a baking pan covered with parchment paper. Bake the turmeric on the lowest heat setting possible until they are completely crunchy dry. It is suggested to stir and re-spread the turmeric bits every hour as you go to promote even drying. We have never done this, but read that this method takes most of the day.
Step 3: Check Doneness
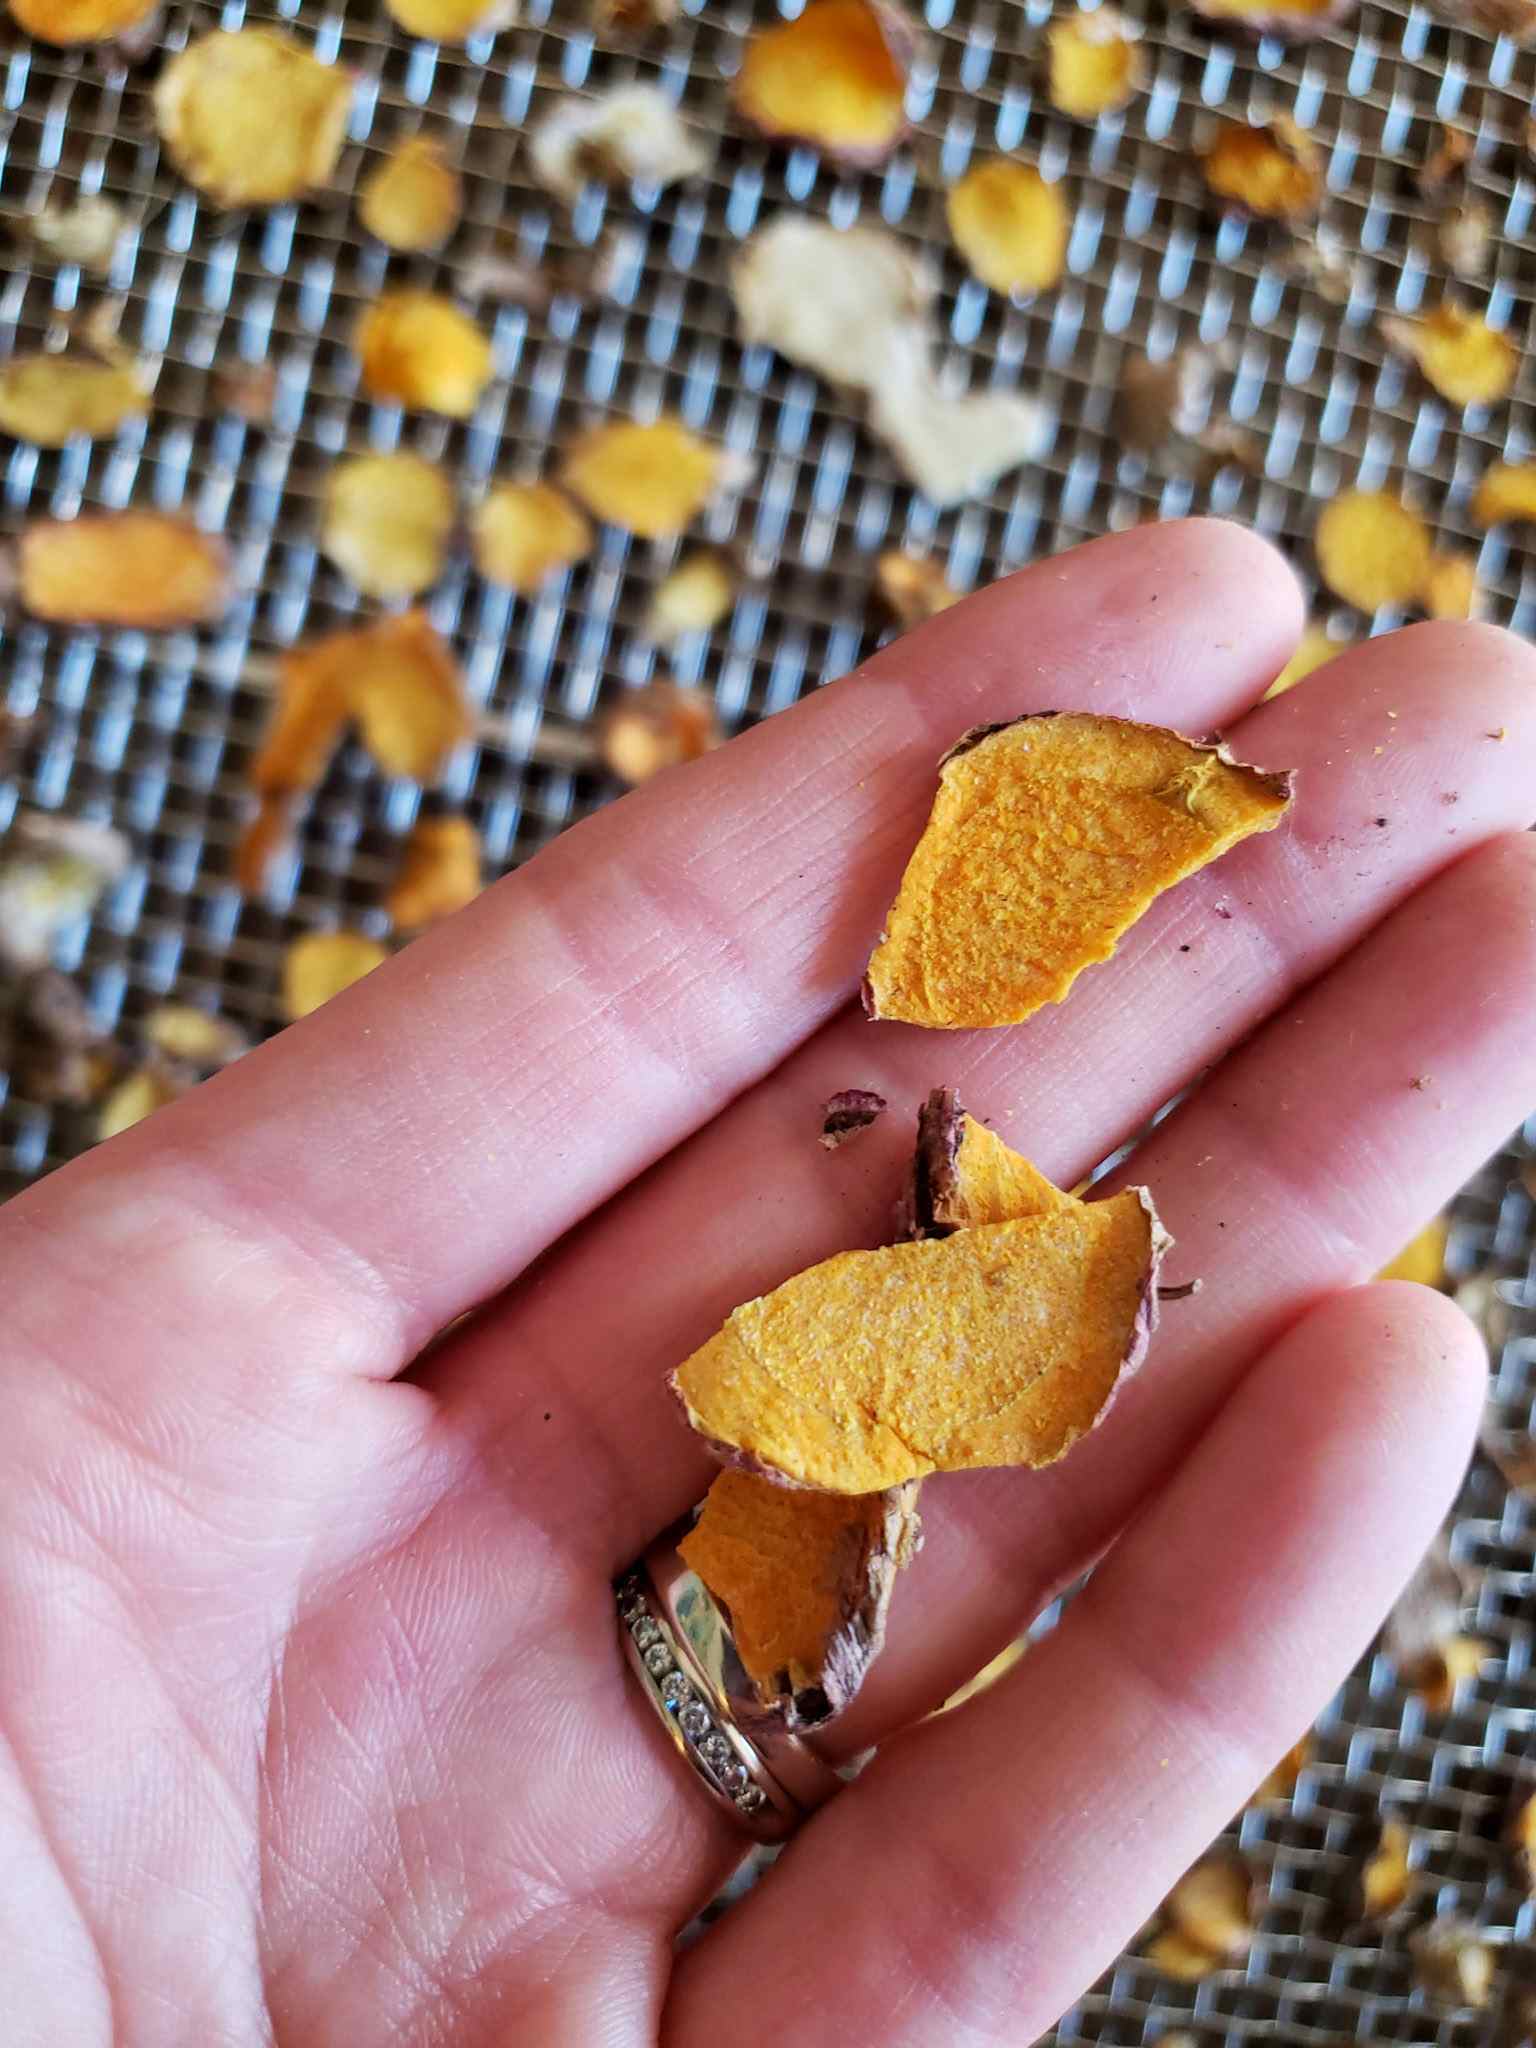
Before removing the turmeric from your dehydrator or oven, check to make sure the pieces are completely dry! If you try to break them, the thin dry slices should snap and crack crisply in half, and not bend or be malleable at all. The texture tells you if all the excess moisture has been removed. If they’re still bendy or soft instead of crunchy, keep on drying!
If too much moisture is left, your turmeric powder will clump up later in the storage container!
Once the turmeric is super dry, it’s….
Step 4: Grind the Turmeric Powder
Next, it is time to grind your crispy dry turmeric bits into a fine powder. This can be done in a blender, food processor, or coffee grinder. Simply pulse and grind it until all the chunks appear to be broken up. In a Vitamix, the result is a super fine, fluffy powder.
Helpful tip:
Even using a Vitamix, I find that some larger hard bits are left behind after the initial blend. Therefore, I like to pour the ground turmeric powder through a fine mesh strainer poised over a bowl and sift it. Then, I take the collected leftover hard bits and run them back through the Vitamix another time to pulverize them into powder. Repeat if necessary. Then use a rubber scraper to gather all of the homemade turmeric powder stuck inside your blender or machine. That is valuable stuff!


Step 5: Store, Use & Enjoy!
Store the finished homemade turmeric powder in an air-tight glass container, such as in a mason jar with tight-fitting lid. A canning funnel really comes in handy to transfer the power into a jar without spilling. Keep the container in a dry, cool place. We store ours in the pantry. When properly dried and stored, your homemade turmeric powder should last for over a year. That is, if you don’t use it all up before then!
Use your turmeric powder the same way you may use curry powder, and beyond! We like to sprinkle homegrown turmeric powder over garden veggies as they sauté in our favorite cast iron wok, add it to soups like this roasted carrot and sweet potato soup, or along with with rice, beans or lentils – such as our madras curry lentils recipe.
We even like to mix turmeric powder into our homemade sourdough bread sometimes! Furthermore, turmeric powder can be used to make delicious golden milk – an earthy, creamy, lightly sweet and very healthy beverage. You can find our quick and easy golden milk recipe here.


If you enjoyed this article, you will probably also like these easy dehydrating tutorials:
- Preserving Garlic: How to Make Homemade Garlic Powder
- How to Make Homemade Onion Powder in 6 Easy Steps
- How to Make Dehydrated Lemon Peel Powder + 13 Ways to Use It
I hope you found this to be useful, and will soon enjoy your own homemade turmeric powder. Please feel free to ask questions and share this article. Thanks for tuning in!

Homemade Dried Turmeric Powder
Equipment
- Food Dehydrator, or Oven
- Blender, Food Processor, or other appliance for grinding
Ingredients
- Fresh turmeric rhizomes
Instructions
- Wash the turmeric rhizomes. No need to peel or boil them first.
- Cut the turmeric rhizomes into thin slices, aiming for about 1/8" thick and fairly consistent slices.
- Lay out the turmeric slices in a single layer on your food dehydrator racks (or on a baking sheet, if drying in the oven).
- Dry the turmeric in a food dehydrator at 100-110°F, or in the oven on the lowest heat setting possible.
- The time it takes for them to fully dry will vary depending on your individual machine and the thickness of the slices, which may be several hours to a couple of days.
- Dehydrate the turmeric until the pieces are completely dry. When done drying they will easily crack and snap in half, rather than bending.
- Use a blender, food processor, or coffee grinder to churn the dried turmeric into powder.
- Pour the turmeric powder through a fine mesh strainer poised over a bowl and sift it. Take the collected leftover hard bits and run them back through the Vitamix/blender another time to pulverize them into powder.
- Store the finished turmeric powder in a glass air-tight container, such as in a mason jar with tight-fitting lid.
- Keep the container in a dry, cool place – such as the pantry. When properly dried and stored, your homemade turmeric powder should last for over a year.
- Enjoy homemade turmeric powder with a variety of meals – but be sure to add black pepper and/or a healthy fat along with it to increase bioavailability and get the most benefit from!


17 Comments
Monique Gilmour
I am at the beginning of my tumeric journey and found your site to be extremely informative, thankyou
Monique
Aaron (Mr. DeannaCat)
Hi Monique, we are so glad you found us! Hopefully you find turmeric to be medicinal and if you are able to grow it yourself, it is quite the fun plant to grow and harvest. Good luck!
Carol
What is a good dehydrator to buy for home use. I live Australia
Aaron (Mr. DeannaCat)
Hi Carol, we recommend using Excalibur dehydrators and it looks like they have their own distribution in Australia. Hope that helps and good luck!
Ruth
I plan on growing turmeric and using the powder in capsules. How fine does the powder have to been for the capsules to be dissolved properly.
Aaron (Mr. DeannaCat)
Hi Ruth, if you have a Vitamix blender it should do the job well enough. We typically try and get the same texture as other dried spices or powders. Be sure to add some black pepper to your capsules as well as it helps with the bioavailability of the curcumin. Good luck!
Martims
Been looking for this for sometime now and here I have it on a platter of gold. Can I go commercial with this procedure ? Thanks a lot.
Alice
Is there a way to make this into a fermented turmeric powder? add ginger?
Aaron (Mr. DeannaCat)
Hi Alice, yes there is and you can add ginger as well if you like. Cut the fresh turmeric (and ginger if you’d like) rhizomes into slices and ferment them in a brine for at least a couple of weeks. Once the turmeric has fermented, remove it from the brine and place on the drying trays of your food dehydrator. Dry the fermented rhizomes on a low setting (95 degrees F) as to keep the good bacteria alive. Once it is fully dry, pulverize or grind into a powder, hope that helps and let us know how it turns out.
Vinita
HI… Thanks for the information. I had boiled the turmeric cut them in fine slices and left it in sunlight to dry but next day I found white spots and black stops on some pieces … what can these spots be? Does this happen often. Please advice. Thanks
Aaron (Mr. DeannaCat)
Hi Vinita, that is most likely fungal growth due to the slow evaporation of moisture from the turmeric rhizomes. It is best to dry in the rhizomes in a food dehydrator as it allows air to circulate on both sides of the rhizomes and can be kept at a higher and more dry temperature than compared to most outdoor conditions. If you wanted to consume the turmeric by using it as a spice, I would discard the turmeric with the mold growing on it. You may still be able to use it if you wanted to use the dried turmeric as a dye only. Hope that helps and good luck!
Manuel A de Cardenas
Does one peel the Tumeric before boiling or no?,
& how long after boiling does it take to dry so when
you use the grater it comes out fine?
Thanks,
M
Aaron (Mr. DeannaCat)
Hi Manuel, we have found that we get a quality product with great color without boiling the rhizomes before drying. Either way, we choose not to peel that turmeric as that is very labor intensive. If you still choose to boil the rhizomes, it doesn’t take but a couple of hours of letting the rhizomes air dry before you proceed to grating or using a food processor in preparation for drying. Hope that helps and good luck!
Raju
What is the difference between ground turmeric and turmeric powder? Pure Turmeric Powder
Aaron (Mr. DeannaCat)
Hello Raju, they are the same thing, just worded differently.
May Guen Celetaria Abellon
I had been searching for a very informative article about making turmeric powder. And this is absolutely very useful, just what I had been looking for. Thank you so much for sharing this.
Pingback: