

Growing Organic Tomatoes: How to Plant, Feed, Prune & Grow Tomato Plants
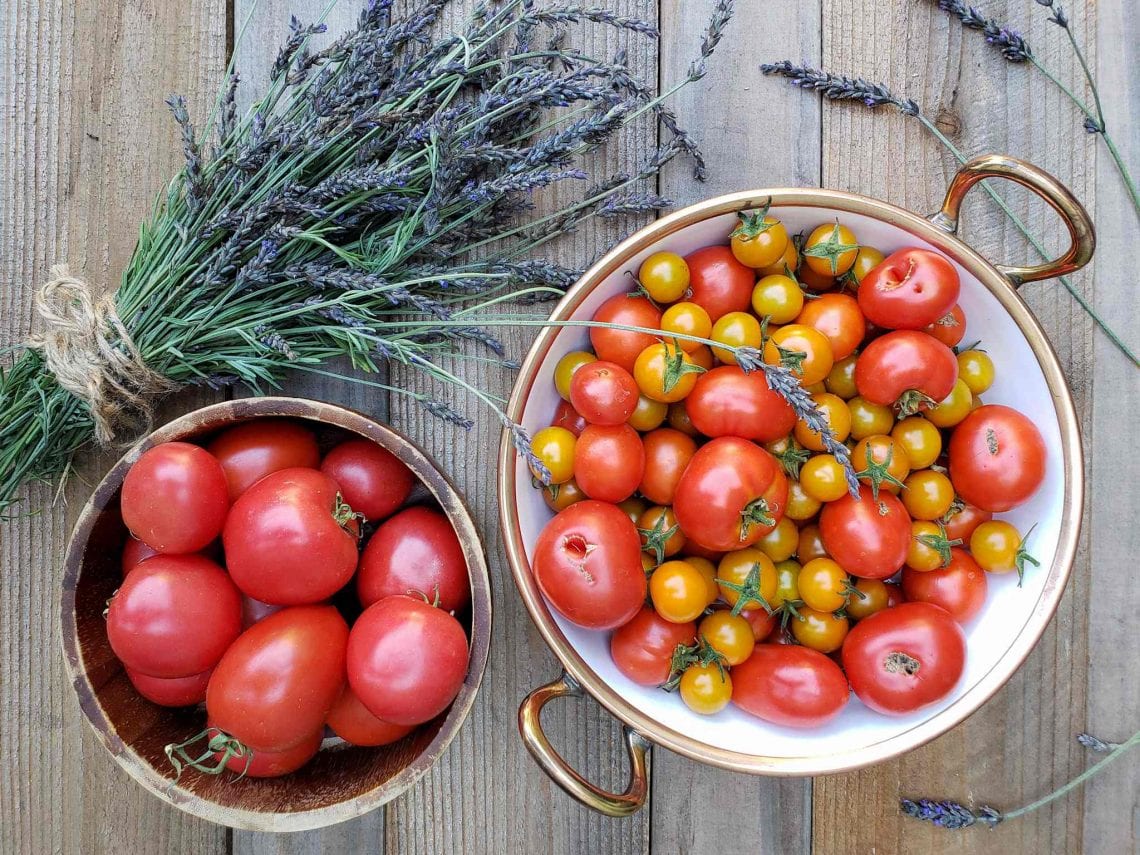
Tomatoes: the quintessential summer garden veggie! Erhm, I mean fruit. In my humble opinion, all homegrown fruit and vegetables are far superior to those you buy in the store. When it comes to tomatoes, this is exceedingly true! Few things beat the flavor or satisfaction of eating a fresh, vine-ripened, juicy homegrown tomato! The good news is, growing tomatoes is pretty easy to do – even in containers! Yet there are always a lot of questions looming about how to grow tomatoes, especially for new gardeners. Read along with this start-to-finish guide on how to grow tomatoes, and get the answers to your burning tomato questions!
This article covers how to grow organic tomatoes from seed or seedlings, including tips for planting time, ongoing care, fertilizer, and common pests or disease. Have you been wondering about the best way to stake, support, or prune tomato plants? We’ll go over several options. Last but not least, harvest time! Let’s talk about some best practices for harvesting ripe tomatoes, as well as our favorite ways to eat and preserve the bounty.
For easy reading, this article is split up into five sections: General Tomato Growing Info, How to Plant Tomatoes, Ongoing Care (including fertilizing, pruning, and supporting), Common Diseases and Pest Control, and finally Harvesting & Preserving Tomatoes. Feel free to skip ahead to the section you need most! Look for the colored headings.
Disclosure: This post may contain affiliate links to products for your convenience, such as to items on Amazon. Homestead and Chill gains a small commission from purchases made through those links, at no additional cost to you.
GENERAL TOMATO GROWING INFO
Growing Tomatoes from Seeds or Seedlings
Tomatoes require a long warm growing season. Therefore, when it comes time to plant tomatoes outside, it is best to plant established seedlings in your garden rather than sowing seeds directly outdoors. This gives them a great head start, and means you’ll be harvesting fresh tomatoes sooner! You can plant tomato seedlings that you raised indoors from seed, or pick up some seedlings from a local nursery.
To grow tomatoes from seed, follow the usual best practices for starting seeds inside. Plant the seeds in clean containers full of seed-starting soil mix, provide ample light, consistent moisture, and watch your seeds sprout and grow! Please see this article for more detailed instructions on how to start seeds indoors. It also covers important ongoing seedling care tips – such as thinning, fertilizing, and potting up seedlings.
If you opt to buy started nursery seedlings instead (no shame in that!), check out some tips on how to choose the best seedlings at the nursery here. The Cliffnotes: look for varieties well-suited for your climate or space, choose the healthiest and freshest looking seedlings (biggest isn’t always better!) and check the seedlings over for pests before bringing them home.

Choosing Tomato Varieties to Grow
If you’re a seed addict like myself, seed shopping to grow tomatoes can be dangerous! There are literally hundreds of tantalizing varieties to choose from. See our top 12 favorite places to buy organic and heirloom seeds here. Most garden centers also carry at least a dozen different types of tomato seedlings to choose from. Read plant descriptions carefully! Pay attention to not only what the fruit are like, but also what the plants growing habits or requirements are. From there, choose varieties that sound delicious of course, and will suit both your desires and climate. What is the variety known for?
For example, we live in a coastal climate with cool and foggy summer weather. Unfortunately, this makes it difficult for us to grow huge beefy heirloom tomatoes. It simply doesn’t get hot enough for them to ripen quickly on the vine, and the fruit becomes mealy and less flavorful. To combat this, we choose a lot of early-ripening and smaller fruit varieties – and still get plenty of awesome homegrown toms! We also look for varieties described to do well in overcast or cooler weather.
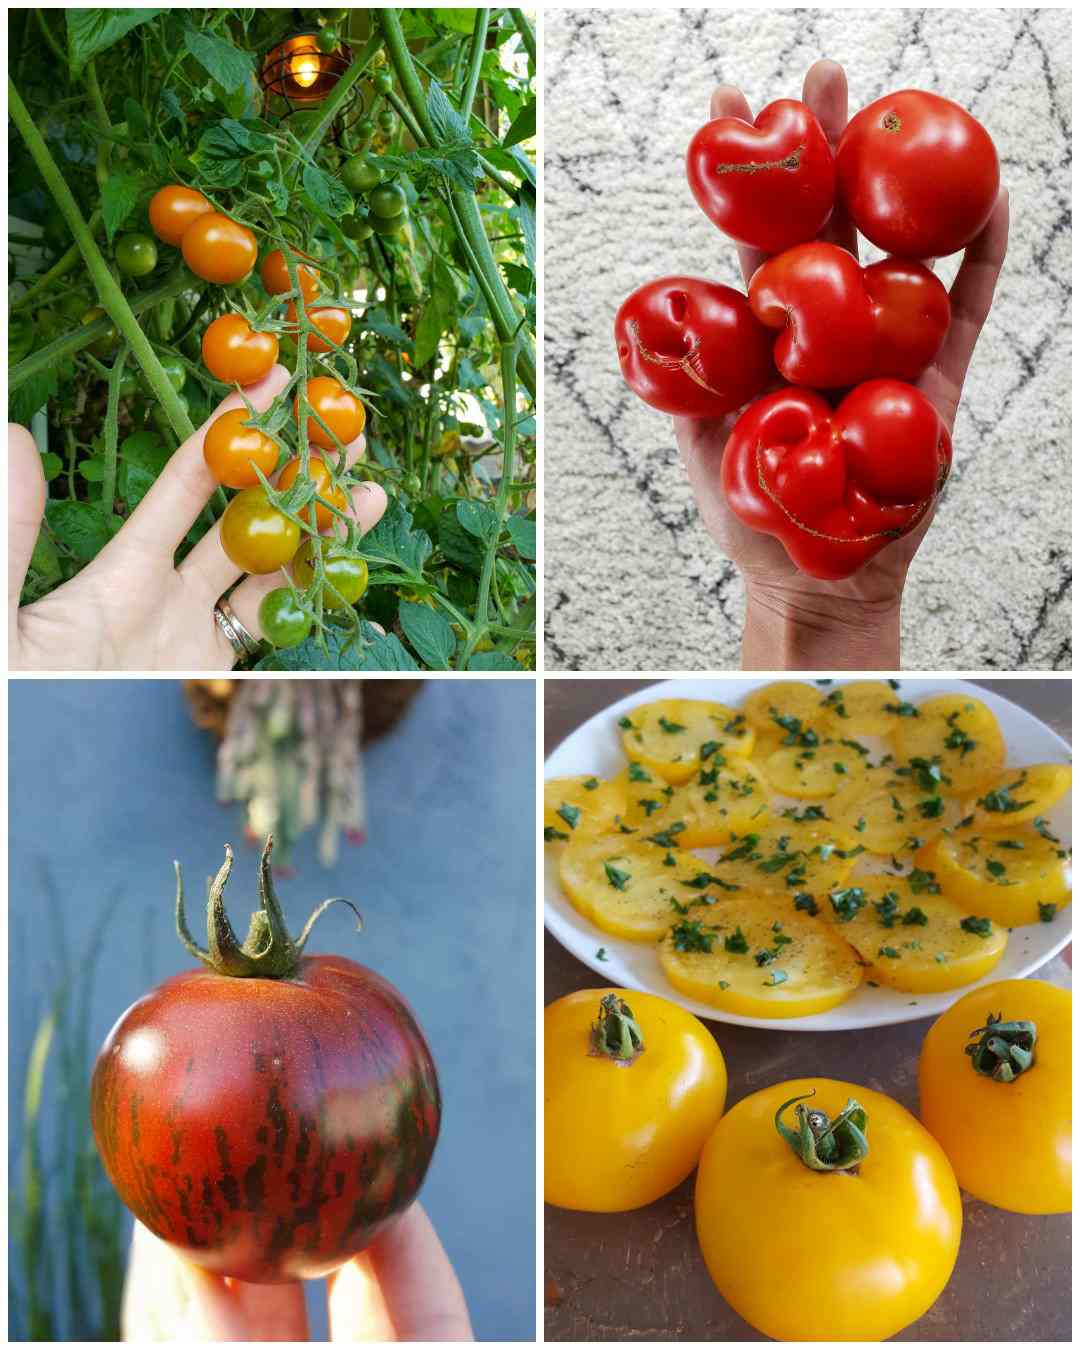
Some of our favorite varieties that fall into the early-producing, small, or cool-weather tolerant group include: Stupice, Sungold Cherry, Amber, Scotland Yellow, Granadero, and Green Zebra. For more ideas for a broader array of climates, check out this Top 10 Heirloom Tomatoes Varieties article from Seed Savers Exchange, or this Top 20 List from Mother Earth News.
Certain tomato varieties are known for their excellent fresh-eating qualities, often called great “slicers” or salad tomatoes. Others are touted for being the ideal canning and sauce tomato, such as paste tomatoes or Roma varieties. Personally, we like to mix it up and grow a variety of all sorts. Yet if you have limited space, you’ll want to be more selective in your choices and make sure you’re getting what you want from the plant!
Another factor to consider when choosing what variety tomatoes to grow is if they’re determinate or indeterminate.
Determinate vs Indeterminate Tomatoes: What is the Difference?
When you grow tomatoes, you need to know if the variety you’re growing is an indeterminate or a determinate variety. The differences between them will influence how you support, prune, harvest, and even plant the tomato! I have found that indeterminate tomatoes are more common in home gardens, but we like to grow a few of each.
Determinate Tomatoes
Determinate or “bush” tomato plants stay slightly shorter, usually around three to five feet in height. They put off most all of their fruit during a shorter period of time, giving one big bountiful harvest. Don’t worry, it isn’t usually all in just one day or two! But do be prepared to harvest, eat, or otherwise preserve most of the plant’s tomatoes over about a month timespan on average. Since they “finish” more quickly, determinants can be a good choice for folks with a shorter growing season – either due to your climate, or if you want a quick harvest so you can plant something else in its place.
Due to their manageable and compact size, determinate tomatoes do very well in containers. They are generally lower-maintenance than indeterminate types. In fact, it is not recommended to prune determinate varieties at all, as it can significantly lessen the fruit yield. That also means they don’t need a lot of fancy training. A simple stake and tomato cage is perfect for determinate tomatoes!
Indeterminate Tomatoes
On the other hand, indeterminate or “vining” tomatoes grow significantly larger – with the ability of reaching up to 12 feet tall! An average around 6 feet is more common though. Rather than busting out one main bumper crop, indeterminate tomatoes continually produce fruit over a long period of time. If allowed, the plants will live on until frost or disease kills them.
Due to their vigorous vining nature, some gardeners choose to train indeterminate tomatoes up strings, tall stakes, or flat trellises rather than using traditional tomato cages. We have done all of the above! It is also common for some gardeners to prune indeterminate tomatoes, depending on their training and support system of choice. Don’t worry – we’ll dig more into that later.
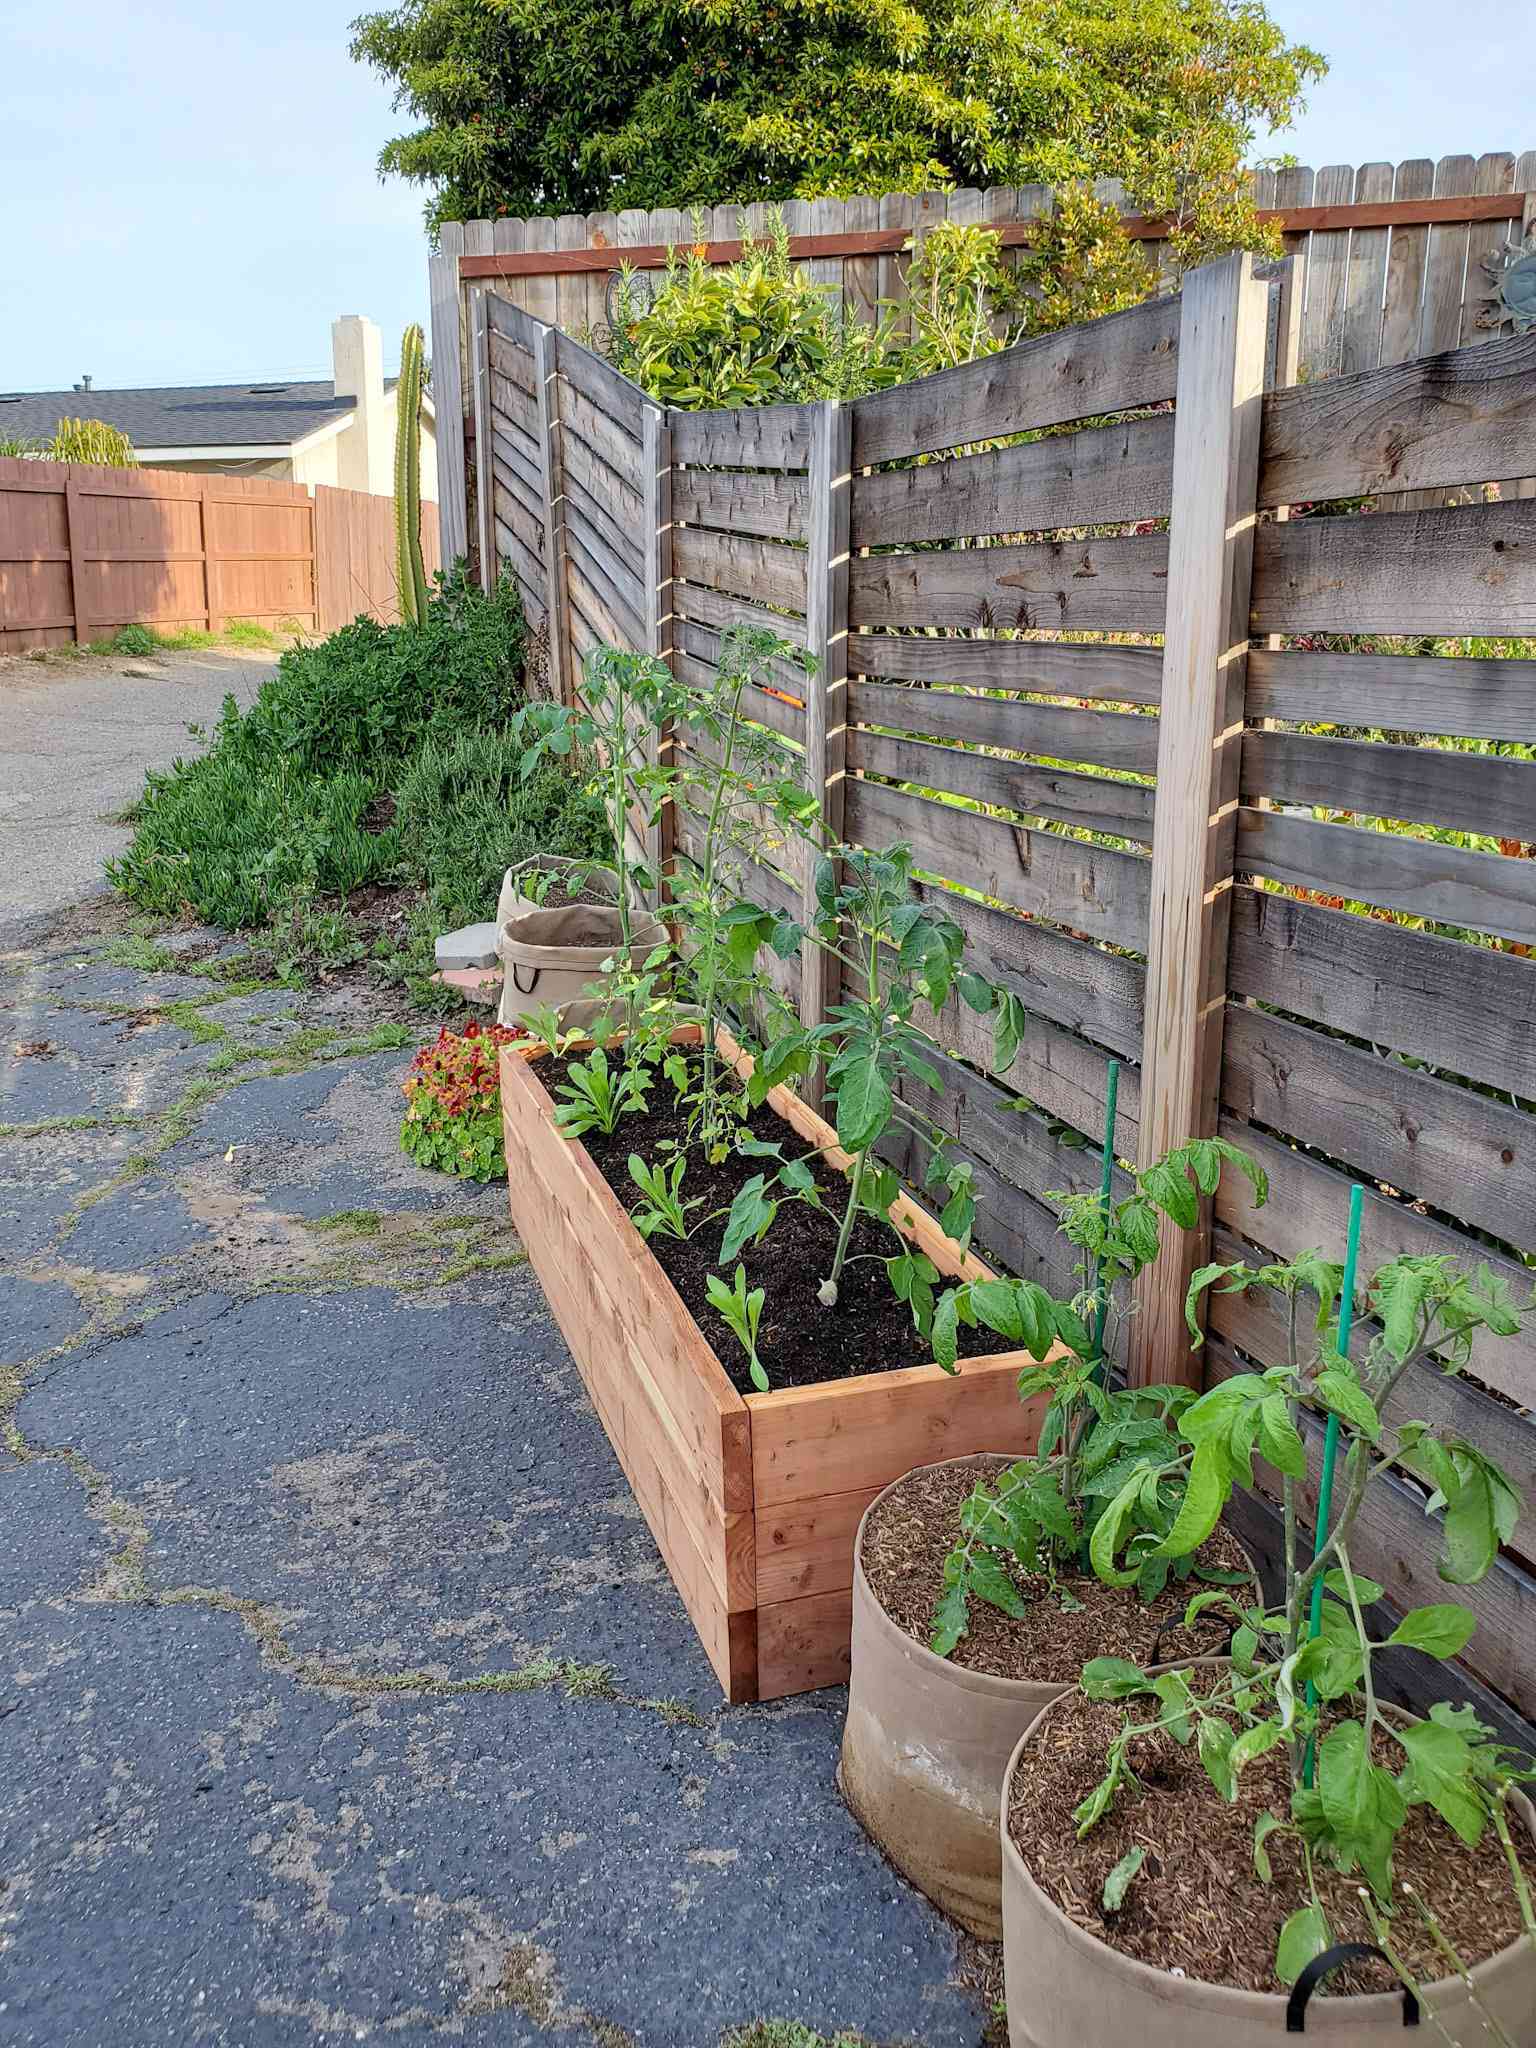
Growing Tomatoes in Containers
Just because determinate tomatoes are perfectly-suited for containers, that doesn’t mean you can’t also grow indeterminate tomato varieties in containers too. In addition to in raised beds, we also grow a few tomatoes in containers each summer – even in our driveway! We prefer to use these 15 gallon fabric grow bags for our tomatoes. However, you can use any type of container – as long as it is fairly large and has good drainage! You will also need to choose a support system (e.g. cage, stakes, trellis) that can fit in or around your chosen container. We usually use either a modest-size tomato cage, or several stakes with twine strung between them if needed.
Like any plant, the size and productivity of tomatoes grown in containers will be limited by the size of the container, and by the quality of soil and care you provide it. Meaning, a large indeterminate tomato plant will not be happy in a small pot for very long. It will run out of root space, use up the nutrients in the soil, and the soil will dry out quickly as the plant becomes increasingly large and thirsty. Set your plant up for success by choosing a container that holds at least 10 to 15 gallons of quality soil. From there on out, all of the tips in this article apply equally to tomatoes grown in containers.
The Best Time to Plant Tomatoes is….
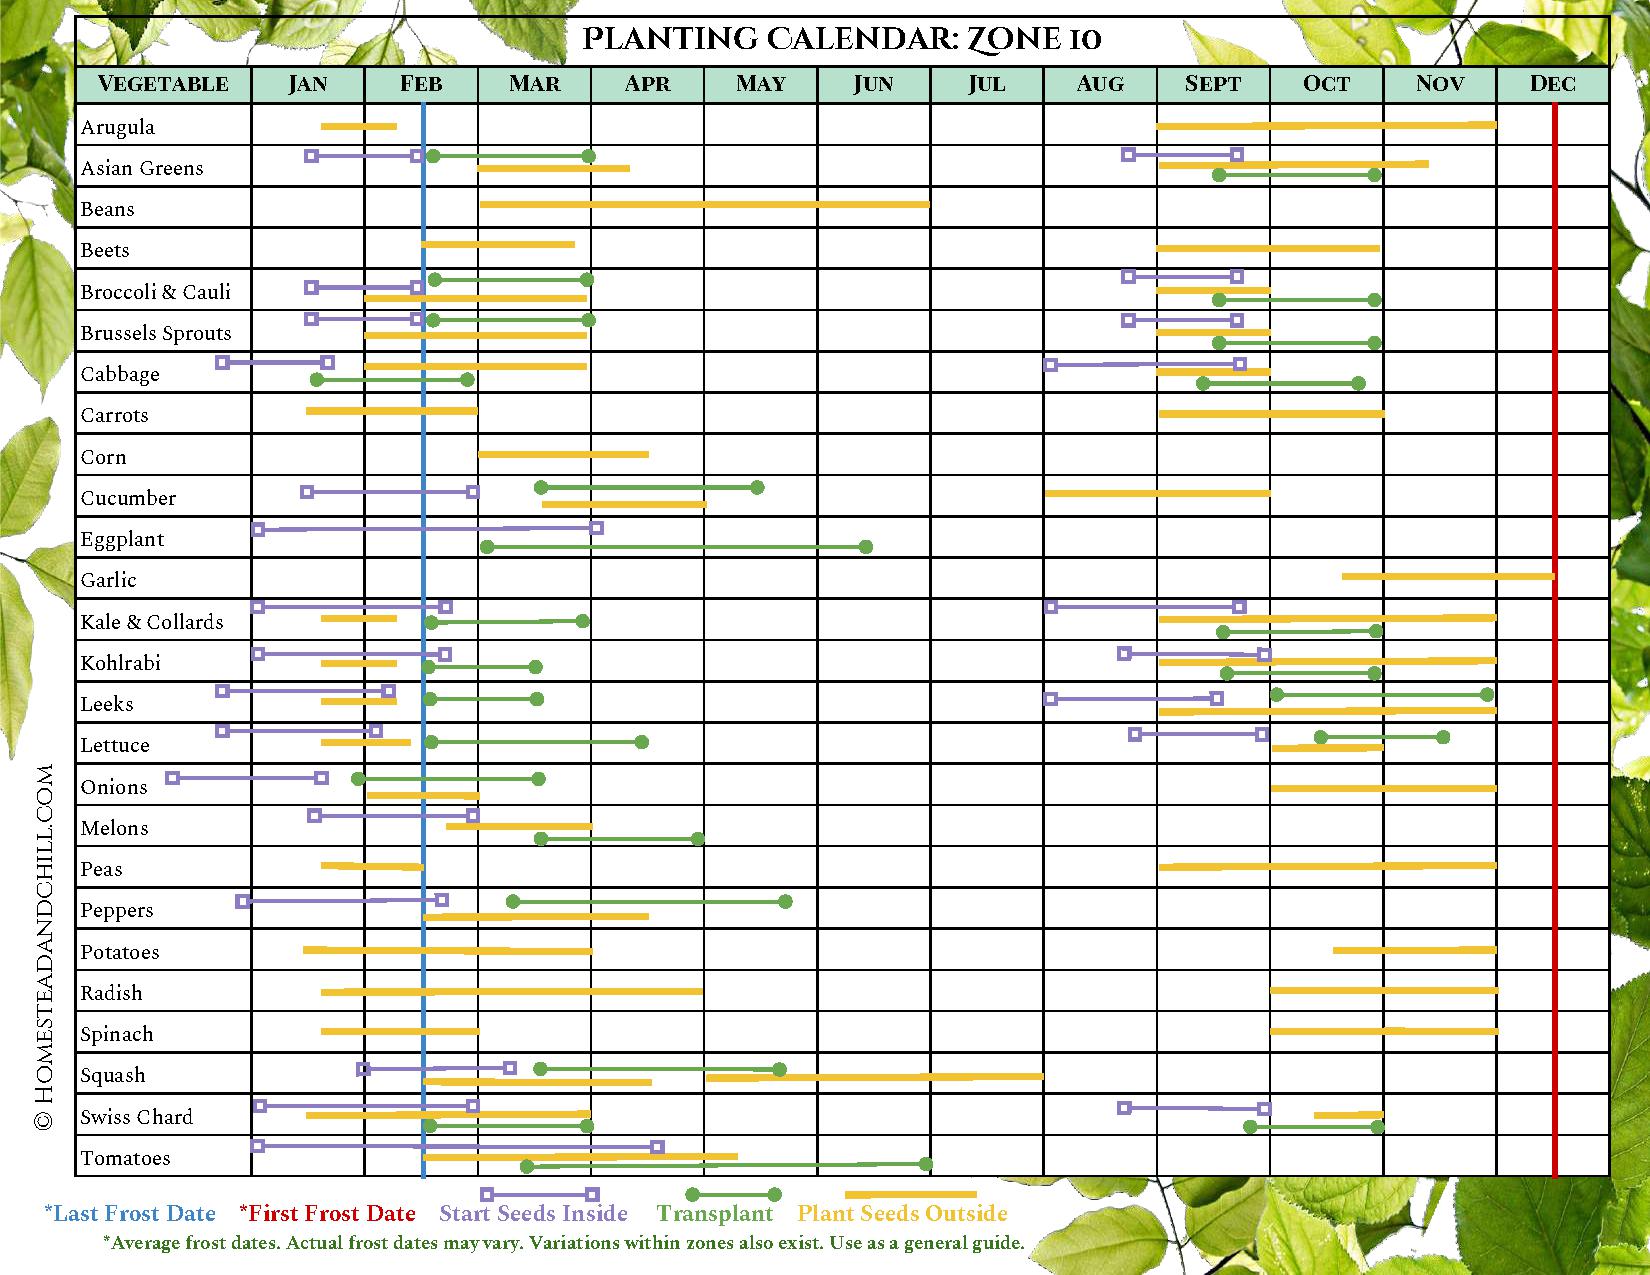
…. it depends on where you live! If you don’t yet have a copy of the Homestead and Chill Garden Planning Toolkit, you may want to nab one. The printable 20-page toolkit includes handy garden planting calendars for every USDA hardiness zone. Your zone-specific calendar will help guide you on when to start seeds indoors, transplant seedlings out, or sow seeds directly outside – for dozens of types of vegetables! If you aren’t sure of your hardiness zone, use this easy lookup tool.
For the most part, tomatoes are a heat-loving crop, grown during the summer months in most all locations. Seeds are started indoors about 6 weeks before your last spring frost date. During that time, they’re usually potted up a time or two, hardened off, and then transplanted outside – once the last risk of frost has well passed. The ideal time to plant tomatoes outside is when the daytime soil temperatures are in the 60s and the overnight soil temperature is no colder than 50 degrees Fahrenheit. Soil temperatures are different then ambient air temperatures, so use a probe thermometer if you aren’t sure!
On the other hand, some locations with excessive heat need to avoid growing tomatoes during the hottest summer months. This is because tomatoes can have issues with fruit development when daytime temperatures are regularly over 95°F, or also with very high humidity and warm nights. Hot temperatures (especially when paired with inadequate or irregular watering) causes stress to the plants, reduces pollination, increases flower drop, and reduces overall yield. Gardeners in locations like Arizona, the deep South, or Hawaii often grow tomatoes for a short season in the spring and again in the fall through winter. Or, those gardeners need to choose a location to grow tomatoes very wisely – discussed below!
Planting Location
When choosing a location to grow tomatoes, full sun is usually the best option. The one caveat is those climates with crazy-hot summers (consistently over 95°F during the day). In that case, you may want to plant your tomatoes in a spot with good morning to midday sun, but afternoon shade if possible.
Also keep in mind the shade that the tomato plants themselves will create. That is, don’t plant tomatoes on the south side of your garden bed (if you’re in the northern hemisphere) in a spot that will shade out other smaller plants once the tomato becomes large. For example, we often grow basil, peppers, and marigolds as companions around our tomato plants. By keeping the tomatoes in the “back” side of the bed and the companion plants in front, they can all receive the sun they need to happily grow. Curious about companion planting? Check out this article all about it. A companion planting chart is included!

HOW TO PLANT TOMATO SEEDLINGS
How about we actually get these seedlings in the ground now? Wait, I lied… Let’s back up to a week before planting first.
Hardening Off
If you are growing tomatoes from seed that you started indoors, be sure to properly harden off your seedlings before planting them outside! Hardening off is the process of slowly and gradually acclimating indoor seedlings to the big bad world outside over the duration of a week or so. The goal is to be sure they’re strong, ready, and will not go into a state of shock or break once they’re exposed to outdoor elements. Read more about hardening off here. If you purchased started seedlings at a nursery, they are already hardened off for you. Nooooow we’re ready to plant.
Tomato Soil Prep
Tomatoes are not too finicky about soil type, though they will appreciate deep soil with plenty of room for their roots! Tomatoes grow best in neutral (pH) loam or sandy loam, and don’t love clay soil. If you have clay soil, amend it with sand, coco coir or peat moss to improve drainage and texture. If you’re starting a new bed or filling a container to grow tomatoes, use good quality potting soil mixed with aged compost. Our soil is rich in compost and organic matter, and has a good balance of moisture retention and drainage alike – perfect for tomatoes. To learn more about how we fill new raised garden beds with soil, see this post.
Before planting tomatoes, we amend our soil in a similar fashion we do for most crops: by adding a combination of several mild slow-release organic fertilizers to the beds, spread evenly over the surface and lightly scratched into the top couple inches of soil. Ideally, apply the fertilizer a week or two before planting, and water it in. Or, you can sprinkle a bit of fertilizer around the top of the soil after planting.
Our go-to fertilizers are a combination of kelp meal, alfalfa meal, neem seed meal, and crustacean meal. Or, for a simple all-in-one approach, check out this excellent organic all-purpose fertilizer. When you’re growing tomatoes, it is best to avoid fertilizers that are excessively high in nitrogen. With too much nitrogen, you’ll grow huge bushy green plants but have fewer fruit. Tomatoes like a good balance of nitrogen, phosphorus and potassium to be most productive.
Planting Hole Additions
In the planting hole itself, we usually add a small handful of worm castings. Worm castings are a very mild form of compost that will not shock or burn baby roots. We use worm castings from our worm compost bin, but you can buy bags of castings online too. If you’re using other compost and are unsure how strong it is, I suggest working it into the surrounding soil or adding it on top rather than in direct contact with the roots.
Another great addition for the planting hole is mycorrhizae (discussed more below). Depending on the brand and instructions, mycorrhizae can either be dusted right on the root ball in powder form, or mixed with water and applied to the root zone. The one we are currently using is watered in after planting.
What about the old epsom salt trick? Some gardeners swear by adding epsom salts to the tomato planting hole, claiming that it helps the plant and fruit growth by adding magnesium and sulfur to the soil (epsom salt is magnesium sulfate). We’ve tried using epsom salt off and on over the years, but I honestly can’t say I’ve noticed much of a difference.
You may have also heard about adding crushed eggshells to the planting hole. The boost of calcium can help prevent blossom end rot, if that has even been an issue for you! However, I suggest thoroughly pulverizing the eggshells into a powder (e.g. in a Vitamix, coffee grinder or food processor) before adding a few tablespoons to each hole. That way, the calcium will be more water-soluble and available for the roots. Amending the soil with crustacean or crab meal is another way to provide highly available calcium.
UPDATE: Learn more about how to prevent and treat blossom end rot here. Hint: crushed eggshells and epsom salts are NOT the answer. A consistent watering schedule is key! I still recommend using mycorrihzae and crab meal too.

Plant Tomatoes Deep & Wide
Dig a nice deep hole for your tomato seedling! It is often recommended to bury a portion of the main tomato plant stalk by several inches (depending on how tall your seedling is, of course). That is because tomatoes will send off new roots from the portion of the stem that is buried in soil. More roots equals a larger, more robust plant. This is also a great way to fix “leggy” seedlings if they became too tall and stretched out indoors. However, don’t bury more than half of the plant height. Gently break away or cut off the lowermost side branches that would otherwise get buried before planting.
Follow the recommended spacing for tomatoes, as they get large and do not like to be crowded! Generally, a spacing of about 24 to 36 inches between plants is recommended. However, if you plan to heavily prune and train your indeterminate tomatoes, you may be able to get away with spacing them 16 to 18 inches apart instead. If it appears your tomato seedling root ball has become “root bound”, where there are a lot of visible roots winding around each other, gently loosen the roots before planting the seedling in the hole. Finally, backfill soil around the seedling and add at least a small stake for support (for now).

Feeding Tomatoes After Planting
After planting tomatoes outside, we like to give our seedlings a few special treats to help them start living their best life possible. These are optional of course, but highly recommended!
One such treat is mycorrhizae. I briefly mentioned above that it can be added to the planting hole directly, or mixed with water and applied to the root zone after planting. Mycorrhizae is a microscopic fungus that grows in association with plant roots, forming a symbiotic relationship. An established colony of mycorrhizae increases nutrient uptake and root growth, plus enhances disease and drought resistance for the plant!
During the growing season (especially in the later half once they start producing a lot of fruit), we typically feed our tomato plants with compost tea and/or alfalfa meal tea on a monthly basis for an added boost of nutrients. Another easy alternative is to sprinkle alfalfa meal around the base of each plant and water it in once per month. Aloe vera is another gentle but effective organic “fertilizer” that we like to feed our plants – especially just-transplanted seedlings. Learn how to make an aloe vera soil drench here.

GROWING TOMATOES: ONGOING CARE
Water
Tomatoes grow best when they’re provided deep and regular water. “Regular” doesn’t mean that they need to be watered daily however! Develop a consistent watering schedule. Like toddlers, tomatoes like routine. Unfortunately, I can’t say exactly how frequently to water since that will vary with your individual climate and soil. Here in the temperate fog, we can get away with watering tomatoes only twice per week. Other places may need significantly more. Aim to keep the soil consistently moist, but never soggy.
It is important to water slowly and deeply, rather than a quick spray to moisten the top few inches of soil. Did you know that tomato plant roots can be nearly as deep as the plants are tall? That means their root systems can go 4 or 5 feet deep and beyond! Tomato plants that get a slow, deep, large drink of water a few times per week will be more happy than those that receive a small drink daily. Our garden beds are all equipped with BPA-free soaker hoses, lightly covered in mulch. It is convenient and easy to turn them on for 45 minutes to an hour per bed, set a timer, and walk away. Learn more about DIY, efficient, and non-toxic irrigation options here.

Fertilizing Growing Tomatoes
Plan to feed your tomatoes plants a few times throughout the growing season. This is particularly true for long-lasting indeterminate varieties.
Tomatoes growing in fresh rich soil (e.g. recently amended, or new high-quality bagged soil) shouldn’t need much fertilizer for the first month or so after transplanting. Yet if they’re looking a bit sad and need a boost, try using a dilute seaweed extract to feed struggling tomato seedlings. We love using seaweed extract because while it provides nutrients and minerals, it is very mild and therefore low-risk for fertilizer burn.
To feed mature tomato plants, you can use dilute seaweed extract or liquid fish fertilizer as often as once every few weeks. Then when our tomato plants really start pumping out fruit (e.g. late July, August and September) we also sprinkle a light dusting (top-dressing) of alfalfa meal on the soil around the base of the tomato plants – just once per month. Space the top dressings a couple weeks away from any other fertilizer treatment.
This all-purpose organic fertilizer is another great alternative for a mid-season snack. Whatever you choose to use, read and follow the instructions on the package! We usually err on the light side of whatever the manufacturer recommends. Also remember to avoid high-nitrogen fertilizers.
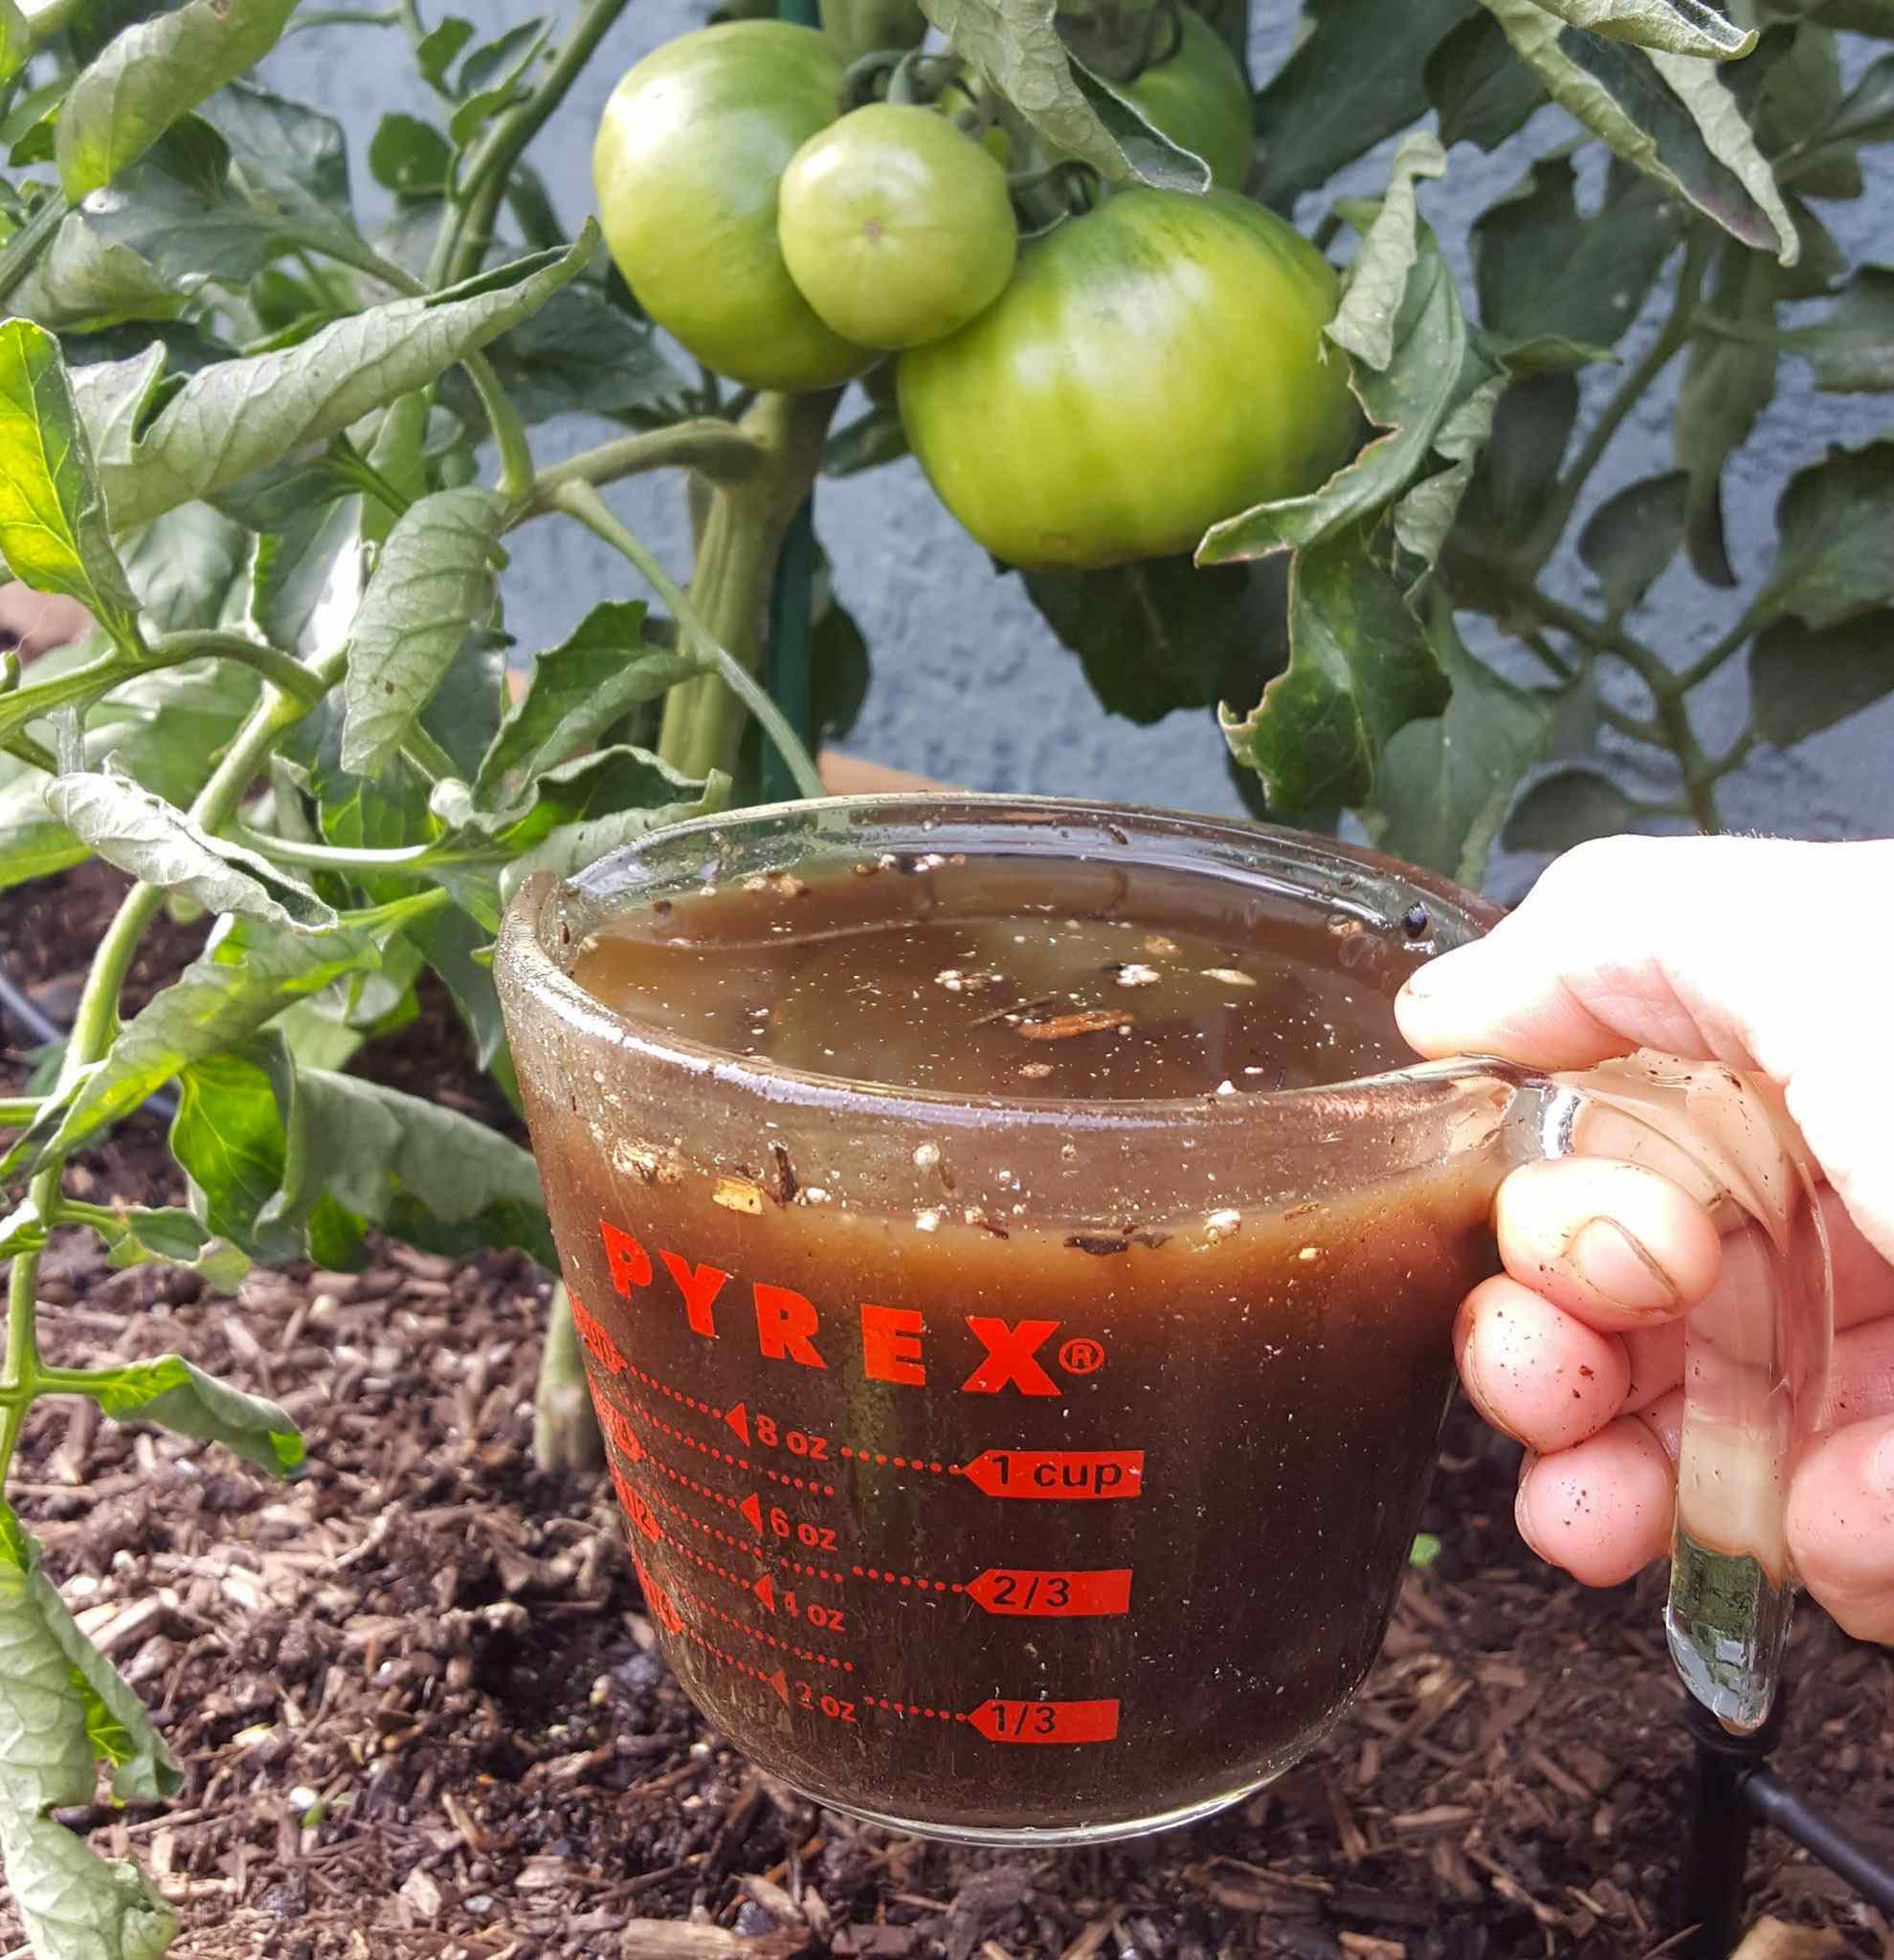
Last but not least, we also like to make homemade compost tea at least once during the growing season – and water all of our raised beds and fruit trees with it! Like most of the other fertilizers we use, compost tea is rich in nutrients and microbes but gentle at the same time. Learn how to make actively aerated compost tea here.
Pruning Tomatoes
Should I prune my tomatoes?
To prune, or not to prune? Ah, the age-old question and debate in the tomato growing world. Guess what? There is no right answer! You can choose to either heavily prune, minimally prune, or not prune your tomatoes at all. We’ve done all of the above and play with different styles every year. The decision to prune or not is a personal one, depending on how much effort you care to invest, the type of tomato grown, and how you plan to support it. Again, determinate tomatoes do not take kindly to pruning. Thus, let determinate tomatoes grow au natural with minimal intervention. You can also let your indeterminate varieties run wild if you wish!
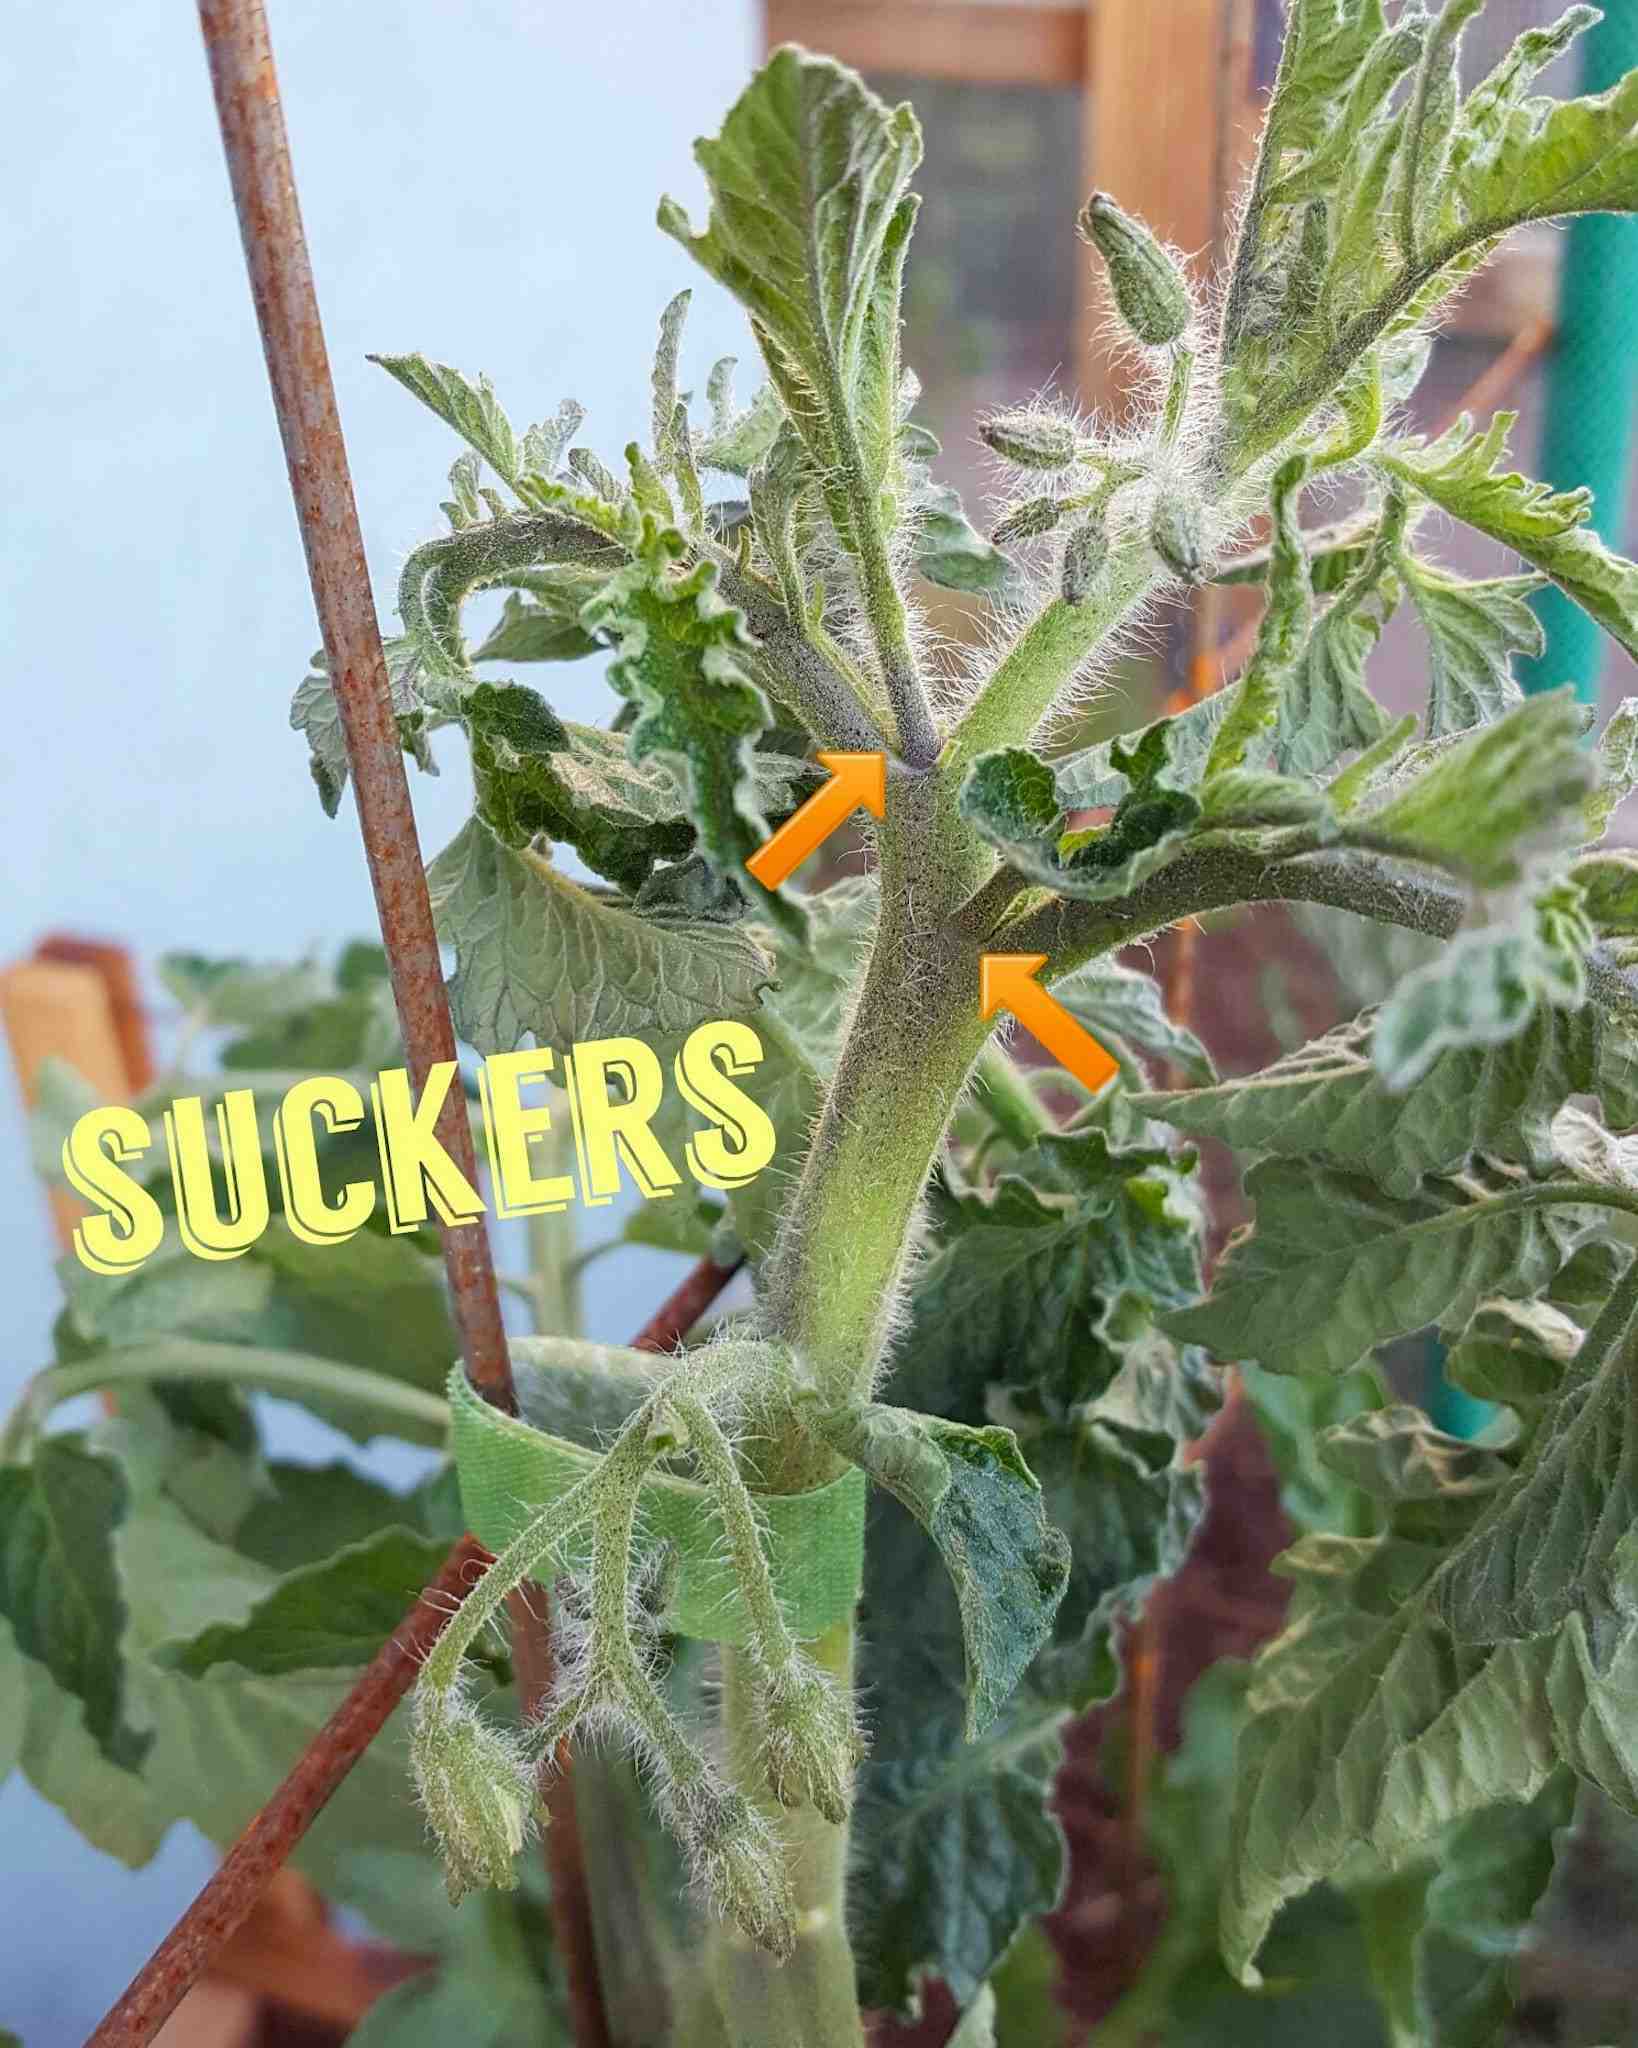
On the other hand, some gardeners like to remove side “sucker” branches from indeterminate tomatoes. A sucker is a new branch that sprouts up in the crotch between an existing leafy branch and the main tomato stem. A small sucker will not have little flower buds. Those are immature fruit branches.
Pruning suckers reduces overall yield, but can increase fruit quality.
If allowed to grow, sucker branches WILL eventually produce fruit. Yet they will also draw energy away from the main stalk of the tomato plant – hence their name, suckers. By pruning away the suckers, you do get less fruit from one plant. However, the fruit that IS produced will be larger, juicier, and some say superior in flavor. This could be especially helpful if you’re growing big beautiful heirloom tomatoes that need a lot of energy to ripen. For a plant that produces hundreds of small cherry tomatoes (like a Sungold cherry), the effects of pruning on quality and production aren’t as obvious. Therefore, we minimally or do not prune our cherry toms.
Pruning makes plants more manageable and compact, but has drawbacks too.
Pruning tomatoes also means the plants are more manageable and smaller in girth, though they’ll still get quite tall! That means you can usually space the plants closer together, but need to plan on training them upward. If you’re excited to grow several varieties in a limited amount of space, heavy pruning and training can make it possible.
However, keep in mind that heavily pruning tomatoes isn’t ideal in all climates! In hot climates, exposed tomatoes that are not otherwise shielded by leaves are prone to sun scalding under intense direct sun rays. It’s like a bad sunburn for tomatoes. First, the fruit gets a white papery spot or blisters on the skin. That area is then more susceptible to rot, insect, bacteria, or fungal damage. To prevent sunscald, use a lightweight material like shade cloth to protect exposed fruit from direct sun rays when needed.
How to Prune Tomato Plants
If you do choose to prune sucker branches, do so early! The earlier, the better. This means you’ll want to check your plants regularly for new suckers sprouting up. To remove them, it is quite easy to simply bend them back to snap off with your fingers. Or, use clean pruning shears for more established suckers. As a middle-ground option, some gardeners remove some of the suckers but also allow a few to grow. This creates a tomato with several “leader” branches that will need staking, tying, or other support (unless you’re using a cage).
Another appropriate time to prune tomatoes is towards the end of the summer when the bottom branches are naturally yellowing, lookin’ all sad and ugly anyways. I remove those quite often! Always trim off unwanted branches as close to the main plant stalk as possible. Finally, pruning severely diseased branches can sometimes help reduce the spread, as well as increase desirable air circulation within the plant. Just be sure to use clean pruning shears! Sanitize them (I use rubbing alcohol) between cuts to prevent spreading disease. Whatever you do while pruning, don’t cut or top the main stalk of the plant!
I don’t have any awesome photos to share of the pruning process itself, so here is a great quick demonstration via YouTube!
Supporting Tomatoes
All tomato plants need support as they grow. Their tall and relatively flexible stems cannot stand upright on their own, especially once they’re heavy and laden with fruit! Without the support from a tomato cage, trellis, stakes, or other support system, plants will sprawl on the ground and branches will break. There are many styles and methods to support and train tomatoes. As with pruning, there is no “right” answer or way to do so! Once again, this is personal preference – hinging on your space, plant variety, and level of involvement. We’ve experimented with all of these methods, and often utilize more than one in our garden each summer.
UPDATE: I’ve since written a more extensive guide on pruning and supporting tomato plants, which covers 6 training methods in more detail. See that guide here.
Cages
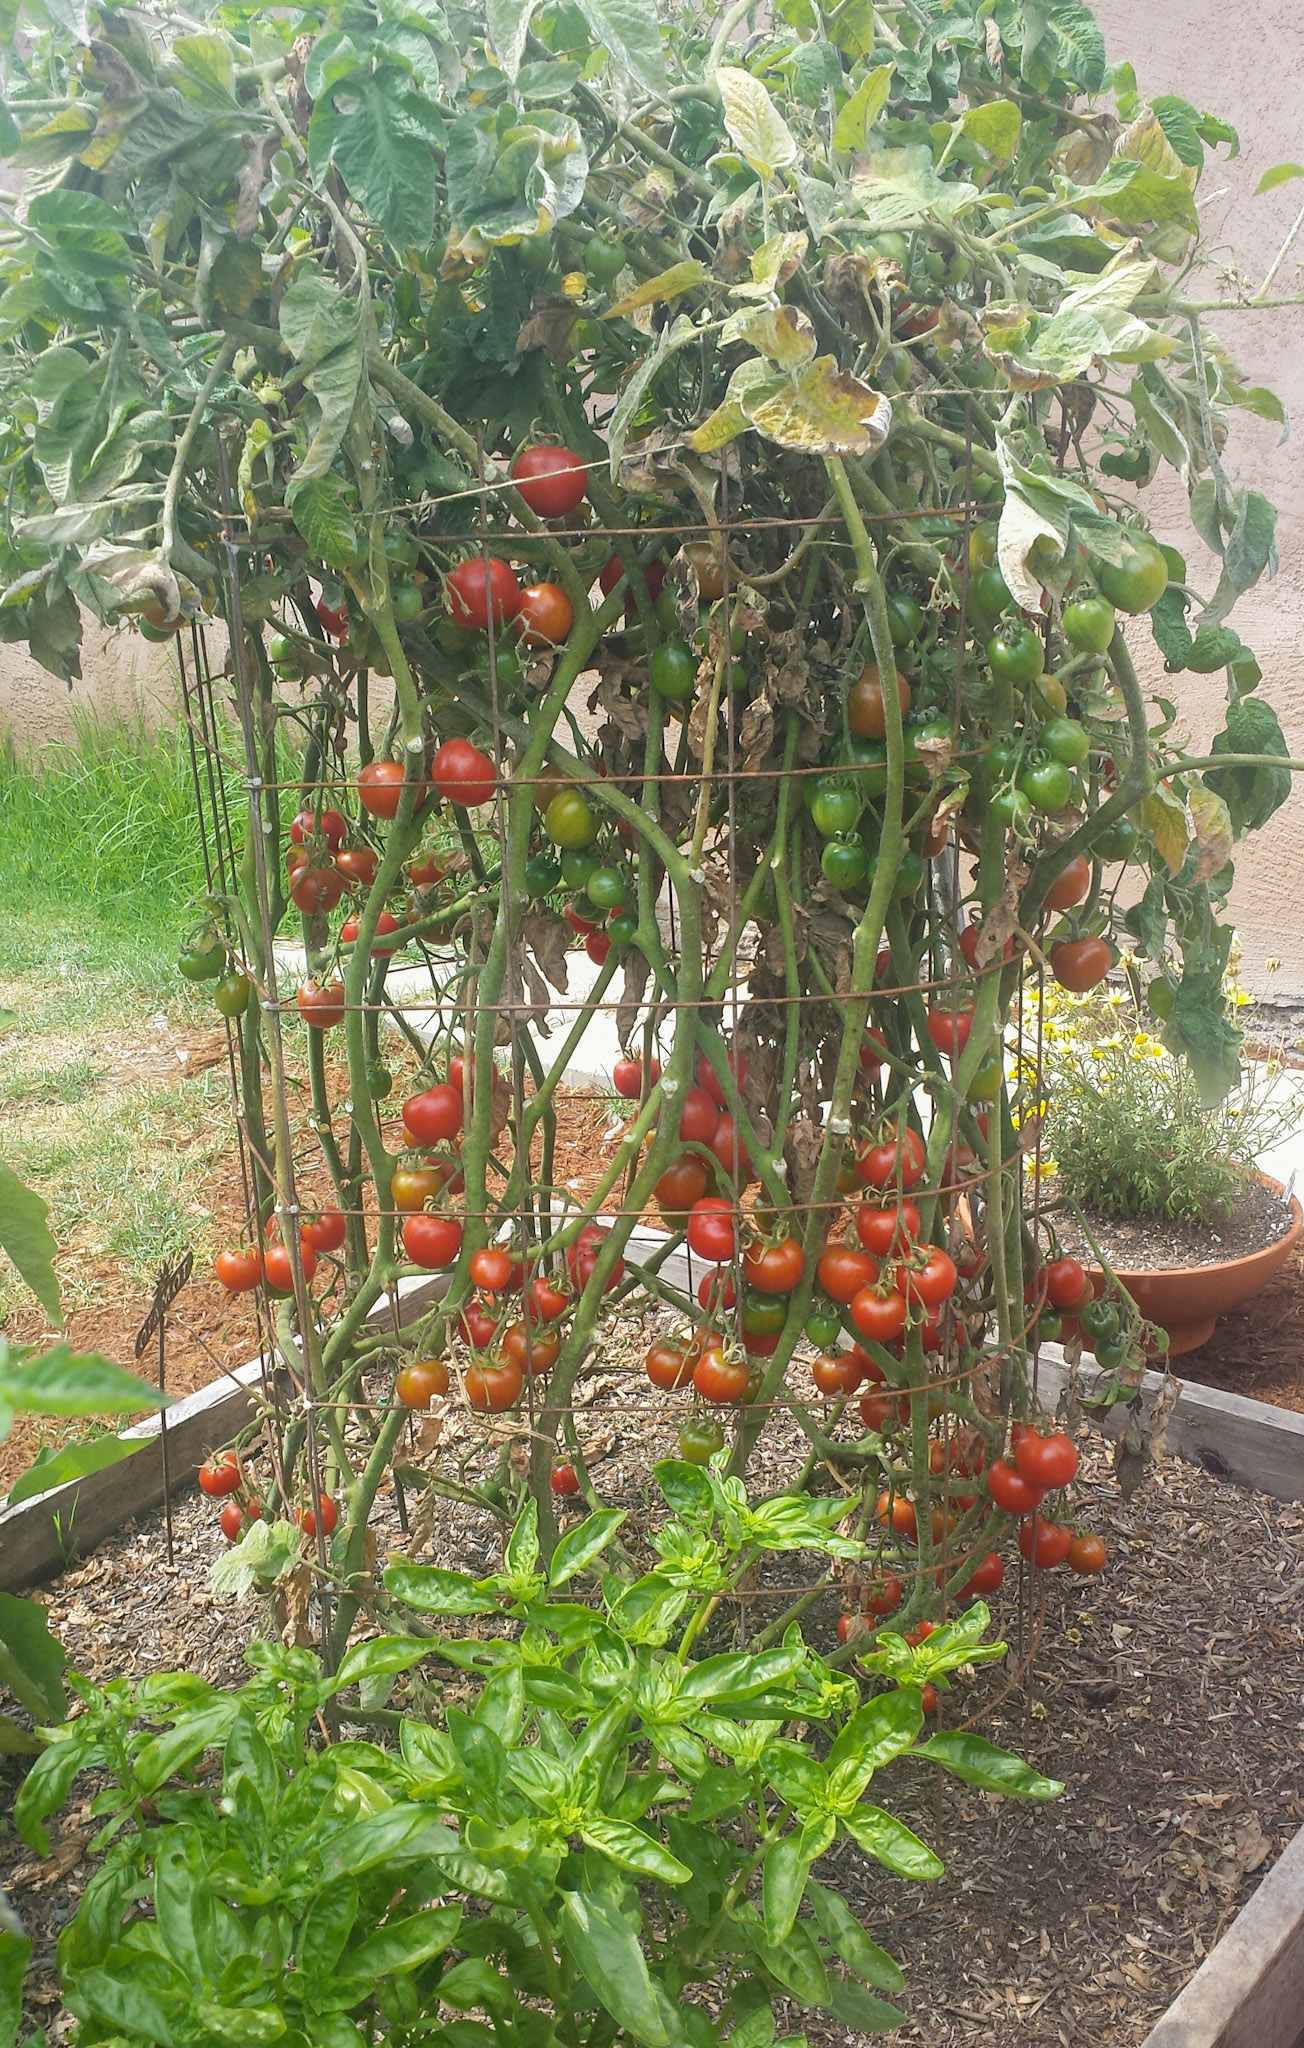
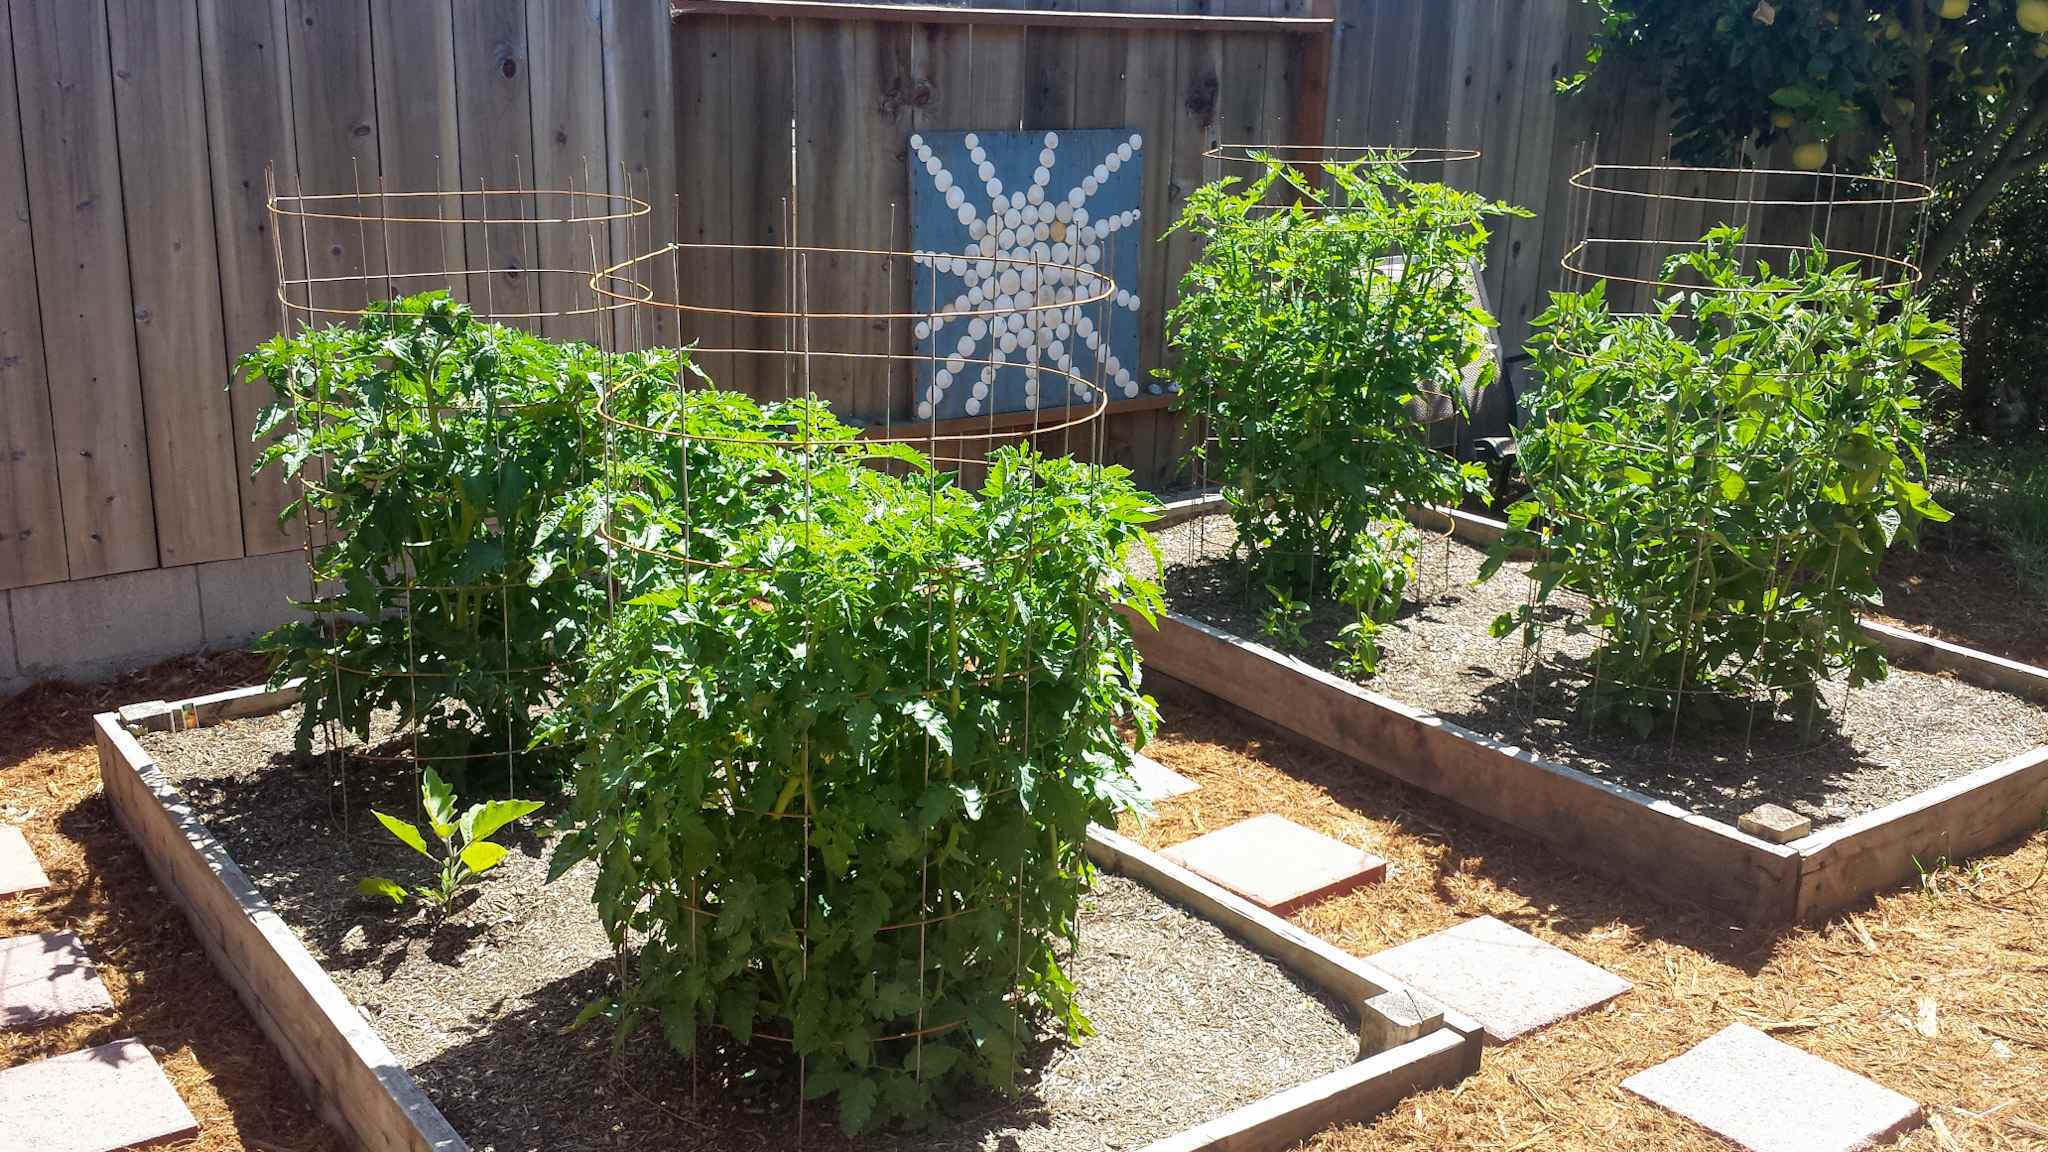
One of the easiest, low-maintenance ways to support tomatoes is to use a classic tomato cage. With no pruning required, cages are ideal for determinate bush tomatoes. You can also use cages to support indeterminate varieties, with little-to-no pruning needed. Unfortunately, most pre-made tomato cages are notoriously flimsy, too small, or relatively expensive. For that reason, we make our own DIY tomato cages! They’re sturdy, large, durable, cheap and easy to make. Learn how to make and use homemade tomato cages here.
Vertical Training on Stakes or String
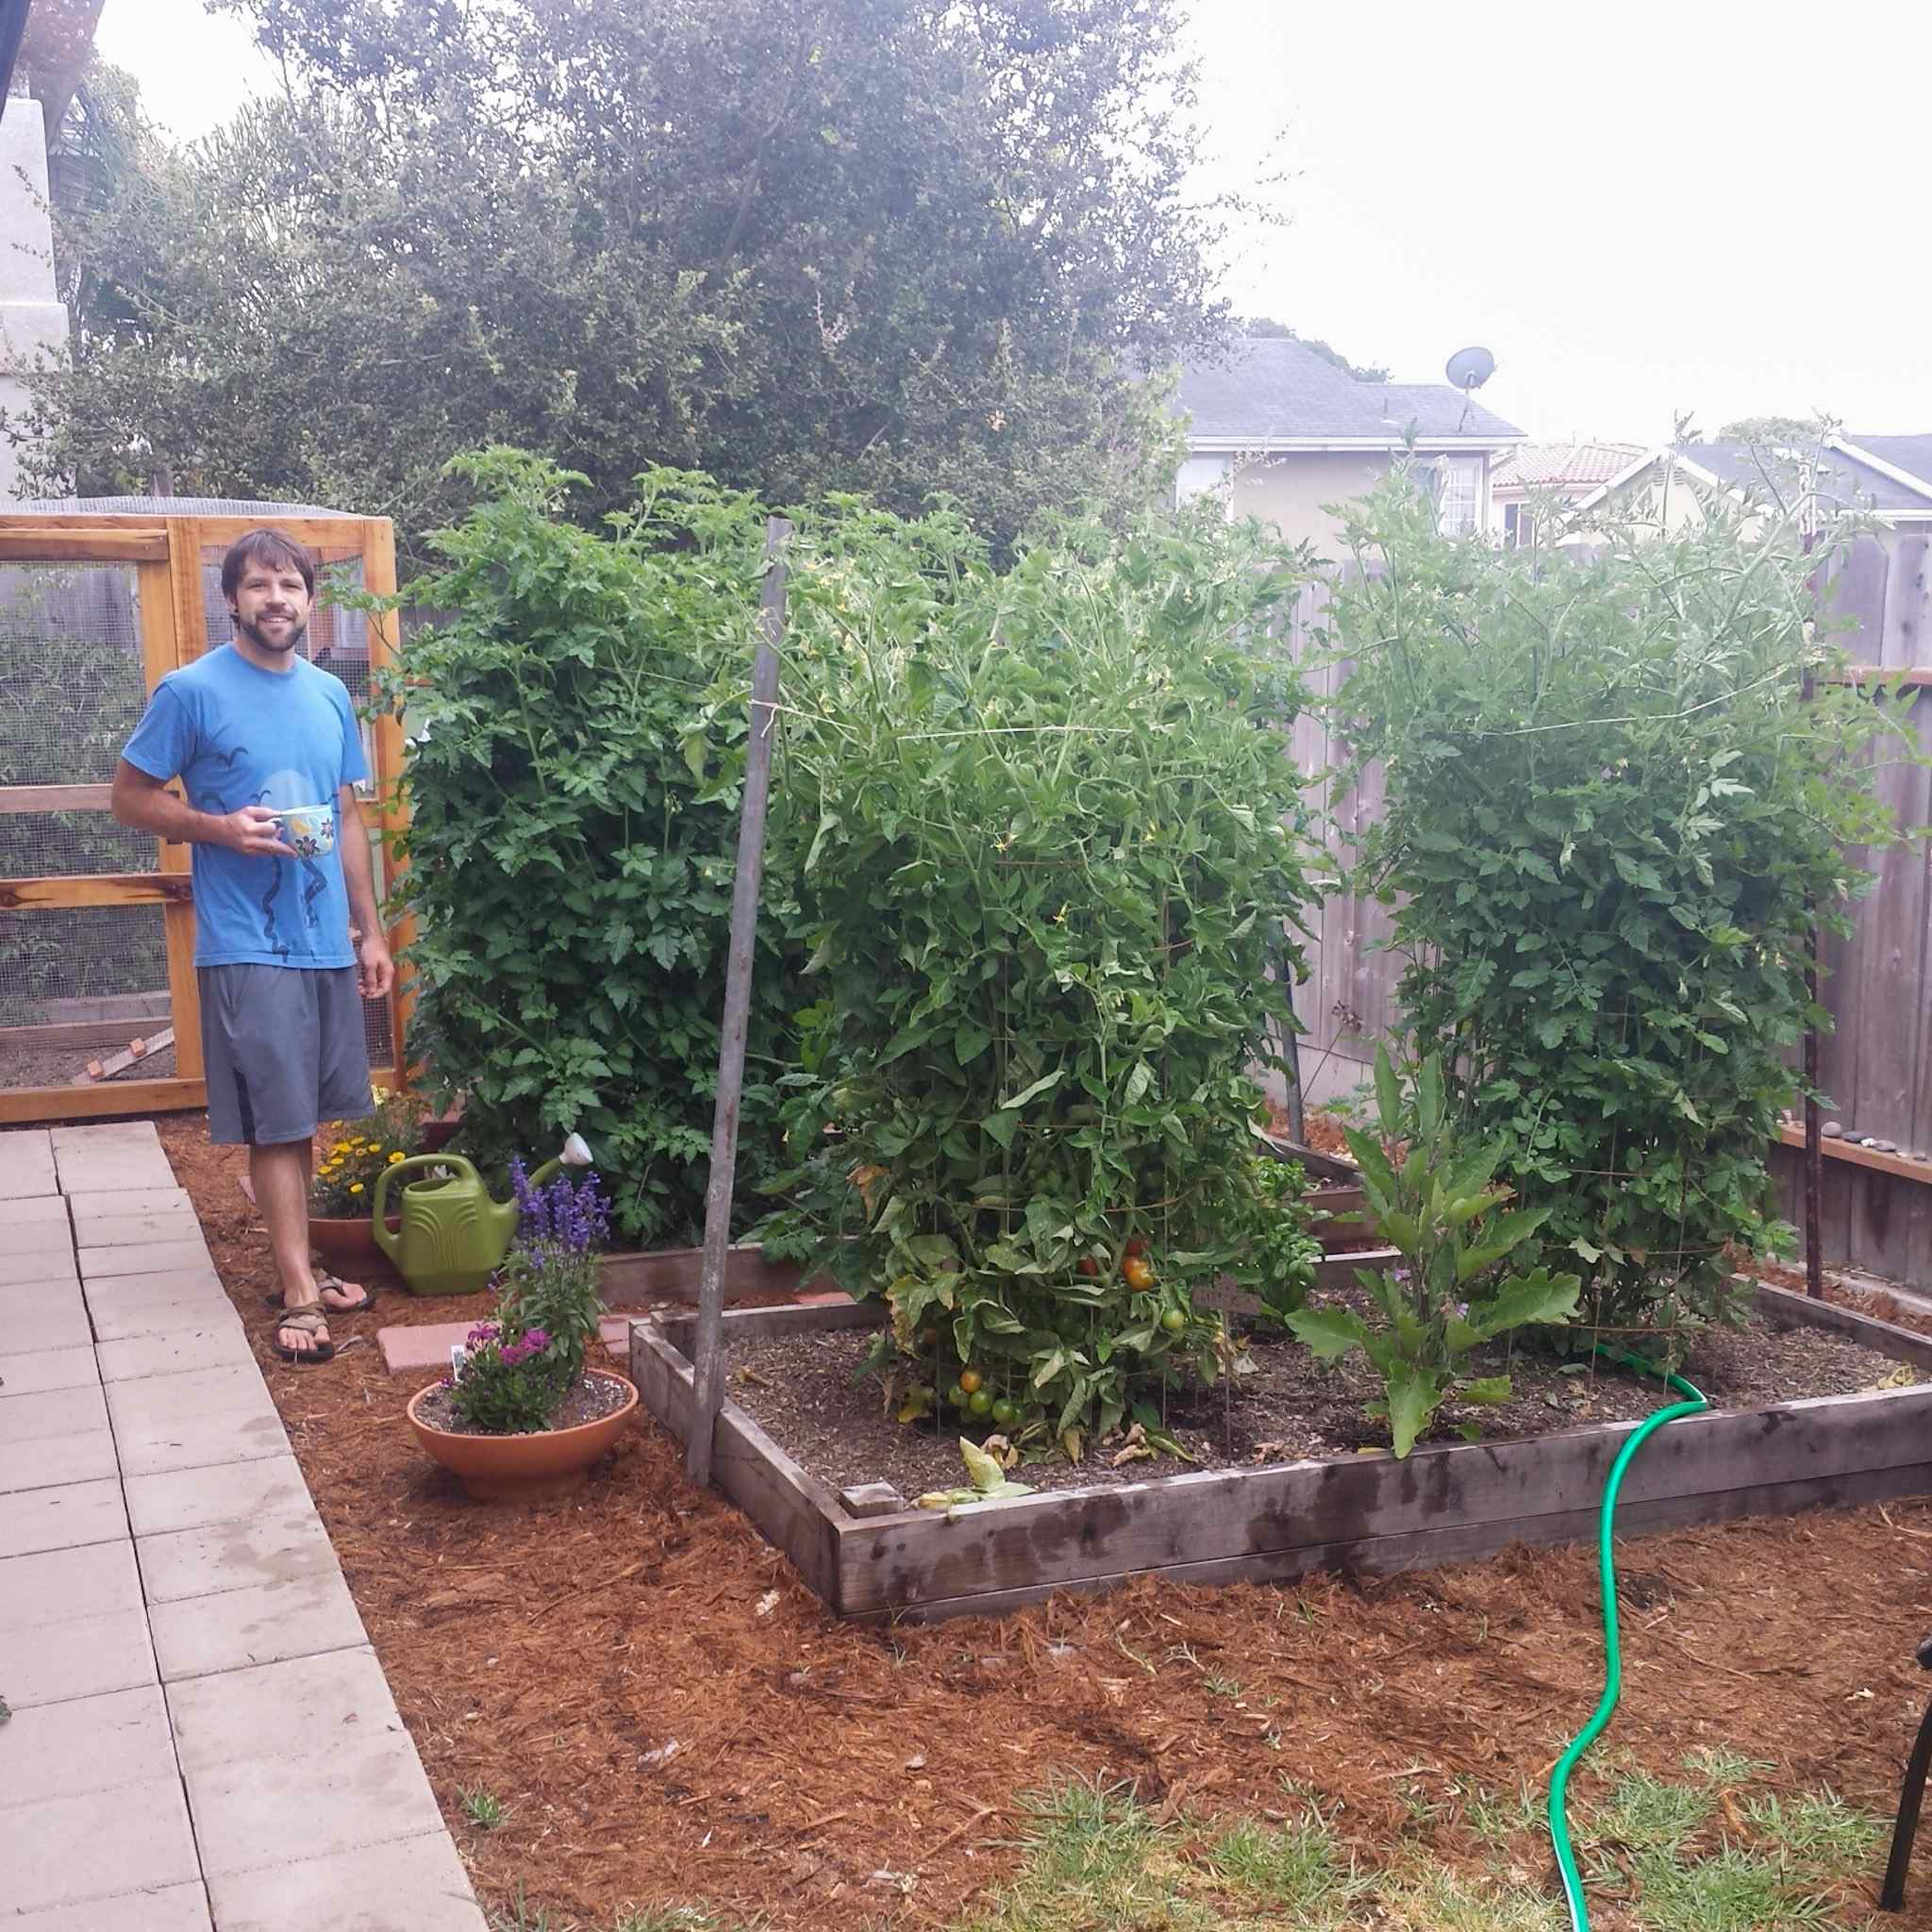
A popular support option for indeterminate tomatoes is to train the vining plants up a single tall stake. Or, up a string that is attached to a support beam above. This method requires heavy pruning of the sucker side branches, fostering just one (or maybe two) leader stems. As the leader stem grows upward, the gardener needs to tie or clip it further up the stake or string. Even though they’re called “vining” tomatoes, a tomato plant will not wrap around a stake or cling to a trellis like pole beans or peas will. Because the plants are well-pruned, this style of tomato support allows for the plants to be spaced closer together.
Be prepared! Indeterminate tomatoes trained in this manner can grow upwards of 10 feet tall – or more! We once had them laying up on our rooftop. No joke. To combat the excessive height, some gardeners or farmers turn to the “lower and lean” system using string. As the tomatoes get taller and taller, slack is let out of the string to slightly lower and lean the plant down. Check out this video if you are interested to learn more about the lower and lean support system.
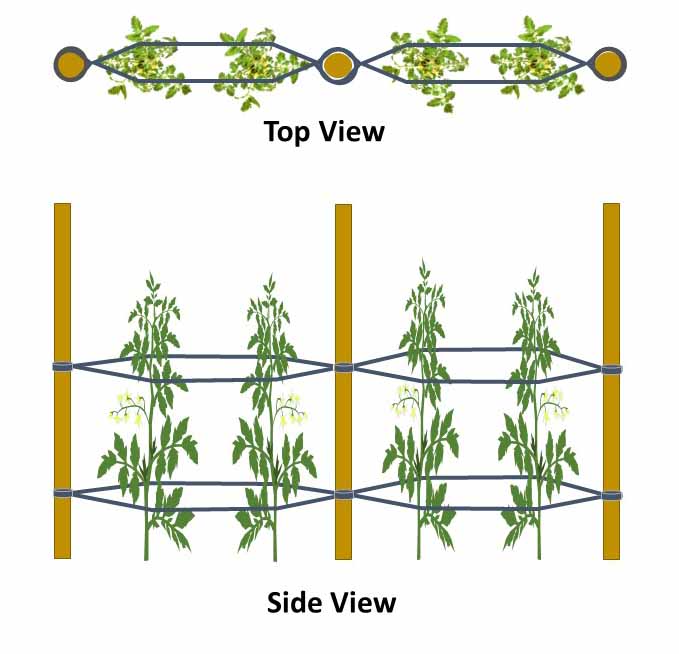
The Florida Weave
The Florida weave, also known as basket-weaving, is an awesome way to support many tomatoes growing together in a long row. It requires less supplies than providing a cage for every plant, and also requires less intensive pruning than the single stake or string method. With this method, stakes or t-posts are placed between every plant or two. Then, twine or string is attached horizontally from stake to stake between the plants. A stake may also be provided along each plant’s main stem. See the image below.
The idea is to sandwich the plants between the layers of sting, effectively holding them upright and supporting branches of fruit. Many rows of string may be added at initial planting time, and you guide the plants between them as they grow. In turn, you could also add new layers of string as needed as the plants grow. This method of training is great for both determinate and indeterminate tomatoes alike.
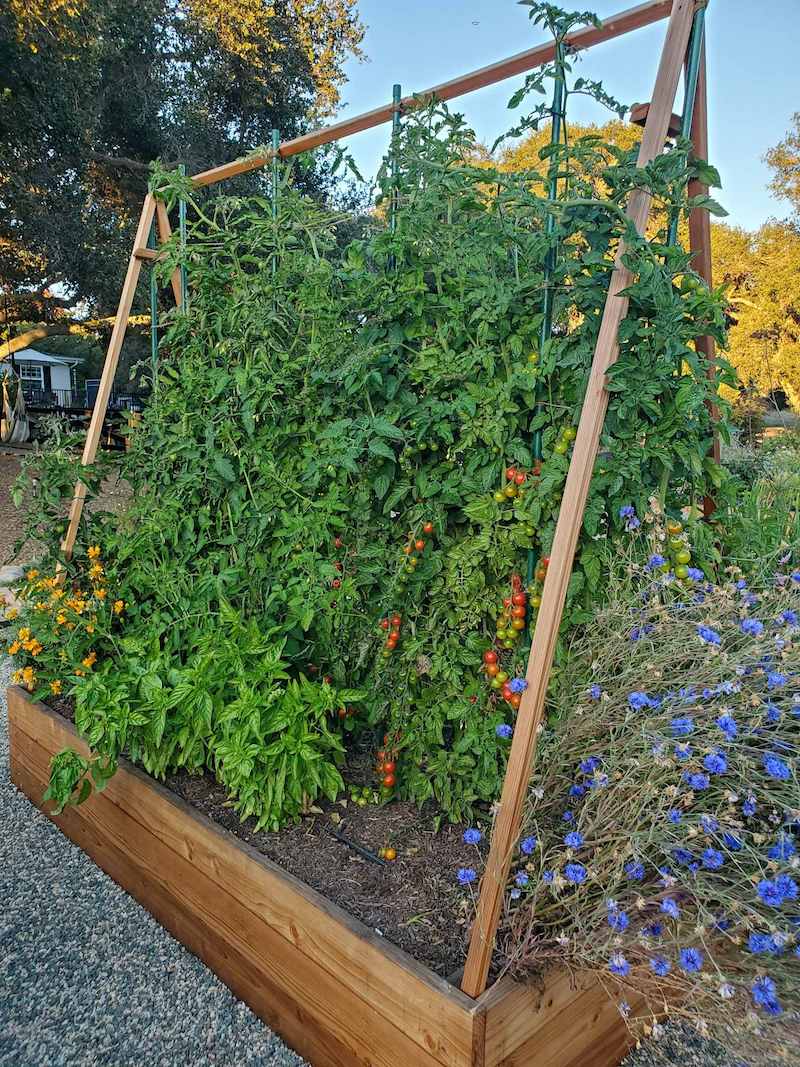
Flat Trellises
The final tomato support system we’ll cover is using a flat trellis. A large flat trellis can be installed behind a row of tomatoes, or between two rows of tomatoes that are planted off-set from one another. We like to use panels of inexpensive remesh to create our trellises. Hog or cattle panel is another popular option too. Then, as the tomatoes grow, use soft plant ties, plant clips, or other training material to secure the branches back against the trellis.
This system is great because you prune as heavily or as lightly as you choose. For instance, it could function much like the single stake or string system to support just one main leader stalk per plant. Or, you could allow more suckers to survive and tie back many branches to the trellis. Even if the plants become a bit unruly and bushy, you can run twine across sections of the trellis to pull them back – similar to the Florida weave. We use this support system in our coop garden quite often.
If you’re interesting in making your own trellises, be sure to check out our tutorial with several easy and inexpensive trellis options. We use them for passionfruit, beans, peas, cucumbers, and chicken-proofing – not just tomatoes!

COMMON TOMATO PESTS & DISEASES
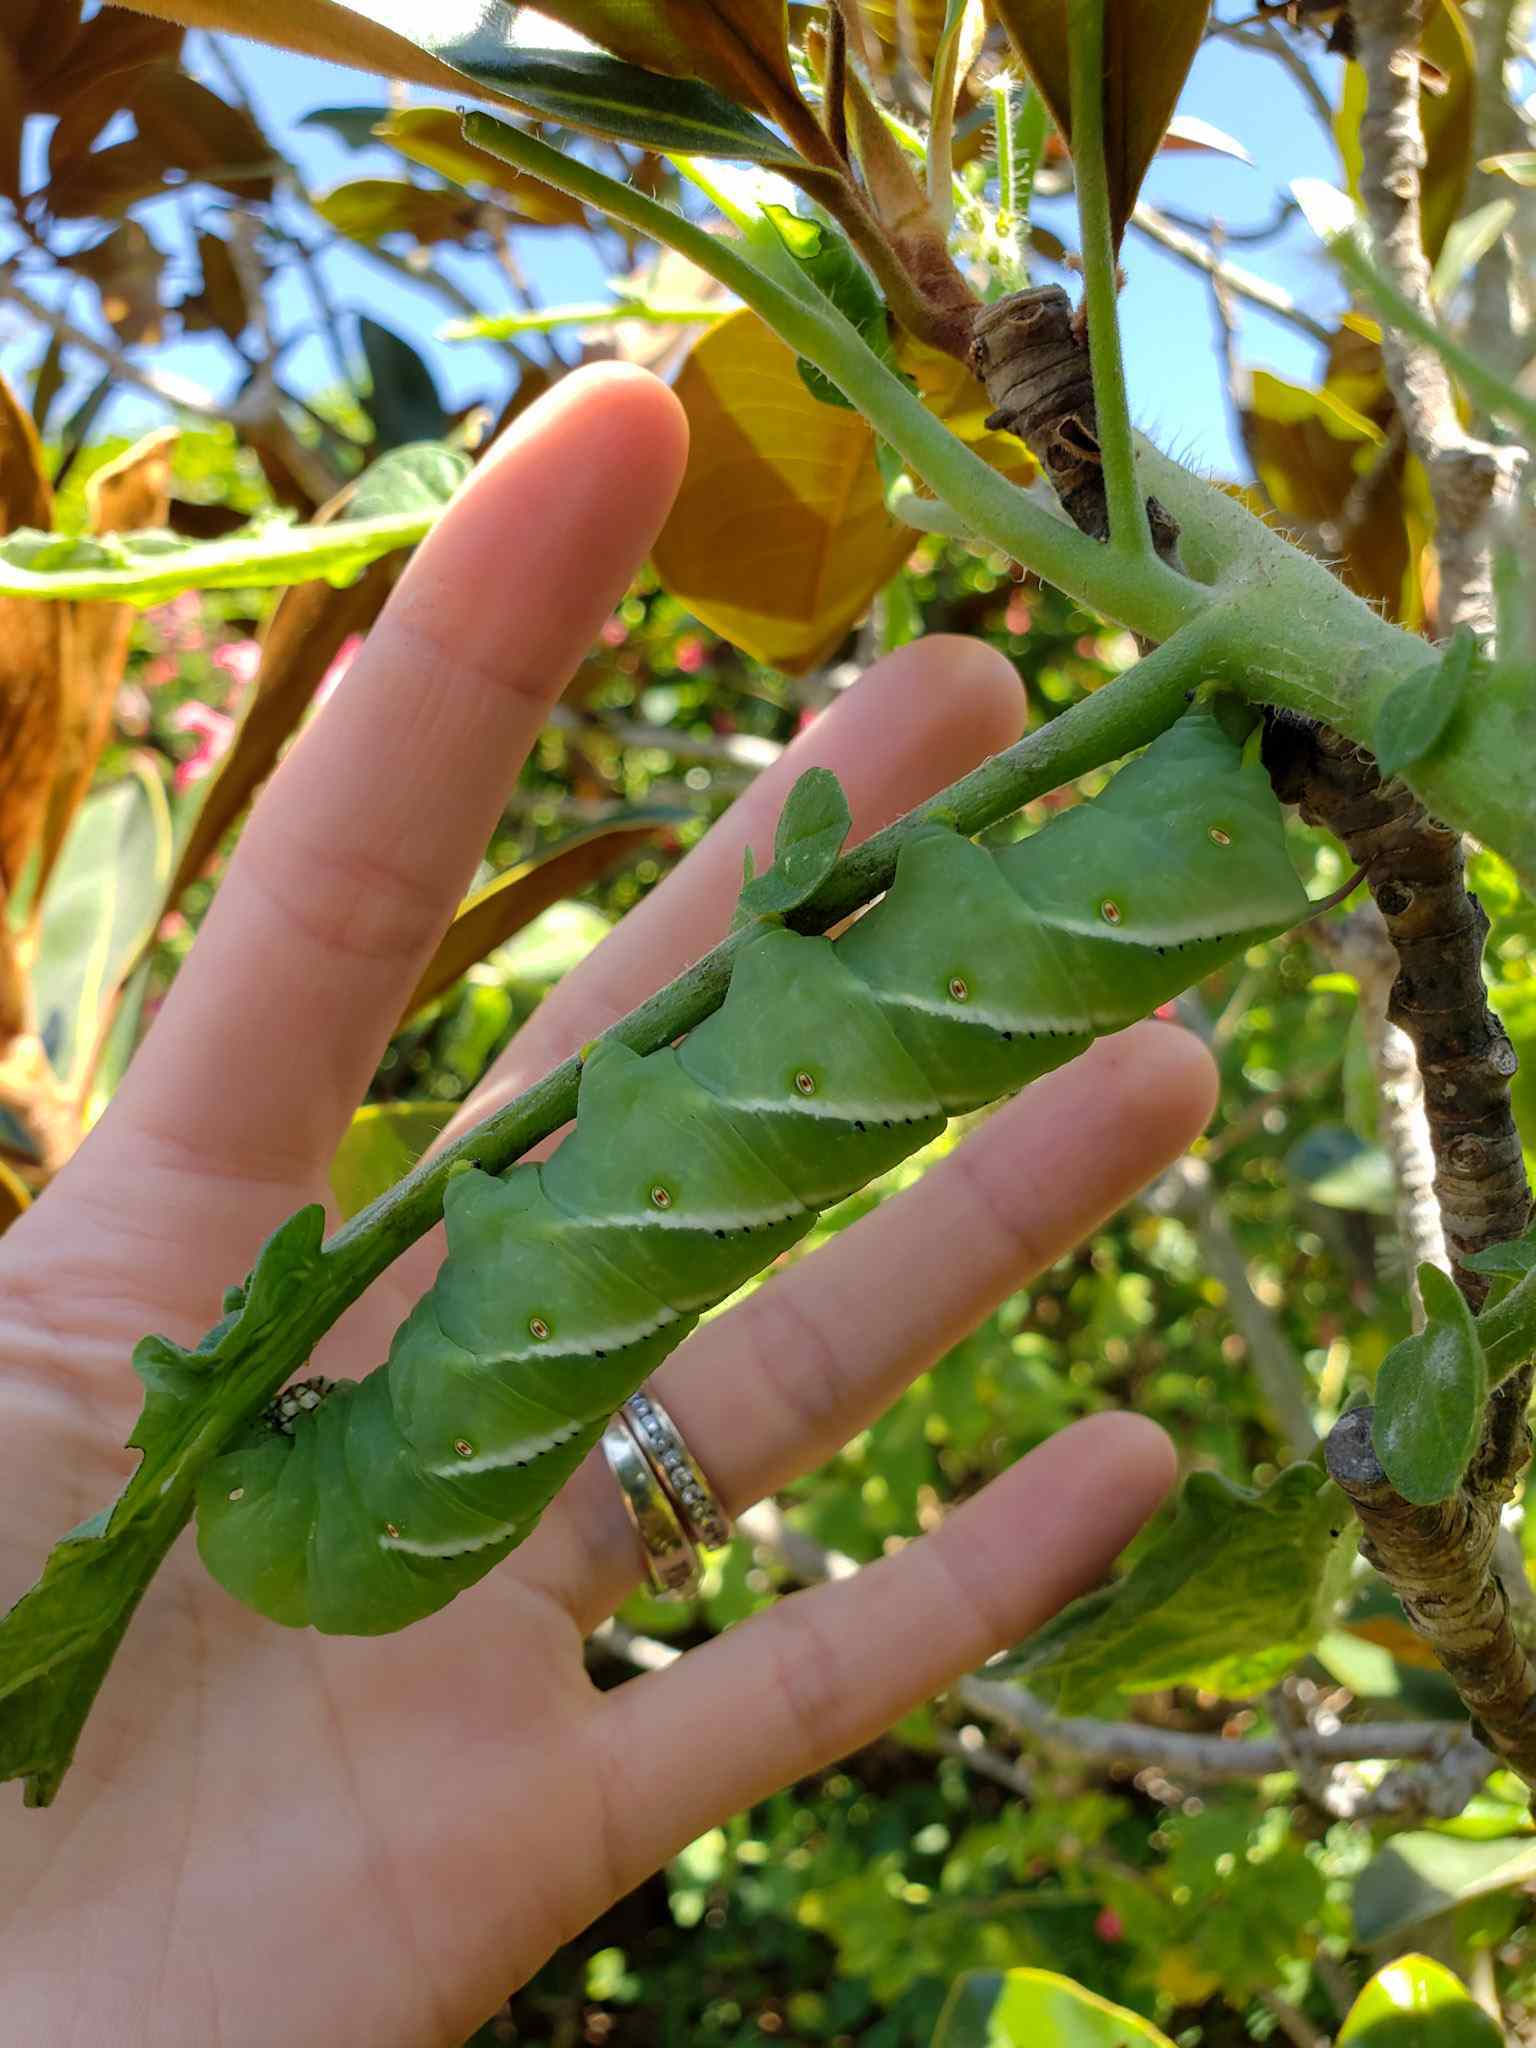
Well shoot, this subject could be a post of its own! Perhaps I will write one someday. In the meantime, here is the quick and dirty: The most common pests and diseases that inflict tomatoes include fungal diseases and mildews (e.g. powdery mildew and blight), mosaic viruses, fusarium wilt, bacterial wilt, root knot nematodes, aphids, whitefly, and the dreaded tobacco or tomato hornworms. I won’t even pretend to be an expert on all of these issues! Especially since we have struggled with only a handful of them personally, including aphids, mildew, nematodes, and the occasional tomato horn worm.
To learn about tomato pests and diseases in more detail, check out this excellent article from Johnny’s Seeds. It includes photos to help ID issues too!
Tips on general disease resistance, fungal disease, nematodes, hornworms & other critters:
- Promote stellar overall plant health by following the recommendations provided in this article such as using organic compost and tea, mycorrhizae, aloe, and consistent watering. A healthy plant with a strong immune system will better fend off pests and diseases – naturally!
- Mildews and blight are more common in crowded conditions with lack of good air circulation around plants. Therefore, follow good plant spacing practices. Pruning away excess branches can also increase airflow. Avoid wetting plant leaves when you’re watering.
- Learn how to prevent and treat blossom end rot here.
- GreenCure is an organic product that we’ve found extremely useful to fight mildew, blight and other fungal diseases. It works by slightly changing the pH of the foliage, making it inhospitable to fungus. One or two treatments early in the season (even before the onset of disease) can be effective at warding off mildew for the rest of the season! Learn more about how to prevent or treat powdery mildew here.
- Many tomato varieties have natural resistance to particular diseases and pests. For example, some may have a strong resistance to early blight, powdery mildew, or root knot nematodes. Seek out resistant varieties to help combat common diseases in your garden.
- If you’ve noticed nobby roots on your tomato plants, you likely have root knot nematodes in the soil. They’re a parasitic nematode that colonize and feed on roots, and especially love tomatoes. Plant french marigolds near your tomatoes, or in a bed before tomatoes are planted in the same space. French marigold plant roots kill root knot nematodes, so be sure to leave the marigold roots in place! Another awesome organic solution we recently discovered is to add beneficial nematodes to the soil, which kill the damaging root knot nematodes along with soil-dwelling grubs and other pests!
- If you get hornworms on your tomato plants, be vigilant for poop! Visible black or green dots (caterpillar poop called “frass”) on plant leaves or around the plant is a great indicator that a tomato horn worm is nearby. If you see poop, start examining the leaves and branches directly above it. Perhaps you’ll find the worm, and then you can manually remove it from your plants. You could also use an organic Bt-based caterpillar spray to kill them, but we prefer to hand-pick first if possible. Please use caution to not over-spray to non-target plants if you do use it!
- A dilute neem oil spray can be useful for general pest and disease prevention. Neem oil can repel whitefly, aphids, fungal diseases and more. However, it usually requires weekly applications to be effective. Neem is also commonly misused, which can lead to burning plant leaves. Please see this article for tips on how to properly emulsify and use neem oil spray if you are interested. We do use neem oil on occasion but prefer to do so only before the plant begins to flower and produce fruit. Otherwise, the oil can burn flowers and leave an oily residue on the tomatoes.
- If your tomatoes are being pestered by larger critters, such as squirrels, mice, birds, opossum, or even deer – get creative with ways to physically block their access. For example, can you fence your garden area, wrap the tomato cages or plants with chicken wire, or drape them with insect netting (which also blocks birds)? Sprinkling chili powder or cheyenne pepper around the base of the plant or soil is also said to repel rodents and many other animals. Finally, I know some gardeners who wrap and protect individual fruit (or small clusters) with reusable organza mesh baggies of the appropriate size.
HARVESTING & PRESERVING TOMATOES
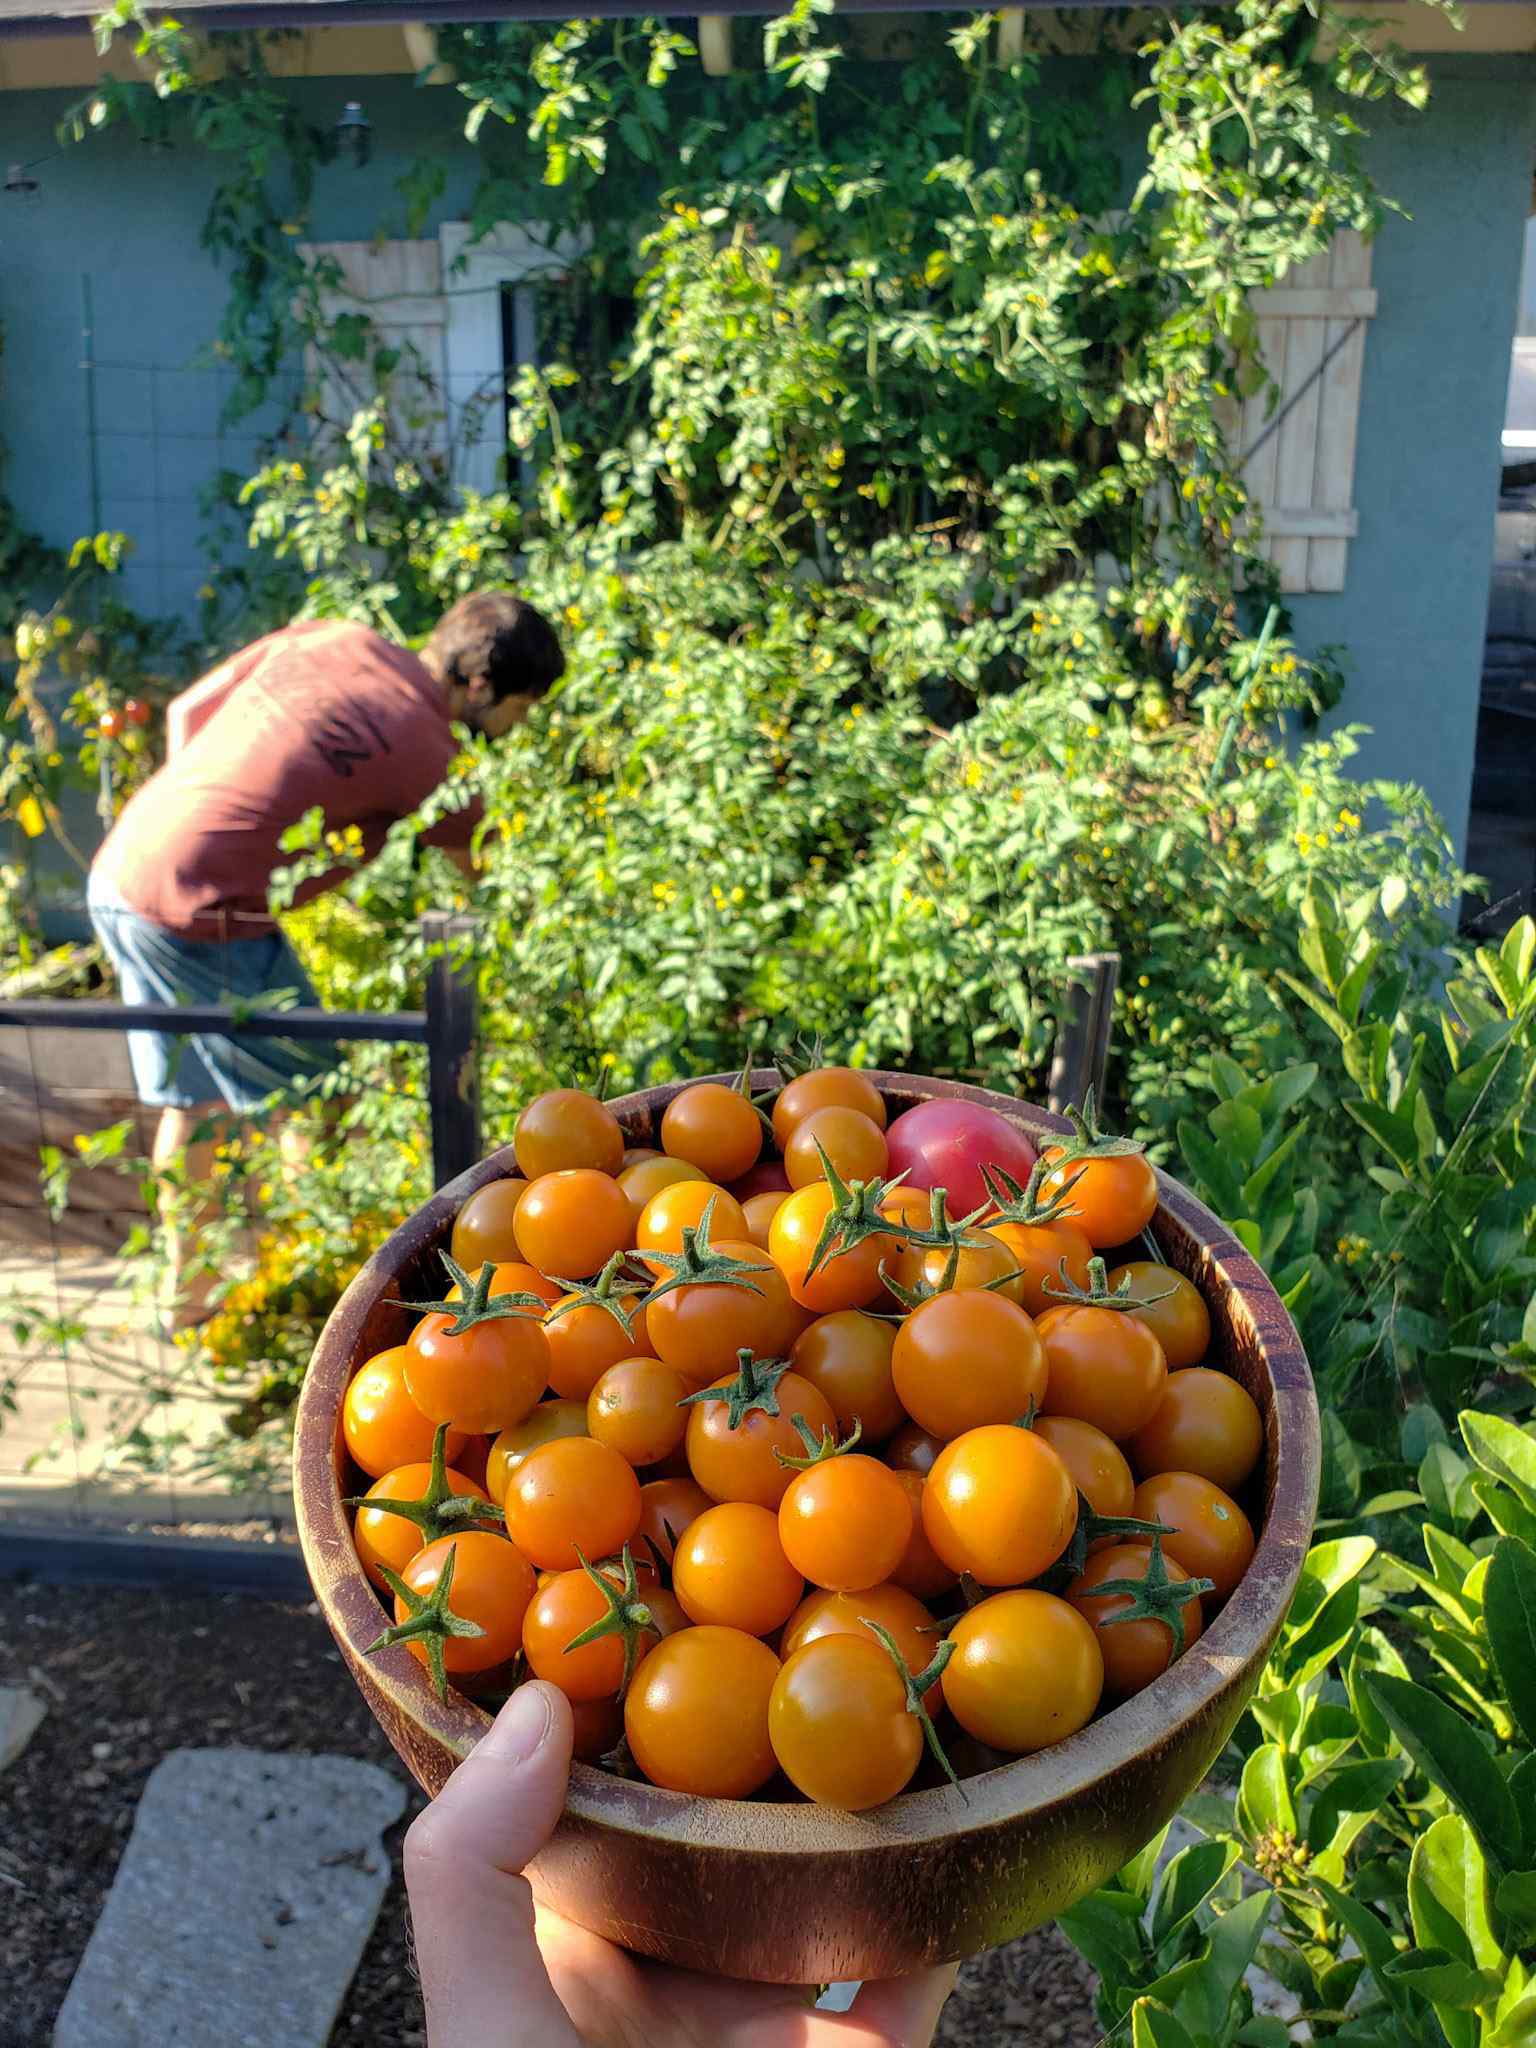
Now, on to the best part! It is time to reap the rewards of your hard work, and enjoy your bounty!
How to Harvest Tomatoes
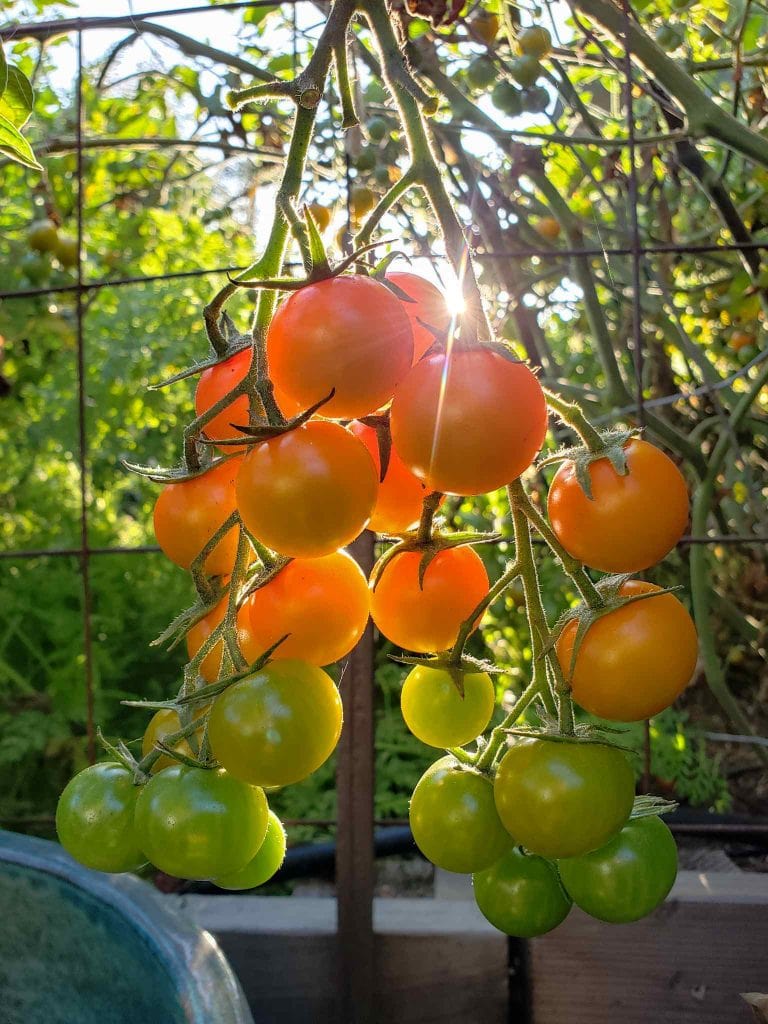
- Ideally, harvest tomatoes once they’re slightly soft to the touch (but still firm, not squishy). They should have turned the color expected of the variety when ripe. Red, orange and yellow tomatoes are more visually obvious when they’re ripe than green, black, or purple tomatoes. In that case, give them a light squeeze to check! If you pick some a little too early, that is okay too. Simply let them sit out on the counter to finish ripening.
- When removing ripe fruit from the plant, try to lightly break off the short stem that is attached to the top of the tomato along with it. If it doesn’t come easily, use pruning snips to cut it. Unless the tomato easily pulls away from the stem, you want to leave it’s little green top hat on. By pulling the tomato away from the stem, it may crack or leave a small open hole at the top where the stem was once attached. This comprises the longevity of the tomatoes shelf life in storage, so use any cracked or exposed ones first!
- Excessive water can make ripe tomatoes split and crack. Therefore, if you have a lot of ripe fruit on your plants, harvest them before a big water session – or if heavy rain is in the forecast!
- When the end of the growing season is drawing near, you can stop watering the plant all together. The cessation of water triggers tomato plants to redirect their energy into quickly ripening the remaining tomatoes, rather than growing more. This is a great trick to use if frost is in the forecast, or if you simply want the plant to hurry up and finish! Only do this when you’re sure you are done with the plant for the season, as it is not ideal to cut water and then try to resume a normal schedule thereafter.
How to Store Fresh Tomatoes
It is best to store fresh tomatoes at room temperature, unless they’re cut or cracked. You should refrigerate those. Did you know that fresh tomatoes lose a ton of flavor once they’re refrigerated? That is one (of the many) reasons that homegrown tomatoes are so much tastier than store-bought ones that have been picked early, ripened off the vine, and then surely refrigerated at some point in time.
Of course, if you harvest a large amount of tomatoes at once, they may begin to spoil on the counter if you don’t use or otherwise preserve them quickly enough! Keep reading to hear our favorite ways to eat and preserve our homegrown tomato bounty.

Eating Tomatoes Fresh
I imagine you probably already have plenty of ideas of how to consume your fresh tomatoes. Yet writing this article has me seriously craving some of our favorite summer tomato-based snacks and meals, so I am going to share them with you anyways. Humor me.
- Enjoy fresh tomatoes with salad, tacos, sandwiches (including on top of crusty homemade sourdough bread) or with your favorite burger. Check out our black bean and quinoa veggie burger patty recipe here.
- Make caprese salad or tomato stacks with fresh sliced tomatoes, basil, mozzarella, and drizzle of olive oil and balsamic vinegar.
- Whip up a Greek salad with chopped tomatoes, cucumber, onion, feta cheese, olive oil and red wine vinegar.
- Turn them into a simple salsa with peppers, onions, cilantro, and lime.
- Add fresh tomatoes on top of homemade pizza, quiche, frittata, pasta, pesto zoodles, and more!

Ways to Preserve Tomatoes
Growing tomatoes and preserving tomatoes go hand-in-hand. Unless you only grow one small plant or two, or realllllly love eating fresh tomatoes with every meal, you’ll more likely than not run in to the need to preserve some excess fruit.
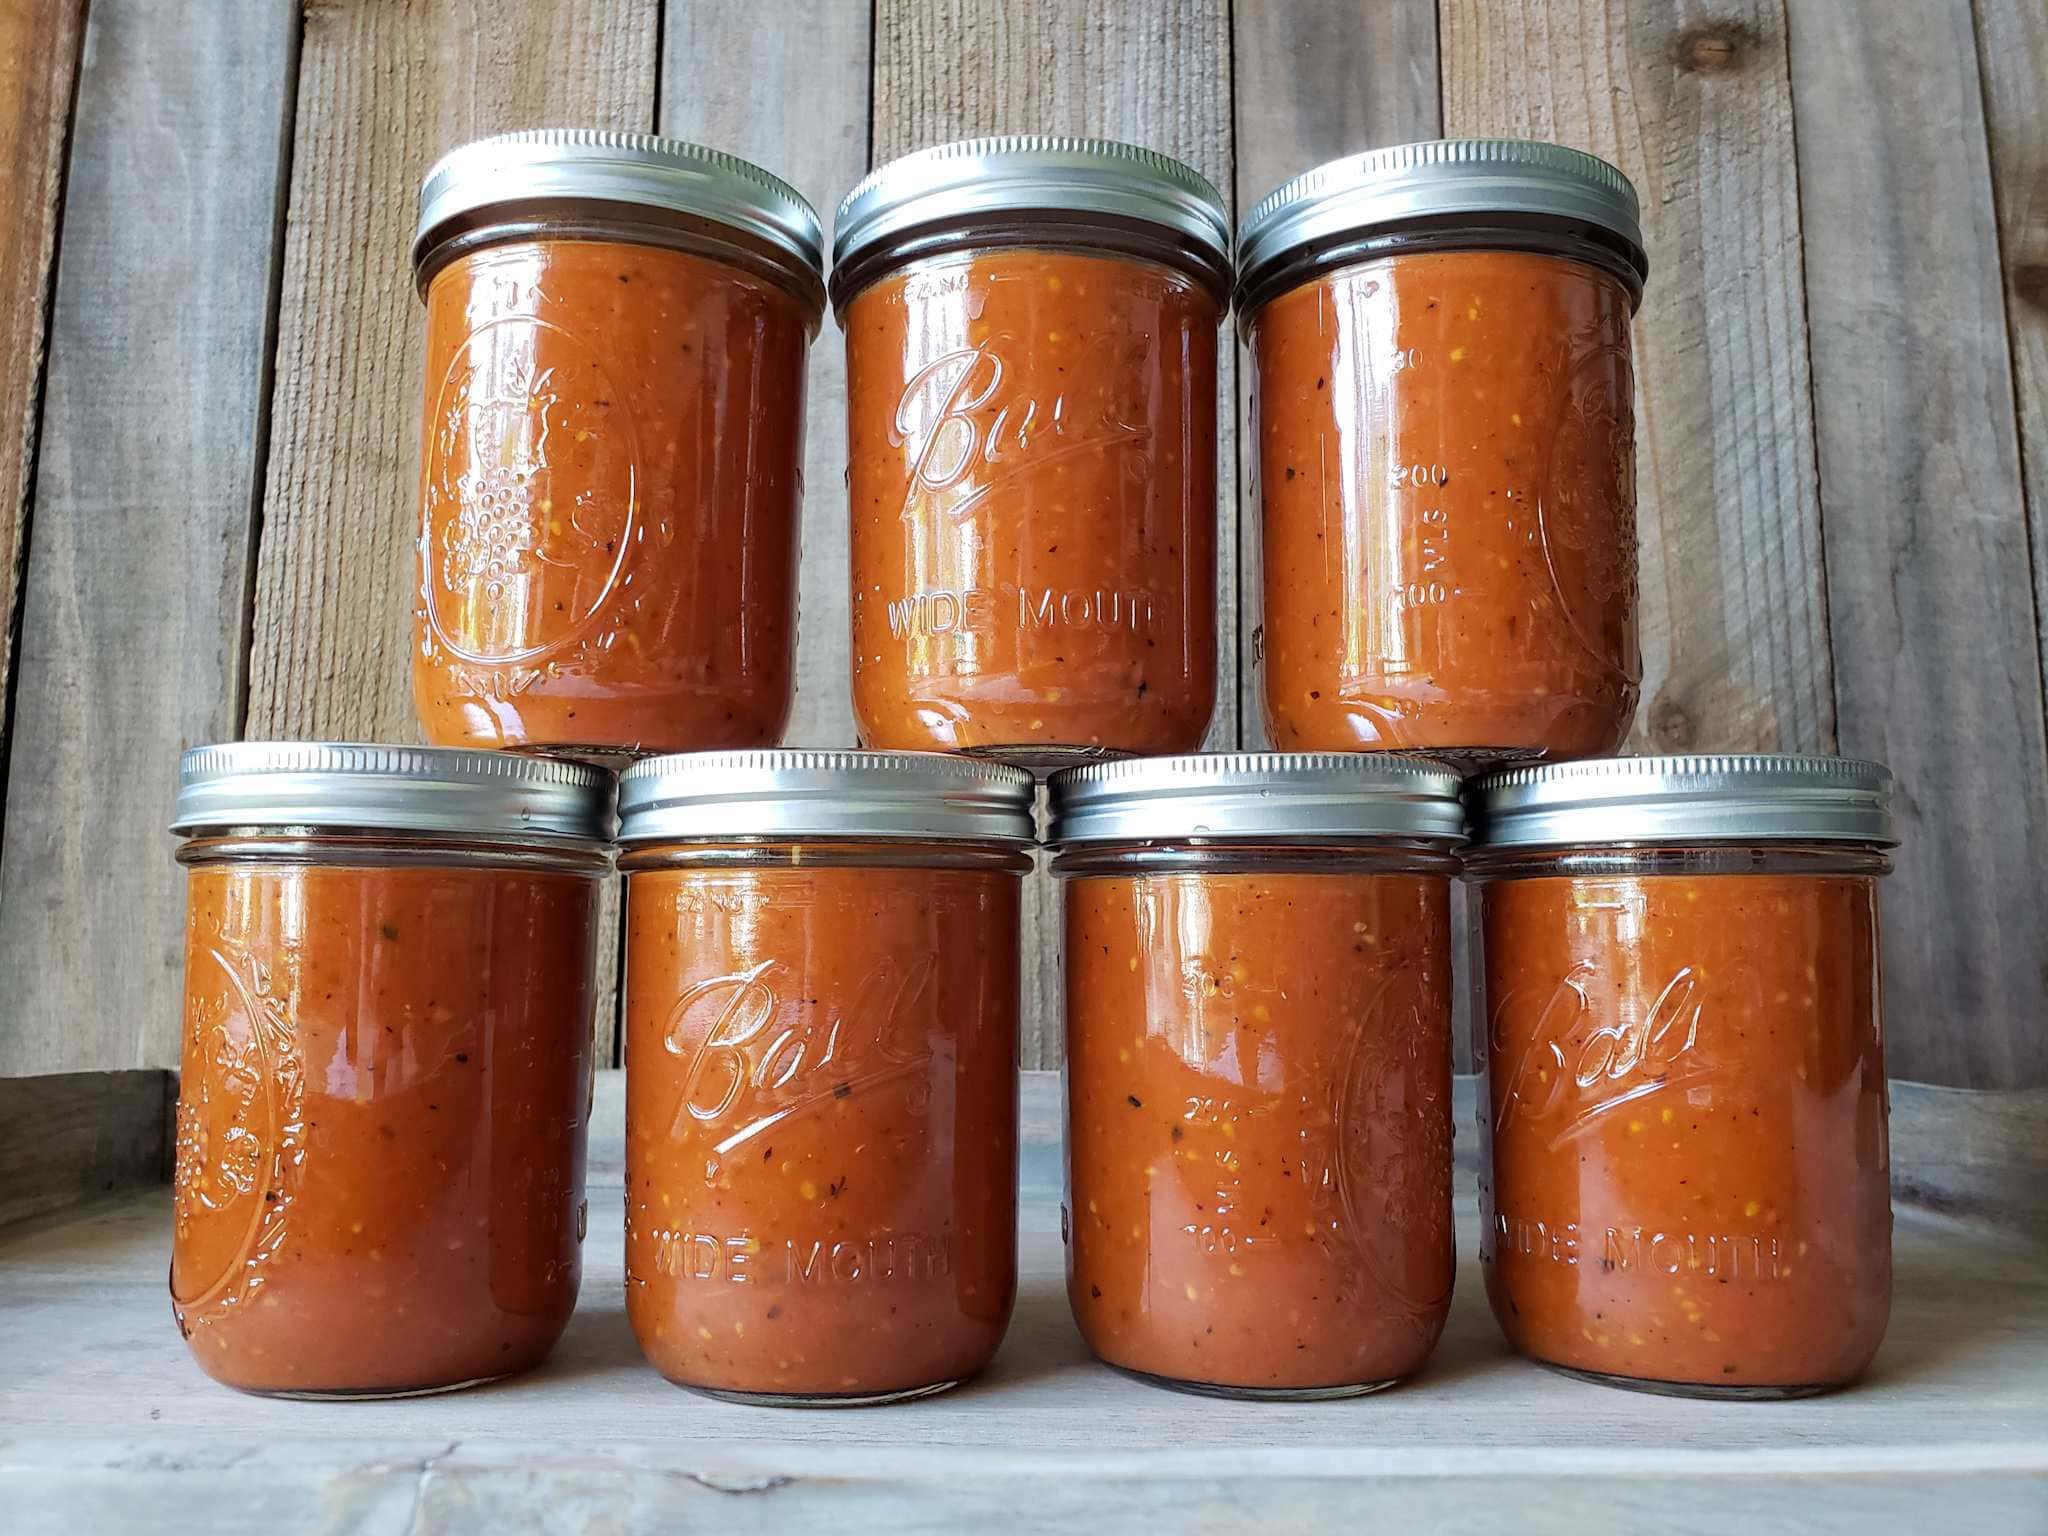
Now, I am going to say something slightly controversial here. We prefer not to can our tomatoes in the summer! Even though canning (via the hot-bath method or with a pressure canner) is one of the most popular ways to preserve fresh tomatoes, I find the process quite tedious – especially on a hot day. That isn’t to say that we don’t occasionally can goods too! It simply isn’t our favorite method. Instead, we like to freeze and dehydrate tomatoes the most.
UPDATE: See this new post 13 Ways to Preserve Tomatoes with recipes for freezing, canning, drying and more.
Freezing Tomatoes
There are a number of ways to freeze tomatoes! Tomatoes can be frozen whole raw, or turned into sauce, salsa, or soup and then frozen. Check out our very popular Super Simple Roasted Tomato Sauce recipe. With only three ingredients and a couple of steps, it is literally the easiest thing ever – and dang delicious too! The recipe can also be canned. We also like to stock the freezer with our favorite Creamy Roasted Tomato Basil Soup to enjoy all winter long.

Dehydrating Tomatoes
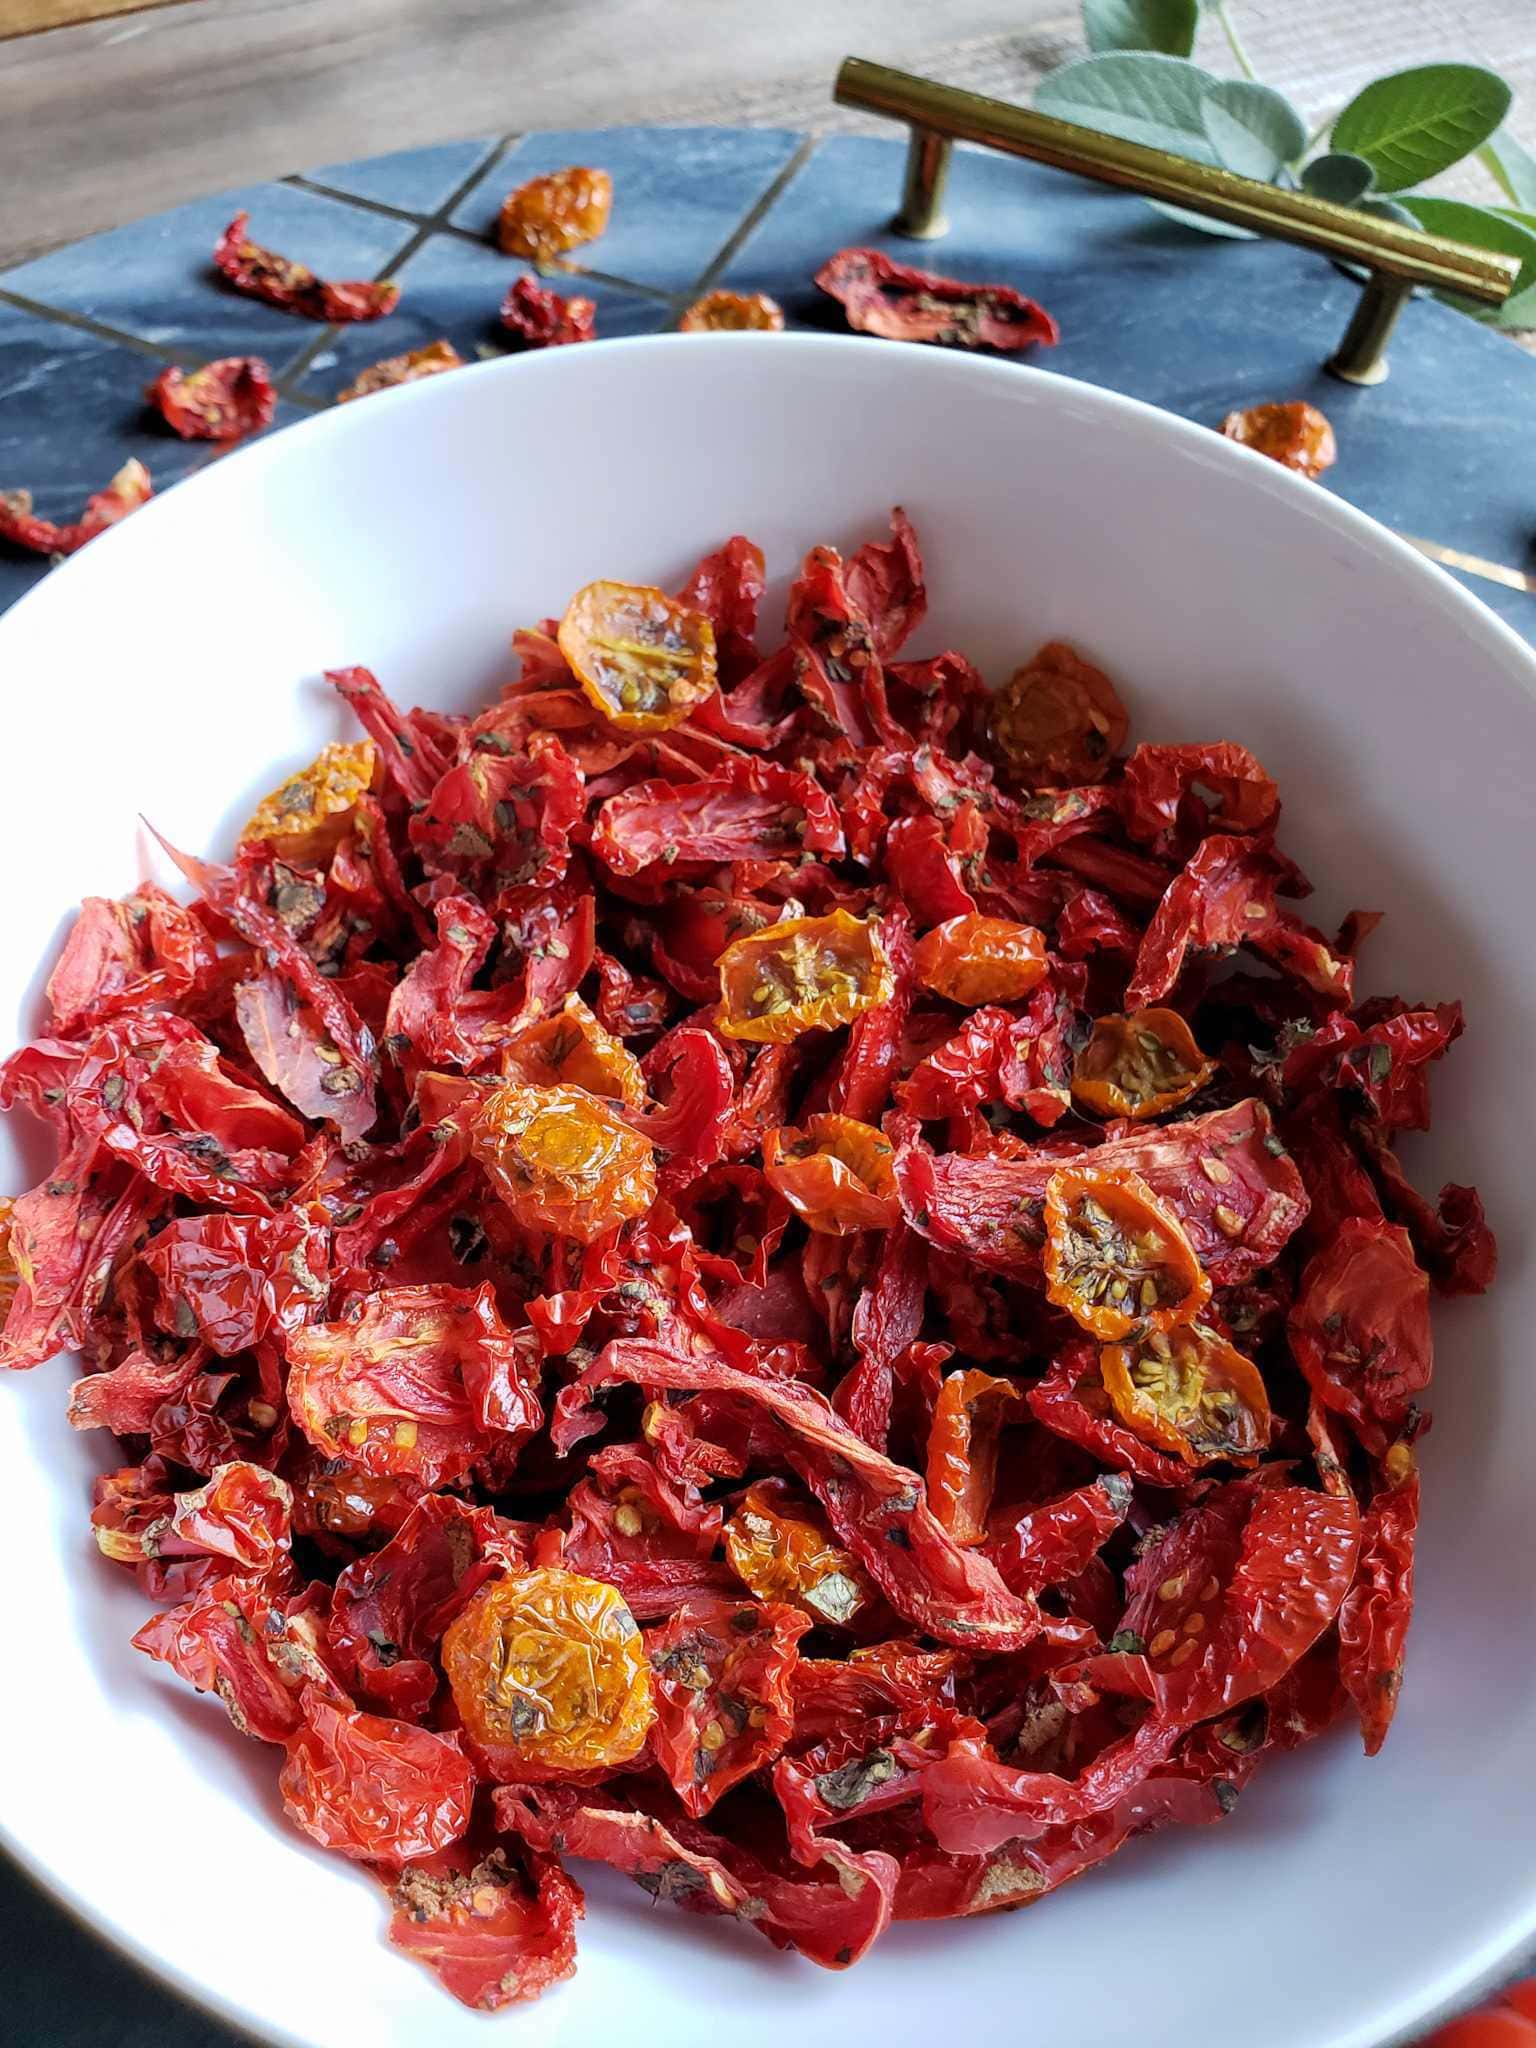
Another awesome way to preserve tomatoes is by dehydrating them. Drying tomatoes greatly condenses them, both in flavor and in size. That means dehydrated tomatoes is an awesome space-saving option for those with limited freezer or cabinet space. We love to toss sliced tomatoes with fresh herbs and turn them into herb “sun-dried” tomatoes. Sun-dried is in quotes because rather than drying them under the actual sun, we rely on a food dehydrator. It is too cool and humid here to thoroughly dry tomatoes for safe long-term storage without one.
Our dehydrated tomatoes stay good for many, many months after drying them. They are absolutely divine in pasta, sourdough bread, sauteed veggies, scrambled eggs and more. See the instructions on how to make sun-dried tomatoes here, including options to dry them in the oven. Finally, you can dry and grind tomatoes (or just the tomato skins) into super-flavorful tomato powder!
And that concludes your ultimate crash-course guide on how to grow organic tomatoes.
Are you ready to go grow some stellar tomatoes this season? Heck, the majority of you probably have a better climate to grow far more amazing tomatoes than we do! I hope you found this article to be useful and interesting. Please feel free to ask questions in the comments below. Also, please spread the tomato love by sharing this post. Thank you for tuning in!


18 Comments
tina haller
What do you suggest I do when I really can’t rotate crops? I live in Sacramento and have grown mainly tomatoes in the two spaces I have. I bought worm castings and compost. What else world be good?
Thanks! I really like your site!
Tina
Aaron (Mr. DeannaCat)
Hi Tina, there is really only so much you can do in general, even more so when you have a smaller garden space to work with. Adding worm castings and compost will help, we like to plant marigolds and basil if you have space to squeeze in a few extra plants around your tomatoes, basil will appreciate some afternoon shade so it can be easily tucked in here or there. Top dressing with a mild organic fertilizer once a month and watering it in will help your tomatoes continue to grow and produce fruit. If you are familiar with making or using compost tea, you can water your tomatoes with the tea once a month or at least a couple times throughout the growing season. Hope that helps and have fun growing!
Laura B.
Another great article Deanna. I am just getting a new raised bed garden established and have found your articles and advice therein very timely and helpful. Keep up the good work. (Hopefully you are getting a referral fee for the fertilizer you recommended in the tomato article that I just purchased off of Amazon.) Peas and Love.
Jocelyn
I don’t know if you’re still checking the comments on this post, but, do you have any recomendations on the best way to support indeteterminate tomatoes in grow bags? Last year we struggled because all of the stakes just flopped over in the bags.
Aaron (Mr. DeannaCat)
Hi Jocelyn, have you checked out our article on How to Make a DIY Tomato Cage: Sturdy, Easy & Cheap!? We find them to be incredibly sturdy, especially when they have stakes attached to them on the outsides. Let us know if you have any other questions and good luck!
Gabriela
Hi Deanne, lots of good tips on the tomato growing but I’m missing what to do at the end of the season when I have lots of green tomatoes left. Looking for ways to use them.
Aaron (Mr. DeannaCat)
Hi Gabriela, you can place the green tomatoes in a paper bag, store them at room temperature and see if they will ripen off the vine. Some people make different dishes using green tomatoes (green tomato sauce, fried green tomatoes, green tomato salsa, pickled green tomatoes, tomato relish, etc.) but unfortunately we do not currently have any dedicated articles to these recipes. Green tomatoes do contain solanine which can make some people feel ill if eaten in large amounts (myself included) so you may want to experiment with the use of green tomatoes in moderation until you know how it affects you. Hope that helps and good luck!
Riley Bianchi
So much good information in one post! This has helped so much with certain questions I have had before. Also, I am trying sun gold tomatoes this year because they seem to be one of your favorites!
Chip
I inherited a lot of aloe vera plants from the previous owners of my house. I am happy to discover that they can be used as fertilizer. Thank you!
McKale
Thank you, Deanna! Amazing, all-encompassing article. What are your thoughts on using your nettle fertilizer on tomatoes? I just made my first batch! So pumped.
DeannaCat
Hey there! I would use it early in their growing cycle only since it is fairly high in quick-acting nitrogen. It would give seedlings a great boost to get bigger and bushier. Great idea! Enjoy!
Teri Phillips
Do you have to buy organic starter plants or can you buy non organic and grow then organically? I’m having a hard time finding organic starter plants.
Aaron (Mr. DeannaCat)
Hi Teri, if you plan on growing them organically you don’t need to be too concerned about their status as a seedling so you should be more than fine picking out whatever varieties suit you. Hope that helps and have fun growing!
Nancy H
Great article Deanna! This season is the first time I started my own tomatoes from seed. I’ve been bringing them out this week in increasing time increments. Yesterday was day 7 of acclimation and some of the tomato leaves got sunburned. Is there anything I can do to help them? Thank you, Nancy
DeannaCat
Hi Nancy. I think they’ll be okay. Not much you can do about the burned leaves now… and it sounds like you have a good understanding of hardening off. Just take it slow and maybe give them a few extra days to the usual week recommendation. I am not sure if they were out all day or in part shade at all? You could try mostly morning sun and then a little afternoon shade for a day or two, easing into full afternoon sun. The seaweed extract or aloe after transplanting will help too! Congrats on starting from seed this year!
Kailey
This article was fantastic! Thank you for hard work on this. I cant wait to dehydrate my tomatoes and i will keep referring back to this all summer.
Chelsea
Thank you for this post! I don’t have a great garden, per se, more seedling thats just popped up when I moved finished compost soil, so I really have no idea what my tomato plants are (or the squash that’s growing). Is there a good way to tell the difference between determinate and indeterminate? Thank you for all of your knowledge!
DeannaCat
Hi there! Unfortunately you won’t really be able to tell until it either keeps on living, or dies back after a bunch of fruit are produced. Either way, it sounds like an awesome surprise and experiment! Have fun!