


Organic Pest Control, Part 3: Over 25 Ways to Stop Pests from Destroying Your Garden!
Aphids, caterpillars, and gophers, oh my! I’ll admit it: managing garden pests can sometimes be a difficult task. It seems like there is always something out there, lurking and causing problems! Trust me, we have our fair share of pests here too. Keeping garden pests at bay can feel particularly challenging when you’re following organic practices… but please, stick with it! Because the benefits of organic gardening for your health, family, local wildlife, and our planet are worthy of your efforts. After reading this post, you should feel armed and prepared to tackle your pest problems – with dozens of organic pest control options.
Read along to learn about over 25 effective physical, biological, and yes… even some “chemical” methods to control pests in your garden. Don’t worry! All of the techniques and products we’ll explore in this article are considered acceptable in organic gardening. Examples include the use of barriers, traps, manual removal, beneficial insects, DIY natural sprays, and a few commercial products as well.
As we go, it will be made clear which methods are effective against what pests, so you can determine the best course of action for your situation! The ultimate goal is to control the pest of concern and reduce damage to your garden, while also minimizing impacts on the environment and other non-target species.
BEFORE YOU ACT
It is essential to approach organic pest management in a holistic, methodical, and conscientious way. Meaning, don’t just aimlessly spray the crap out of everything just because one plant had some mysterious nibble holes in it!
If you tuned into the first two articles in this organic pest control series, you read that we try to follow the concept of Integrated Pest Management here on our homestead. Basically, this means taking certain reasonable and responsible steps before we start applying organic pest control products or measures – like those you’ll learn about in this article.

In Part One, we dug into the many ways you can help prevent pests in your garden in the first place, with techniques such as companion planting, polyculture, crop rotation, soil health, and smart plant selection. Even with all the preventative measures in the world, you’ll probably still have some pests in your garden… And that is totally okay! An organic garden will never be totally free of pests, nor should it be. That led us to Part Two: all about proper pest identification. We got to know the top 18 common garden pests, and also learned how to ID the good guys – so we don’t accidentally harm them!
If you haven’t checked out those articles yet, I highly suggest doing so!
And now, how to stop or kill pests.
ORGANIC PEST CONTROL METHODS
The ways you can stop pests from destroying your garden can be broken up into distinct categories: physical, biological or chemical organic pest control methods, which is how they’ll be presented below. Deciding which methods to implement in your garden, and when, depends on the situation, severity of the problem, and your personal preferences. Experience will also dictate your response. You’ll learn with time which of your plants need special care, and which you can leave to fend for themselves.
Personally, we try and wait to use sprays or products (even organic ones!) as a last resort, after trying other options. If there is only a small population of pests, causing minimal damage, we often just leave them be. The hope is that our beneficial insects with help us out, creating a natural balance within the ecosystem of our garden. Yet if damage is becoming more serious than simply cosmetic, risking the plants health and vitality, or a population starts to grow beyond a normal, manageable level – then we intervene.
This list below is not exhaustive of all organic pest control options out there, but should give you more than enough ideas to go into battle with!

SECTION ONE:
Physical Organic Pest Control
Physical pest control encompasses the many mechanical ways to block, kill, or remove pests from an environment, without the use of pesticides, sprays, or other similar products. This can range from physically using your hands, to using barriers, traps, or other materials to reduce a pest population and/or protect crops. Read about several examples below!
MANUAL REMOVAL
The fact of the matter is, if you’re going to be an organic gardener, you have to get comfortable with insects – including touching them! Sure, you don’t necessarily have to use your bare hands like I often do, but manually squishing or removing certain pests right when you see them is a quick-and-easy way to stop them in their tracks! I do this all the time. For example, by hand-picking caterpillars from our brassicas and leafy greens, pinching cucumber beetles and leaf miners, or squishing colonies of aphids.
When you are out collecting insects, consider bringing a bucket of soapy water with you. Especially if you’re dealing with a large number of insects, emptying a trap (we’ll get to that), or feeling squeamish about squishing. Use gardening gloves, and drop the victims into the bucket of soapy water. Let them soak in there to die, then dispose of the water away from your garden. Tip: Hunt for snails and slugs at night, especially in damp conditions!
In addition to squishing or collecting insects, you can also manually go after their eggs – as long as you know how to ID them! A great example is cabbage butterfly eggs, which will hatch into leaf-munching caterpillars. If you’ve observed cabbage white butterflies in your garden, examine your plants for little oblong white to yellow dots on the leaves. Check the underside too, and squish what you can find! Cabbage white butterfly eggs are solo, not in tight clusters (which may be ladybug eggs). If you have an issue with squash vine borers, learn to ID those eggs and remove them too!
Finally, manual removal doesn’t need to mean only with your hands. Use a hard stream of water to blast off aphids or other small soft-bodied insects like spider mites. Just make sure not to blast too hard and damage the plant, especially young tender seedlings!
Manual Removal is effective against these pests: Aphids, cabbage loopers, cabbage white butterfly caterpillars, snails, slugs, squash bugs, and many other insects – when you can find and catch them.

PRUNING
This is another variation of manual removal. When an infestation of insects is concentrated on just a few leaves or branch of a plant, you could prune that entire section away! However, make sure you aren’t taking so much that it will kill the plant or strip it bear – preventing photosynthesis. If you’re worried that you may have shocked your plant, consider feeding it an aloe vera soil drench or some dilute seaweed extract to help it bounce back!
Pruning away problems also applies to non-systemic plant diseases, such as powdery mildew or rust. Cut away the leaves or portions that appear most infected. Furthermore, those types of diseases often thrive in crowded conditions, so the plant will benefit from a trim and increased air circulation anyways. If an entire plant is infested or diseased, it may be in the best interest of your garden to completely remove that plant, to prevent it from spreading.
Speaking of spreading problems, dispose of infested or diseased trimmings in the trash, as opposed to your compost or green waste bin. Also be sure to clean your pruning snips frequently while pruning, particularly if you’re working on plants with disease! Wiping them with rubbing alcohol while you’re out in the garden is one quick and easy way. For a deeper clean, check out our post all about sanitizing garden supplies.
I’ll add here that general garden clean-up can help reduce pest activity. For example, keeping a mulch or compost pile directly next to your garden space may increase the population of pill bugs, rats, or other scavengers. Clearing thick bushes and vines can reduce space for slugs, snails, and rats to hide, and thus reduce their populations.
Pruning is effective against these pests: Aphids, spider mites, mealybugs, scale, mildew, rust – or any other pests or disease that form in concentrated clusters.

FENCING
Block the pests out! The use of fencing around a garden space can be extremely effective in preventing access from vertebrate pests, such as deer, rabbits, and our biggest garden pest of all – chickens! We have wire fences around our backyard raised garden beds, fruit trees, and other planting areas to protect them from our adorable, ravenous, hole-digging, free range chickens. Fences could be installed around an entire garden, or around individual raised beds.
Many rural gardeners enclose their garden on four sides to keep the deer out. I have even seen some that have netting or fencing over the top as well, to prevent access from more agile creatures, like birds, opossums, or raccoons. Obviously, the design, type, and size of your fencing system will dictate just how effective it will be against what kind of pests. For example, if rabbits or squirrels are an issue, choose a fencing material with smaller openings than one you’d use to keep deer out.
In addition to above-ground, you can use fencing as organic pest control to protect your garden from below! I am talking about burrowing pests like gophers, voles, moles, and even rats. Gophers are rampant in our area. Therefore, we line the bottom of every raised bed with hardware cloth – something I suggest to anyone installing raised beds in a gopher-prone area! (To read more about how we design and build garden beds, check out this article.)
We also plant our tender young fruit trees in large DIY gopher baskets made from hardware cloth. Note that hardware cloth is far more durable and vermin-proof than chicken wire! Pests can chew or squeeze through chicken wire, and it will degrade with time.
Fencing is effective against these pests: Deer, rabbits, squirrels, gophers, voles, moles, cats, chickens, opossums, skunks, birds, and other vertebrate pests – depending on your fencing systems design and installation.

ROW COVERS
Let’s take the idea of “fencing” down to an even finer, more targeted level of protection! Individual garden plots, raised beds, or sections thereof can be covered with row covers. Also called “floating row covers”, they block out pests or other undesirable elements. Meaning, some row covers are used to stop insects, while others may have the purpose of providing additional warmth or shade for the plants when needed.
Row covers can be implemented as organic pest control in many sizes and styles. Traditionally, hoops are used to support the cloth-like “blanket” material – at the desired height over the plants. Some covers are held high on other supporting structures, allowing space for tall plants (or people!) underneath. Other gardeners lay light row covers directly on top of the plants themselves.
If the right material is used, and the covers are kept closed and tucked in around the sides, they can effectively keep out cabbage white butterflies and their caterpillars, cucumber beetles, squash bugs, and even smaller flying insects like whitefly or leafhoppers. Here is one example of a popular fine-mesh row cover material. Chances are, it would also protect your plants from squirrels, rabbits, birds, and other larger vertebrate pests too! Sounds awesome, right?
See this article to read about using hoops and row covers in more detail, including how to make homemade PVC hoops, information on various types of row cover material, and also an important caveat about pollinators.
Row covers are effective against these pests: Cabbage white butterflies/moths (and their caterpillars), cucumber beetles, squash bugs, tomato hornworms, white fly, squash bugs, leaf miner flies, squash vine borers, flea beetles, other flying insects, and other small vertebrate pests – depending on your type of cover material and installation.

BIRD NETTING
Birds can be quite the garden pests! They like to go after fruit, and some plants – especially tender young seedlings, leafy greens, or small sprouts. Therefore, many gardeners find the need to drape their fruit trees, garden beds, shrubs, or vines with bird netting, particularly after planting new seedlings or as fruit ripens near harvest time.
Bird netting can be a really great and effective tool to use! However, in addition to keeping them off your plants, the birds can get caught up in the netting too! So please use this with care and caution. There are some really inexpensive bird netting options, but those are more prone to tangling, snagging birds, and generally more difficult to work with. On the other hand, there are some higher quality bird netting choices that are thicker, more fabric-like, easily reusable, and not nearly as prone to catching birds.
Bird Netting is effective against these pests: birds, and possibly other vertebrate pests – depending on installation.

BEER TRAPS
Yep, you read that right. Beer is highly attractive to many soil-dwelling garden pest insects! The good news is, they are a cheap date too. When it comes to trapping insects like pill bugs, sowbugs, slugs, and millipedes – the cheaper the beer, the better. We found that our resident pill bugs even snubbed their noses at Heineken! Too “good”. Budweiser seems to do the trick! Side note: do pill bugs have noses?
To create a beer trap for pests, all you need is an old cat food or tuna can and some cheap beer. Rinse out the can, if you haven’t already. Then, in a location where you know you have a lot of soil-dwelling pest activity, dig out a small hole or wiggle the can down into the soil. Work it deep enough so that the upper rim is at the same level as the top of the soil. Pack soil back around the can as needed. Sometimes we put several cans throughout one raised bed! (Note: If you are attempting to trap snails and slugs, a larger shallow pan could also be used).
Next, fill the can about halfway full of beer. If you overfill it, they may be able to crawl back out. And now you wait. Check back the following day – many soil-dwelling pests come out only at night. Do you have a bunch of new dead friends on your hands? I sure hope so! The traps can be left out for a few days, but be forewarned that they can start to get pretty stinky. When changing the traps, I usually bring a bucket of soapy water along to dump the remnants in to. Refill with more cheap beer, and repeat as needed!
Beer Traps are effective against these pests: pill bugs, sow bugs, millipedes, slugs, snails, and other soil-dwelling pests.

FRUIT OR WOOD TRAPS
What do most soil-dwelling pests like? Food… along with damp, dark hiding places. So why not give them what they’re looking for?
If you are struggling with pill bugs (aka “rollie pollies”), sowbugs, millipedes, or stink bugs, try baiting them with a large piece of fruit or vegetable matter. The larger the surface area, the better. For example, using the rind or a slice of melon, a big leafy green, or a long slice or skin from an overgrown squash. Place the fruit or veggie “face down” (if there is a face – like the melon side of a rind) on the soil surface in the damp and pest-prone area overnight, or for several nights.
Wood traps follow the exact same idea, but can attract different pests. Squash bugs and other beetles are especially infamous for falling for this trick. Dampen a board or other wide flat piece of wood and place it on the soil surface. Cardboard may also work.
In the early morning hours, before the pests retreat back into the soil, peel up your fruit or wood trap and see what you caught! If your trap can be reused, brush the pests into a bucket of soapy water. If not, trash the whole thing! Be ready to possibly scoop out an inch or two of the soil from beneath where the trap was sitting as well. I have found hundreds of pill bugs clustered under one melon rind or collard green leaf!
Fruit or Wood Traps are effective against these pests: pill bugs, sow bugs, millipedes, beetles, squash bugs, stink bugs, and other nocturnal or soil-dwelling pests.

CLOCHES & COLLARS
There may be times when you don’t need to protect your entire garden, or even a whole plot or raised bed. Perhaps just a few plants need an extra layer of defense? Then maybe consider providing them individual cloches or collars.
A cloche is a small translucent cover that sits over a plant, creating a safe bubble and shield from various pests, depending on the material used. Cloches can be made from wicker, wire fencing material, plastic, or even glass. Wire cloches can be effective against squirrels, rabbits, rodents, birds, or similar – especially if they’re secured in place. More solid cloches can ward off insects in addition to the others listed, but also create heat like a mini-greenhouse, so keep that in mind depending on the season! There are cloches available to buy, or you can create DIY versions – for example, by cutting a milk jug in half to repurpose.
A collar is a similar concept, but with an open top. This eliminates the concern for built up heat or sunburn, but can still provide a shield around the base of the plant. People get creative and make collars from halved plastic water bottles, milk jugs, wire fencing, cups, styrofoam, cardboard, and more!
Collars are a particularly useful tool to protect the stem of plants from cutworm damage, or other pests that attack plants at the soil level. I’ve read that wrapping nylon stocking, cheesecloth, aluminum foil, or paper towel rolls around the base of squash vines (at the soil level and just above) can prevent penetration of squash vine borers! I have used toilet paper rolls around young sunflower seedlings, keeping the wild birds from snipping them off.
Cloches and Collars are effective against these pests: It depends on the style and placement, but could range from small insects to larger vertebrate pests!

Other Ideas for Physical Pest Control:
- Copper Foil Tape: Snails and slugs do not like to cross it. Therefore, wrapping copper tape around pots, raised beds, the base of individual plants, or even the trunk of a tree may prevent slug and snail access.
- Crushed Eggshells: Supposedly, snails and slugs also do not like to crawl over crushed eggshells. Sprinkle crushed eggshells around the perimeter of flower beds, raised beds, or the base of plants to deter them. I have heard mixed reviews about how well this works. My mom says pine needles help deter slugs in the same way!
- Sticky Traps: Place yellow sticky traps in areas with flying pest insect activity. These are particularly effective against gnats, fruit flies, white flies, flea beetles, leaf miner flies, and squash vine borer moths. We use them constantly in our greenhouse, but are also useful outdoors or inside for houseplants!
- Snap traps: For rodent control, or underground control of gophers, snap traps are a much more safe and humane option than using poison products. However, be sure to only set traps in areas of known rodent activity, and only at night! Traps left out during the daytime may accidentally kill wild birds or other non-target wildlife!
- Flashy bird tape: Bright iridescent tape that flashes and moves in the sun and wind can deter birds from unwanted areas. Tie the tape from fruit trees, on arbors, or attached to other plants or structures. I commonly see this technique used at wineries in our area. A DIY option that is similar is to hang CDs instead. Wait, what is a CD again?
- Decoy cabbage white butterflies: Apparently, cabbage white butterflies (who then create cabbage worms!) are territorial, and will stay away if there are other cabbage whites around. Some gardeners have success in deterring them by placing decoy or dummy white butterflies around their garden beds. If you need help with cabbage white butterfly and cabbage worm control, check out this article dedicated to those jerks!
- Live Traps: Rather than kill traps, you could try to relocate your pests. Baited live traps can be set for small vermin, opossums, raccoons, rabbits, or skunks – good luck with that one! Be cautious of neighbor cats and other small pets! If you do successfully relocate an animal, keep in mind that there are likely many others around that will take their place eventually…

SECTION 2:
Biological Methods of Organic Pest Control
Biological pest control is a central concept to Integrated Pest Management (IPM). It is the idea of using natural enemies to reduce pest populations, usually combined with active human assistance. A prime example of this is using beneficial insects or nematodes in the garden.
BENEFICIAL INSECTS
Use bugs to fight bugs! Some insects are not desirable around our plants, while others we welcome with open arms. There are many helpful garden insects that prey upon other pest insects. Ladybugs, lacewings, and praying mantis are some of the most popular predatory beneficial insects used in IPM – but there are many others! To boost their populations, we buy and release beneficial insects in our garden.
LADYBUGS
Ladybugs are ferocious predators of aphids, spider mites, mealybugs, white fly, and other soft-bodied insects. According to the Planet Natural Research Center, a ladybug will eat up to 50 aphids a day. That means that during its lifetime, a single ladybug is capable of consuming up to 5,000 aphids! During the early stages of their life, ladybug larvae are the most effective and quick at gobbling down pest insects. Yet ladybug larvae look pretty different than their adult form. Therefore, make sure you know how to recognize these good guys in the garden, and don’t mistake them for pests!
If you are struggling with soft-bodies pest insects, consider releasing ladybugs on your plants! We do this at least once a year, sometimes twice if needed. They are effective outdoors in the garden, or even in a greenhouse setting. Ensure you’re buying native American ladybugs and not invasive Asian lady beetles. Here is a trusted source for the right ones.
When you release your ladybugs, here are a few tips to ensure they stick around. They have a reputation for flying off!
- When they arrive, store the ladybugs in the refrigerator until that evening. This slows down their metabolism and activity, but is totally safe.
- Release ladybugs that evening, just after the sun goes down.
- Thoroughly wet the plants that you are going to place them on first.
- Ensure you release them near a food source, e.g. aphids.
- If you order a large amount, place them in a few different locations throughout your garden.
Some may still fly away, but if you follow these tricks, plenty should stick around too! After we release ours, they may not be as concentrated in the area that we originally put them, but we notice an increase in the ladybug population around our garden in general. If you can get them to stick around long enough to lay eggs and then hatch new larvae, then the feast will really begin! Also, don’t be alarmed if there are a few dead ladybugs in your purchased container. It happens.
Ladybugs are effective against these pests: Aphids, mealybugs, spider mites, caterpillars, leafhoppers, thrips, whiteflies, insect eggs, and more!

LACEWINGS
Green lacewings provide very similar benefits as ladybugs! Adult lacewings become most active at night, and are attracted to light. Their adult form may feed on honeydew or on small insects. Lacewing larvae look like tiny alligators. The larvae are the best predators, and feed on aphids, leafhoppers, spider mites, mealybugs, thrips and other soft bodied insects.
Most often, lacewings are sold and shipped as eggs, since they can be quite fragile. The benefit of this is that eggs can’t fly off upon arrival, as some ladybugs do! Here is one source to purchase lacewing eggs. Also like ladybugs, lacewings can be useful when released outdoors or in a greenhouse, including hoop houses. We never used to see lacewings in our garden. Then, we bought a batch of lacewings eggs several years ago. Guess what? We see them all the time now! It makes us really, really happy.
Lacewings are effective against these pests: Aphids, mealybugs, spider mites, caterpillars, leafhoppers, thrips, whiteflies, insect eggs, and more!

PRAYING MANTIS
The Praying mantis is the ultimate predatory insect. They are strictly carnivorous, and hunt and consume a wide array of insects – and more! When they’re still young and small, a praying mantis will feed on aphids, leafhoppers, flies, caterpillars, and other small insects. As they grow and mature, their diet expands to include beetles, crickets, bees, dragonflies, moths, and are even known to eat birds, lizards, frogs, and small rodents! Crazy, right?!?
Praying mantis egg cases are pretty badass looking! You can buy an egg case, let it hatch, and release thousands of these guys into your garden if you wish!
I am always happy but also a tad worried to find praying mantis in our garden. We don’t intentionally purchase and release these guys. While they’re excellent pest predators, they are non-selective and will also eat beneficial insects, caterpillars, and butterflies. Since we raise monarch caterpillars and butterflies, I always relocate praying mantis away from our milkweed when I find them!
Praying Mantis are effective against these pests: Pretty much every pest insect, and more!

MEALYBUG DESTROYERS
Mealybug Destroyers are a rad little type of lady beetle! Cryptoleamus lady beetles, to be exact. They do just as their nickname indicates, and devour mealybugs – along with aphids and other small soft-bodied insects. We buy and release these guys on our passionfruit vines to help with the mealybug issue there.
True to lady beetle form, the mealybug destroyer larvae is the most ferocious eater of mealybugs. Please note how similar the mealybug larvae look to their prey, the mealybugs themselves. It is tricky, but you can tell them apart this way: mealybug destroyers are more “furry” and lumpy, with no tail – while mealybugs have a long tail and are a little less wooly looking.
Mealybug Destroyers are effective against these pests: Primarily mealybugs, but will also consume aphids, spider mites, and other small-soft-bodied insects.

PARASITIC WASPS
Parasitic wasps lay their eggs inside or on top of other arthropods, including caterpillars and their pupae. Therefore, this is a great tool against tomato horn worms and other pest caterpillars! There are dozens of species and types, so they won’t all look like the one below. Once their eggs hatch, and the wasp larvae feed on the host, killing it.
Yes, you can buy a starter community of parasitic wasps to introduce to your garden! These Trichogramma wasps are a popular choice. Unlike other large wasps that you may be imagining, these do not bite or sting, and go virtually unnoticed by humans! Again, this is one I am leery of purchasing for our garden, only because of our monarchs. Maybe we’ll try in the winter, after monarch season and when the cabbage worms are enjoying our brassicas and leafy greens.
Parasitic Wasps are effective against these pests: Caterpillars including tomato hornworms, cabbage worms, cut worms, and more.

BENEFICIAL NEMATODES
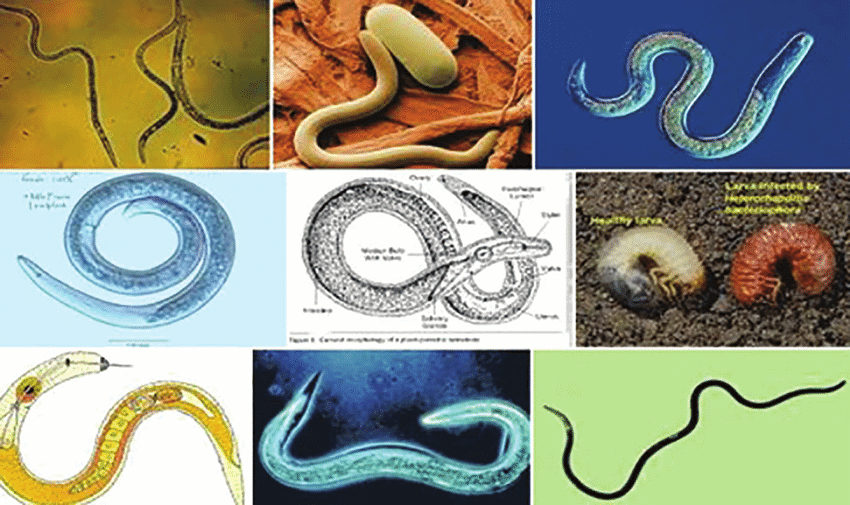
Beneficial nematodes are like tiny, tiny “worms” that live in the soil. You won’t be able to see them with your naked eye. Under a microscope, they look like worms, but aren’t the same as other garden worms. Nematodes are their own distinct phylum in the animal kingdom!
Beneficial nematodes are hugely important, as they feed on over 200 pests from up to 100 different insect families. They do their pest-control work by penetrating pests, releasing a bacteria, and feeding on them. The best part is – they don’t harm earthworms, lady beetles, or other beneficial insects! They are particularly good at controlling populations of pest grubs, fungus gnats, soil-dwelling caterpillars, and even harmful nematodes.
These are the native nematodes that we buy and release into our garden beds routinely! Read more about using beneficial nematodes in this article.
Beneficial Nematodes are effective against these pests: Soil-dwelling insects and larvae like curl grubs, cutworms, flea beetle larvae, squash bug larvae, Japanese beetle larvae, root-knot nematodes, army worms, flea larvae, thrips and weevils.
SECTION 3:
“Chemical” Organic Pest Control Methods
I have “chemical” in quotes for this section intentionally. “Chemical pest control” is another way to group and classify pest management strategies, and means using man-made substances to kill or deter pests. However, note that NO harsh chemicals are included on this list.
All of the products and sprays listed below are OMRI-certified for organic gardening. Or, they aren’t even “certified” because they’re made with such gentle common household products! Their application and mechanism-of-action makes them fall into this category, since some are sprayed or applied much like pesticides. Yet I wouldn’t normally refer to any of these as “chemicals”. Most of them contain active ingredients derived from nature!
DIY SOAP SPRAY
Of all the sprays, we use soap the most often in our garden! There are many commercially pre-made insecticidal soaps that include a bunch of ingredients. Alternatively, you can make your own simple and pure organic pest control solution, like we do! Soap sprays work to kill soft-bodied insects by disrupting their cell membrane. Essentially, it coats and penetrates their natural protective barrier, causing them to dessicate – or dry out. However, soap does not harm beneficial insects like ladybugs, lacewings or bees, nor is it all that effective against caterpillars.
To create your own homemade insect soap spray, simply combine 1 tablespoon of liquid soap per quart of water. For a large batch, use 5 to 6 tablespoons per gallon of water. Use warm water and shake it up in your sprayer to help it mix.
Pure castile soap is the best choice for making soap spray, and it won’t harm your plants We use Dr. Bronner’s castile soap. The peppermint Dr. Bronner’s soap provides a further line of defense, since peppermint deters pests! You can also add chili powder or essential oils to this recipe, described more below.
Insect soap spray has little-to-no residual effect, and only kills on direct contact, so spray it right on the pests! Turn over or peel open curled-up leaves as needed to reach the bugs. I usually get all up in there and rub the infected areas as I spray, squishing the aphids or mealybugs at the same time.
As with all foliar sprays, it is best to apply soap spray in the evening. Do not apply spray in direct sunlight, as it can sunburn plant leaves. Soap spray can be re-applied once every 4 to 7 days as needed, and may take several treatments to solve the problem.
Soap Spray is effective against these pests: soft-bodied insects such as aphids, mealybugs, spider mites, white flies, psyllids, scale, along with Japanese beetles and boxelder bugs.

DIATOMACEOUS EARTH
What exactly is DE anyway? DE, or Diatomaceous Earth, is made up of the fossilized remains of tiny aquatic phytoplankton called diatoms. It is found in the earth naturally, and extracted to be used in industrial products, spa or swimming pool filters, organic pest control products, and even in food. DE comes in many grades. We always choose food-grade DE to use in our garden or chicken coop, which is the most pure and safe.
Diatomaceous earth is a fine, talc-like white powder. To us humans, it feels silky smooth! However, when it comes in contact with any insect that has an exoskeleton, its microscopically sharp edges creates hundreds of abrasions on them. This deteriorates their bodies protective outer layer, making them desiccate – or dry out, and die.
The good news is, DE is proven to be almost completely safe around humans, mammals, wildlife, and beneficial insects! The caveat here is inhalation exposure. It is not good for humans or animals to inhale large amounts of fine airborne diatomaceous earth (particularly long-term exposure). Thus, heed some caution there.
Sprinkle diatomaceous earth on the surface of soil, around or under potted plants and structures, and even dust plants directly! DE will harm any target insect that comes in contact with it, whether they’re directly dusted with it, or they walk over it later. That is…. as long as the DE is dry.
The main drawback with using diatomaceous earth is that when it gets wet, it’s rendered far less effective. Therefore, try to sprinkle it in areas that will remain dry for at least a few days, or plan to reapply it after watering or rain. To prevent or kill mites, lice, and ants in our chicken coop, we sprinkle a layer of diatomaceous earth under their wood shavings.
Diatomaceous Earth is effective against these pests: fleas, mites, lice, ants, millipedes, earwigs, cockroaches, silverfish, crickets, most beetles, cockroaches, centipedes, pill bugs, sow bugs, and some grubs or larvae (like fungus gnat larvae).

NEEM OIL
Neem oil is a plant-based concentrated oil, extracted primarily from the seeds of the India-native neem tree. The oil is properly diluted and mixed, and sprayed onto plants for organic pest control.
“Neem oil is made of many components, including Omega 3, 6, and 9 Fatty Acids. Azadirachtin is the most active component as a pesticide. It reduces insects ability to feed, and acts as a general insect repellent. It also interferes with insect hormone systems, making it harder for insects to grow and lay eggs. ”
Oregon State University
Neem oil is particularly effective against small soft-bodied insects, like aphids, thrips, spider mites, mealybugs, scale, and white flies. When applied directly, the oil can coat their bodies and kill them – or otherwise interfere with reproduction and feeding. It is also said to repel mosquitoes, flies, cabbage white butterflies, and moths. Additionally, that protective shine that neem oil adds to leaves makes them less susceptible to fungal diseases like powdery mildew, rust, or blight.
On the other hand, neem oil is not toxic to bees when used correctly! It also doesn’t bother other beneficial insects like ladybugs, earthworms, parasitic wasps, spiders, or adult butterflies – especially if they aren’t directly sprayed with it!
“Neem oil” is sold either as concentrated 100% pure neem oil, a concentrated neem oil containing other ingredients, or pre-mixed, ready-to-use spray. Personally, we prefer to use this 100% pure organic cold-pressed neem oil and mix our own spray. It is the most cost-effective and safe. Furthermore, one pre-mixed neem oil product line was recently found to be contaminated with several synthetic, non-organic pesticides that weren’t included on the label, including Malathion, Chlorpyrifos, and Permethrin! Yuck.
How to Use Neem Oil
In our experience, neem oil does a great job of preventing pest issues, deterring pests, or slowing the spread of disease – if caught early! As a pest infestation or disease progresses, neem can still be used in conjunction with other organic pest control methods to bolster the effort, but may not be able to combat it on its own. Meaning, if you’re experiencing a full-blown infestation of aphids, or a serious case of powdery mildew, we have not found neem to be very effective at bringing something back from the brink of death.
Therefore, we mostly use it as part of routine care and prevention for a handful of pest-prone plants, like our cannabis, citrus trees, passionfruit vines, and artichokes. They all have persistent issues with aphids, mealybugs, and/or powdery mildew.
On the other hand, we use very little neem oil on short-lived plants in our vegetable garden. I am not a fan of using neem oil on foliage that I am going to consume, like kale, swiss chard, or lettuce. It leaves a bit of an oily residue behind that can be difficult to wash off. However, for the leaves of squash plants, tomatoes, eggplant, or other vegetation we aren’t going to consume, it can be a good product to keep in your organic pest control toolkit!
Neem oil can be useful and effective in your garden… if applied right! Unfortunately, neem is often times mixed and used incorrectly, or in the wrong situation – which can cause more harm than good! To learn how to properly emulsify, mix, and apply neem oil spray, please check out this article all about it!
Neem Oil is effective against these pests: May kill or inhibit fungal diseases along with small soft-bodied insects, including aphids, thrips, spider mites, mealybugs, scale, and white flies. Acts as a general deterrent for other insects like flea beetles, leaf miner flies, mosquitoes, flies, cabbage white butterflies, and moths.

BACILLUS THURINGIENSIS – “Bt”
Bacillus thuringiensis, also known as Bt, is a naturally-occurring, soil-dwelling bacteria. It is a common active ingredient in organic biological pesticides. Namely, it kills caterpillars. Bt is ONLY toxic against the larvae of butterflies or moths. It makes them stop eating. Therefore, Bt is commonly used to control cabbage worms and cabbage loopers on the brassica plant family – cabbage, kale, collards, and brussels sprouts, to name a few. Yet it will kill caterpillars on any type of crops.
“Bt is a bacterium that is not toxic to humans or other mammals, but is toxic to certain insects when ingested. It works as an insecticide by producing a crystal-shaped protein (Cry toxin) that specifically kills certain insects. Bt is naturally found on leaves and in soil worldwide. It has been used commercially both in organic and conventional agriculture for over fifty years. Over two decades of review, the EPA and numerous scientific bodies have consistently found that Bt and Bt-crops are not harmful to humans.”
Entomological Society of America
Bt spray is available to purchase either pre-mixed, or as a concentrate that must be diluted before it is applied to plants. Concentrates are the more cost-effective option. We use this concentrate by Safer Brand. Mostly, for our cannabis plants to stop “bud worms” from destroying them – and on rare occasions in the garden, when the cabbage worms are beyond other means of control. When used on vegetable crops, Bt is considered safe for human consumption, even when sprayed the same day as harvest. (To read more about cannabis-specific organic pest control, see this post.)

How to Use Bt in the Garden
When mixing your Bt spray, follow the directions on the Bt product you purchase. For the one we use, it calls to dilute 1 tablespoon of Bt per one gallon of water. Mix well directly in your pump sprayer. Spray your plants of concern to the point of dripping, including the bottom of leaves.
Like other foliar sprays, it is best to apply your Bt solution in the evening hours. Yet Bt is even more mild than others, and doesn’t pose the same risk for accidentally burning leaves with improper applications. On the contrary, Bt rapidly degrades in sunlight and also washes off with rain or other water. It is most effective the day or two after application, and considered virtually non existent after a week.
I read a clever trick recently about using Bt to battle squash vine borers. If you can locate the entry hole where they’ve bored into your squash plant vine (the frass is a big clue!) you can try to inject Bt solution up into the hollow vine where you suspect the borer larvae is hiding. They’re usually about an inch above the frass hole. Ha! Borers are such frass-holes.
Bt is most effective against small caterpillars, so is important to treat caterpillar-infested plants early on. It may not impact larger caterpillars, such as those over 1 inch long. You may need to hand-pick those fatties. Speaking of fatties, you know how much I love monarch caterpillars! We are very, very cautious as to not spray Bt anywhere near our milkweed plants. Also, avoid over-spraying your plants onto non-target areas!
Bt is effective against these pests: All small caterpillars, including cabbage white butterfly caterpillars or “cabbage worms”, cabbage loopers or inch worms, small tomato or tobacco hornworms, and cutworms.

CAYENNE OR RED CHILI POWDER
Many garden pests are appalled when they (or their area) are ambushed with chili powder. Can you blame them? Apparently, hot chili powder can repel everything from cats and racoons to aphids and spider mites. You can apply chili or cayenne powder to your garden space in a few ways.
One, you can simply sprinkle red chili powder around areas with current pest activity. For example, last year we noticed mice were climbing into one of our raised garden beds. They used the tomato cage as a jungle gym to access and munch on our tomatoes. I heavily dusted the area with chili powder, including the soil, the understory of the plants, the edges of the wood bed. I even sprinkled a little on the gravel path in the direction I believed they were coming from. No more mice! Similarly, when dusted around the base of a plant, it may help deter soil-dwelling insects like cutworms or pill bugs.
Two, you can make a spray containing chili powder. To do so, mix 1.5 teaspoons with one quart of warm water. Also add one teaspoon of soap, which help its it adhere to plants. Let it all soak together for a while, and shake well to combine. Spray this concoction onto plants of concern. It is best to apply foliar sprays in the evening, after sundown. Take caution here! Don’t get this in your eyes. Also, just as some people are more sensitive to chilis, some plants may also be. Do a test spray on just a few leaves to see how they’re affected. Furthermore, note that the plant may take on the flavor of chili powder! Therefore, I wouldn’t suggest spraying it on leafy greens, fruit, or directly onto vegetables that you will consume.
Chili Powder is effective against these pests: Will deter rodents, rabbits, skunks, deer, raccoons, cats, opossums, aphids, cabbage worms, cutworms, pill bugs, and spider mites.
ESSENTIAL OILS
Just as peppermint soap, neem oil, and chili pepper odors are unappealing and therefore deter pests, essential oils provide the same benefit. Essential oils are very, very concentrated – a little goes a long way! If you’d like, try adding just a few drops to the soap, neem, or Bt organic pest control sprays described above for a little extra protection. 10-20 drops (or about 1/2 teaspoon) per gallon of water is good. Scale up or down as you use more or less water.
Peppermint, lavender, orange, tea tree, rosemary, peppermint, or eucalyptus are some good examples of essential oils that act as natural insect repellents, though there are many others as well! We personally love this little mix-pack of certified organic EOs, for personal, home, and garden use.
Essential Oils are effective against these pests: Most all insects will be repelled by the essential oils listed above.

BAKING SODA & SOAP
While the soap spray recipe we already discussed is primarily used against insects, the addition of baking soda to a homemade soap spray can be used to fight fungal diseases like powdery mildew. Sodium bicarbonate, also known as baking soda, alters the pH of the leaves. This makes them an unfavorable environment for fungus to grow.
To create a homemade baking soda spray, combine 1 tablespoon of baking soda per one gallon of water, along with 2 tablespoon of liquid castile soap. The soap helps the baking soda adhere to the leaves evenly. From what I understand, you could also add 1 tablespoon of baking soda to the full soap or neem oil spray recipes described above – for an extra ooomph against disease.
Mix in a pump sprayer, and apply to the plants you wish to protect or treat in the evening hours. Re-apply every 7-14 days for active fungal disease outbreaks, and every 2 weeks as prevention. Similar to neem, baking soda sprays are best used as a preventative measure for disease-prone plants, or applied at the first onset of disease. For more advanced disease, you will want to prune away the most infected parts (if possible) and then continue attempting to treat the lesser impacted areas. Also see Green Cure for fungal disease control, described in the bulleted list below.
Baking Soda is effective against these diseases: powdery mildew, downy mildew, black spot, and blight.
Other Organic Pest Control Products you may find useful:
- GreenCure: An organic potassium-bicarbonate fungicide, used to control powdery mildew, black spot, downy mildew, blights, molds and other plant diseases. Insta-friends recommended this product to us, and we tried it for the first time last spring. Our young brassica seedlings got hit with powdery mildew very early, while they were still in the greenhouse, and we didn’t want to neem them. We applied this stuff twice over the coarse of a week. Guess what? The plants were free of powdery mildew for months to come. I have never seen something so effective against PM.
- Sluggo: An organic iron-phosphate based product that is used to kill snails and slugs. It is safe around pets, wildlife, and your edibles. Sprinkle the small white pellets in problem areas. It attracts snails and slugs – they consume it, lose their appetite, and stop eating. As the pellets break down in your garden, they double as a form of fertilizer! Iron is an essential mineral for plants.
- Rubbing alcohol: Spot-swab individual mealybugs with an alcohol-soaked Q-Tip. This is particularly useful for small-scale issues, like on individual houseplants. A rubbing alcohol, soap, water solution can also be created to fight flea beetles or aphids. However, I have read there is some risk of injuring your plants.
And that, my friends, is 25 + ways you can stop pests from destroying your garden!

So what do you think? Are you still here? Ha! Did you learn something new? Or, did I forget a handy tip? I’m sure I did! Feel free to ask questions, and comment with any organic pest control measures that work for you. That way, we can all learn from each other!
Moving forward, I will work on writing more detailed articles on how to manage specific pests. For example, an article just about how to prevent and treat powdery mildew. Or, how to fight aphids in the garden. One by one, I hope to cover all the pests under the sun! I also didn’t mention weeds as pests… I will get to that too.
Until then, this is sort of like the mothership – of all things organic pest control.


35 Comments
JENNIFER WEBSTER
Hi All, This might be too way out but I have to ask. I’m from Jamaica and we grow a vegatable we call callaloo, it’s close to spinach. It’s in the Amarinth family. They have some white crawlers that move like slugs and they decimate the leaves so that they look like lace. I pinch them off, I spray neem with soap, and BT. What are these bugs? I didn’t see anything in the article. Thanks
Aaron (Mr. DeannaCat)
Hi Jennifer, we aren’t familiar with callaloo but it sounds like you likely have a caterpillar of some type eating the leaves. Neem oil won’t help but spraying BT once every week or two will keep the caterpillars at bay, just be sure to spray that crop only as you don’t want to harm caterpillars that may be on other plants. If your bottle of BT is old, it may not work as well as I believe they recommend using it within 1 year of opening as the bacteria will become less effective with time. Hope that helps and good luck!
Lee
Should copper fungicide be avoided?
Aaron (Mr. DeannaCat)
Hi Lee, we have yet to use any copper fungicides but they are deemed okay to use in organic farming although with a bit of caution. It can accumulate in soil with time and can pose health risks to plants and animals as well. Check out this article for a quick run down on copper fungicide use. If the disease you are trying to prevent or treat can only be successfully managed with copper fungicide then it may be an option for you. If there are other alternatives I would look into those first. Hope that helps and good luck!
Megan Deller
Hey!! Where are you purchasing your GreenCure now that it isn’t sold on Amazon? I ordered it in the past and it really helped! Thanks in advance!
Aaron (Mr. DeannaCat)
Hello Megan, we are looking for another option as we have heard recently that the business (or person) has since closed their operation. However, this company is using the same ingredients and packaging it on their own without the Green Cure label. We purchased some from them last year and they were very helpful, you can always call them if you have any questions. Good luck!
Claire
Hello! I am having a major problem with ants farming aphids on my plants – especially corn and they are getting deep into the tight leaves on the ears of corn. I have tried DE to get rid lf them and borax/sugar traps, but I can’t get rid of the ants or the aphids. Any suggestions? There is a good ladybug population already in my garden.
Aaron (Mr. DeannaCat)
Hi Claire, ants and aphids working together can be quite a pain to get rid of. Check out our article on how to make a soap spray for aphid control or neem oil foliar spray for preventative measures. The soap spray will kill the aphids on direct contact and the neem oil may repel pests going forward, you can also combine the two into one spray as well. I would apply the neem oil spray no more than twice a week but you can use the soap spray as needed, hope that helps and good luck!
Jeannette
Hi my parents planted Huge gardens and put wood ash in each hole as they planted beans peas etc to deter cut worms. Does this really work? We recycle as much as possible but would plastic wrapped around each plant plug deter cut worms etc.? Tks
Aaron (Mr. DeannaCat)
Hi Jeannette, yes wood ash and eggshells are both said to harm cut worms and keep them away from your plants. You can also create plant collars which will help keep them off your plants as well. Just be sure that an inch or so of the collar is submerged in the soil with an inch or two raised above the soil surrounding your plant stem. You could use plastic from milk jugs, yogurt containers, or even toilet paper and paper towel rolls. Hope that helps and happy gardening.
Cam
Just wanted to say hanks for all your very detailed articles. I learn so much from your site. All your articles are great but I especially like the article on good bugs/bad bugs; the pictures really helped since I never know if the bugs I see should stay or go. I look forward to more interesting articles.
Aaron (Mr. DeannaCat)
Appreciate the kind words Cam, it is definitely paramount to know what bugs are in your garden and why they are there. We will try to keep the interesting articles coming and thanks for reading!
Kathi Albuschat
Thank you for the informative article. I look forward to reading the previous two. I do have a question – I would like to start using BT and beneficial nematodes preventatively as soon as possible as I have had good luck with that in the past, but it’s mid March in Oregon and we still have a few frost days left. Do I need to wait until the soil warms up to apply?
Aaron (Mr. DeannaCat)
Hello Kathi, glad to hear you will be “tackling” the previous two pest Organic Pest Control articles as well! Check out our article on using beneficial nematodes here. It is best to apply the nematodes to already wet soil when the soil temperature reaches 40 to 70 degrees Fahrenheit. With that in mind, it may be best to wait a couple weeks after your last frost date. Hope that helps and good luck!
Kathi Albuschat
Thank you!
Emil
Hey guys,this is fantastic information, I ha e question for you. Did you ever heard about using cinnamon of hydrogen peroxide as anti fungal treatment for seedlings?
Aaron (Mr. DeannaCat)
Hi Emil, yes we are familiar with cinnamon and hydrogen peroxide being used as an anti-fungal for plants although we have yet to use either method as of yet. What type of specific problem are you having or expecting with your seedlings where you would need to use one of these methods?
Kim
Such an informative, interesting post. I have learnt so much from it, many thanks!!