

How to Freeze Green Beans (With or Without Blanching)
To blanch or not to blanch, that is the question! The age-old debate whether or not to blanch green beans before freezing sparks some passionate stances on both sides, but I’m here to tell you: there is no “wrong” or “right” way to freeze fresh green beans! There are pros and cons to each method, so I figured I’d explain the difference and show you how to freeze green beans from the garden both ways. Then, you can decide what option works best for you.
In this tutorial, you’ll learn how to freeze whole or cut green beans with and without blanching, including tips on how to prepare, pack, and cook frozen green beans for the best quality, texture, and long term storage. We often steam blanch our garden green beans before freezing, though you can use a classic water bath blanch (or skip blanching entirely).
Freezing green beans is a wonderful, easy way to preserve them. We love to freeze green beans from the garden to toss in homemade soup all winter long. Looking for other ways to preserve green beans? Try our quick pickled green beans recipe (canning or refrigerator pickles) or this lacto-fermented dilly green beans recipe.
Freezing green beans from the garden
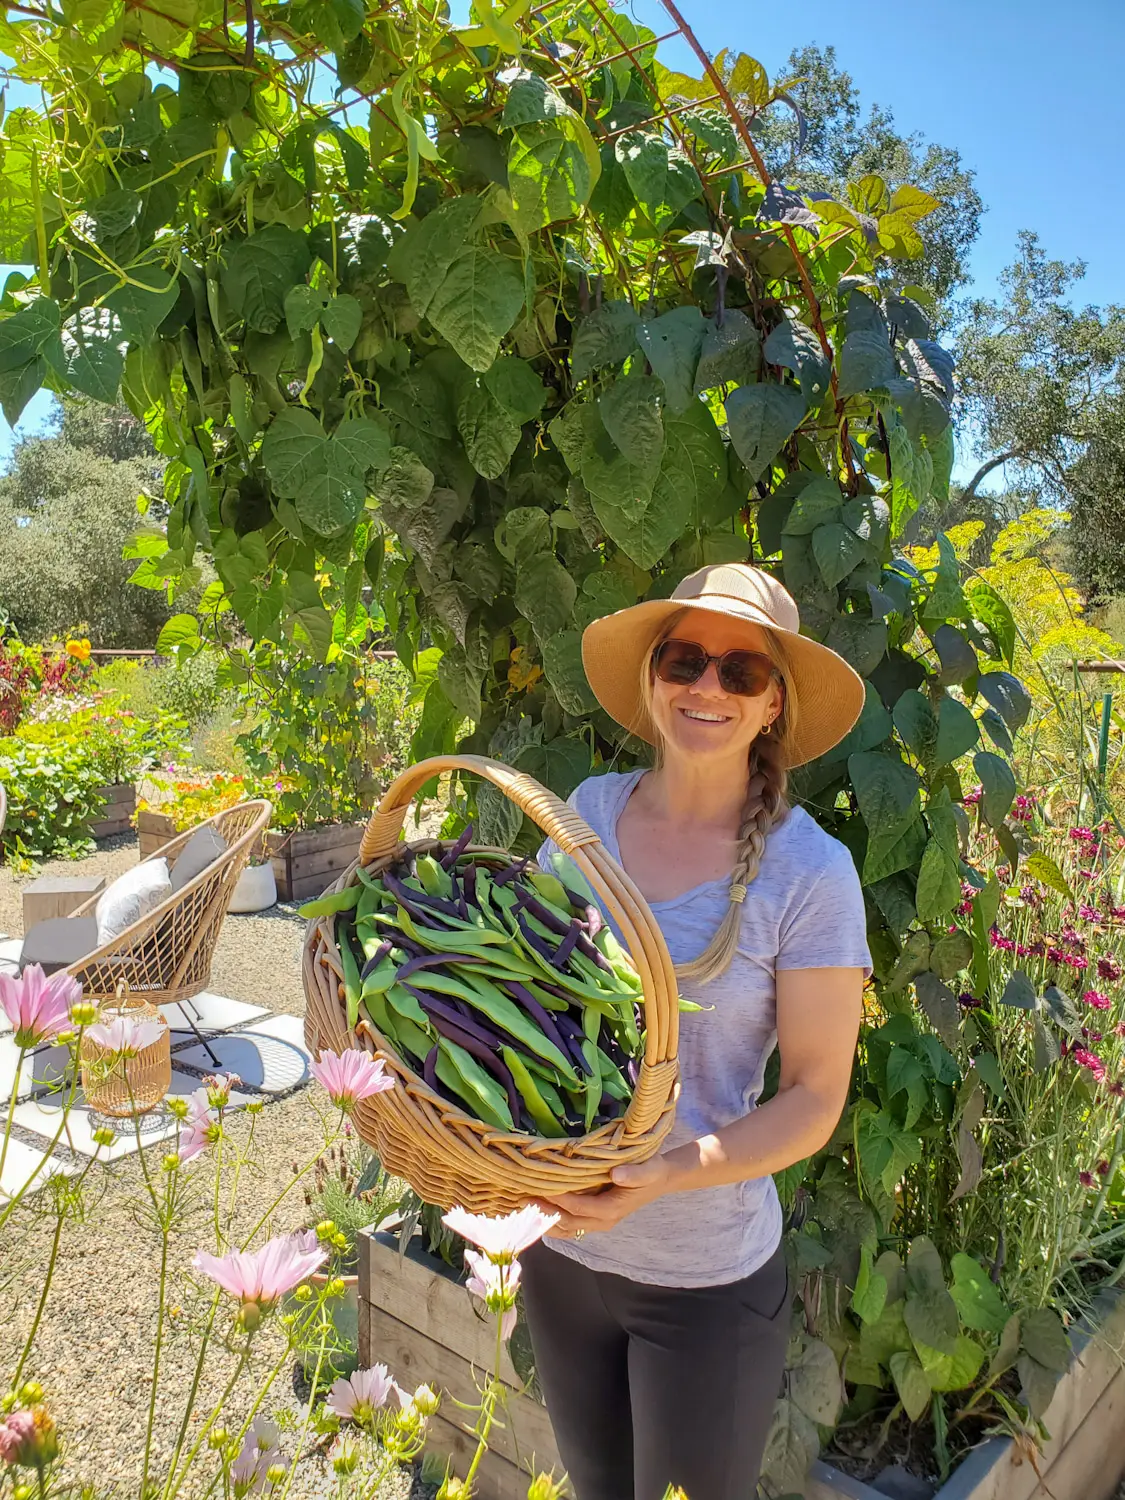
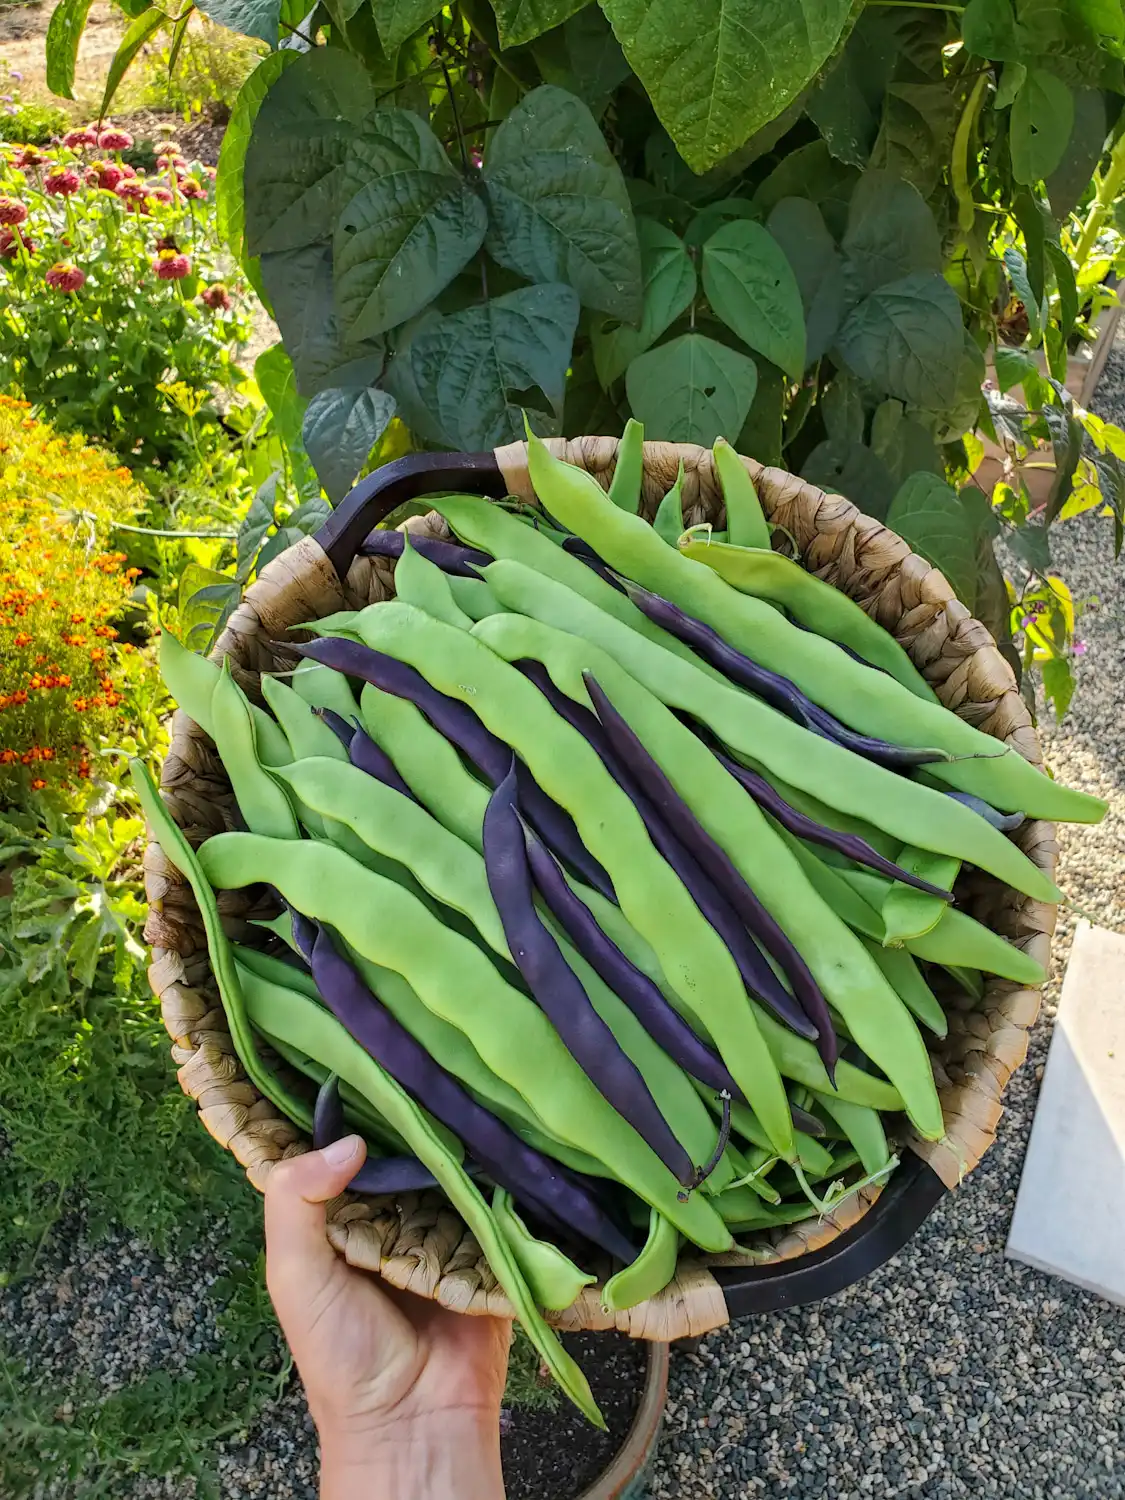
The tips in this post apply to freezing all types of green beans – including classic string beans, pole beans, French haricots, snap beans, and more. We mostly grow flat Romano-style pole beans these days. No matter the type, fresh is best! Older beans have already started to naturally degrade, so they won’t hold up quite as well once frozen. That said, homegrown green beans are ideal to freeze compared to grocery store beans, which were likely picked many many weeks before they hit the store. If you don’t have a garden, snag super fresh beans at your local farmer’s market instead!
To freeze green beans from the garden, try do so soon after harvesting them (within a couple of days). Store harvested beans in the fridge in a plastic bag to keep them firm and fresh in the meantime. Also try to choose the most tender, crisp beans from the garden to freeze – not overgrown, tough, stringy ones.
Can you freeze green beans without blanching?
Sure! To save time and a few steps, you can freeze green beans without blanching them first. Simply wash, dry, trim, and pack the green beans into freezer containers, leaving as little air in the container as possible (explained in more detail below).
It is perfectly safe to freeze green beans without blanching. However, food preservation experts do recommend blanching green beans first for the best results and texture – especially for long term storage. Therefore, freezing green beans raw is ideal for a small volume of beans that you plan to use within a couple months.
What happens if you freeze green beans without blanching?
If you freeze green beans without blanching them first, the texture, color, and taste won’t be quite as fresh when you defrost and eat them after long-term storage. They’ll be good for a couple of months in the freezer, but quickly go downhill thereafter. So, if you want your frozen green beans to last to their fullest potential (up to a year) in the freezer, you probably want to blanch them first.
Here is the science behind it: when fruits and vegetables are frozen, natural enzymes cause them to deteriorate over time. Freezing slows down the enzyme activity and spoilage, but doesn’t stop it entirely. This is especially true for vegetables (more so than fruit) and is why frozen vegetables are sometimes mushy.
Yet by quickly blanching green beans (partially cooking) in boiling water or steam before freezing, those pesky enzymes are deactivated and halted. Meaning, green beans that are blanched before freezing will retain better texture, flavor, nutrients, and more vibrant color in long term storage (several months or longer) compared to those that were frozen fresh raw.
How to Prepare Green Beans for Freezing: Step-by-Step
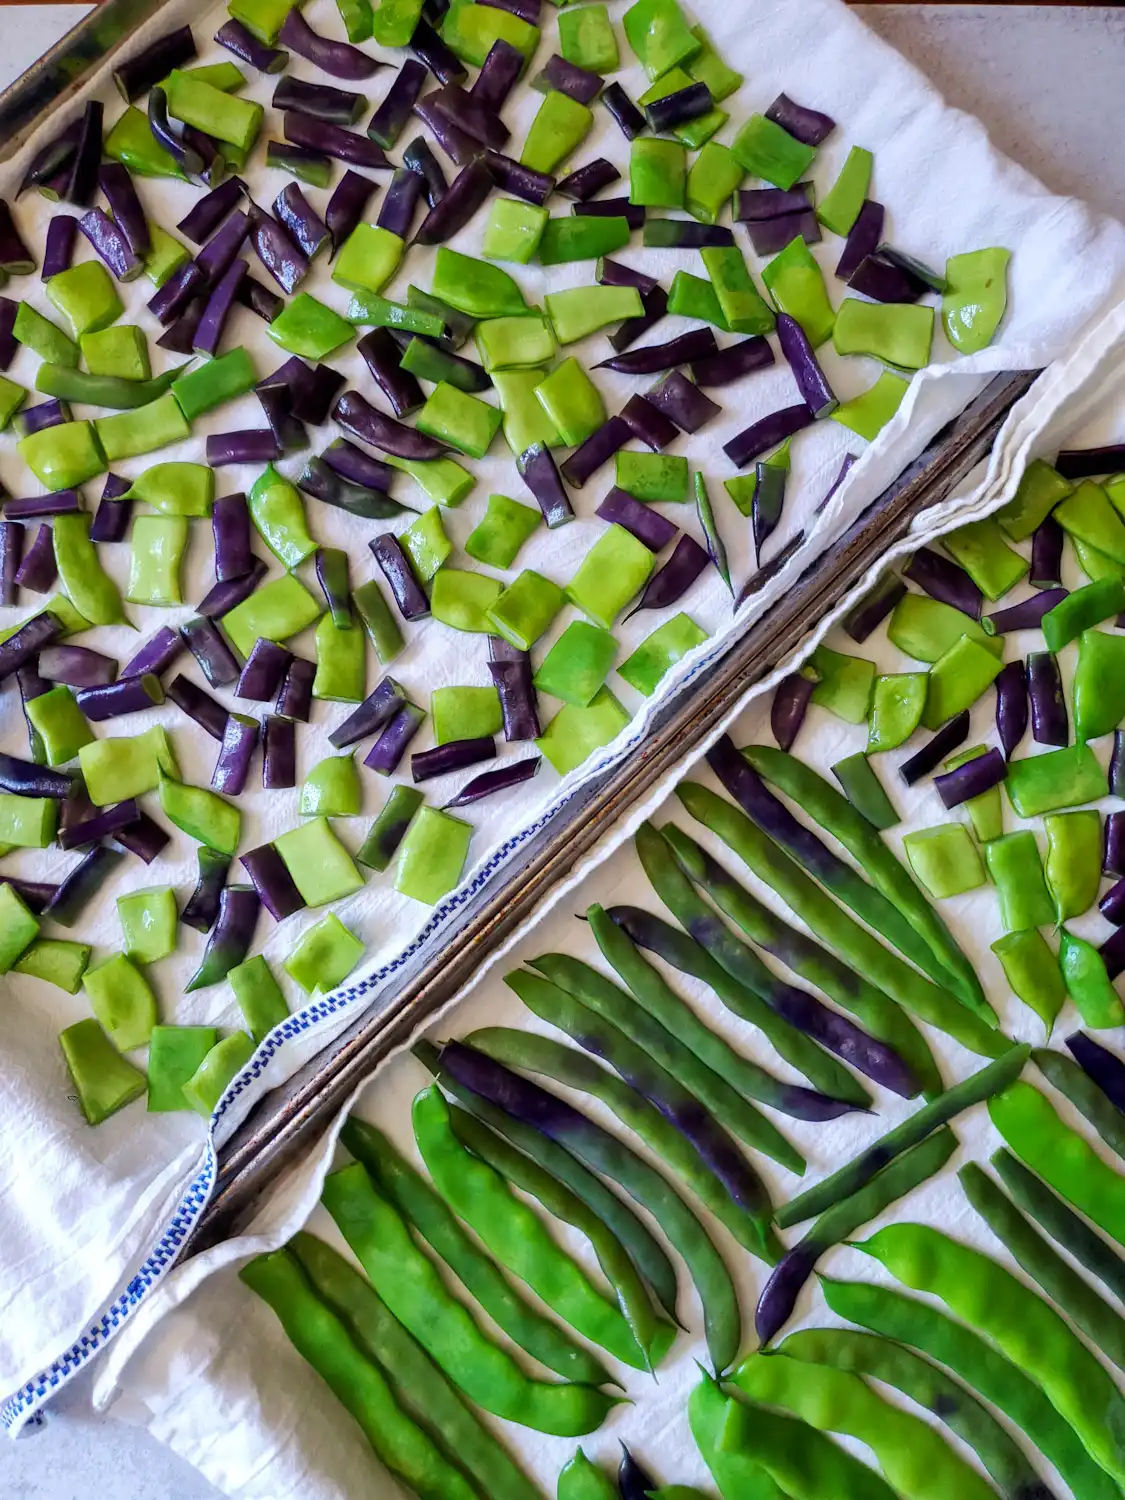
1) Wash & Trim
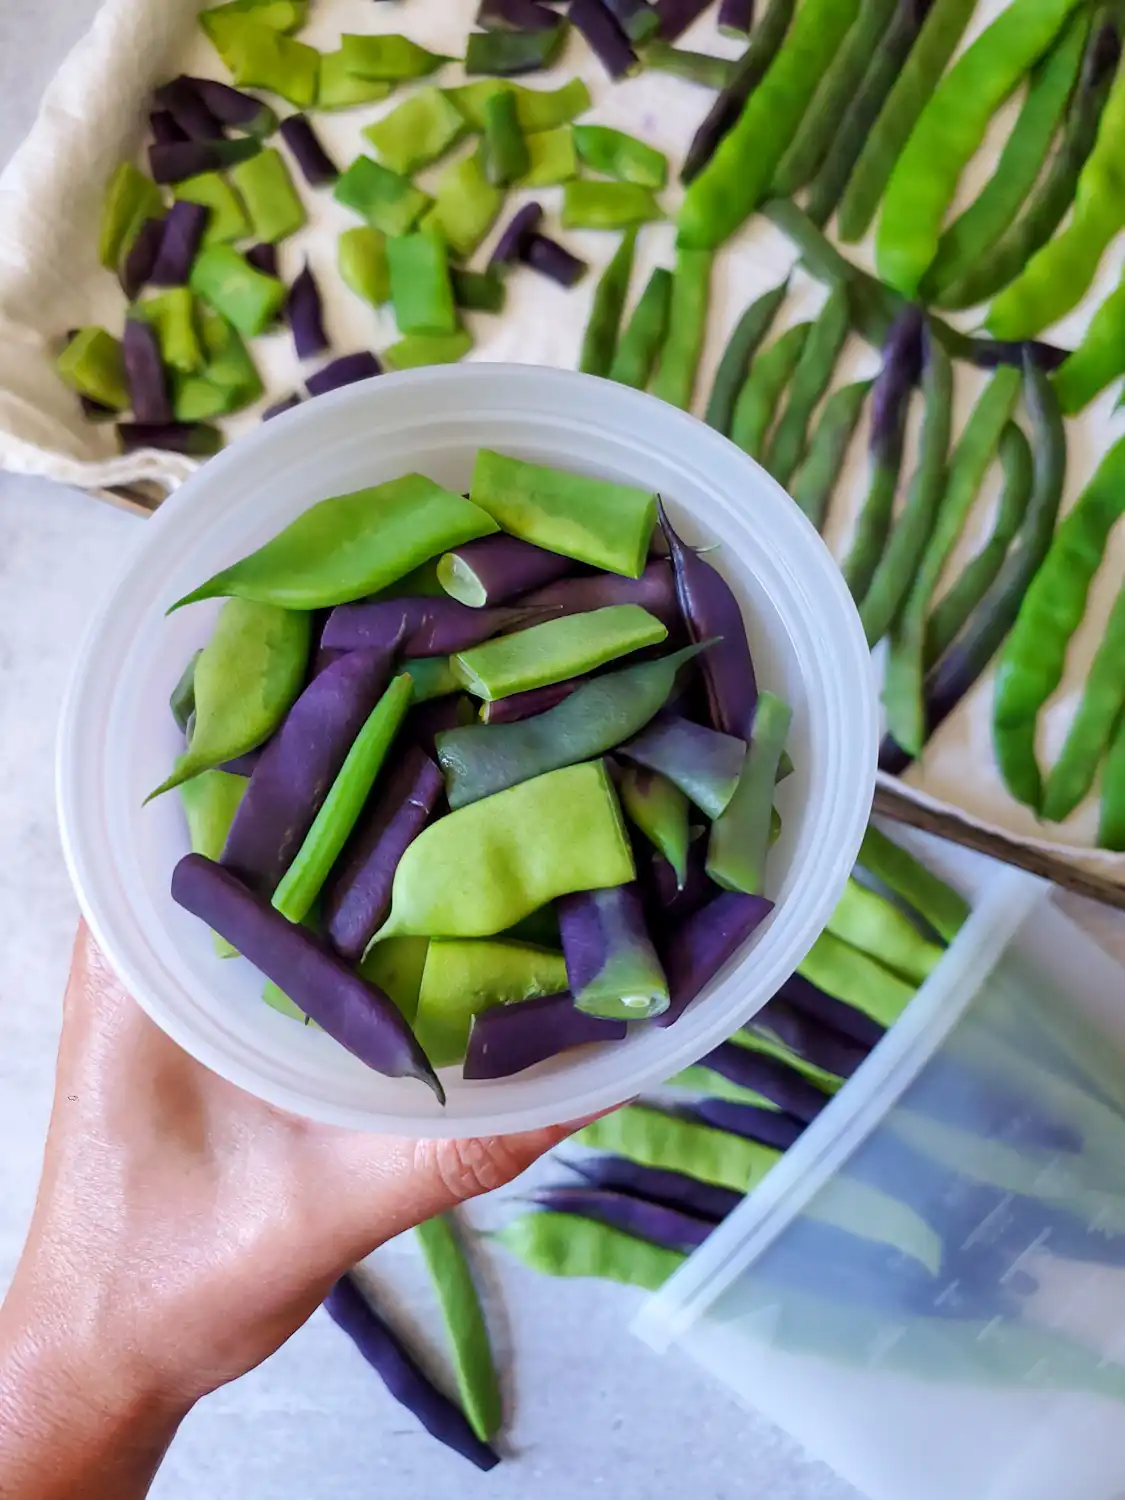
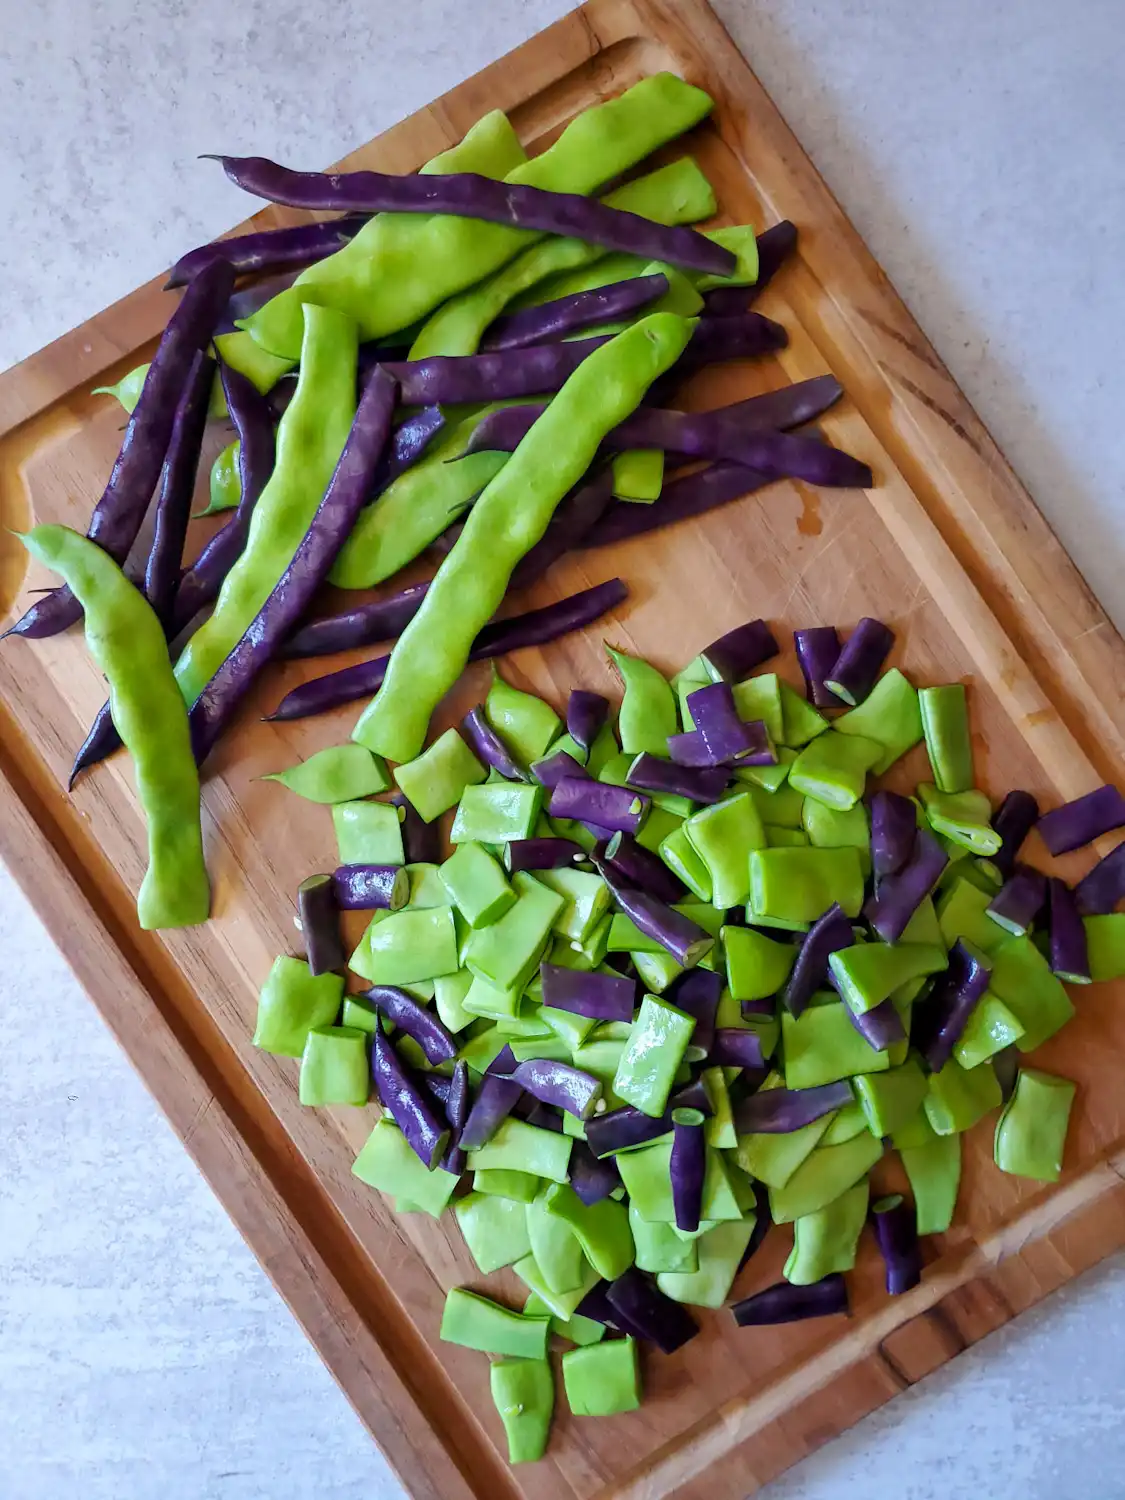
You can leave green beans whole to freeze, or cut them into smaller pieces. I do a little of both! We sometimes add whole frozen green beans into meals (e.g. stir fry or as a side), but especially love freezing bite-size beans that are ready to toss into soups, stews, or chili.
- Start by washing the green beans by rinsing them under cool water.
- Trim off the woody stem end, but there’s no need to cut off the other tender pointed tip.
- Cut or snap into pieces, or leave whole.
Note: Cut green beans are more prone to getting water-logged from the blanching and ice bath process than whole beans, but steam blanching and/or thoroughly drying before freezing after can help reduce that.
If you’re not going to blanch your beans, you can skip the next two steps and go straight to drying and packing.
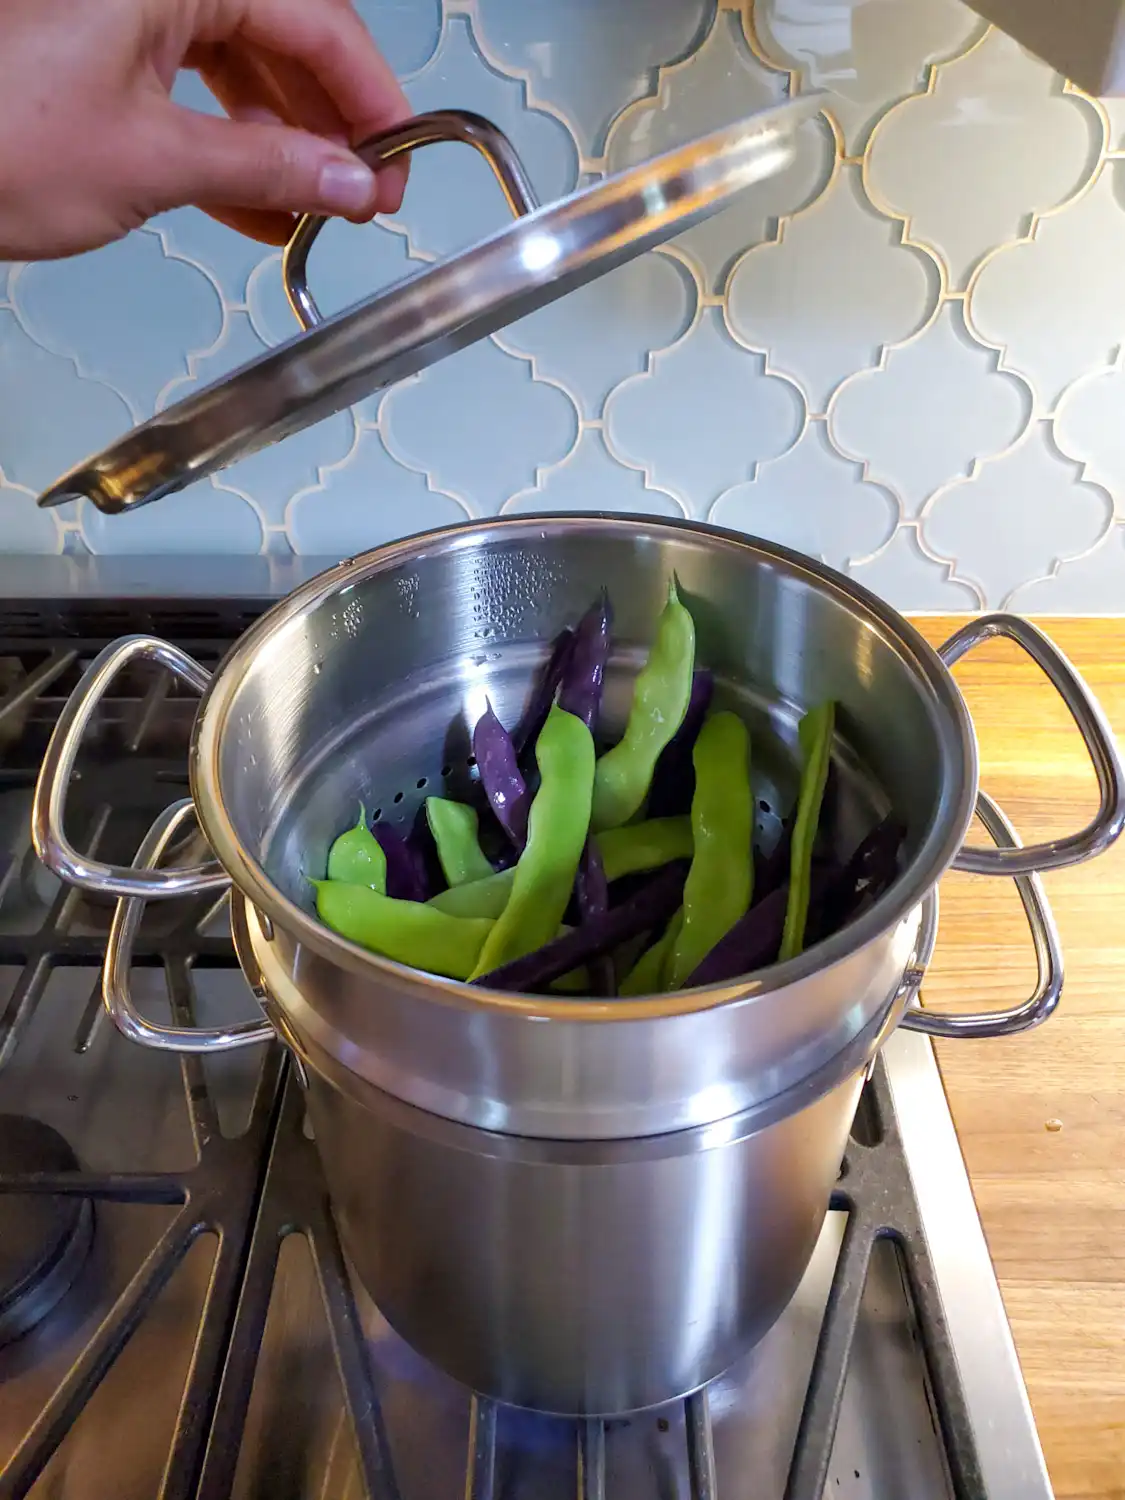
Step 2) Blanching Green Beans
To blanch green beans before freezing, you can either use the boiling water method or a steam blanch.
- Bring a large pot of water with a pinch of salt to a rolling boil, OR use a pot with a steamer basket insert and lid. If using a steamer, add enough water so that it covers the bottom of the pot but not so deep that it touches the steamer insert. Either way, ensure the pot is fully heated and steamy before adding the beans.
- Once the water is boiling (or the pot is filled with steam), add the green beans. When steam blanching, don’t overfill the pot – leave some room to toss them. Cover the pot with a lid and set a timer right away. Don’t overcook them!
- Blanch green beans for 2 to 3 minutes maximum. I’ve seen recommendations for 2 minutes for smaller beans or cut pieces, and 3 minutes for larger whole beans. If using a steamer, stop and toss the green beans with tongs halfway through to promote even cooking. When boiling, start counting once the water returns to a boil after adding the beans.
- If blanching several batches, return the pot to a boil/steam before processing the next batch.
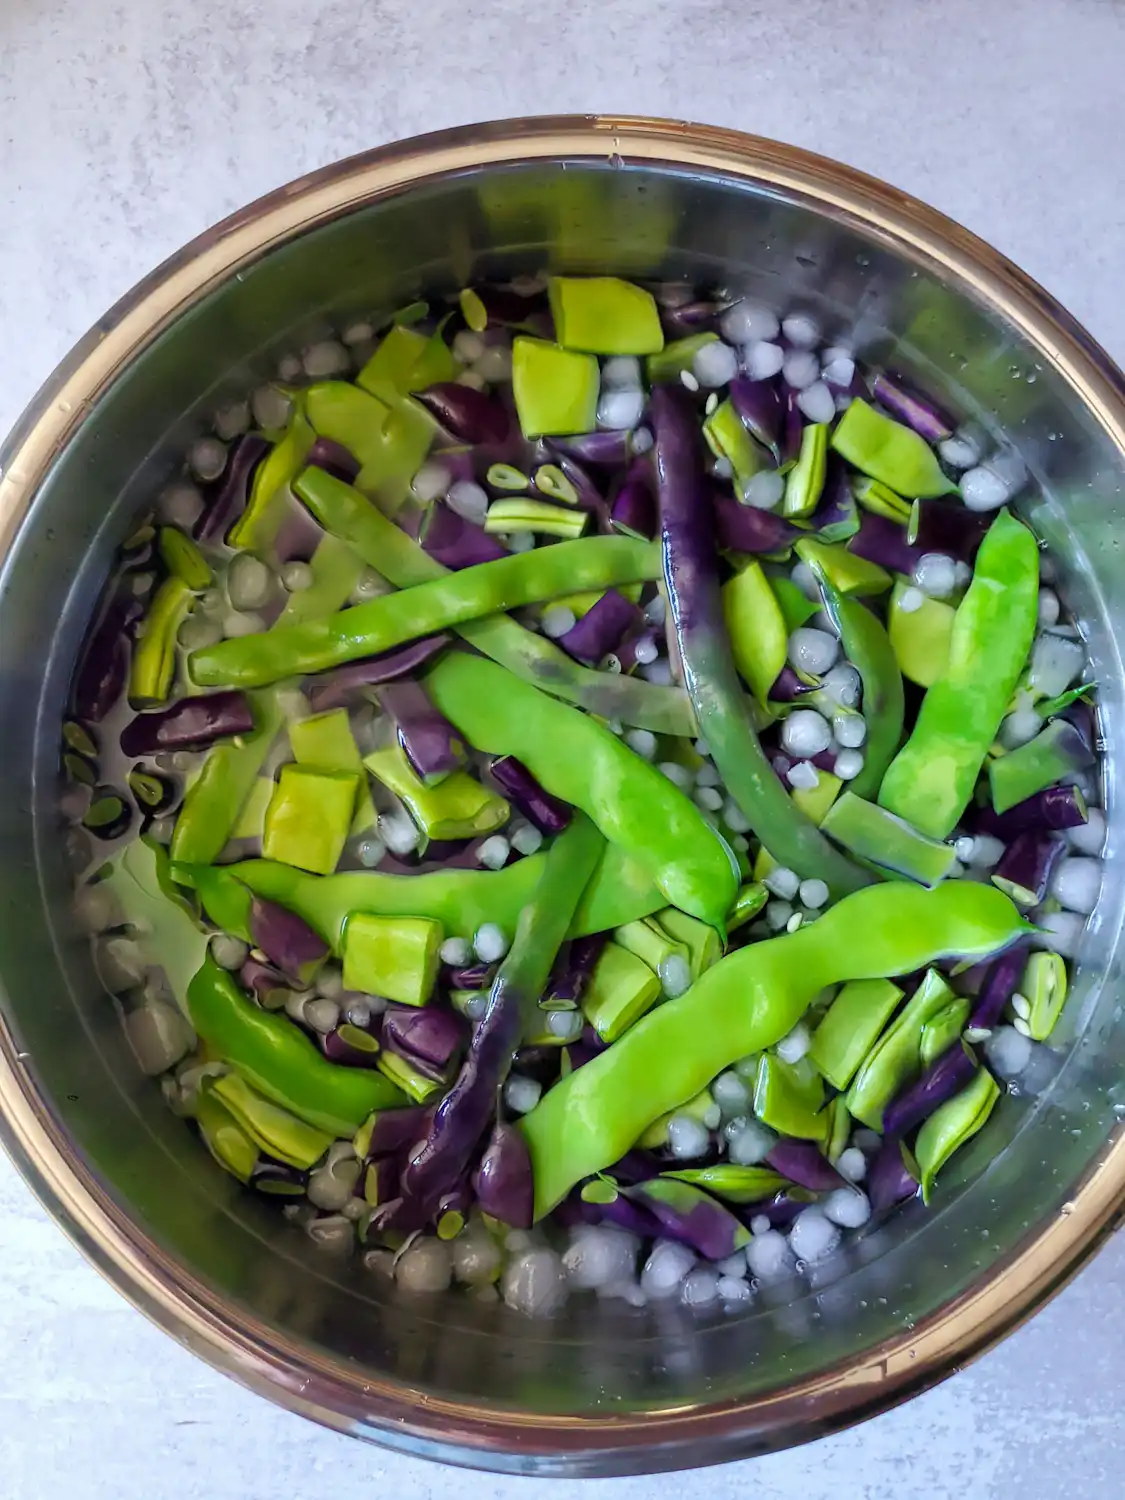
Step 3) Ice Bath
It’s important to quickly transfer blanched green beans to an ice bath to stop the cooking process. So, set up an ice bath (a large bowl of water and ice) and have it ready before you blanch the beans.
- Immediately after blanching, carefully transfer the green beans to the ice water. Use tongs or a wire skimmer to fish them out of the boiling water, or just lift and dump out the basket if using a steamer.
- Allow the green beans to soak and cool in the ice bath for 3 to 4 minutes.
- Add more ice between batches as needed to keep the water icy cold.
Step 4) Dry
Whether you’re freezing blanched or raw green beans, drying the beans as much as possible before freezing is key to retaining a decent texture!
- Transfer the green beans from the ice bath into a colander or strainer to drip dry, gently shaking to remove excess water.
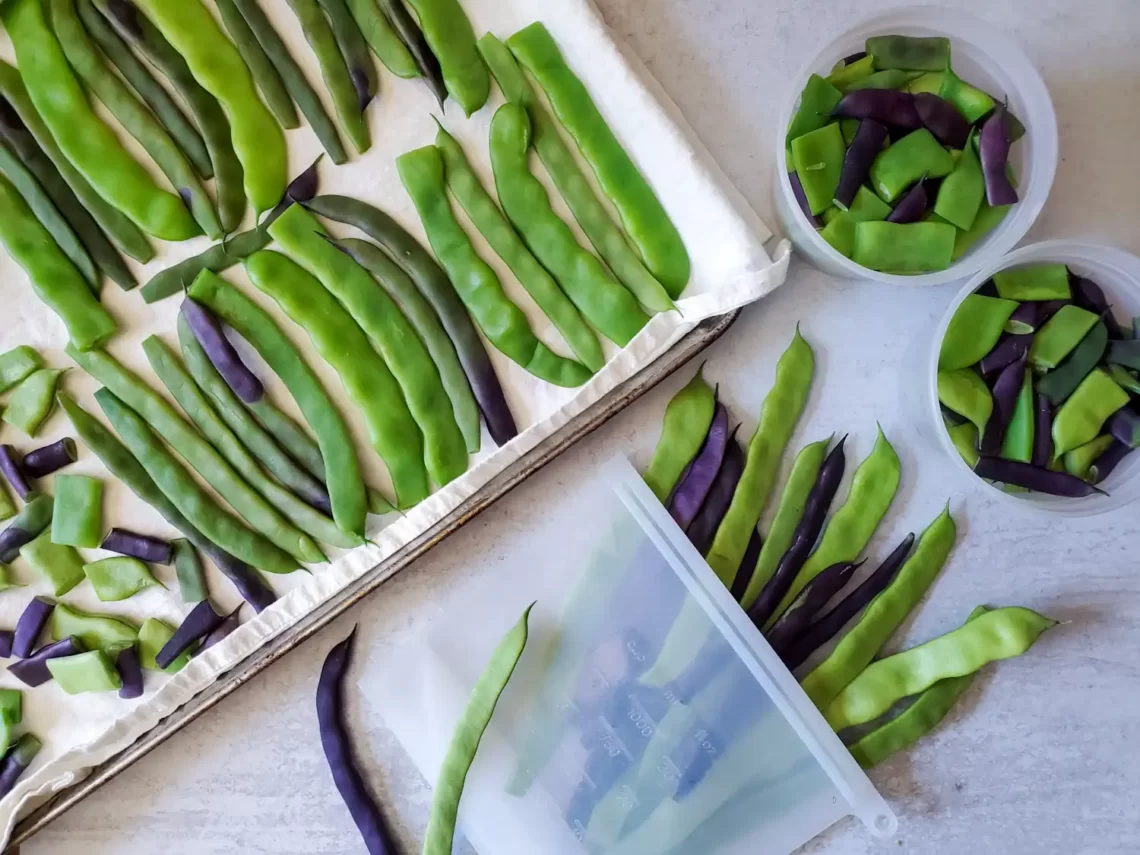
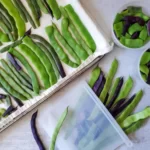
- Then lay them out in a single layer on a large baking sheet lined with a lint-free towel to air dry further. If you’re processing a lot of green beans, it may be necessary to use several towel-lined pans. Allow them to sit for 30 to 60 minutes until they’re decently dry.
- Turning on a fan nearby and/or patting dry with another towel can help expedite the drying process.
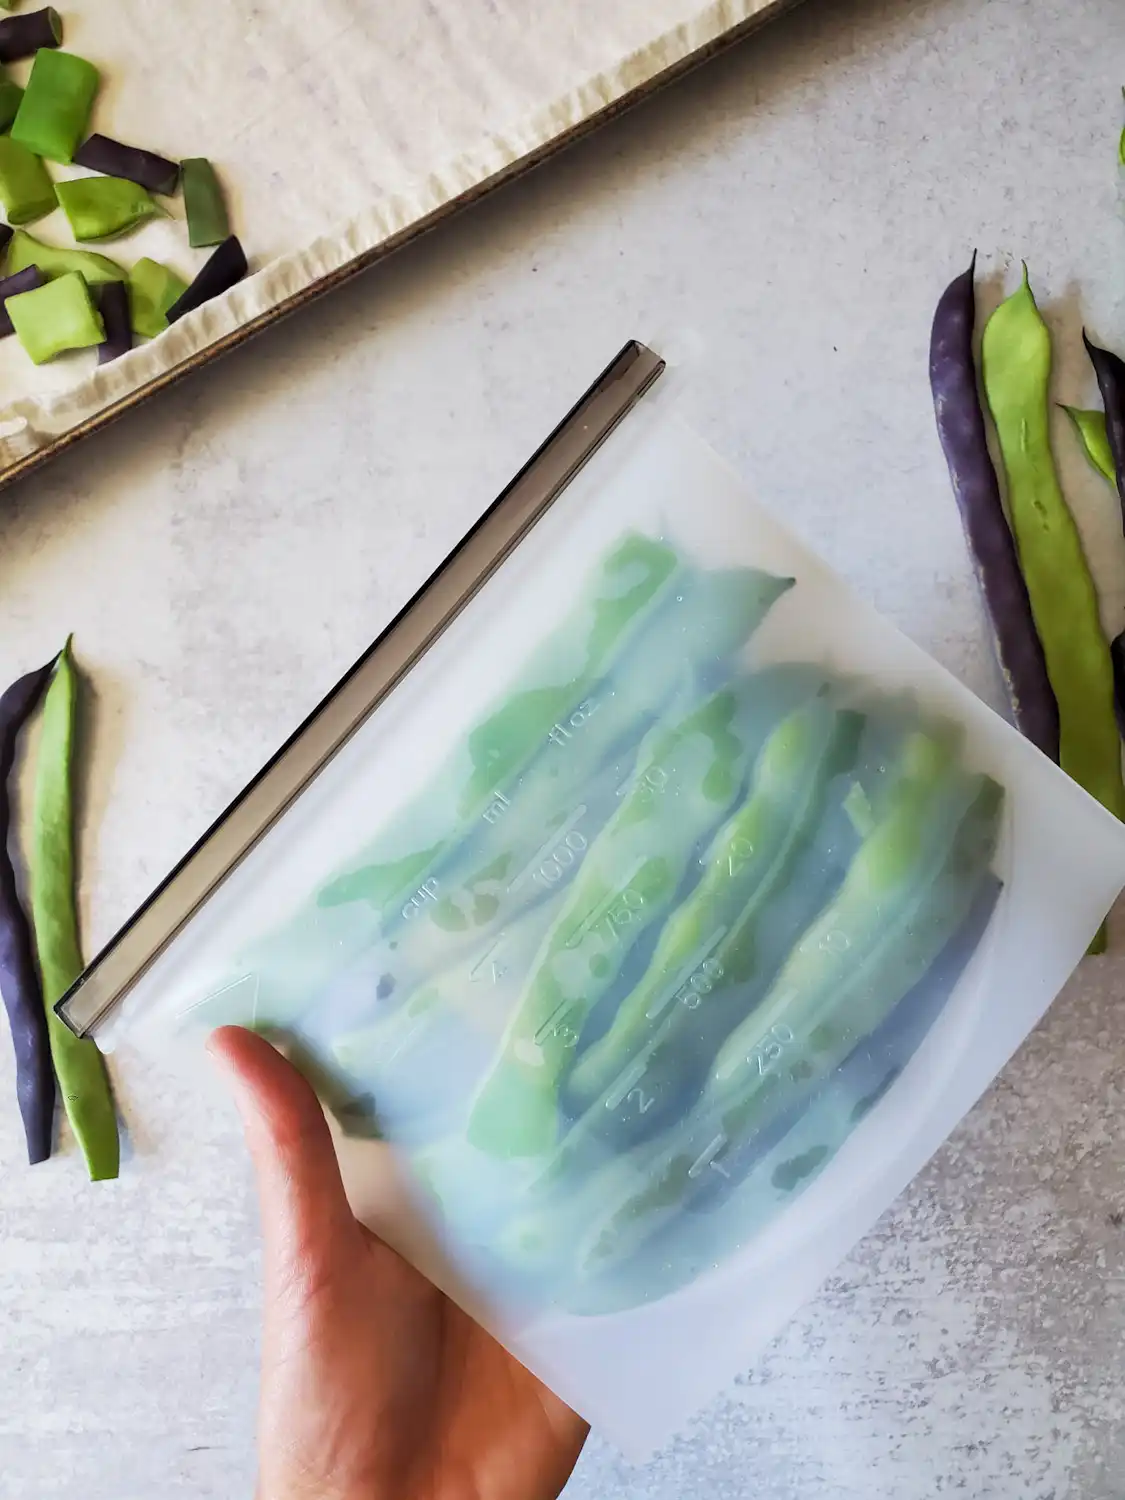
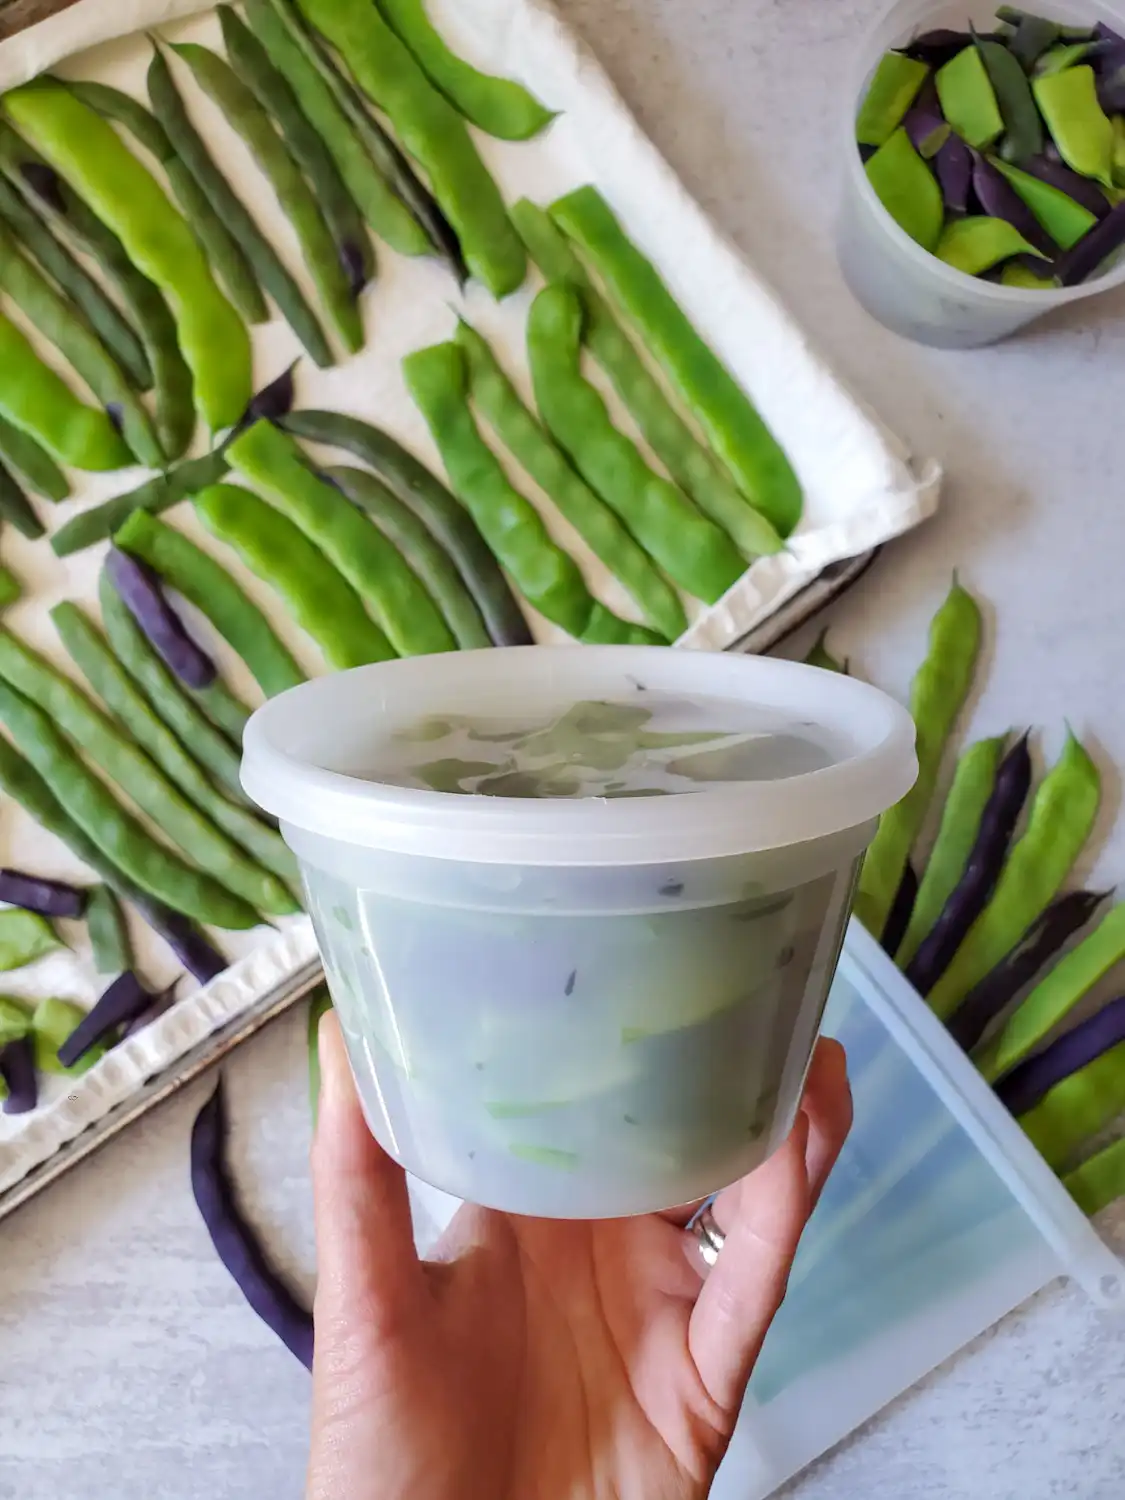
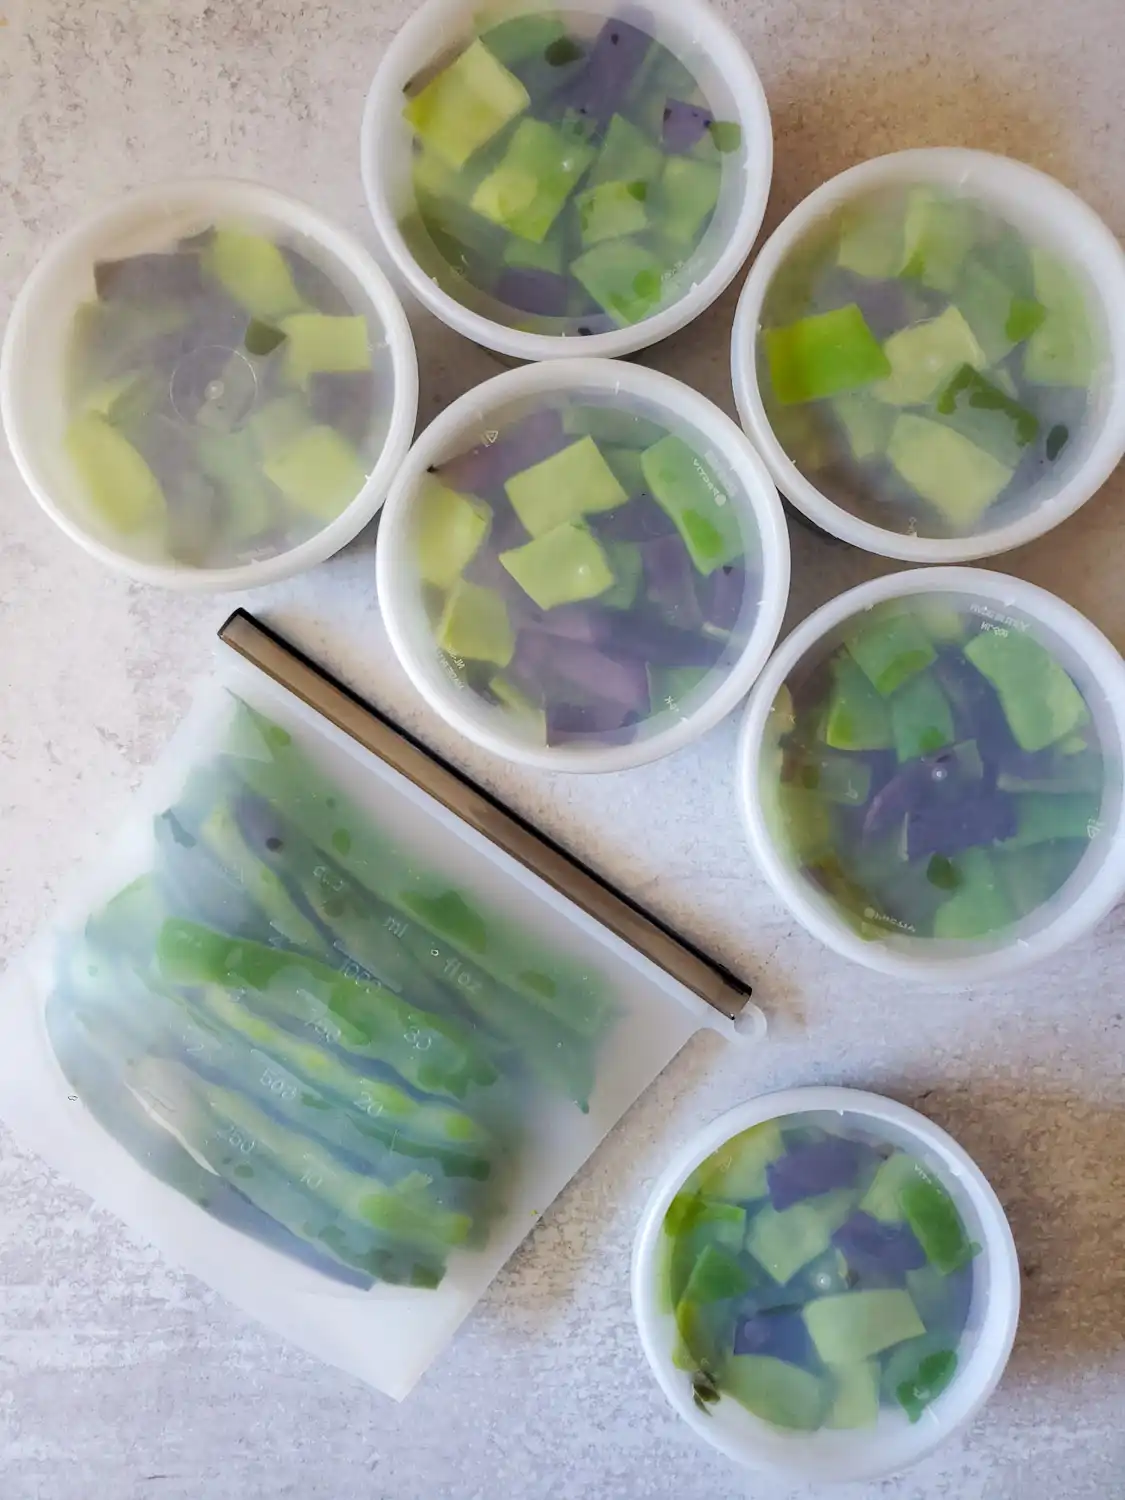
Step 5) How to store fresh green beans in the freezer: two ways
Now it’s time to pack the cooled dry green beans into freezer containers of choice.
Resealable freezer bags are one popular option, including ziplock bags or reusable silicone freezer bags like these. Pack the bags full, partially seal the bag, and then press down to remove as much air as possible while sealing it closed. Less air inside the container = less freezer burn!
Optional “flash freeze”: Before packing freezer bags, lay the beans out in a single layer on a baking tray, freeze the whole tray for a few hours, and then pack the beans into bags once frozen. Flash freezing prevents the beans from sticking together in one big clump. This can be helpful when freezing a large amount of beans together in one bag, making it easy to take out just a small portion to use when needed.
You can also freeze green beans in reusable freezer containers like these durable BPA-free pint containers, or this smaller half-pint option. Similar to bags, I pack them as full as possible (carefully stacking the beans in, not tossing them in willy-nilly) and then press down on the lid while sealing it, reducing the amount of air in the container as much as possible.
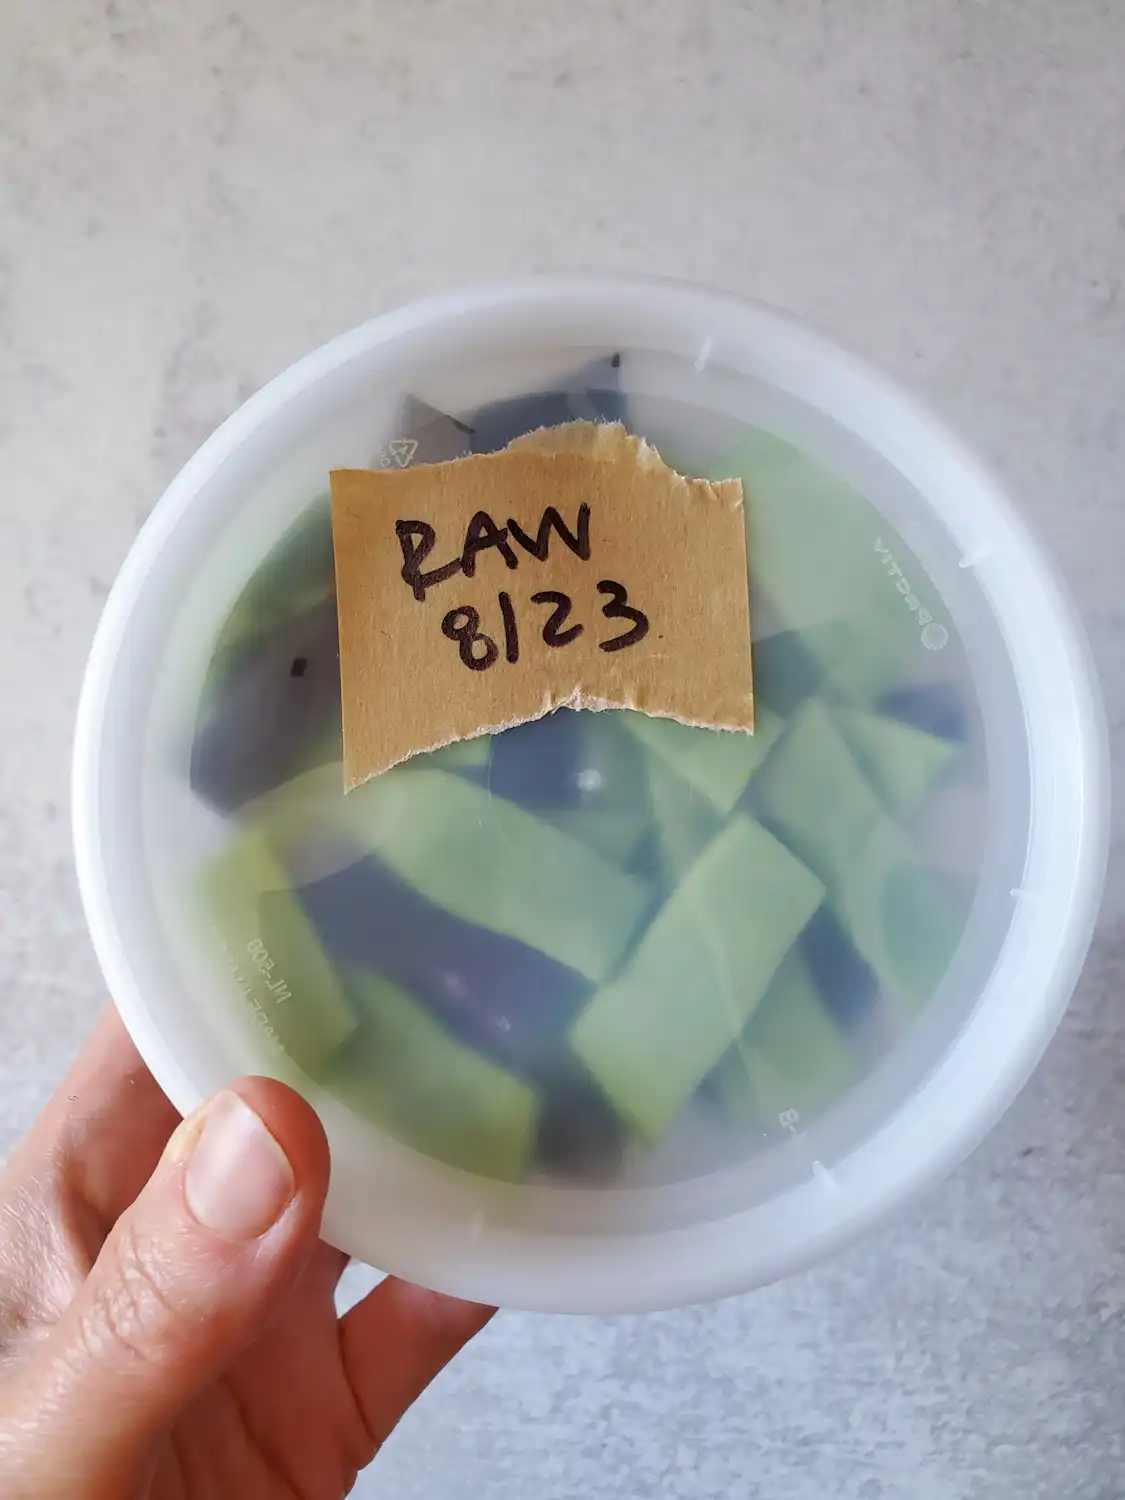
Finally, don’t forget to date and label your freezer containers.
How long do frozen green beans last (stay good)?
Frozen green beans will last in the freezer for up to a year, though quality (texture and flavor) decreases with time. Blanched green beans will be good for at least 8 to 10 months in the freezer, while unblanched green beans are best to use within 3 or 4 months.
How to cook and use frozen green beans
Frozen green beans, blanched or unblanched, will never be super crunchy like fresh green beans once were. That’s just the reality of frozen foods! The key to preventing mushy frozen green beans largely depends on how you cook them. In fact, you should hardly cook them at all! Especially blanched green beans, since they’ve already been “cooked” for a few minutes before freezing. The goal is to simply reheat them, but as briefly as possible.
Frozen green beans are perfect to toss straight into stir fry, casseroles, soups, stews, or enjoy on their own as a side. Frozen green beans can be used straight out of the freezer, so it’s not necessary to defrost them first! If desired, thaw them in the refrigerator overnight, or by soaking them (inside their freezer container) in a bowl of cool water.
To add frozen green beans to a dish (e.g. soup or stir fry), add them to the pot or pan at the very end, once the rest of the dish is essentially done cooking. To reheat green beans to enjoy on their own, I suggest quickly heating them in a skillet with a little butter or oil, salt, and pepper (or other seasonings of choice) – but not cooking them in water. For example, we love to add frozen green beans to homemade tomato basil soup, hearty lentil and kale soup, no-chicken noodle soup – or even into our vegan roasted sugar pie pumpkin 3-bean chili!
And that concludes this lesson.
Have you tried freezing green beans with or without blanching before? What way do you like best? I hope this tutorial helped answer your curiosities and questions about how to freeze green beans from the garden – plus plenty of tips on the best way to store and use them! Please let us know if you have any questions in the comments below. If you found this post useful, please consider leaving a review, star rating, or sharing this post!
You may also enjoy:
- Probiotic-Packed “Pickled” Fermented Dilly Green Beans
- How to Grow Bushels of Beans from Seed (Bush Beans & Pole Beans)
- How to Freeze Zucchini (Summer Squash) Two Ways
- How to Freeze Tomatoes (Defrost & Use)
- The “Besto Pesto”: Lemon Walnut Basil Pesto Recipe (freezer friendly)
- Preserving Onions: Oven-Roasted Onions for the Freezer
How to Freeze Green Beans – With or Without Blanching
Equipment
- Large pot or steamer pot (if blanching)
- Large bowl for ice bath (if blanching)
- Lint-free towels
- Freezer containers of choice
Ingredients
- fresh green beans
Instructions
Prep
- Wash the green beans, and trim off the woody stem end.
- Cut or snap into pieces, or leave whole.
- If you're NOT blanching, skip to drying and packing the freezer containers.
Blanching
- Bring a large pot of water with a pinch of salt to a rolling boil, OR use a pot with a steamer basket insert and lid.
- Once the water is boiling (or the pot is filled with steam), add the green beans. When steam blanching, don’t overfill the pot – leave some room to toss them.
- Cover the pot with a lid and set a timer right away. Don’t overcook them!
- Blanch green beans for 2 to 3 minutes maximum. If using a steamer, stop and toss the green beans with tongs halfway through to promote even cooking. When boiling, start counting once the water returns to a boil after adding the beans.
- If blanching several batches, return the pot to a boil/steam before processing the next batch.
Ice Bath
- Immediately after blanching, carefully transfer the green beans to the ice water. Use tongs or a wire skimmer to fish them out of the boiling water, or simply lift and dump out the basket if using a steamer.
- Allow the green beans to soak and cool in the ice bath for 3 to 4 minutes.
- Add more ice between batches as needed to keep the water icy cold.
Dry
- Transfer the green beans from the ice bath into a colander or strainer to drip dry, gently shaking to remove excess water.
- Then lay them out in a single layer on a large baking sheet lined with a lint-free towel to dry further. If you’re processing a lot of green beans, it may be necessary to use several towel-lined pans. Allow them to sit for 30 to 60 minutes until they’re decently dry.
- Turning on a fan nearby and/or patting dry with another towel can help expedite the drying process.
Pack & Freeze
- Pack cooled, dry green beans into freezer containers of choice – such as resealable freezer bags, reusable silicone bags, or other freezer-safe containers.
- Optional “flash freeze”: Before packing freezer bags, lay the beans out in a single layer on a baking tray, freeze the whole tray for a few hours, and then pack the beans into bags once frozen. Flash freezing prevents the beans from sticking together in one big clump.
- Try to pack the containers as full as possible, and press out as much air as possible when sealing. Less air inside = less freezer burn and fresher beans.
- Date and label your freezer containers.
- Frozen green beans will last in the freezer for up to a year, though quality (texture and flavor) decreases with time. Blanched green beans will be good for at least 8 to 10 months in the freezer, while unblanched green beans are best to use within 3 or 4 months.
Reheating and Using Frozen Green Beans
- Frozen green beans can be used straight from the freezer – no need to thaw or defrost first.
- For the best results and texture, try to reheat them quickly but cook for as little time possible.
- To add frozen green beans to a dish (e.g. soups or stir fry) add them at the very end, once the rest of the dish is almost finished cooking.
- To reheat green beans to enjoy on their own, quickly heat them in a skillet with a little butter or oil, salt, and pepper (or other seasonings of choice) – not by cooking them in water.


2 Comments
Christy
This is so helpful! I always regret not freezing green beans during the summer, but this year I will try! 😁🙏🏼🙌🏼
Aaron (Mr. DeannaCat)
Hi Christy, that’s great to hear and it’s a great way to save some of those big summer bean harvests for the colder months.