

How to Start a Homestead: 9 Must-Read Tips for New Homesteaders
Do you dream of homegrown, home-cooked meals? A more simple, healthy and sustainable lifestyle? A deeply gratifying connection to your property, plants, and animals? If so, it sounds like homesteading is right up your alley! But how do I start a homestead, you ask?
The idea of starting a homestead can definitely feel overwhelming. There is so much to consider; so many things to do! What steps do I take? What should I do first? Let me try to answer that complex question as best I can.
The short and sweet answer is: Just start. The longer (but still relatively vague) answer is: The steps you take to start a homestead will depend on your goals, and what you can do within your means. By “your means” I am referring to each persons unique property, budget, free time, skills, climate, town regulations, availability of local resources, and so on.
Unfortunately, I can’t provide an exact formula to start a homestead that will work for every budding homesteader. However, I hope this article will give you some good ideas to help set attainable goals, priorities, and most importantly: remind you that it doesn’t happen overnight! I will also share our experience of turning an average suburban home into a mini modern homestead, with tips we learned along the way. Be sure to check out our year-by-year project timeline (with before-and-after photos) at the end of the article!
But first…

What is a Homestead, or Homesteading?
There are many definitions and ideas of what a homestead is. In a historical context, a “homestead” was defined as a parcel of land (typically 160 acres) that was granted to any US citizen willing to move West to settle on and farm the land for at least five years, as part of the Homestead Act of 1862.
In more modern terms, the act of homesteading is used to describe an agrarian and largely self-sufficient lifestyle. Homesteading activities typically include growing and preserving food crops, cooking meals from scratch, raising animals, making homemade medicines, personal care products, perhaps even clothing, and an overall goal to “live off the land”. Homesteaders may also barter and trade for the things they cannot produce themselves.
Homesteaders come in many forms and styles these days. Some homesteaders have acres of land to play with (and maintain), while urban homesteaders are challenged and creative in smaller spaces. There are some hard-core, very traditional homesteaders that attempt to live a fully self-sufficient, zero-waste, off-grid, or near “prepper” status life. Then there are your hobby homesteaders, who are simply drawn to this lifestyle and enjoy it as a light-hearted escape from their usual 9-5 “real life”. All versions of homesteading are awesome and acceptable! I’d say we are somewhere in between.
Keeping that in mind, let’s see if we can help you better wrap your head around how to get started on your personal homesteading journey.
9 STEPS TO START A HOMESTEAD
Let’s talk about 9 steps or tips to start a homestead. However, keep in mind that they don’t necessarily need to all happen in this order, or even at all. Also many things, such as learning and getting crafty, are an ongoing process that will never stop – as long as you’re homesteading!
1) Evaluate Your Property
Every property will come with its unique strengths and challenges. When you first set out to start a homestead – what type of property are you working with? Do you already own land, or are you still on the hunt to find a slice of Earth to call your own? Are you currently in your forever home, or do you hope to move again someday soon?
Temporary vs Forever
While you will not want to invest a huge amount of money or energy into a rental or temporary space, don’t let it stop you from practicing at least some homesteading activities! For example, when we lived in rental accommodations, we still built a couple of raised garden beds. We also grew food in containers, and started composting. This small introduction enabled us to learn some basics of gardening before buying our first home. Just be sure to check with your landlord before doing anything too permanent.
We know this current property isn’t our forever home, but we certainly haven’t let that stop us from enjoying it to the fullest while we are here! Before we were able to have an extensive garden, we stocked up on seasonal produce at local farmers markets to practice various food preservation techniques. You can also learn to sew, craft, brew kombucha, or make homemade sourdough – no matter your living situation!

Size, Restrictions, & Layout
Now, think about the property size. A modestly-sized property will be more manageable in regards to maintenance, but may also limit the activities you can do on it – such as what types of animals you can raise. Goats, cows, or pigs would not be happy in our 1/5 acre town lot. Nor could we legally keep them! Be sure to familiarize yourself with your town regulations regarding livestock, poultry, bee-keeping, or even things like having a farm stand or collecting rainwater if those are things you’re interested in doing.
Now, assuming you do have some property to work with… it’s time to make the most of it! Before diving into any permanent projects, be sure to take time to sit back and observe first. For example, you should evaluate an area’s sun exposure and source of shade before installing a veggie garden. Also keep in mind how the sun’s path will change with the seasons.
Spend time wandering about in your space. How do you want it to eventually look, feel, and function? While nothing needs to be set in stone now, try to dream up your optimal layout – which should be convenient and functional.
A great example of a thoughtful and purposeful layout is through permaculture design, as shown below. You won’t want your farm animals directly next to the house. They may be stinky or noisy! Yet you don’t want them so far away that it becomes a trek to go visit and care for them, especially if you live in an area with cold winters. Something you will visit frequently, such as a kitchen herb garden, would be ideal just outside the front or back door. Keep your compost area fairly accessible, but not outside your bedroom or kitchen window. I think you get the idea!

2) Make a List of Projects & Ideas
If you’re dreaming to start a homestead, two types of thoughts are likely going through your head. 1) You’re fantasizing about all of the wonderful, healthy, uber-rewarding things that this new lifestyle will bring you. And it will! I promise. But 2) You are also fretting over all the skills, tools, money, time, or other resources you may not have to make all of those dreams come true right now. Here is the deal: pretty much no one does. Not right at first, and not all at once!
Remember that creating a homestead is a process, and this is just the start.
Before you read my example idea list below, please know that it is NOT intended to add to the feeling of overwhelm! Yet for me, it feels good (great, actually!) to get all of the ideas swimming around in my head OUT and down on paper. I find it easier to focus, and then narrow down or prioritize what is next, which is exactly what you’ll have to do.
Example Homesteading Projects & Goals
- Create a veggie garden space
- Plant an herb garden
- Plant fruit trees or an orchard
- Start a compost area, worm bin, compost tumbler (or all of the above)
- Create a pollinator bed, area, or even a meadow full of flowers
- Learn how to ferment, can, dehydrate and/or pickle your harvests
- Adopt chickens, goats, sheep, rabbits, pigs, cows, or other “farm animals”
- Build a barn, stables, or other auxiliary structures
- Create a root cellar or large pantry
- Learn how to make kombucha, homemade sourdough, apple cider vinegar, homemade seasonings, vegetable (or bone) broth, and other useful staples
- Learn how to make natural medicine like Fire Cider and Elderberry Syrup, or personal care products like calendula oil, soap, lotions.
- Start a beehive
- Learn how to sew, knit, crochet, or use natural dyes
- Turn your property in to a Certified Wildlife Habitat
- Build or install a greenhouse or hoop house
- Set up a rainwater collection system system
- Learn how to make compost tea
- Start a farm stand
- Sell homemade goods locally or online
- Host workshops, classes, or homestays to share your knowledge and skills with others
SO many great ideas, right?!
While great to have dreams and goals, let’s take a step back first.

3) Prioritize
Now take just one or two manageable projects at a time, and forget everything else on the list for a while. It is 100% unrealistic (and 7000% stressful) to try and do everything at once, within a year, or even within a couple of years! That is, unless you are diving in to start a homestead full-time with unlimited resources and help.
Where to begin? Well, your priorities are personal. This journey to start a homestead is all about what you want to do, and when you want to do it. There are no rules!
Will this simply be a hobby homestead, or do you intend to make a living from your land? That will obviously influence how seriously or quickly you approach projects, and which ones to focus on first. For example, do you hope to sell eggs locally? Then building a secure chicken coop and establishing a flock will be at the top of your list.
Certain homestead projects will dictate the order or timeline for others. For instance, you shouldn’t set up a beehive until you have a healthy pollinator garden, orchard, or other nectar and pollen-producing plants established first.
Circumstance will also drive your priorities. Like: “Oh crap, the irrigation line broke! I guess it is time to brush up on our plumbing skills…” Or that moment when your kitchen counter is overflowing with homegrown tomatoes, but you’ve never preserved tomatoes before. Evidently, the time to dive in and learn is now!

My Recommendations
If I had to recommend three homestead projects to focus on first, they would be: create a small vegetable garden, plant trees, and think about irrigation. Edible and/or ornamental trees are a quintessential part of a productive homestead, but they can take a long time to grow! The sooner you get trees planted, the sooner they’ll mature to provide food, shade, and privacy. The trees and garden space will both need water, so establishing a functional irrigation plan is also key!
The next step I highly encourage is to start composting, even on a small scale. The goal of starting a homestead is to be self-sufficient and sustainable, and compost pretty much screams both of those things. Close the loop and up-cycle kitchen scraps or garden trimmings into free rich organic fertilizer. Homemade compost (aka “black gold”) is invaluable and will significantly boost the fertility of your garden! Soil health is everything. Check out this Compost 101 article to learn about 6 different ways you can compost at home, or learn how to create and maintain simple worm compost bin here.


4) Never Stop Learning
Now that you have your priorities straight, it is time to do a bit of research on the task at hand! Personally, I feel that anything worth doing is worth doing right. I’m not saying to overthink every tiny detail or fret over every little what-if; there is definitely something to be said about enjoying the process of “learning by doing”! Yet it is a great idea to become at least somewhat familiar with the ideas that you’d like to implement before diving in.
Let’s also be clear about this: mistakes WILL be made! It is normal and expected. Plus you’ll learn and grow from them! On the other hand, if you educate yourself on a skill or task first, you may nip a few mistakes in the bud – and prevent potential wasted time, resources, and heartache.
Where to Learn How to Homestead
One of the most common questions I get asked is “where did you learn all this stuff?” The answer is: All over the place! Wherever I can! I’ll admit that I gained a slight head start in college by choosing to focus on environmental studies and sustainability, but SO much more of what I’ve learned about homesteading came after that.
Pick up a few good books on subjects of your interest, such as urban homesteading, gardening, raising chickens, bee keeping, herbal medicine, or compost. Cold winter months are an especially great time to read, soak in new knowledge, and plan. Check out some resources that helped us start a homestead below, and a full favorite book list here – including recipe books and more!
Instagram is a great place to find photos for inspiration, and also connect with other modern homesteaders to share experiences and learn. I truly love being a part of that community. (Come find me @deannacat3 if you haven’t already!) Seek out other relevant websites, forums, or simply Google questions as they arise. Are you more of a visual person? Me too. I can’t tell you how many how-to YouTube videos we’ve watched and acquired skills from.
Even better, get up close and personal! Look into local organizations that may offer tours, workshops, or classes. For instance, our local Farm Supply Company routinely hosts free workshops on various incredibly useful topics. We have attended talks about how to plant and prune fruit trees, the basics of keeping chickens, safely canning food, and more. I know our local Master Gardeners chapter does the same.
Last but not least, I’m here to help the best I can! Here are a handful of our foundation 101 articles that may be useful as you start your homestead:
- How to Design & Build a Raised Garden Bed
- How to Fill a Raised Garden Bed: Build the Perfect Organic Soil
- Choosing the Best Fruit or Ornamental Tree for Your Garden: Climate, Varieties, & More
- How to Plant a Tree: Best Practices
- How to Start a Garden 101
- 7 Best Easy Annual Flowers to Grow from Seed
- Seed Starting 101: How to Sow Seeds Indoors
- What to Expect When You’re Expecting: Backyard Chickens 101
- A Beginner’s Guide to Using a Hobby Greenhouse
- Rainwater Collection Systems 101 & FAQs

5) Start Small
As you may likely imagine, maintaining a bustling, productive, full-blown homestead can take up a lot of your time! Truth be told, we don’t have much of a social life outside of our home and day jobs these days – but we’re perfectly okay with that! It is by choice, and we don’t view it as a sacrifice. But you need to ask yourself: How much free time do you have, or are you willing to dedicate to your homestead, garden, or animals?
Time commitment aside, starting small will enable you to enjoy the process and give each project your full attention. Personally, I’d much rather take my time on something and feel like I “nailed it!” than half-ass five things at once. Or even worse, start things and never finish them at all.
For instance, I recommended starting a vegetable garden as an early homesteading priority. However, that doesn’t mean I suggest building and installing 15 raised beds all at once! Start a small manageable garden area, especially if gardening is new to you – and leave room to expand later. You’ll continue to learn as you go, and also get a better idea of what you can realistically keep up with.
What if there is an issue you didn’t anticipate? Such as a problem with the soil you used to fill garden beds, or gophers coming from below and eating your crops? Or, if you change your mind about the style or method of a project? It is SO much easier to make adjustments or even completely re-do a smaller space than if you went overboard in your initial pursuit. See what I mean in the photos below.
The idea of “start small” applies to all types of homesteading activities and projects. Maybe consider planting your first garden with nursery seedlings rather than growing everything from seed, or at least a portion of it. Adopt and learn how to raise a handful of chicks, rather than starting your first flock with 20. Master the art of one food preservation skill before tackling them all.


6) Get Comfortable in the Kitchen
As your homestead (and plants!) begin to grow, you’ll need to know your way around the kitchen. Preparing meals with fresh homegrown food is the bees knees, and one of the key components of homesteading! If you aren’t already a “natural” in the kitchen – don’t worry! Dig in and have fun. While I totally embrace following recipes at times, don’t let them restrict you either.
Improvise. Experiment. Work with what you’ve got. Make a meal your own!
In addition to playing with all that fresh homegrown food, there are times that homesteading outright demands your time in the kitchen – to preserve the excess bounty! When your garden looks like it is ready to burst at the seams with veggies, you’ll want to find ways to preserve it. If I had to estimate, I’d say that we eat 65-70% of our homegrown produce fresh, preserve 25%, and the remaining 5-10% is split between the chickens and compost pile – but nothing goes to waste!
“Putting up” your bounty is an excellent way to reap your rewards into the winter, or enjoy something later when it’s no longer in season. Preserving food also enables you to enjoy your homegrown goodies in a different way, such as a seasoning or condiment, which keeps things interesting and palatable!
There are many methods to preserve homegrown food, including: fermentation, dehydration, freezing, canning, vinegar pickling, or even extending shelf life via simple cold storage. We rely on the first three listed the most.
Our Top Homestead Preservation Recipes:
- Simple Roasted Tomato Sauce (freeze or can)
- The Besto Pesto: Lemon Walnut Parmesan Basil Pesto (freeze)
- Allllll the dried seasonings, such as homemade garlic powder, onion powder, chili powder, turmeric powder, and lemon peel powder (dehydrate)
- Super Green Sauerkraut (fermented)
- Various veggie “pickles” like dilly green beans, radishes, carrots, and beets (fermented)
- Apple Cider Vinegar (fermented)
- Sweet & Spicy Pepper Sauce (fermented)
- Low Sugar Peach Jam without pectin (can or freeze)

7) Adding “Farm” Animals to Your Homestead
Not all homesteaders raise animals, but it is more common than not. Ducks, goats, cows, sheep, chickens, rabbits, pigs, quail, llama… the list goes on. Animals can serve many purposes – beyond being raised to eat!
We are vegetarian, so I won’t be able to teach you much about raising animals for meat. Our chicken’s eggs provide us with a nutritious and organic source of home-raised protein. However, we see our chickens as beloved pets and friends first and foremost. We’d also love to raise goats for milk and cheese one day, but only when we have enough time and space – which definitely isn’t now! Other vegetarian homesteaders keep rabbits as companions. Plus, bunny poo is a wonderfully rich but mild natural fertilizer.

More than a few things to consider with animals…
If you are interested in adding animals to your new homestead, I beg you to do your research first. Above and beyond any other homestead project, it is your responsibility to thoroughly educate and prepare yourself to care for your animals. Make sure you know what you’re getting into, and that you can make the commitments required to provide them a safe and comfortable life. Each type of farm animal has unique needs, but they also each have a lot in common.
Providing secure, clean, and predator-proof housing should be a top priority. This is true no matter if you’re living in the country or an urban setting, and particularly important for small and vulnerable animals like chickens. I can’t tell you how many people have contacted me completely heartbroken and shocked after a “predator incident” with their chicken flock. The worst part is, 99% of the cases were preventable with better predator-proofing.
Other things to consider are: the animal’s dietary needs, daily or weekly care routines, waste management (read: poop), local regulations, and ranging space required. Also, do you have a plan for when you go away on vacation? Is there a local specialty veterinarian to call on when they get sick? Are you comfortable jumping in to help during emergencies?
I don’t mean to dissuade you from bringing home some farm animals! Just be prepared, please.

Interested in raising backyard chickens? These resources may help!
- What to Expect When You’re Expecting: Backyard Chickens 101
- Baby Chick Care 101: Information on Brooders, Daily Care, Disease, & More
- The Top 18 Chicken Breeds for Your Backyard Flock
8) Get Crafty & Thrifty
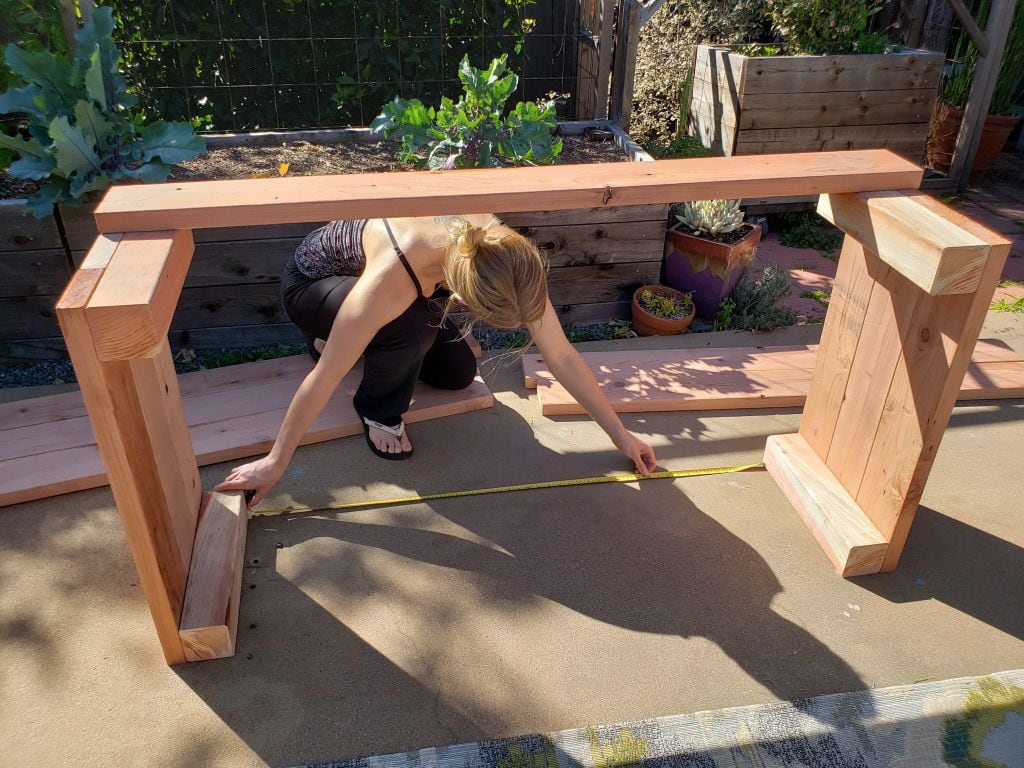
The journey to start a homestead may push you out of your comfort zone in many ways – which is one of the things I love about it most! Don’t be afraid to get crafty, creative, and build things you never have before. DIY projects can help you save money, add character to your homestead, and are always an excellent learning experience – frustrations and all!
Trust me, when we first started our homesteading journey, I did not consider either of us handy… at all. Sure, I always liked to sew or do crafts, but actually building things? Nada experience. We even attempted to build our very first raised garden bed using a hammer and nails instead of screws and a drill. It was 1000 times more laborious and far less sturdy than our future garden beds. Lesson learned!
Saving Money on Homestead Projects
The cost of projects is often a big concern for new homesteaders. Thinking outside the box can definitely make things more affordable. Be an opportunist. Seek out used or discounted materials, equipment, or tools online, on Craigslist, Nextdoor, at thrift stores, or local yard sales. Many of our ceramic garden pots, harvest baskets, mason jars, and other kitchen goodies are thrifted.
Another awesome way to save money (and be sustainable!) as you start your homestead is to up-cycle things you already have. Our chicken coop is made of about 70% up-cycled wood that we found in the rafters of our garage when we moved in. It was the first “structure” I ever designed and built!
There is one caveat here. Sometimes it is worth buying the “right” materials for the job rather than sacrificing durability or quality by using something cheap. For instance, it may be really inexpensive to build a raised garden bed with used fence boards or pallets from Craigslist… but how long will it last? Or, is that wood potentially pressure-treated and toxic? Having to replace garden beds in a few years (as opposed to the decade-or-longer lifespan of cedar or heart redwood raised beds) may actually cost you in the long run. Similarly, be smart and recognize when it is worth hiring a professional contractor to help with high-risk jobs.


9) Have Fun
Last but not least, my final bit of sage advice to instill in you is this: don’t forget to enjoy the process. Isn’t the whole idea to start a homestead and leave some of the “real life” stress behind, slow down, and stop to smell the roses?! Remember that Rome wasn’t built in a day, and nor will your new homestead be.
When you see the timeline of how we transformed our home into a homestead below, you’ll notice that we focused on just a couple projects per year. I personally loved spacing it out. Not only was that the only realistic way for us to approach it, but it kept me excited and busy – for years! Taking your time means you always have something to look forward to and plan. Honestly? It is far less exciting now that all of the big projects are mostly done.
While you’re busy planning where the gardens, chickens, bees, and trees will go, don’t forget to create space for yourself too! Add places to relax around your homestead, such as outdoor benches, tables, or a fire pit. Create interest and a touch of whimsy with garden art, sculptures, or other things that bring you joy. Make the space inviting after dark with the addition of solar lights. Take time out to pat yourself on the back and admire your hard work.

Our Journey to Start a Homestead
People are always quite curious about how we turned our very average, fairly barren .19 acre beach town lot into a thriving mini-farm. The answer is: with hard work, patience, and love!
To be honest, I don’t think we ever said “let’s start a homestead”. It simply started with two garden beds and a chicken coop, and naturally continued to grow and evolve from there. We fell in love with the process of planning and working on outdoor projects together, and simply kept going until we ran out of space and projects to do. We’ve also put almost all of our energy into the outside of our home rather than inside – which definitely needs some major love too!

How we prioritized & budgeted for projects
It became a routine to tackle two “big projects” per year, usually about 6 months apart. That is just what worked well for us! You might not be surprised to hear that my mind never stops going, and neither of us like to sit still much. Our mild climate also allows us to work outside year-round. The bulk of the work was done from 2014 to 2018.
I’m sure you may be wondering about budgeting, so here is the scoop: First of all, we don’t spend much money outside the home except for bills and necessities. I am not a big shopper. We don’t go out to eat, go to the movies or other spendy activities, and travel very rarely. Additionally, we have done everything DIY – except for replacing the roof. Remember, know when it’s best to call in the pros!
Even so, we usually could not afford to save up several thousand dollars at once for a big garden project. But then we found out about the Home Depot consumer credit card and its special promotions. Not to encourage anyone to go into debt! But I want to be honest, and it did help us achieve our goals. When you spend a certain amount on the card at once (usually $500, 1000, 2000, etc) you can qualify for a corresponding interest-free period (either 6, 12, 18, or 24 months, depending on how much was spent). Then we’d pay off that project within the interest-free time frame BEFORE starting the next one. We knew we had the means and diligence to do this.
Our transformation & project timeline
Prior to 2013, we lived in rental accommodations and only casually gardened with a couple raised beds and a handful of started nursery seedlings. We also learned some basic dehydrating and canning skills, read books, and dreamed of the future.
2013
- Purchased this home
- Brought two old raised garden bed frames (and bagged up the soil!) from our rental house. We put the beds in the backyard but knew we’d re-work the space later (the future “coop garden” area)
- Planted a few trees and pollinator-friendly perennials
- Started a new worm compost bin
2014
- Built the chicken coop and run, and got our first flock of chicks
- Started making fermented foods (simple cabbage kraut and carrots)
- Got a compost tumbler

2015
- Put two new raised beds in the front yard, but without properly preparing the space first. The weeds quickly took over the beds (Spring)
- Re-did the raised beds in the front yard, removed the weedy grass from one half of the yard and replaced it with gravel, and added the trellis wall along the north end of the front yard. (Fall, as shown in the “Start Small” section above.)
- Began brewing kombucha
- Started growing more from seed, started some seeds indoors
- Planted more trees
2016
- Created the “Patio Garden“: Installed raised beds and trellises around the outer perimeter of the concrete patio in the backyard, as a way to grow more food and also block the free-ranging chickens off from the patio itself. (Spring)
- Renovated the side yard, added the greenhouse, and transitioned to growing 99% of our garden from seed (Fall, shown above)
- Built our larger compost pile area
- Installed our first small rainwater collection system

2017
- Backyard “Coop Garden” renovation: Removed the two old raised beds we brought from the rental house, built taller and larger beds in a more south-facing orientation with improved chicken-proof fencing (Spring)
- Phase 2 of the front yard garden renovations: Removed the remaining grass from second half of the front yard, changed all remaining lawn sprinklers to drip, and landscaped the area with cobblestone-bordered “pollinator islands” full of perennials and herbs (Fall)
- Purchased our first large 530-gallon rainwater storage tank
- Planted more trees


2018
- Removed the last of the backyard “grass” between the patio and coop garden areas (which the chickens had basically decimated anyways), built a large oval stone raised bed and filled it with flowering perennials and herbs (Spring)
- Removed a portion of the asphalt driveway and a big corner of useless ice plant, expanded the front yard garden, terraced the new area, and built a new front fence. The last real big transformation project left to do! (Fall)
- Learned how to make sourdough
- Started raising monarch butterflies
- Became a Certified Wildlife Habitat and Monarch Way Station
- Installed the 2nd large 530-gallon rainwater storage tank
- Planted more trees


2019
Started this blog to share our experiences with you all!
2020
Began dreaming of our next property with more space.
Yup. Despite all of this work, we do want to move on to start a new homestead one day in the next few years! I envision space for a pollinator meadow, an orchard, bee hives, bunnies, a studio with space for classes or workshops, and perhaps even a yurt for you all to come and visit.
And that is how you start a homestead!
Welcome to the start of your homestead life; one that will keep you busy, active, healthy, and both mentally and physically connected to your home. I hope our experiences and this article were insightful, and provided you with both information and peace of mind as you go forward to start a homestead of your own.
Please feel free to ask questions, share your homesteading experience with us, and spread the love by sharing this article – or Pin it below! I plan to write individual articles on each of the major projects we’ve completed, so stay tuned.
Now it is time to go turn on some music, dance, sweat, laugh, cry, brainstorm, maybe even bleed a little, and enjoy your newfound hobby and love. Don’t forget to relax in your space and keep the “chill” in Homestead and Chill.


42 Comments
George
I love all the info. but the most inspiring to me is your aesthetics. I love the raised beds and gravel pathways to keep things organized but with all the plants spilling out it keeps it wild looking. It’s a very nice feel and vibe.
Thanks for being on the planet.
Andy Calasco
Re: homesteading in rental properties: I’m a lawyer, and in states like mine (Texas), landlord/tenant laws and lease terms often allow tenants who make permanent improvements to the rental property to DEDUCT THE COST OF THE IMPROVEMENTS FROM THEIR RENT! You’ll likely need your landlord’s advance agreement (and just for common courtesy), but your raised beds or small greenhouse will increase the value of your landlord’s property, so it’s a win-win in most cases and usually easy to get them to agree.
Clàudia
Hi there! Congrats on everything you’re doing! It’s awesome and super inspiring!
I have a question about the soil in raised beds.
I have rented a small plot and next to it there’s a place where the City Council leaves all the leftovers from trimming all around the city, they leave it there on piles and they eventually become huge piles of vegetable compost. I was wondering if I can fill my raised beds with this compost plus the volcanic stones you suggest in your post. Would that be rich enough? Do I really need to mix potting soil and such? I’ve seen in your post that you only apply 40% of compost and I don’t know if it’s because you have it less available or because it’s not advisable to put more quantity.
Thank you very much!
Clàudia
Aaron (Mr. DeannaCat)
Hello Claudia! Compost alone even with an aeration additive such as volcanic rock would not be advisable to plant in. Compost will not retain water as well as it would when combined with soil. The city green waste can be tricky, many people may throw diseased plants into their green waste which ends up in the compost. It is also best to use fully “finished” compost which usually needs to reach a certain temperature to fully break down and kill pathogens. Hope that helps and good luck!
Delia Ryder
I love your list of projects & ideas – I’m going to put those to very good use!! Thank you tons!
I’d also love to grab more information on starting a beehive! Any beginner tips?
Aaron (Mr. DeannaCat)
Hello Delia, glad you’ve found the information useful. Unfortunately, our current property resides within the city limits and having bees is against city code. We do wish to one day be able to have bees but that will have to wait for now. Thanks for reading and good luck!
Julia Johnson
I’m so excited to start our homestead! My biggest struggle has been finding a space we like big enough for cows as well as chickens – but I think we have some ideas in mind. Thank you for all the great info!
Seth
Starting a homestead has been a dream of my partner and I over the past few years. To rely on the land and become self-sufficient. We have always felt most like our true selves when in nature and caring for soil. Although outside of raising chickens, and tending to vegetable gardens, we don’t have much experience. This article has been truly helpful and inspiring.
Do you plan to move to a bigger property in the future to expand your homestead?
Aaron (Mr. DeannaCat)
Hello Seth, glad to hear you and your partner have found your passion in life! We do plan to one day move to a bigger property since we have outgrown this one. Thanks for reading and good luck in the future!
Bryan
It’s good to get started early! My wife and I have bounced around the idea for years, but now that we have our 2nd kid on the way, we really want to give them a life away from all the noise of the city.
It’s hard not to feel a little lost, but stories like this inspire me to keep going. Good luck to the both of you.
jeremy
Out of curiosity, what direction is your house facing?
I’m about to build some garden beds and knowing what direction some of your beds, trellis’, etc are facing help.
Thanks ahead of time.
PS. Looks amazing!
Aaron (Mr. DeannaCat)
Hello Jeremy, most of our garden is “south facing”. We go a little more in depth on garden specifics such as proper location, style, protection etc. in this article; How To Start A Garden: 101 which you may find useful. Hope that answers your question and feel free to reach out if you still have questions. Thanks for reading and good luck!
Gail
Thank you for sharing. Both of my grandmother’s and my great grandmother tried to teach me these skills as a child. My maternal grandmother kept a garden and compost pile at all times. She jarred and canned what we didn’t eat (she lived with us). She taught me how to fish and I remember catching, killing and cleaning fish right at the campground. There is no better flavor than fish caught and eaten in the same hour. My paternal grandmother quilted and sewed expertly. My maternal great grandmother was a hermit who lived in a trailer in the wilderness. She raised farm animals and every year we would help her slaughter some of her animals in exchange for some of the meat. I only paid casual attention to these lessons. Now, nearly 40 years later I am trying to learn/remember what they wanted to teach me. I started my 1st vegetable garden this year. I live in an urban environment and I am thinking I will pull out the grass in my front yard to grow food. Your article has helped to inspire me and I look forward to reading more from you. I am excited by the challenge.
dc
This has to be one of my favorite of your posts. Love the pictures and the inspiring story! My husband and I are just starting our journey, and we’re super excited!
Thank you so much, Deanna!
dc (and Dave)
Kerrie
Thank you for this post! super inspiring and helpful!
Thank you for being so thorough.
Kerrie