


How to Build a Raised Garden Bed: Step-by-Step Guide
So you want to build a raised garden bed? Right on! Raised beds, also known as planter boxes, are a great choice for growing food at home! They’re a fun, useful, healthy, and beautiful addition to any yard. But maybe you are feeling a bit overwhelmed by the process and decisions that need to be made? This article will definitely get you going on the right track! Coming from someone who has built over 40 raised garden beds over the years, I most certainly have some tips and tricks for you, including ways to learn from our mistakes.
From location and design considerations, wood types, supplies needed, and installation best practices, let’s explore everything you need to know about getting started with raised bed gardening. Follow the 10 steps below to learn exactly how to design and build a raised garden bed.
For all you visual learners, be sure to watch the tutorial video included at the end. Jump straight to the video here. Then, be sure to check out how we installed drip irrigation to all our newest raised garden beds in this post! We added irrigation risers inside every bed before filling them with soil, so it’s helpful to plan in advance.
Benefits of Raised Garden Beds
If you don’t already have experience with raised bed gardening, you’re going to love it! While there is a little more upfront cost than planting straight in the ground, it’s totally worth it (in my humble opinion). It’s nearly impossible for us to grow food right in the ground because gophers are rampant here. (Learn more about non-toxic gopher control here.) Plus, our native sandy soil is not the best quality.
With raised garden beds, you have way better control over the condition, quality, and texture of your soil. Raised beds can be filled with the ideal soil that your plants will love. Burrowing pests and weeds can be blocked off from below with hardware cloth and landscape fabric, protecting your plants. Our bodies and backs really prefer the ergonomics of raised garden beds over in-ground gardening. Last but not least, I love how they look! Raised beds create dimension, interest, and defined spaces in the garden.

Potential roadblocks to getting started
Don’t own a home? Don’t let it stop you! We built raised garden beds at several rentals prior to buying a home. Check with your landlord; you may be pleasantly surprised. A couple of them were left behind in moves, but we were able to dig out a couple smaller ones to take with us too!
Not feeling handy enough to build your own? That’s okay! There are some really excellent, durable, beautiful raised bed kits available too – like this selection from Gardener’s Supply Co. Or, check out these rad galvanized metal beds from Epic Gardening. Code “deannacat3” will save 5%!
I have faith you CAN build raised garden beds though, especially after today’s tutorial!
SUPPLIES NEEDED TO BUILD A RAISED BED
- Lumber – We’ll talk more about wood choices and amounts below. We use 2 x 6″ heart redwood boards and 4 x 4″ redwood for corner support.
- Miter Saw or Circular Saw – or you could have the hardware store cut wood for you
- 2.5 or 3-inch long Deck Screws – we use 8 gauge
- Power Drill
- Measuring Tape
Optional:
- Weed blocking landscape fabric for under the beds
- Hardware cloth for gopher-proofing
- Galvanized mending braces to stabilize longest sides
- Non-toxic food-grade wood sealer for added longevity
STEP 1: Choose a Location
Most vegetables prefer to get as much sun as possible, with a few exceptions. So, choose a location in your yard that gets maximum sun exposure – all day long, in all seasons, if feasible. Yes, even if that means right in the middle of the front lawn, because… why not?!
If you have a small space or obstacles to work around, creating a few garden areas that end up with partial shade is okay. We have a handful of beds that get far less sun than the others, shaded by our house or neighboring trees. We can still utilize them to plant veggies that are more shade-tolerant like lettuce, kale, asian greens, spinach, arugula, or mustard greens, to name a few. If you live in a climate with extremely hot summers, your garden may even thank you for a little late afternoon shade!
Is your only garden space on a hard surface, like a concrete patio? You’re in luck! I wrote an article dedicated to how to build a raised garden bed and install it on top of a hard surface – either right on the ground, elevated, or even some that are mobile. The design is essentially the same as what you’ll find in this article here, but with a few modifications/options for the bottom. Plus, extra tips about drainage considerations. Check out that article here.
Changing Seasons and Shadows
Don’t forget that the sun’s path changes throughout the seasons. In the winter, the sun dips lower in the sky – on the southern horizon if you’re in the northern hemisphere like us. That is particularly important to pay attention to if you live in a place with mild winters and hope to garden year-round.
I can’t tell you how many times I have seen people place garden beds along a fence, wall, or house and I have to cringe a little. It makes sense aesthetically, keeping the garden tucked up against something, “out of the way”. Whenever possible, I suggest to keep raised garden beds out in the open, away from structures. Because unless that wall or fence is facing south, it is going to cast shade on your garden. That is not ideal.
“South-Facing” Gardens
If you’re in the northern hemisphere, a south-facing garden is an ideal choice. This orientation will provide your garden maximum sun exposure from the south in all seasons. As an exception to what I mentioned above, placing a raised garden bed along a south-facing fence or wall does work well. The only time that orientation will create shade is in the very latest hours of long summer days. If you live in the southern hemisphere the logic is just the opposite. There, a north-facing garden would be best.

Please note that I suggest keeping raised garden beds at least 6 inches from wood fences and definitely your house. Give everything some room to breathe! This will help prevent water damage, and also give you a little space to keep an eye on things.
STEP 2: Determine Your Ideal Bed Size & Layout
One of the many, many beautiful things about gardening is that it can be totally unique and individual! Whether you have a small yard or acres of open space, beds can be designed to fit that space. Within your limits, let your imagination run wild on the layout, number, shapes, and sizes of beds! On the other hand, there are definitely some sizing and layout best practices to consider during all that dreaming. Let’s discuss.
Layout
In addition to considering sun exposure, you want to think about working in and around your beds. Preferably, with comfort and ease! Are there already other structures, plants, or features in your space that you need to work around? Do you plan to have multiple beds?
I have seen some very tightly spaced beds, like some spaced within one foot of another. While this can be excellent for maximizing yield in a small space, things can get crowded very easily – especially in the peak of summer when plants start overflowing. In our gardens, we prefer at least 28 inches between beds, at the very minimum. Most of our current garden beds now are spaced 36-48” apart. That distance creates the perfect spacing to move a wheelbarrow or our favorite garden cart up and down the aisles between the beds. It is not only handy, but essential, for our backs sake.
Test it Out Before Building
Before making any final decisions, grab some scrap wood, rope, string, broom sticks, or whatever else you can find! Lay it out on the ground in the approximate space and size you’re imagining. This will give you a better idea of what the space would actually look and feel like once it’s all in place.


Another tool you could utilize is the Homestead and Chill garden planning toolkit! It includes a plot plan you can use to sketch your ideas out, to scale. If you don’t have one yet, grab it below. It also includes tools like a companion planting chart, and planting calendars for every USDA hardiness zone!
Raised Garden Bed Length
It’s best to build raised garden beds no longer than 8 feet, perhaps 10 feet maximum. If you desire a super long continuous raised bed, I suggest breaking it up into sections instead. Meaning, several raised garden beds can be placed end-to-end to create the look of one longer bed. This is what we did both in our coop garden and patio garden areas. See the photos below.
The bigger the bed, the more heavy it will be to move into place once it’s built, unless you plan to build it in place. The longer the bed, the more chances that the weight and pressure of the soil will cause stress and bowing on the longest sides. Plus, if anything ever needs repairs or replacement, it will be more difficult to work with. Especially if you ever have to dig all the soil out!

Raised Garden Bed Width
The ideal width for a raised garden bed is 4 feet maximum. Planter boxes should never be wider than what you can reach across or access from either side. We do not want to have to step in the bed. That compacts soil, which is not a good thing! It also is not comfortable or ergonomic to have to reach and stretch too far in. Thus, I would not suggest building something like a 6-by-6 foot square bed.
If your raised bed is going to be up against something (like a wall or fence) or otherwise inaccessible from one side, then you may want to make it even more narrow. For example, the coop garden beds along the back of our house (a south-facing wall) are just under 3 feet wide. That way, we can still reach in comfortably from the front side only.

How deep should my raised garden beds be?
Keep in mind that most plants prefer at least 12 inches of soil depth for their roots to happily grow. 18 to 24 inches deep is even better! Particularly for large, deep-rooting plants like tomatoes. If allowed, tomatoes can grow roots over 3 to 4 feet deep. Even smaller vegetable plants like cucumber, eggplant, peas, and kale can develop roots up to 24 inches deep. By limiting their space for root growth, it also limits the overall growth and health of the plant.
Tall, deep beds mean less bending over. They are much less strenuous on your back! Deeper beds also retain moisture better. All of our raised garden beds are 18″ or 24” deep, using three or four 2×6” boards up each side. To keep your plants most happy, I recommend building beds at least 16-18 inches tall OR more shallow ones that are open to native soil without a barrier below.

Should I block off the bottom of my raised garden beds, or not?
That is going to be a personal decision, and one that varies depending on your situation. See, we have to line the bottom of our beds with commercial duty landscape fabric. Before our garden looked the way it does now, our yard was full of invasive, weedy crabgrass. Gophers are also an issue, so we need to line the bottom with hardware cloth as well.
Once upon a time, we dug out and removed a nice large section of crabgrass from the front yard, making space for a couple raised garden beds. We placed the raised beds down on the bare soil where the crabgrass once was, thinking we had removed it all. We didn’t include a weed barrier. This was not a smart move. Within 6 months, the beds were insanely infested with crabgrass. So much so, guess what we did? Dug out all the soil, lifted the beds up, and re-did the entire space. That included removing the rest of the grass, laying down layers of painters paper and weed block fabric, setting the beds back down on top of it all, and filling gravel in around them.
Yup, this was a feature in my post: “15 Mistakes to Avoid in the Garden”. Avoid this.

Your garden is an investment. It is worth protecting. If you don’t have super invasive weeds or burrowing pests, luck you! These extra precautions might not be needed. But if you do have gophers or crabgrass (aka bermuda grass) I highly suggest using the hardware cloth and landscape fabric. For less invasive weeds, a good layer of cardboard in the bottom of the bed will usually do the trick.
Now that we have gone over some recommendations for choosing your ideal raised garden bed location, design, and size, let’s dive into supplies.
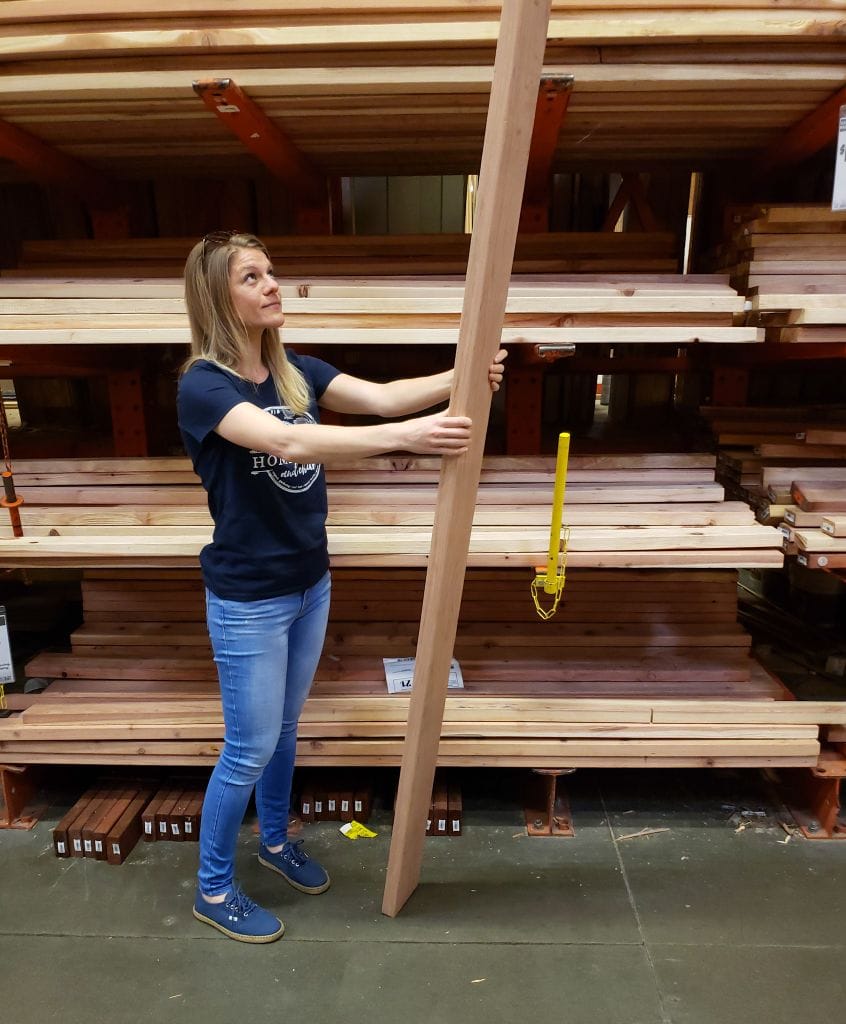
STEP 3: Determine Your Lumber Needs
To determine your lumber needs to build a raised garden bed, you’ll need to choose the type of wood you want to use, and calculate how much will be needed for the project.
Wood Choices for Raised Garden Beds
What kind of wood should I use for my garden bed? It depends on your personal preferences, budget, and what is available in your area. An ideal wood choice will be long-lasting, sustainable, and safe! Let’s review a few great options, as well as a few not-so-good options that should be avoided.
Redwood and Cedar are the most popular, high-quality hardwood options for building raised beds. Neither need to be stained or sealed in any way. They are naturally very durable and will last well over a decade on their own! However, you could treat them with a non-toxic wood sealer to even further extend their life if you wish. (Edit: We sealed the inside of our raised beds in our newest garden, and also used silicone caulk in the seams between the boards. See more details in this post, which outlines 7 ways to make wood garden beds last as long as possible).
For any wood selection, look for ones marked with “FSC” – which stands for the Forest Stewardship Council. FSC certification ensures that products come from responsibly managed forests that provide environmental, social and economic benefits. Also look out for bowed or cracked boards! Keep those out of your pile.

Redwood
We love and use heart redwood to build all of our raised beds. I emphasize heart-grade because this is a higher quality than common construction redwood. Common redwood is good too, but heart is that much more dense and therefore durable.
Redwood is naturally resistant to water, rot and termites, making it an excellent choice to build a raised garden bed. Redwood raised beds should hold up for a decade or longer! I have heard of redwood beds lasting over 20 years for some people! I mean, they make water tanks out of redwood. That is saying a lot. Personally, I also think redwood is absolutely gorgeous. It starts off a beautiful pink color, changes to a slightly orange tan tone within a year, and then fades to a beachy barnwood grey.
Cedar
Cedar has a lot of the same excellent properties that redwood does. It is durable, beautiful, and rot-resistant. This makes it one of the most popular and common types of lumber used to build a raised garden bed. We do not have experience working with cedar, though I have heard it is expected to last a few years less than redwood.
The cost of cedar and redwood vary by location as well. Cedar is more common and affordable on the East Coast, and redwood on the West Coast.
Other long-lasting hardwood options: Hemlock, walnut, black locust, and oak.
Softer Woods
Pine or Douglas fir wood are middle-of the road choices. They are often more affordable, which makes them very appealing if you’re on budget! However, as softwoods, they’re not known to last nearly as long as the hardwoods listed previously. Raised beds made from these materials are known to last about 3 to 7 years on average, depending on climate.
AVOID using these materials for raised garden beds!
- Treated lumber, or pressure treated lumber – Historically, an arsenic-based compound called Chromated copper arsenate (CCA) was used for pressure treated lumber. CCA was banned in 2003, and was replaced with various “less harmful” chemicals to treat wood. These include Alkaline copper quaternary, Copper azole, copper-HDO, and copper naphthenate. While these are all reported to be less toxic than arsenic, I personally still would not use them. Upon reading an article from Iowa State University, it explained studies have found that these chemicals do and will leach into the surrounding soil they’re in contact with. Our Home Depot is legally forbidden to cut pressure treated wood for you, though they will cut all other untreated lumber. That is saying something.
- Railroad ties – These are treated with Creosote, deemed a “probable” human carcinogen by the EPA. It is also known to damage plants that are growing near it.
- Recycled or reclaimed wood that you are unsure of the origins, age, or if it has been treated, stained, or painted. They could be toxic!
Alternative materials for creating raised garden beds:
Here I am, assuming that you want to build a raised garden bed from wood. However, there are other options such as concrete blocks, bricks, cinder blocks, felled logs, galvanized metal tubs, wine barrels, straw bales, or poured concrete, to name a few. Each of these have their pros and cons. Read more details in this article: Choosing the Best Materials for Raised Garden Beds.

How much lumber do I need to build a raised garden bed?
Once you know your desired bed size(s) and wood type, you can run some calculations! Drawing a sketch of your bed is very helpful in the process. It makes it much easier to visualize and add up the total lengths of boards needed. Note that you do not need one board for every piece of each side. You can often cut one long board to create multiple sides of the bed.
This step is easiest if you already have your wood picked out and know where you are going to buy it. That way, you can see what size of boards they sell. The heart redwood 2×6 boards we use are most commonly sold in 8 or 12 foot lengths. For example, let’s pretend we are going to build a 6×4 foot bed. We would want to buy the 12-foot boards – because those could be cut in half to create two perfectly-sized 6-foot pieces for the long sides of the bed. Then, one board can be cut in thirds to create the short ends of the bed.

If we didn’t plan in advance and purchased the 8-foot boards instead, we’d end up needing to buy twice as much wood to create all the long sides. We’d also have a lot of random two-foot sections left over. This would be a wasteful and costly mistake, especially since the 12 foot boards are only a few dollars more each than the 8 foot boards; no where near double the price! On the other hand, if we were going to build a raised garden bed that is 6’x2′ (the size of our patio garden beds) then the 8 foot boards would work out nicely – and, they fit in our Subaru.
The available lengths of lumber have indeed swayed our design slightly at times. You may find the same to be true.
Corner Supports
For this design, you’ll also need a durable 4×4” board for the corner supports. We use redwood for these too, though heart wood is not usually available. Definitely choose a hardwood like redwood or cedar here, even if you are using a softer wood for your side boards. A softer wood would not make good support pieces. These are what hold your bed together – and are most prone to rotting! You want them to last. For an 16-18” deep bed, one 6 foot 4×4″ can be cut in quarters to create 4 corners. If you’re doing a deep 24” raised bed, grab an 8 foot 4×4″.
Other lumber size considerations:
In regards to thickness, most wood will come in two options: 1-inch thick, or 2-inch thick. Keep in mind that boards labelled as 1-inch are really only 3/4”, and 2-inch boards are only truly 1.5 inches. If you choose to build a raised garden bed that is more shallow (so it won’t be subjected to as much soil and pressure) you could choose 1-inch thick boards, which may help keep costs down. However, thicker boards will most definitely last longer. They’re also the most sturdy choice for deep beds.
One last consideration when choosing lumber is: do you want to use 2x4s or 2×6 board? We prefer using 2×6″. Fewer of them are needed to reach the desired height of the bed! Or maybe you’ll even be able to locate 12” wide boards, though we don’t see those much.
STEP 4: Purchase Supplies
Make a list, check it twice, and head out shopping! As much as I would love to say “support your local lumber yard!”, we honestly don’t. The prices for redwood boards at our local lumber supply company are literally five times the cost of a big box store like Home Depot or Lowe’s. Maybe your area will be different! Call around to compare prices first.
Cost
You may be wondering: How much does it cost to build a raised garden bed? In my experience, the average cost per raised bed is about $200 to 400 dollars total, including lumber, screws, hardware cloth, and the soil or compost used to fill the bed. However, the answer depends on your location, year, materials used and size of bed. Lumber prices have been highly variable lately! Whether you use bagged or bulk soil to fill your raised beds also greatly influences the cost – since local bulk delivery is often more affordable.
STEP 5: Prep Your Bed Materials
Now that you got your lumber home, it is time to cut it into the sizes you need. If you plan to seal your wood, it may be easiest to apply the sealer before cutting the wood – or at least before assembling them. We never used to seal our raised beds in the past, but at our new homestead, we did apply two coats this nontoxic sealer to both the inside and outside of the beds. Learn more here.
Mark your cuts
Using a measuring tape and pen, measure and mark you wood to the desired lengths for the long and short sides.
NOTE: Using our design and instructions, your bed will end up being about 3 inches wider than you intended, unless you cut your shorter sides three inches shorter in advance. See the photo below. The shorter sides of the bed, which are built first, are going to be sandwiched between the longer sides. Because the longer sides are 1.5” thick boards, you will gain 1.5 inches on each side or a total of 3 inches in width for the whole bed.

If your raised garden beds are going to be installed in a fairly open space, this may not matter. However, if you’re working within more restricted space limitations, planning to add 4 ft wide hardware cloth to the bottom, or otherwise need your bed to be exactly the width you intended, cut the shorter sides three inches smaller than the final width you want your bed. also For example, if you wish for your final outer dimensions of the bed to be 48”, make the short boards 45” each.
Measure 4×4″ corner pieces
Just as how 2×6″ boards are not truly 2 inches wide, they are also not really 6 inches tall. Their actual dimensions are closer to 5 1/2 inches. So, three 2×6″ boards stacked on top of each other it actually creates a 16.5-inch raised bed, NOT an 18-inch tall bed. This is important to keep in mind when cutting the corner pieces from the 4×4”. If you cut them at 18″, you will end up with funny pieces sticking out of the corners on either the top or bottom of your bed.
Some folks do like to leave longer corner pieces on the bottom of their bed, dig holes in the corners, and use those nubs to anchor the bed in place into the ground. You could do that too, but note that it makes it a little bit more tricky to install hardware cloth or landscape fabric on the bottom. We don’t feel the need to “anchor” our beds. They aren’t going anywhere.
Cut the lumber
To cut lumber at home, we like to use this miter saw. We can mount it on a portable workbench, which makes the work surface very sturdy and safe, and our cuts accurate and straight. It has been a great tool to have around the homestead! We used it when building our new front yard fence recently, which required angular cuts. It is also capable of cutting 4x4s! Not all saws can do this.

Before we upgraded to the miter saw, we used a trusty basic circular saw. We positioned our lumber on top of two 4x4s or sawhorses to get clearance off the ground, and ran it through. However, it wasn’t large enough to cut 4x4s. This meant we either had to rotate the 4×4 and cut it from multiple sides, or have the lumber cut at the hardware store for us. Speaking of…
No power saw?
If you are not comfortable with a power saw, or do not intend to invest in one, don’t let that stop you! While they may charge a small fee per cut, you can have the kind folks at your local lumber yard cut it for you at the time of purchase. This can be particularly helpful if you don’t have the right tools, or a large enough vehicle to bring longer boards home in. Make sure to bring a list with your measurements with you!

STEP 6: Assemble the shorter ends of the raised garden bed first
When we build raised garden beds, we have learned to start with the short sides first. You’ll see why in a minute.
On a level surface like a table, garage floor, or concrete patio, lay out two of the now-cut 4×4” corner pieces. Position them the same distance apart that your shortest side boards are. Place the short boards on top. Keep the ends of the 2×6” boards flush with the outer edge of the corner 4×4” piece. To make sure everything is nice and square, measure the distance between 4×4’s at both ends.

Next, using 2.5 to 3-inch decking screws and a power drill, add two screws to the end of each 2×6” board, attaching them to the 4×4 below. To prevent the 2×6” from splitting, keep the screws at least 1” away from any edges of the board, preferably sinking it into the center of the 4×4”. No, we don’t find the need to drill pilot holes first. The decking screws are great in that regard! If loose boards shift around while you’re working, re-adjust to bring everything back to square.
Repeat this process for the second short side.

STEP 7: Connect the shorter ends with the long boards
Now that you have both short sides assembled, stand them up on their sides. Set up each end at the distance that the longest side of the bed will be, with the corner 4×4’s facing inward towards each other.
Next, set your long boards on top, creating a table of sorts. Line up the outermost edges of the long boards flush with the outer face of the short sides. Repeating a similar process as above, measure the distance between the end corners, ensuring one side isn’t all crooked. They should all be almost exactly the same distance apart. See the photo below.
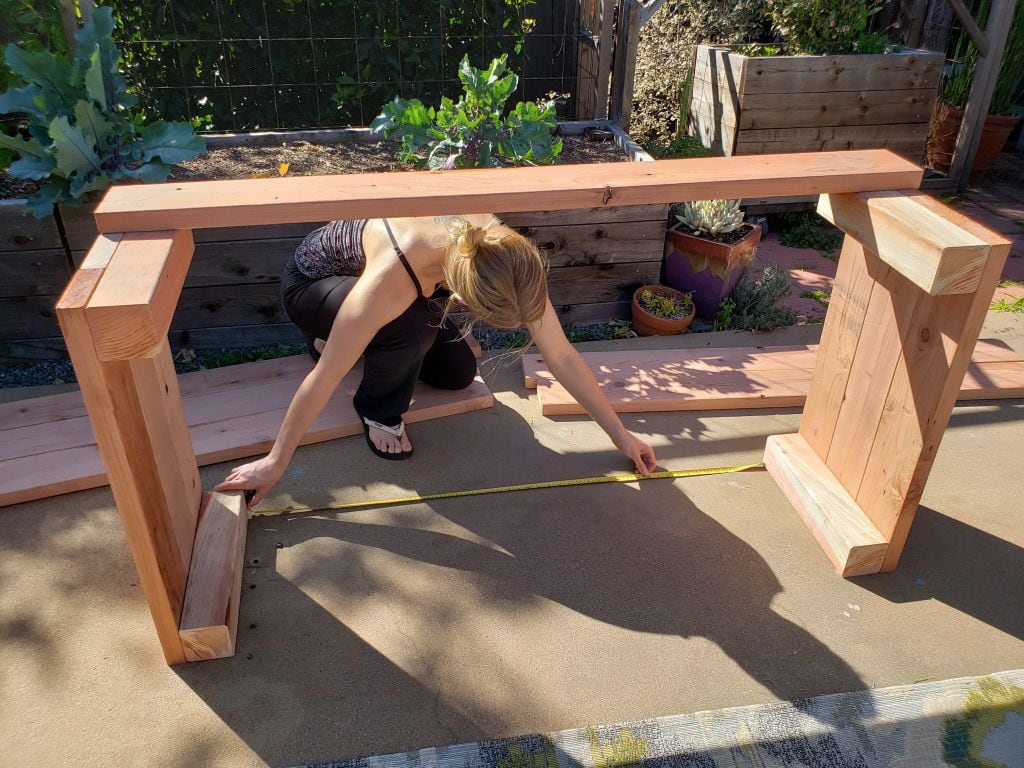
Once everything is all square, attach the long boards with 2 screws on each end of each 2×6” board. Make sure you’re driving the screws into the center of the 4×4, not the short-side 2x6s. This means your holes are going to be a little further in on the board than they were on the short sides. After attaching all boards along one side, flip it all over and repeat the process on the final side of the bed.

Ta da! You just built a raised garden bed!
Now do you see why we started with the short sides? If we did the long sides first, and then stood them up, you may be trying to work 6 feet up in the air when attaching the rest!
Yes… you could do all of this keeping the bed down on the ground, positioned as it would be in the garden. That is totally up to you. Yet, we have learned over the years that using this “stand-the-bed-up-while-you-attach-it” method has a few perks. One, it provides natural resistance and better support while you’re drilling in screws. By pushing downwards against the ground, you’re able to take advantage of your body weight and gravity. Two, it is far less awkward than drilling sideways into something that may shift and move when you do so. It helps us keep everything more square.


STEP 8: Add the bottom protection & side support (optional)
Back to the conversation about pests, be it weedy or furry types… As we already discussed, you may or may not need to line the bottom of your bed with anything. If you have burrowing pests, like gophers or moles, I highly suggest adding hardware cloth to the bottom. If aggressive weeds are a concern, do not skip the weed block fabric! Gentler weeds can usually be kept at bay with a layer of cardboard on the bottom of your raised garden bed, if you prefer.
Hardware Cloth
Hardware cloth is a mesh wire fencing material made from strong galvanized metal. Thus, it won’t rust and disintegrate with time as chicken wire does. It also can’t be chewed through by rodents like chicken wire can. This makes it the ideal material for lining garden beds, making gopher baskets for fruit trees, and predator-proofing chicken coops.
Commonly sold in 2, 3 or 4-foot wide rolls of varying lengths. If your bed is narrow enough, one 3 or 4 foot wide piece could stretch across the bottom of the bed. If not, combine two pieces, overlapping and attaching them in the middle if needed, with either zip ties or bits of galvanized wire.

To attach the wire to the bottom edge of the bed, we use a couple different things. The most sturdy option is using wide-head cabinet screws, which pinch the wire between their head and the wood. A staple gun can also be used. Sometimes we do a little of both, depending on what we have on hand. To cut the hardware cloth, decent wire snips or cutters are needed. We love these ones! The long blades make it easier to cut through quicker, almost like scissors, instead of one tiny snip at a time.

Weed-blocking Landscape Fabric
Not all weed blocking material is made the same. When I mention it, I think most folks conjure up images of that thin black plastic-like stuff that rips and makes a hot mess. Nope! That isn’t what we use. We use this heavy-duty, commercial material. It is thicker, far more durable, but still provides excellent drainage.
How you attach it to the bed is up to you, or maybe you won’t attach it at all. We often times lay down weed block fabric over a large area, set our beds on top, and then cover it with the green rock gravel or mulch we use around our beds.
If you don’t want it sticking out beyond the bed, use a staple gun to attach it to the bottom of the bed, or line the inside of the bed with fabric. However, if the area you are installing the raised beds is very weedy, I highly recommend extending the weed barrier fabric well beyond the perimeter of the bed itself. Weeds will be drawn to the moisture in your raised bed and are very good at finding a way in.


Side Supports
One final touch you may want to consider adding to your raised garden bed is a support brace. I suggest this for any beds over 6 feet in length, attached along the middle of the longest sides. This is to add extra support for the wood, to prevent bowing with time. We generally use a galvanized steel mending brace. Some folks add an additional strip of wood, like a 2×4”. I have seen this done both on the inside and outside of the bed.

STEP 9: Put the Raised Bed in Place
The raised bed is built, all the finishing touches are in place. It’s finally time to get it settled into its new home!
It is best for raised beds to be as level as possible, though perfection isn’t necessary. A level bed promotes even water distribution. If needed, adjust and level out the soil or surface that it is going to sit on. For sloped surfaces, it is best practice to dig out and terrace the bed space to make it more level.
If you can create a little nest for the bed to sit down in to, rather than flush on top of the soil surface, that’s even better. For example, by digging out just an inch or two of soil, mulch, or gravel to nestle the sides down in to a bit. This can help prevent the water or soil from running out the bottom too quickly. If you built a more shallow bed, or did not line the bottom, this is even more worthy of a step.
Speaking of not lining the bottom… If you chose to not line the bottom of your raised beds and are going to set it straight onto the native soil, you may want to consider amending and tilling the soil below a little. Even though we are not usually proponents of tilling soil, it could be helpful when first setting up a bed. If your native soil is rocky, compacted, clay, or otherwise less-than-ideal for growing plants, try to loosen the soil and work in some good aged compost before setting the bed down on top. Particularly if your bed is 12” deep or less. Your plants and their roots will thank you!

STEP 10: Fill Your Bed with Soil

After your raised garden bed is all situated in place, it needs to be filled up! This very important subject deserves a post of its own: “How to Fill a Raised Bed: Build the Perfect Organic Soil”. Read along to learn all about our soil choices, compost, aeration, natural amendments, and mild plant-based fertilizers.
Please enjoy this video tutorial of everything we just went over together!
That’s all there is to it!
Now you know everything you need to know to confidently site, design, and build a raised garden bed! It is only a matter of time that you’ll be harvesting delicious and nutritious homegrown produce to feed your family!
If you enjoyed this article, you may also like:
- How to Install Drip Irrigation in Raised Garden Beds (Drip Tape)
- Easy Raised Bed Drip Irrigation (Connected to Faucet or Spigot)
- How to Build a Trellis: Inexpensive & Easy Designs
- A Beginner’s Guide to Using a Hobby Greenhouse
- Seed Starting 101: How to Sow Seeds Indoors
- How to Amend & Prepare a Raised Bed Soil: Before Planting or Between Seasons
- How to Start a Homestead: 9 Must-Read Tips for New Homesteaders
- Composting 101: What, Why & How to Compost at Home
- How to Build & Install a Raised Garden Bed on Concrete (or other hard surface)
In all, I hope you found this helpful and informative. Feel free to ask questions, and spread the raised bed love by sharing this article!


77 Comments
Laurie Gerber
What a thoroughly excellent tutorial!!! I’m heading out to measure my space. Thank you for the practical hints and inspiration.
Aaron (Mr. DeannaCat)
Hi Laurie, we are glad you found the tutorial so helpful! We have made raised beds of all shapes and sizes so it is really up to the space that you have and the design you are going for. Good luck!
Colin
Hi there,
Slightly off topic ish. But question about the garden seal product. I am putting in a fence around my raised bed garden. Would you use the garden seal as an in ground preservative for the fence posts or go another route? Unsure if typical in ground preservatives are a good idea being near the garden.
Thank you!
Aaron (Mr. DeannaCat)
Hi Colin, it looks like the same company offers a product called Fence-Seal which may be more in line with what you are looking for although I haven’t compared the two products side by side to see the exact differences between them, although it looks like all of their products are non-toxic. I guess it just depends on how big of a fence you plan on building, were you going to use 4×4 or metal fence posts to create a 5-7 foot fence? For in ground posts, whether they are metal or wood, most people would use concrete in the post holes and you wouldn’t worry about sealing the wood below ground. Reach out if you have any other questions and good luck with your project!
Laurelei Ballard
This is exactly what I was looking for and so well explained. I have wanted to surround my slab patio and you did what I envisioned. May I ask how you attached the fencing/trellis to those beds? Thanks.
Aaron (Mr. DeannaCat)
Hi Laurelei, we created the trellises with wooden frames by using 2×2 redwood and attaching sections of concrete remesh to the back and affixing the remesh to the wood with wide headed screws, from there you attach the side lengths (which you leave longer in length than the remesh screen) to the back of your raised beds with screws. We have an article all about how to make your own trellises here. We had this setup in our previous property because we had chickens that free ranged the backyard, this kept them off the patio and from eating our veggies in the raised beds. Hope that helps and good luck!
Hamid Sheikhi
Hello,
In order to minimize the cutting of hardware cloth, just curious which approach you’d recommend.
Would it be better to just lay down the hardware cloth in the area where the raised garden bed would be situated and place the raised garden bed on top of it, or would you instead recommend attaching the hardware cloth to the bed as you have done on these tutorials?
Thank you.
Aaron (Mr. DeannaCat)
Hi Hamid, we typically attach the hardware cloth to the beds themselves as to ensure that there aren’t any openings in between the cloth and the raised bed that gophers may be able to get into with time. We typically build our raised beds to be 4 feet wide from edge to edge which is the perfect size for 4 foot hardware cloth to attach to the edges, you just need to cut off the length of cloth to fit the lengths of your raised beds. If your raised beds are 2 or 3 foot wide, you can always get hardware cloth in a similar width so it will attach easiest to fit the width. Hope that helps and reach out if you have any other questions.
Hamid
That makes sense. Thank you so much for such a quick response!
Cathy
Hi,
Thank you so much for sharing this! I just want to be sure I understand the measurements in this plan. If I am trying to build a 4×8 raised bed, when I attach the 8 foot long boards onto the 4ft boards, I will lose the width of the 4′ boards (ex. lose 1.5″ on both sides if 1.5″ thick boards) so the internal growing length will not be 8′ but rather 7’9″? Is that correct? It looks like no matter how I attach the boards (assuming using 8′ and 4′ boards) the internal growing dimension will never be 8×4 unless I use longer boards?
Aaron (Mr. DeannaCat)
Hi Cathy, when we construct our 8×4 foot raised beds, we are aiming for an exterior dimension of 8×4 feet. We cut the shorter boards 45″ in length as opposed to 48″ to fit within this dimension, I just measured the inner diameter of our raised beds and they were 93″x 45″ or 7.75’x 3.75′. But you are correct, you need to use larger boards if you want the inner diameter of the beds to truly be 8×4 feet, however, there will most likely be an excess of wasted material (wood) if you try and make up for the 3 inches on each end as 10 foot boards would be the next size you would be able to use, wasting close to 2 feet of board that you couldn’t use unless you have another project in mind. Hope that helps and good luck!
Amy
Amazing job! I love all the information you have shared. It will save an inexperienced person like me a lot of time and frustration! Thank you so much.
I am sure you had this information written in your post somewhere, but I couldn’t find it. In the video you mentioned that you sealed the wood and used caulking between the boards to help keep moisture out. What did you use for this and did you do it both on the inside and outside walls of the raised garden bed?
Thank you again- Amy
Aaron (Mr. DeannaCat)
Hi Amy, we used premium exterior silicone to caulk the inside seams of the raised beds. Check out our article on 7 Ways To Make Wood Garden Beds Last: Nontoxic Sealer & More for a more in depth look at the process. Hope that helps and have fun growing!
Gabe Sanders
Wow! Thanks for all the great information. I think I will start on this project later this coming week.
Denise
Hi, What did you use to join the two pieces of hardware cloth together where they overlap? These boxes are so pretty an the garden looks beautiful. It will be so easy to work and grow in these! Thank you for the plans.
Aaron (Mr. DeannaCat)
Hello Denise, when we have had to use two pieces of hardware cloth, we used zip ties to connect the two pieces together at the middle. We have since started making our raised beds the same width or narrower than the hardware cloth we are working with as we can just roll out the hardware cloth and it fits edge to edge with the bed. Most of our current raised beds are 8×4 feet and the 4 foot hardware cloth fits great, you can do the same with a 2 or 3 foot bed as they make hardware cloth that width as well. Hope that helps and good luck with your raised bed construction!
Phil
Great article Really helpful thanks
Minor correction Redwood and Cedar are both softwoods.
Adrienne Ricker
Thank you so much for this! I just moved into a rental that has beds constructed by the previous tenants and wish to add some more. I went to move some of the beds around and discovered all the existing ones are termite infested. Is this normal? Is there a way to prevent it? Will it be bad for the plants? What is the concern that they will spread to the house? THANK YOU!
Aaron (Mr. DeannaCat)
Hi Adrienne, the raised beds that you inherited are likely quite old and that is somewhat normal for there to be termite activity in raised beds that have been in the ground for a number of years. The only way to prevent it is to use rot resistant wood such as redwood or cedar, you can also build a raised bed with corrugated steel with a wooden frame. I wouldn’t be too worried about the termites and their effects on your plants or house in regards to having raised beds. You can also check out our article on Choosing the Best Materials for Raised Garden Beds for more ideas. Hope that helps and good luck!