


Harvesting Fresh Lavender: How to Harvest, Prune & Dry Lavender Flowers
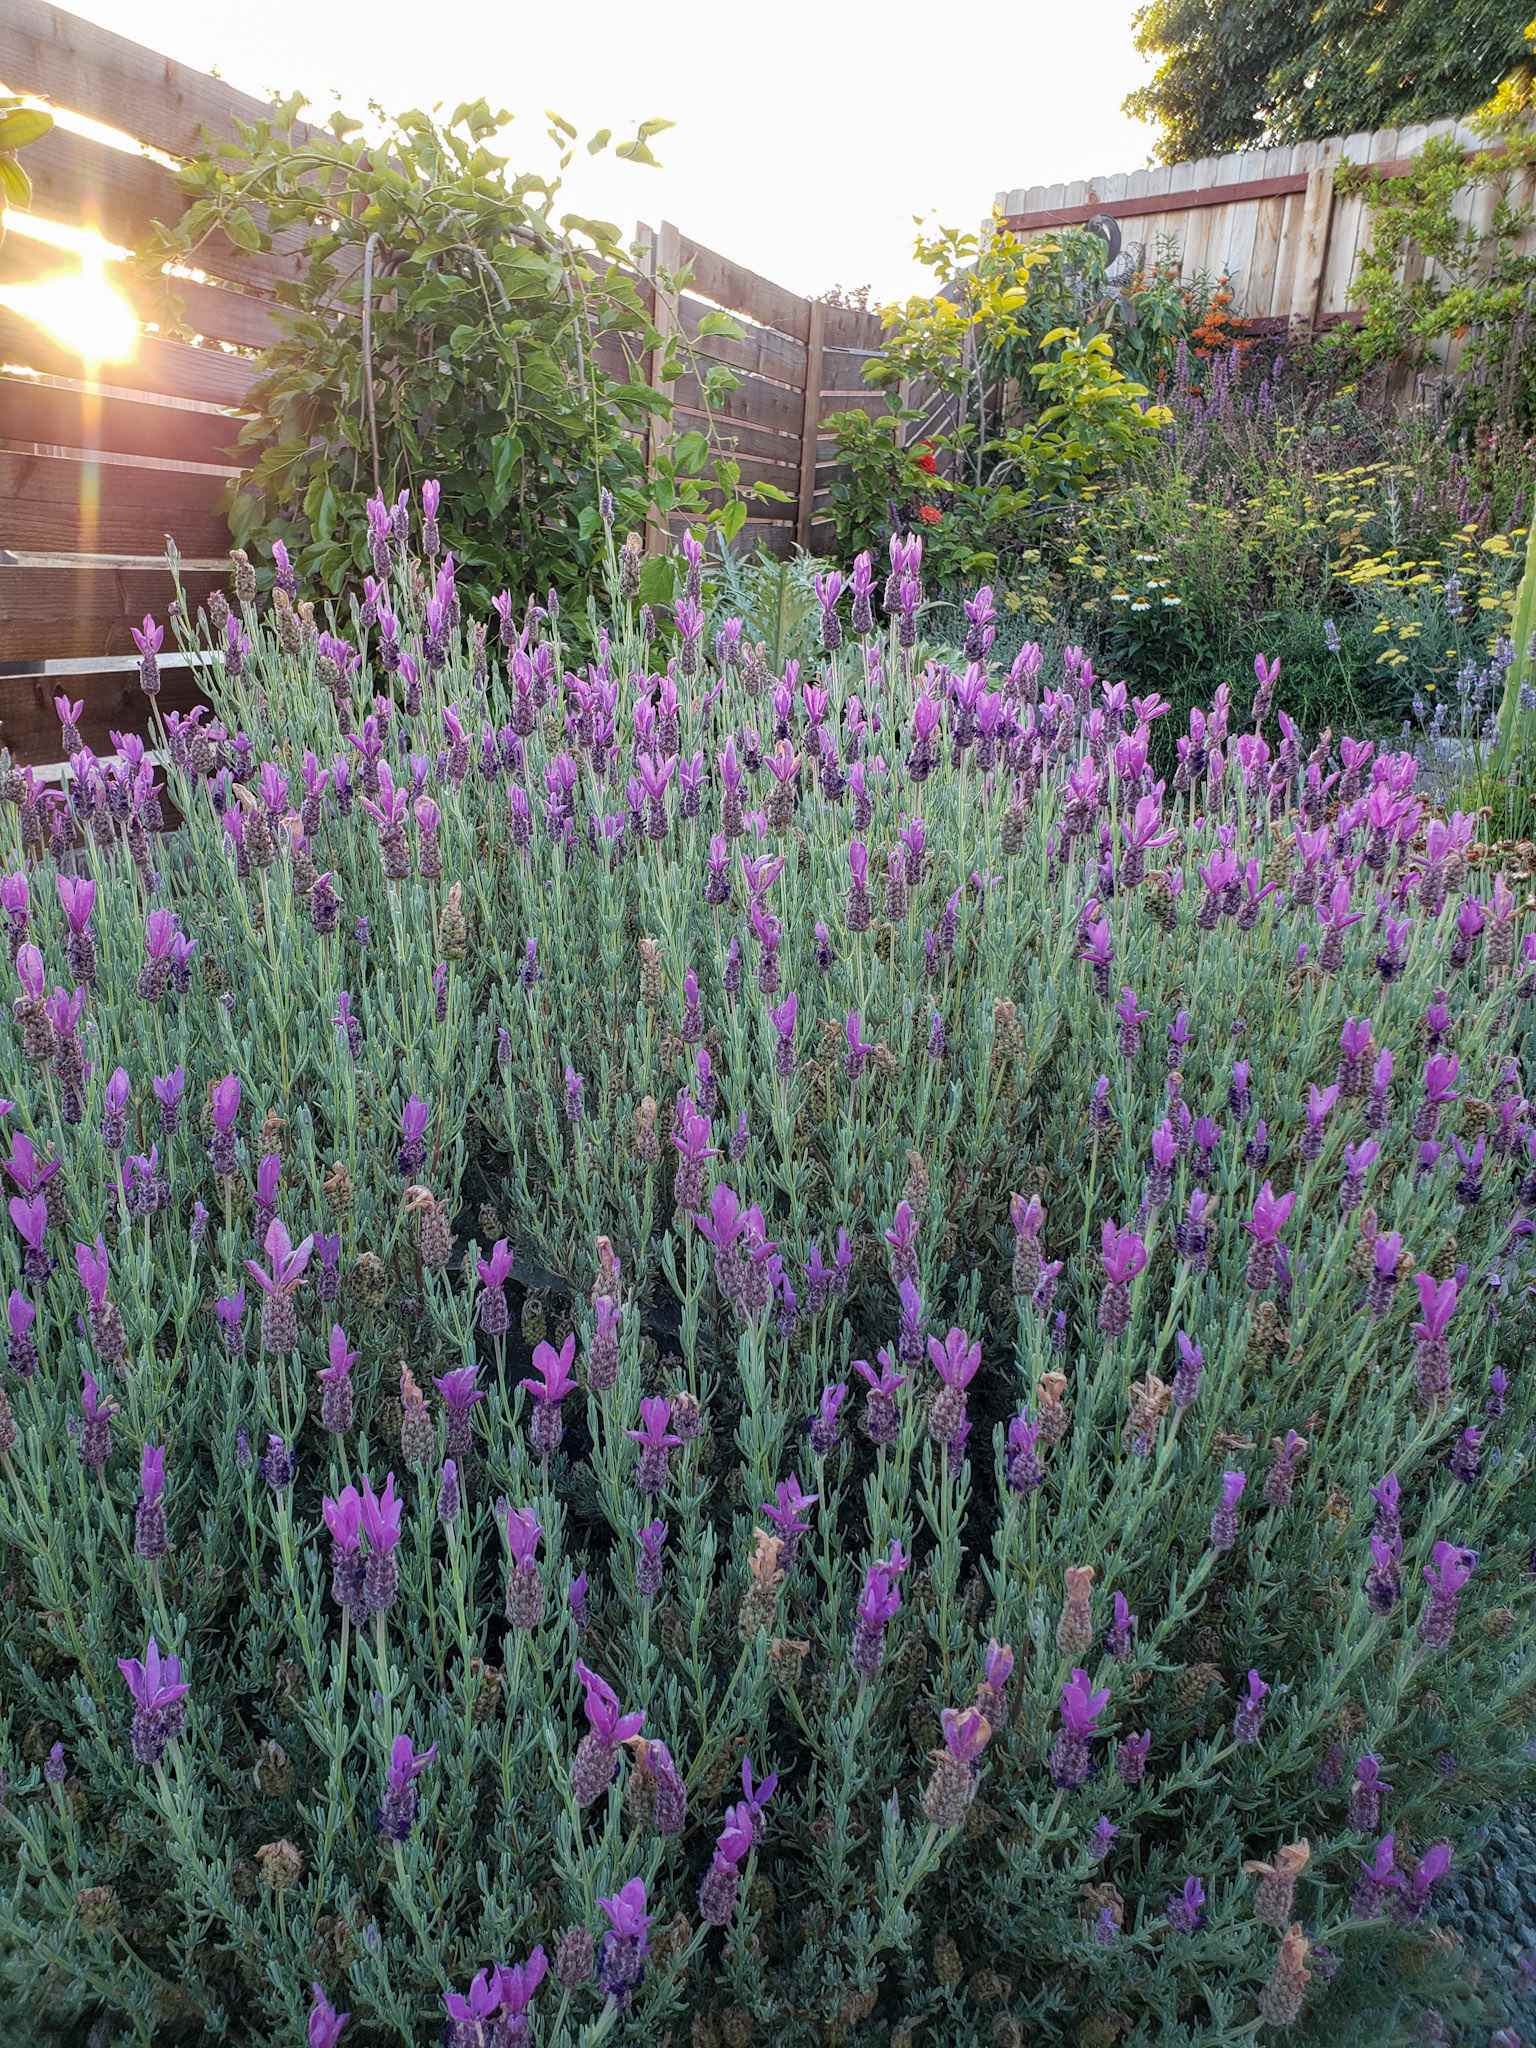
Are you growing lavender in your garden? Read along to learn how to harvest fresh lavender flowers, along with several ways to dry and use them! Of all the scents in our garden, the fragrance of fresh lavender blooms has to be one of my all-time favorites. Yet lavender is so much more than just a pretty, aromatic flower! Soothing to both your skin and mind alike, lavender is an edible, versatile, highly-healing plant. It is also very attractive to pollinators, which is always a desirable feature in a sustainable garden.
English, Spanish, French…oh my! No matter what type of lavender you grow, all of these tips on how to harvest and dry fresh lavender apply. Harvesting lavender is incredibly easy. Plus, the more you harvest, the more blooms will come! In this article, we’ll go over the best time to harvest lavender, exactly where to trim it, as well as how to give the plant a deeper prune. Then I’ll show you three ways to dry fresh lavender buds, and share plenty of ideas on what to do with them! How does lavender salve, sachets, and cocktails sound?

Quick Tips on Growing Lavender
Growing lavender can be fairly fuss-free in the right climate and conditions. In general, lavender can grow as a perennial in USDA zones 5 through 10, though nuances among each variety or climate can make the plants more or less happy. For example, we live in zone 9b/10a and our lavender grows readily – like a weed! Here, lavender bushes grow several feet in every direction and bloom essentially year round. Meanwhile folks in Florida (also zone 9b/10a) may struggle to grow lavender at all. That is because lavender thrives in warm, sunny, arid Mediterranean climates, and it doesn’t do well in high humidity or wet conditions.
One way to offset frequent rains and dampness is to grow lavender in a container. Use a well-draining potting soil mixed with sand, or even a cactus potting mix. Above all else, avoid overwatering it. Excessive moisture and overwatering is the most common cause of death in lavender. Soggy roots will quickly lead to fungal disease and demise. When planting lavender directly in the ground, choose a sunny location with excellent drainage and sandy soil. Lavender doesn’t need a lot of compost, fertilizer, or overly rich soil. In fact, it is happiest in poor rocky soil.
Lavender is slow and finicky to start from seed, though possible. Follow these tips to start lavender seeds indoors, but give them up to a month or two to germinate. The quick-and-easiest way to grow lavender is to start with an established seedling or nursery plant. Truthfully, that is what we’ve always done! Young plants can also be slow growers at first, so be patient with them. By year two or three, the roots become established and they’ll grow and bloom more vigorously. First year sleep, second year creep, third year leap.

Lavender Varieties
There are numerous varieties of lavender to choose from. Most all of them fall into one of the broader groups of either English, French, or Spanish lavender. Some stay quite compact, while others get huge! Dozens of hybrids exist too. All varieties offer wonderful aroma and are technically edible, though English and lavandin varieties (L. x intermedia) are the most sweet and palatable for culinary applications.
Seek out varieties that are well-suited to your climate. For example, true English Lavenders (Lavandula angustifolia) are the most cold-hardy, including ‘Hidecote’ and ‘Munstead’ varieties of English lavender. Those are the few rated down to zone 5. French and Spanish lavenders do better in warmer climates and higher zones. ‘Phenomenal’ is a true English lavender that is known to handle the heat and humidity of the southeast. Lavandula stoechas and L. dentata are also among some of the more humidity-tolerant varieties.
If you aren’t sure what your USDA growing zone is, use this simple zip code lookup tool to find out. I always suggest plant shopping at locally-owned nurseries – they’ll likely carry lavender varieties best suited to your area! We grow a wide selection of French, Spanish, and English lavender varieties in our temperate garden.
HOW TO HARVEST LAVENDER FLOWERS
If you’re able to successfully grow lavender, now comes the easiest (and most rewarding) part: harvesting. The best news is, the more you prune your lavender, the more flowers will grow! Harvesting and pruning lavender also encourages branching, resulting in an increasingly bushy plant.
Some of the most common questions I receive about growing lavender are “when is the best time to harvest lavender?” and “exactly how do you harvest or prune lavender?” – so let’s go over all of the above!
When to Harvest Lavender
The best time to harvest lavender is: early, on many levels! Early spring, early bloom, early morning.
Harvesting lavender flowers in the early spring will give the plant ample time to produce another flush of blooms to enjoy again in the late summer to fall. This is especially pertinent if you have a short summer growing season. In frost-free climates where some varieties of lavender may bloom year-round, you can continually harvest small bunches over and over throughout the year.
If you have hopes for the highest fragrance and essential oil content, the best time to harvest individual lavender flowers is early in their bloom cycle. Meaning, when the young tender buds are tight and barely starting to bloom. Fully-open lavender flowers will boast the most color, and are highly attractive for bouquets. As lavender flowers age, their aroma and therapeutic oil content decreases. Also, mature browning flower buds will crumble and fall off the stem more easily, which isn’t ideal for bouquets and can make for a messy drying process. However, I don’t let that stop me from sometimes using older blooms too! Late is better than never, as removing spent blooms is good for the plant regardless.
Finally, herbalists traditionally harvest medicinal flowers in the early morning, once any dew has dried but when the plants are still perky from the cool night air. As the day goes on, some of the fragrant essential oils and terpenes will begin to dissipate in the hot sun. I try to follow this practice as much as possible, especially when I plan to make medicinal oil or salve from the lavender buds. However, life is busy – so pick ‘em when you can!

Where to Harvest Lavender Flowers
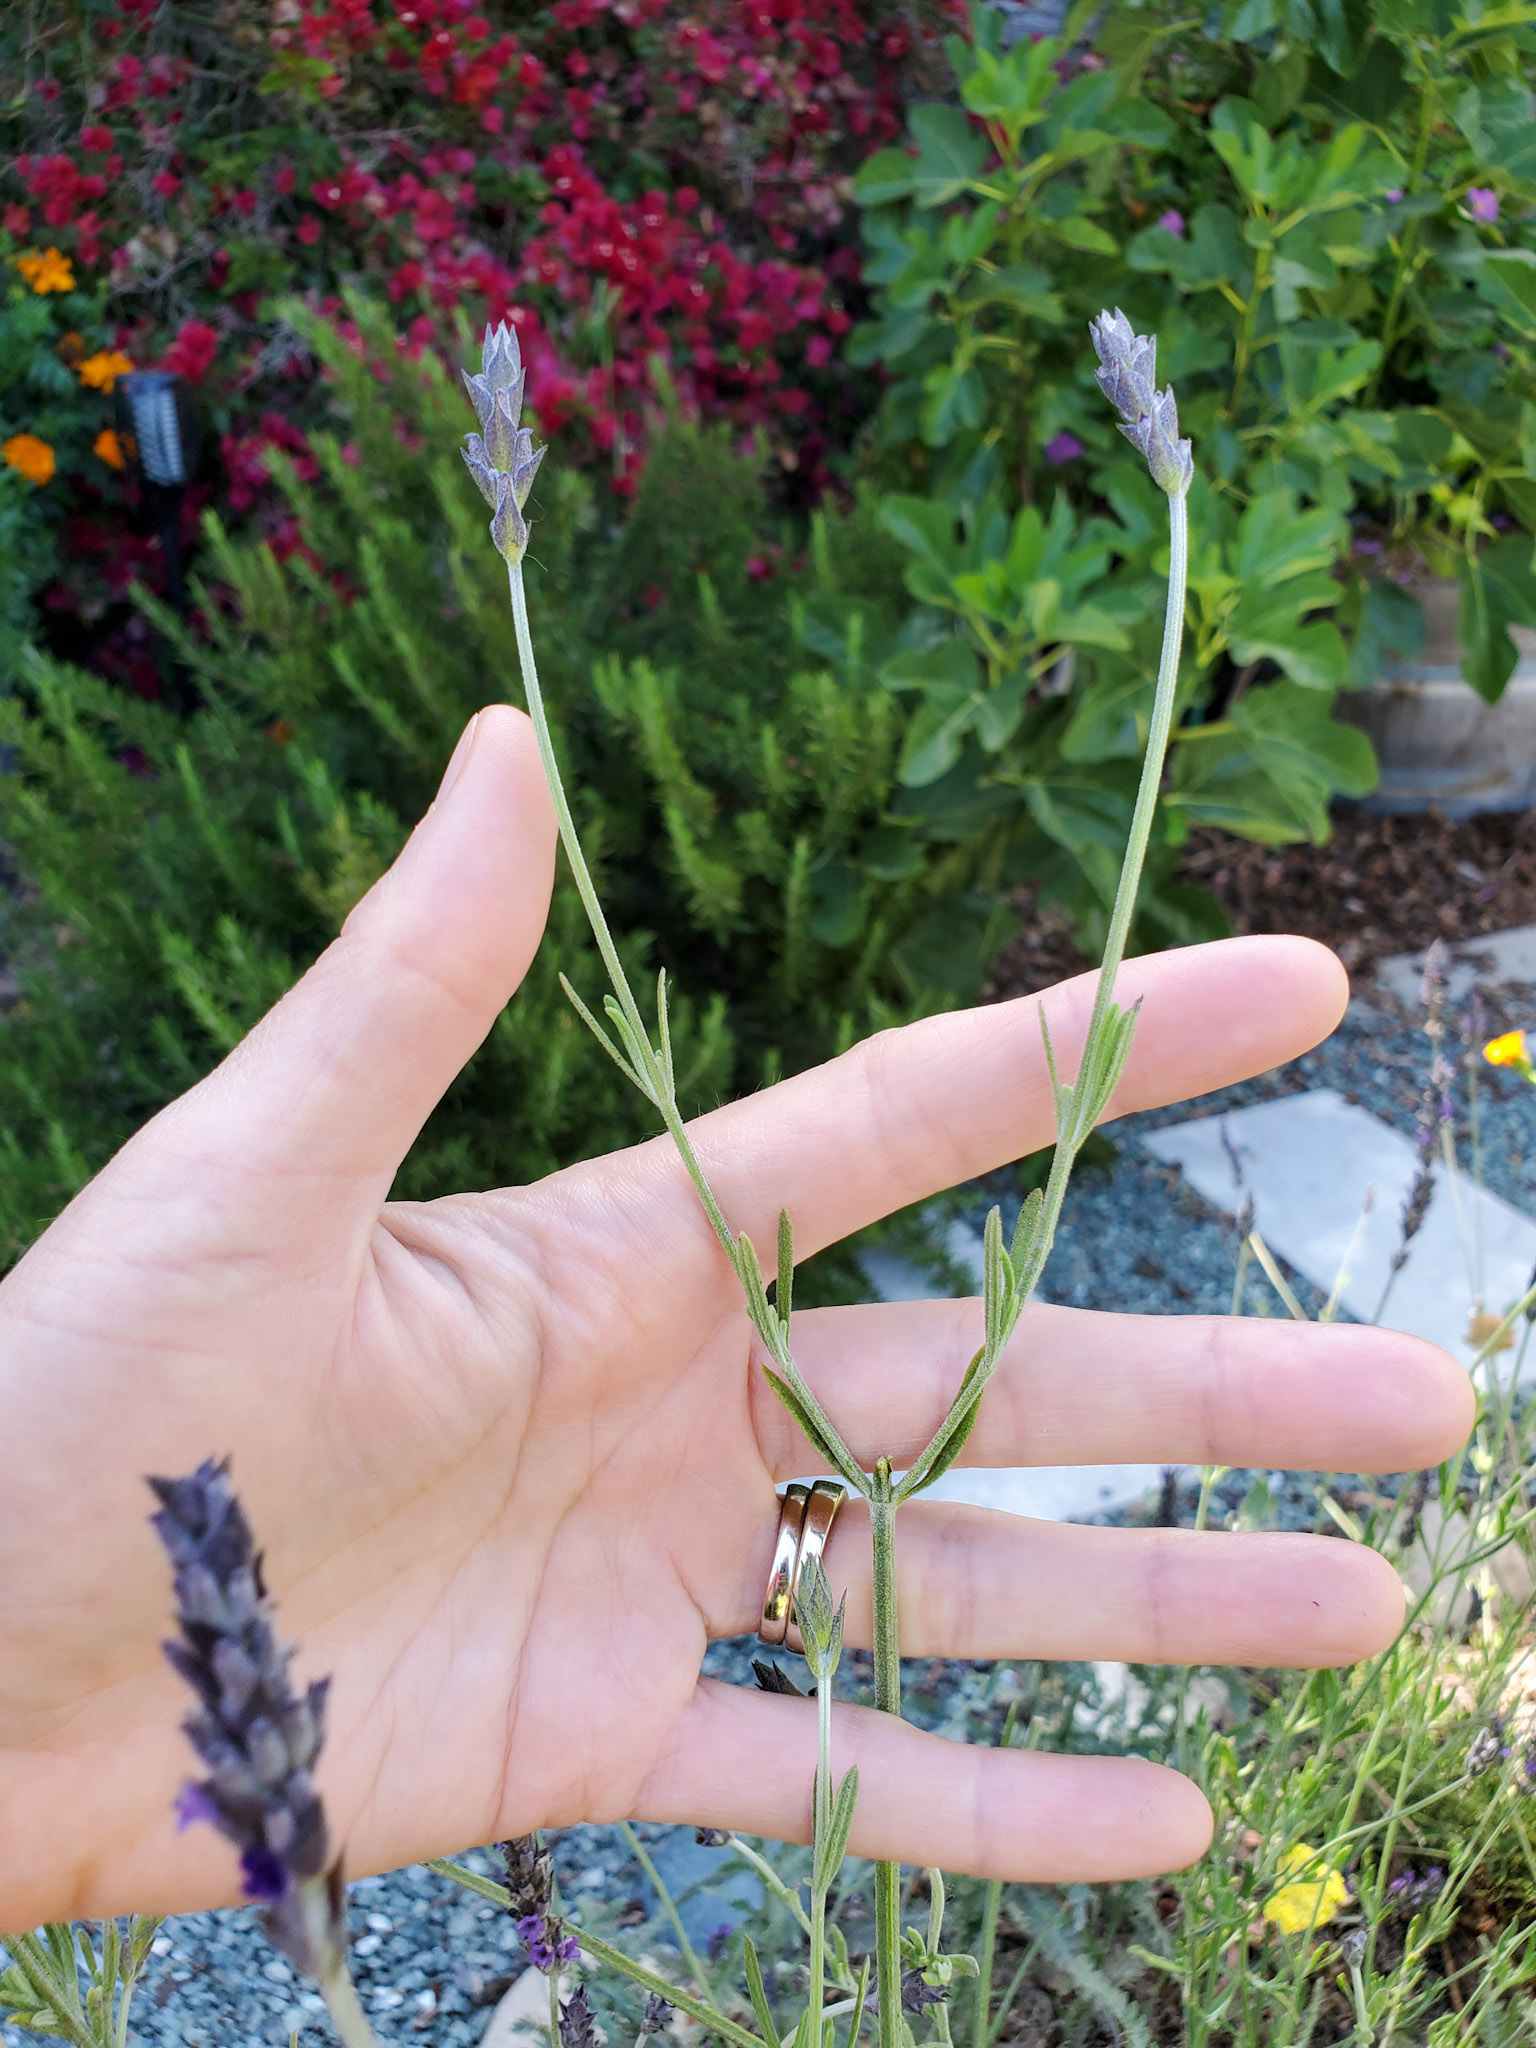
To harvest individual (or small amounts of) lavender flowers, first identify the bloom that you wish to harvest. Then, follow the stem down from the flower bud until you reach a junction where two side leaves, new buds, or branches have begun to form. Using small pruning snips or scissors, cut the stem there – just above the leaves or side branches. Once the center stem and flower is removed, the plant redirects its energy. Now, those two side shoots will rapidly grow and produce fresh flowers of their own!
For longer stems or a bouquet that also includes some green foliage, simply follow the main stem down a little farther, snipping above a similar branching junction but deeper into the plant. You may find the need to do this with smaller, compact lavender plants that have less space between the bud and leaf nodes. Or, to clip a little extra off a large established plant.
After harvest, you ’ll be left with a nice little bunch of lavender – perfect to hang and dry, or to display as a beautiful bouquet. To enjoy lavender like classic cut flowers, simply place the harvested blooms in a vase of water (if you don’t intend to dry them). For medicinal or edible applications, you’ll want to use it as soon as possible for the best fragrance and flavor. Keep reading below to learn how to dry fresh lavender.


How to Prune Lavender
Pruning lavender is similar to the harvesting process, just a bit more vigorous! Plan to prune your lavender plant once or twice per year. Always prune after flowering. If you prune lavender right before it goes into bloom, it will significantly delay the arrival of flowers.
The first and less crucial “pruning” session can simply be harvesting a good amount of the first bloom of flowers in spring. Even if you aren’t harvesting flowers to keep and dry, the act of deadheading (removing spent blooms) is great for overall plant health and promotes new growth. During the spring prune, aim to cut back about a quarter to one-third of the plant.
The best time to give your lavender plant a slightly harder prune is in the fall, after the last bout of flowers fades. Hardy English lavender varieties naturally die back in the winter and respond better to hard pruning than non-English varieties.


Pruning English Lavender
Prune English lavender back by one-half to two-thirds of the new growth each fall. As with harvesting, trim just above leaf nodes or side branches. Avoid cutting into the lowest bare woody growth. Take a peek around the base of the lavender plant: you’ll see tough woody growth close to the ground that has no sprouts or leaf nodes, and more tender growth (green or light brown) above that. Trim at least a few inches above the naked woody part, leaving behind a couple leaf nodes per branch.

Pruning Spanish & French Lavender
To prune more tender Spanish and French lavender varieties, be more gentle than you would with English Lavender. Cutting back too much can damage and potentially kill the plant. Lightly prune, harvest, or deadhead blooms throughout the growing season. Then towards the end of summer, prune the shrub into a rounded mound of foliage. Most gardening resources recommend taking off no more than one-third of the plant.
Despite the “best practices”, don’t be too nervous about pruning! A just-pruned lavender plant can look quite rough around the edges… literally. Don’t worry, it will bounce back and fill in! Plus, routine pruning actually prolongs the life of the plant. We have cut some established plants that were yellowing and looking a bit sad waaaaaay back (almost to the ground, into the “no-no” woody zone) and they were full of lush new growth within a few months. The more established the plant, the more resilient it is to a hard prune.


HOW TO DRY LAVENDER FLOWERS
Now that you’ve harvested fresh lavender, let’s talk about three different ways you can dry it. The method you choose is totally up to you. I will touch on some of the pros and cons of each.
1) Hanging Lavender to Dry
The most simple way to dry fresh lavender is to let it hang dry.
- Collect handful-size bouquets, secure the stems together with twine or a rubber band, and hang them upside down to passively dry.
- If you harvested a lot of lavender at once, it is best to create and hang several small bunches rather than one large one. Large dense bunches of lavender will receive less air flow, dry more slowly, and are more prone to developing mold.
- For that same reason, do not tie the bands too tightly. The bunches should be tied secure enough to not fall apart, but not crazy-tight against the stems.
- Hang the lavender bunches in a warm, dry location with good air circulation. An open window or fan nearby will help. Drying lavender in a dark place (out of direct sunlight) will improve color retention.
- The time it takes to fully dry can vary from a couple of weeks to over a month, depending on your climate. To test if the lavender is dry, try to break one of the stems. When completely dry, they will crisply snap in half rather than bend.
- You could also place bunches upright to dry in a similar manner (such as in an airy vase without water) though the tops may flop over and dry less straight.
Clearly, this method of drying lavender works best in warm arid climates or controlled indoor conditions that enable the lavender to thoroughly dry. Living near the coast, we experience a bit of fog and mild humidity, and our decorative lavender dries pretty well this way. We have bouquets of dried lavender on display in every room!

2) Drying Lavender in a Food Dehydrator
Another way to dry lavender is to use a food dehydrator. This process is also very easy, and much quicker than passively drying it at room temperature. I prefer to use a dehydrator to dry lavender that is intended to make lavender-infused oil or salve. It not only expedites the process, but also helps to ensure the lavender is 100% dry! Inadequately dried herbs that contain leftover moisture can easily cause medicinal oils to develop mold and spoil. With our cool foggy summers, this is simply what works best for us to guarantee success.
However, it is best to avoid overheating the lavender in order to preserve the highest level of essential oils and therapeutic benefits possible. Therefore, set your food dehydrator on the lowest temperature setting (no more than 100 to 105°F).
To dry lavender in a dehydrator, this is the process that I follow:
- Harvest fresh lavender as described above. Even though I will only dry the buds themselves, I like to remove the entire long flower stem during harvest to keep the plant looking fresh.
- Gather the lavender with the buds clustered together, and trim off the excess stems. Toss those in the compost pile.
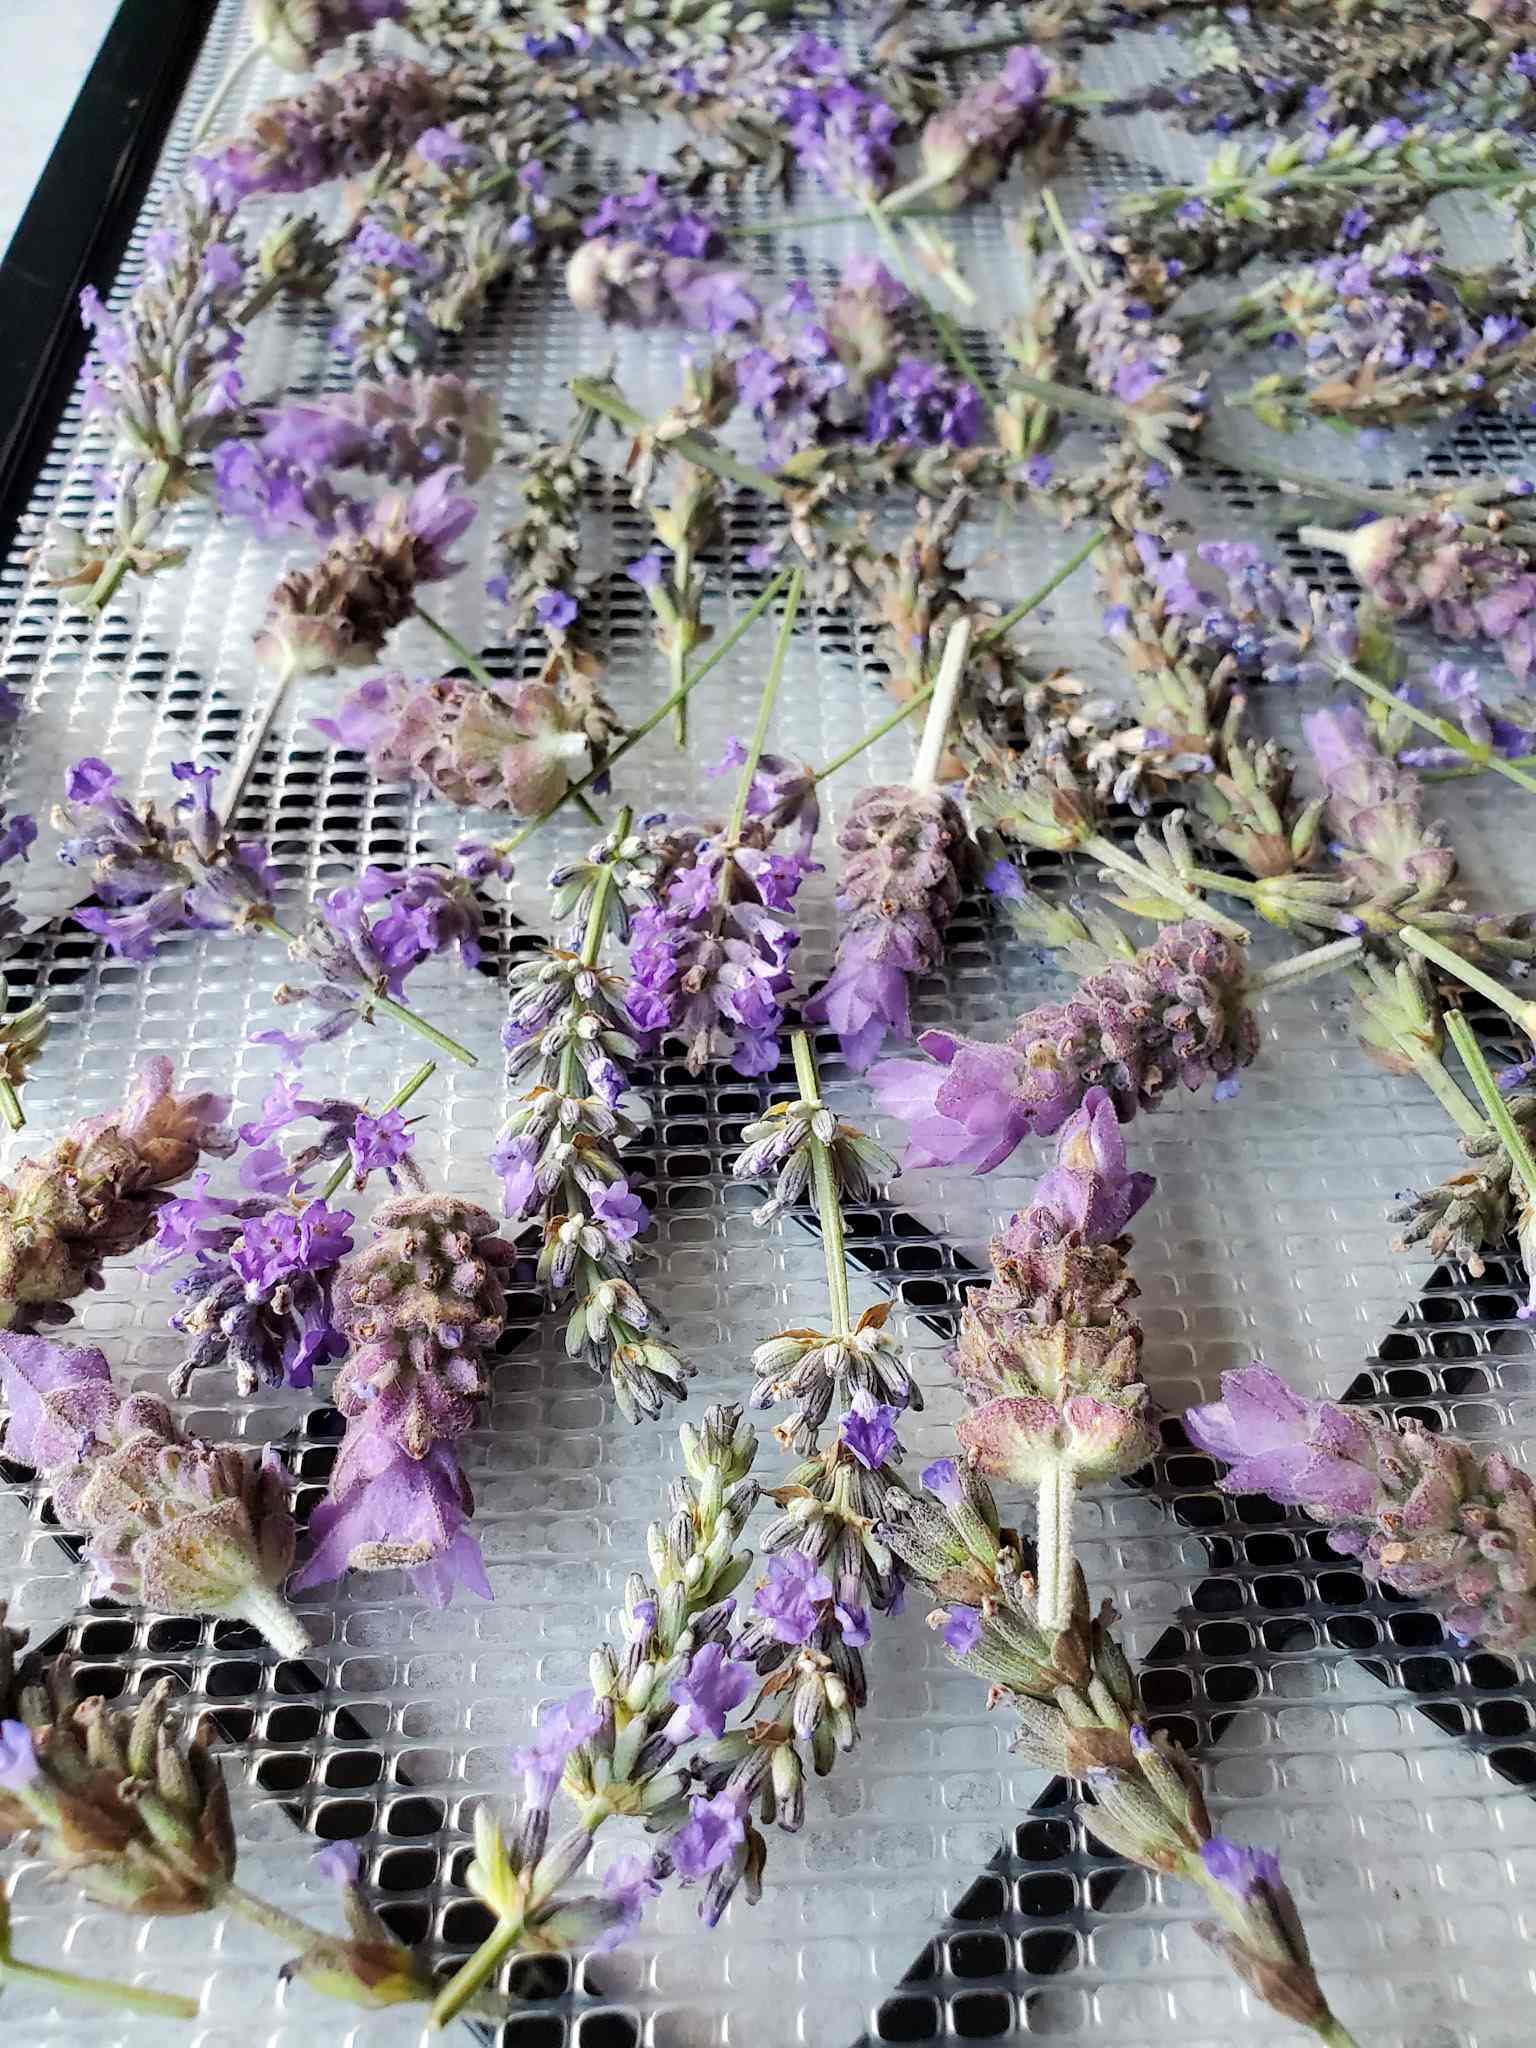
- Lay lavender buds out on the dehydrator trays in a single layer. If your lavender is extra crumbly or your dehydrator trays have large openings, you may want to use dehydrator tray liners (if you have them). Alternatively, you can line your dehydrator trays with parchment paper if the flower buds are falling through.
- Dry the lavender on a low temperature setting. Our Excalibur dehydrators have a “living foods” setting (95-105°F), designed to preserve beneficial plant enzymes.
- The lavender will take about 24 to 48 hours to fully dry, depending on the variety of lavender, size of buds, and machine used. To test if they’re fully dry, try breaking a large bud apart. It should feel dry, crumbly, and the middle stem should snap rather than bend.
- Once the buds are dry, transfer them to an air-tight container for storage or their other final destination/use.


3) Drying on Screens or in Baskets
The third and final way to dry lavender is much like the first method, minus the bunching and hanging. Some traditional herbalists simply lay out their fresh herbs and flowers to dry on screens, or in airy baskets. You can dry full lavender stems or just the buds this way.
Homemade herb drying racks can be assembled of a single or many “shelves” of flat framed screens. Or you could use a specialized multi-tier hanging herb drying rack like this one – which is what we use to dry other herbs, including cannabis. Also like the first method, allowing lavender to passively dry on screens or in baskets requires warm arid conditions – and time. Spread the lavender flowers out in a single layer to allow good air flow between them.

How to Store Dried Lavender
After the lavender has finished drying, one option is to leave the flower buds intact on the long stem, ideal for displaying dried bouquets or to use in dry floral arrangements. Otherwise, snip or strip the flower bud portion off of the stem and store it in an airtight glass container for maximum freshness, flavor, and aroma. Store the container in a cool, dark, and dry location.
Ways to Use Dried Lavender
Floral bouquets aside, there are dozens of creative ways to use dry lavender! Lavender is incredibly versatile and beneficial. It is used for aromatherapy, proven to help reduce anxiety, stress, depression, and insomnia. The aroma is also known to repel pest insects. In addition to smelling wonderful, lavender has many other health benefits. With natural anti-inflammatory, antioxidant, antibacterial, anti-fungal, and pain relieving properties, dry lavender is ideal to use in homemade medicine and body care products.
As an edible flower, there are many culinary uses for lavender too! Remember, English and lavandin hybrid varieties are most popular to use in edible applications. The higher camphor content in Spanish and French lavender make them less palatable and sweet – yet camphor is an excellent terpene to ease swelling, itching, and pain!
Here are a few ideas of how to use dry lavender:
- Use a small mesh bag or cheesecloth to create sachets of soothing lavender potpourri, perfect for a dresser drawer, bathroom, car, or bedside table.
- Make a refreshing lavender room or linen spray.
- Use it as an ingredient to make lavender-infused oil, tinctures, salves, soap, body scrub, and more. We make homemade organic lavender salve (learn how to here), and recently began offering it in the Homestead and Chill shop! My friend Tanya over at Lovely Greens has a great recipe to make lavender bath bombs. (I wish I had the time to take soaking baths!)
- Create lavender simple syrup. We love making a light lavender syrup to add to homemade kombucha (I go light on the sugar, heavy on the lavender). In fact, lavender-lemon is one of our favorite kombucha flavor combinations for second fermentation. Lavender syrup is also killer in cocktails!
- Make lavender sugar to incorporate into desserts like sugar cookies, cake, or cupcakes.
- Lavender can be included in sweet and savory marinades – most often used for meats, but also amazing with roasted potatoes or other veggies.
- Sprinkle dry lavender in your chicken coop and nesting boxes to repel flies, cut odor, and calm your hens.
- We routinely add old dead-headed lavender buds and stems as a soil top-dressing in potted plants, to serve as organic mulch as well as repel pests.
I plan to write more detailed articles about several of these ideas, so stay tuned! So far, I have shared tutorials on how to make lavender-infused oil here, and also homemade lavender salve here!

And that is how you harvest, prune, and dry lavender.
I bet you’re already reaching for your clippers and headed for the door! As you can see, harvesting and drying fresh lavender is super simple and rewarding. I also find the process really therapeutic – the perfect excuse to turn on some music, tune out, and snip snip snip away…
I hope you found this article to be useful and interesting! Please feel free to ask questions or say hi in the comments below, and spread the lavender love by sharing this article. Thank you for tuning in, and happy harvesting!
You may also enjoy these related articles:
- How to Make Homemade Lavender Oil, and 9 Ways to Use It
- How to Make Homemade Lavender Salve to Soothe Skin & Nerves
- All About Calendula: How to Grow, Harvest, Dry & Use Calendula Flowers
- How to Make Calendula-Infused Oil
- Top 23 Plants for Pollinators: Attract Bees, Butterflies, and Hummingbirds
- Companion Planting 101, with Printable Companion Planting Chart
- Growing Herbs 101: How to Start a Kitchen Herb Garden


47 Comments
dan
Thanks, I appreciate the photo with a Bee; it let me know who likes a plant.
I bought a Bee Hotel from Etsy and needed a reason for Bees to visit and hang out.
Val
Lavender spray ,another great artical I look so forward to reading your emails
Just wondering how I could make a lavender spray and what it can be used for,as I have lots of lavender I can use
Aaron (Mr. DeannaCat)
Hi Val, thanks for reading and for your support of Homestead and Chill! Check out this recipe on how to make your own lavender spray, most people use it to refresh a room, or to spray on linen, towels, clothing etc. Hope that helps and good luck using up your lavender flowers!
Leslie and Harry
Hello,
I am in MT up from Fl for my great grandson’s wedding. My granddaughter and I pulled up a part of a lavender bush and it is very dry. Hoping your expertise can help…can we save the part of the bush we pulled up. It has beautiful lavender sprigs? AND we were hoping to replant it, but really have no idea how to?
Also, we have 100 sprigs we cut and would like them to be used in 1 week as part of the wedding dinner presentation.
Hoping you could help and email me on what to do .
Blessings,
Leslie
Aaron (Mr. DeannaCat)
Hi Leslie, you can cut off branches of the lavender plant and store the twigs in a vase of water in a window sill, they should start to root in time and when the have a fair amount of new roots growing off their stems sections, plant them out in the ground again. If you wanted to replant the lavender bush you dug up, you could try and re-plant it and give it plenty of water in hopes that it will take hold. Your best bet for using the lavender sprigs as part of the wedding presentation is to let them dry fully and use them however you see fit for the wedding. Hope that helps and good luck!
Patty Jameson
My lavendar has been epic this year!! I’m harvesting a ton of flower buds. However, I don’t get how to get flower buds off Spanish Otto lavendar. What am I not getting with this type of lavendar. Thanks!
Aaron (Mr. DeannaCat)
Hi Patty, that seems odd as lavender in general is fairly low maintenance and we have never experienced any of the Spanish lavenders (or lavender in general) to be lacking in blooms. It may just take time but some things to consider are its location, soil, and moisture level compared to your other plants and see if there are any major differences. Lightly prune the plant in early spring before in blooms in hopes of spurring a more profuse flowering period.