
How to Grow Potatoes in Containers (Grow Bags)
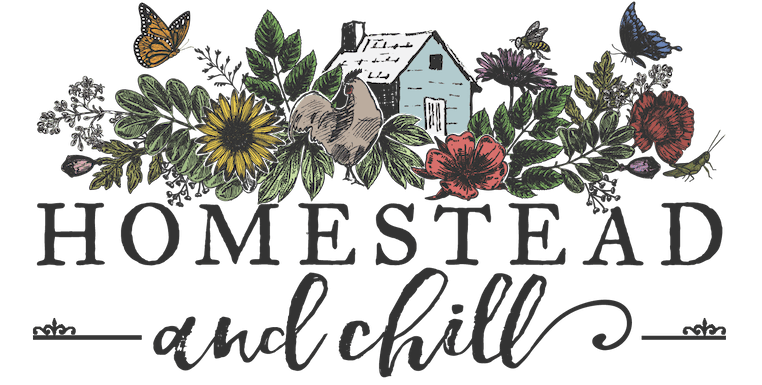
Nothing beats homegrown potatoes! I mean, that can be said about pretty much all organic homegrown produce… but homegrown potatoes are somethin’ special. No grocery store potato can even come close to the rich, earthy, creamy, complex flavor profile of a homegrown spud. The great news is, they’re also quite easy to grow! With the right conditions, you can be harvesting and enjoying your own homegrown potatoes in no time too!
Read along to learn how to grow potatoes in containers, including their soil needs, sunlight, water, and temperature preferences. We’ll also discuss options for obtaining potato seed, and how properly to prepare it for planting.
There are several ways to grow potatoes, such as in hills in the ground, in a raised bed, inside a wire fence cylinder, or even trash cans! Most of the tips and information I will share here today can be applied to any growing style. We personally love to grow potatoes in fabric grow bags because of their excellent drainage, mobility, ability to control the soil condition and moisture, and ease for harvest. The ones we love and use are very durable, and can be reused for years and years!
At the end of this post, check out the video about how to grow potatoes that goes along with it!
SUPPLIES & REQUIREMENTS
- Seed Potatoes
- Soil – Rich, loose, well-draining, and acidified if possible
- Container(s) – We use 15-gallon or 20-gallon grow bags. They can be used to grow food even in the most limited garden spaces!
- A sunny location
- Consistent water
- Optional: Straw
Let’s start with the part that makes the rest possible: seed potatoes.
Seed Potatoes
You can either buy potatoes that are specifically sold as seed, or try your hand at sprouting and growing store-bought potatoes. Generally, you’ll have the most guaranteed success with seed potatoes. They’re grown specifically for this task, and are certified to be disease-free. They often times even come slightly pre-sprouted for you! You will also have more options to find and grow unique varieties that way.
Some places we have bought seed potatoes over the years include High Mowing Seeds, Seeds Now, Peaceful Valley, Territorial Seed, Johnny’s, and Irish Eyes. We also sometimes see them at our local garden center or nursery. Note that most places will sell out of seed potatoes by spring! It is important to order your potatoes in the winter to ensure you get some, or you may be left with slim pickings.
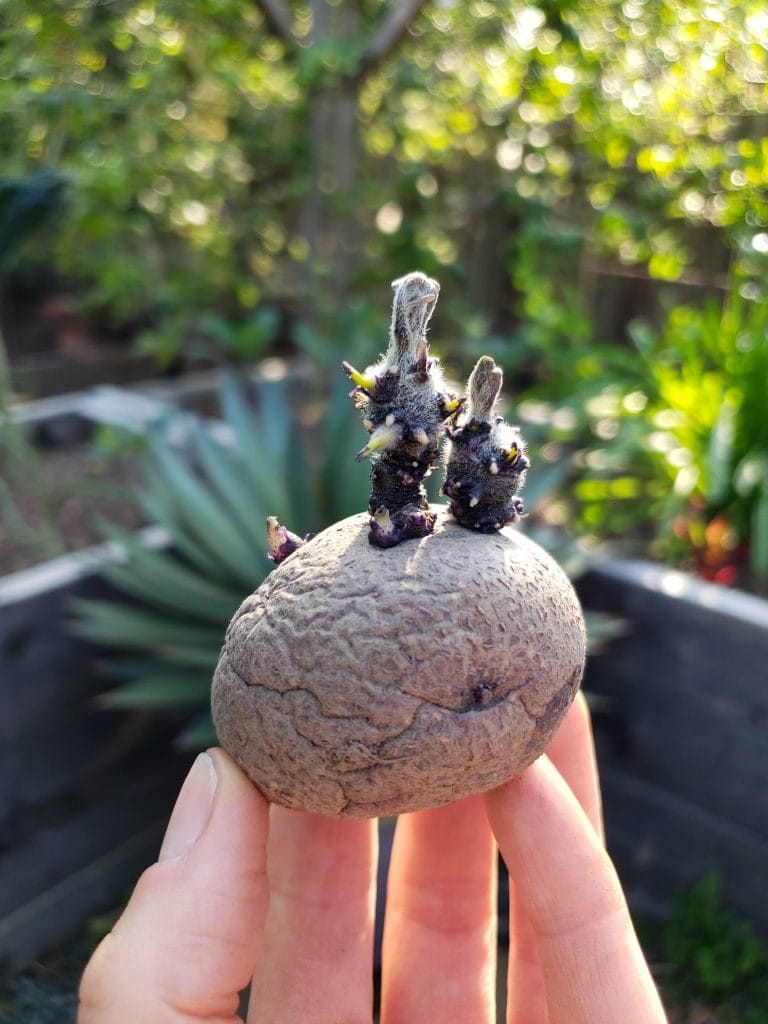
There are dozens, even hundreds, of different potato varieties to choose from! Spuds can vary in size, shape, color, texture, flavor, best use, and time to harvest. Read through the seed potato descriptions to see which variety you may like best! They’ll usually say if that variety is known to be more mealy or crisp, juicy or dry, and which ones are better for storing, mashing, frying, or baking. Speaking of different types…
Early, Late, and Mid-Season Potatoes
When you’re potato seed shopping, you’ll likely see one of these three designations with each variety. Which variety of potato should I choose? To help you decide, here is a brief breakdown of their differences:
- Early season potatoes, or “new potatoes” reach maturity within only 75 to 90 days. These could be ready to harvest in early summer, depending on when you planted them. If you are in a climate with very hot summers, choosing early season varieties may be best to beat the heat! Potatoes don’t love temperatures over 80 degrees. Alternately, if you’re shooting to plant a round of potatoes in late summer for a fall harvest, an early-season type may be ready for harvest before the first frost hits.
- Early potatoes are least likely get blight, as they’re usually harvested before disease can take hold. However, they don’t last as long in storage. A couple popular early potatoes include Caribe and Norland, but there are many.
- Mid-season potatoes, also referred to as “second early” are just a tad longer than earliest types. These ones will be ready to harvest in about 95 to 110 days. Yukon Gold is a widely popular and delicious mid-season potato that grows well in warm climates.
- Late-season potatoes, also called “main crop potatoes” are generally finished growing and ready to harvest within 120-135 days, closer to the middle or end of summer. While they take longer to grow, the late-season type are known to last longer in storage as well. These are said to be best for baking, mashing, and roasting. The earlier varieties are more crisp and tender for pan-frying. Kennebec and Butte are well-known late-season varieties.
- Both early and mid-season potatoes are considered determinate, while late-season spuds are indeterminate.
If you’re like us and plan to grow several varieties, check out this 4-pack of 20-gallon grow bags! Amazon also has a 5-pack of 15-gallon bags that have handles, which makes moving them around much easier. These bags come in handy for many more crops than just potatoes! We use them for peppers, tomatoes, and others too.
Grocery Store “Seed”
If you do opt to try to grow from store-bought spuds, here are a few tips: One, most definitely choose organic. Inorganic produce can be treated with chemicals that intentionally inhibit sprouting. That will just thwart your efforts. I would also suggest buying your potatoes well in advance (like months) before you plan to plant them. This will give them plenty of time to soften up and sprout for you, also referred to as “chitting”.
Chit or Get off the Pot
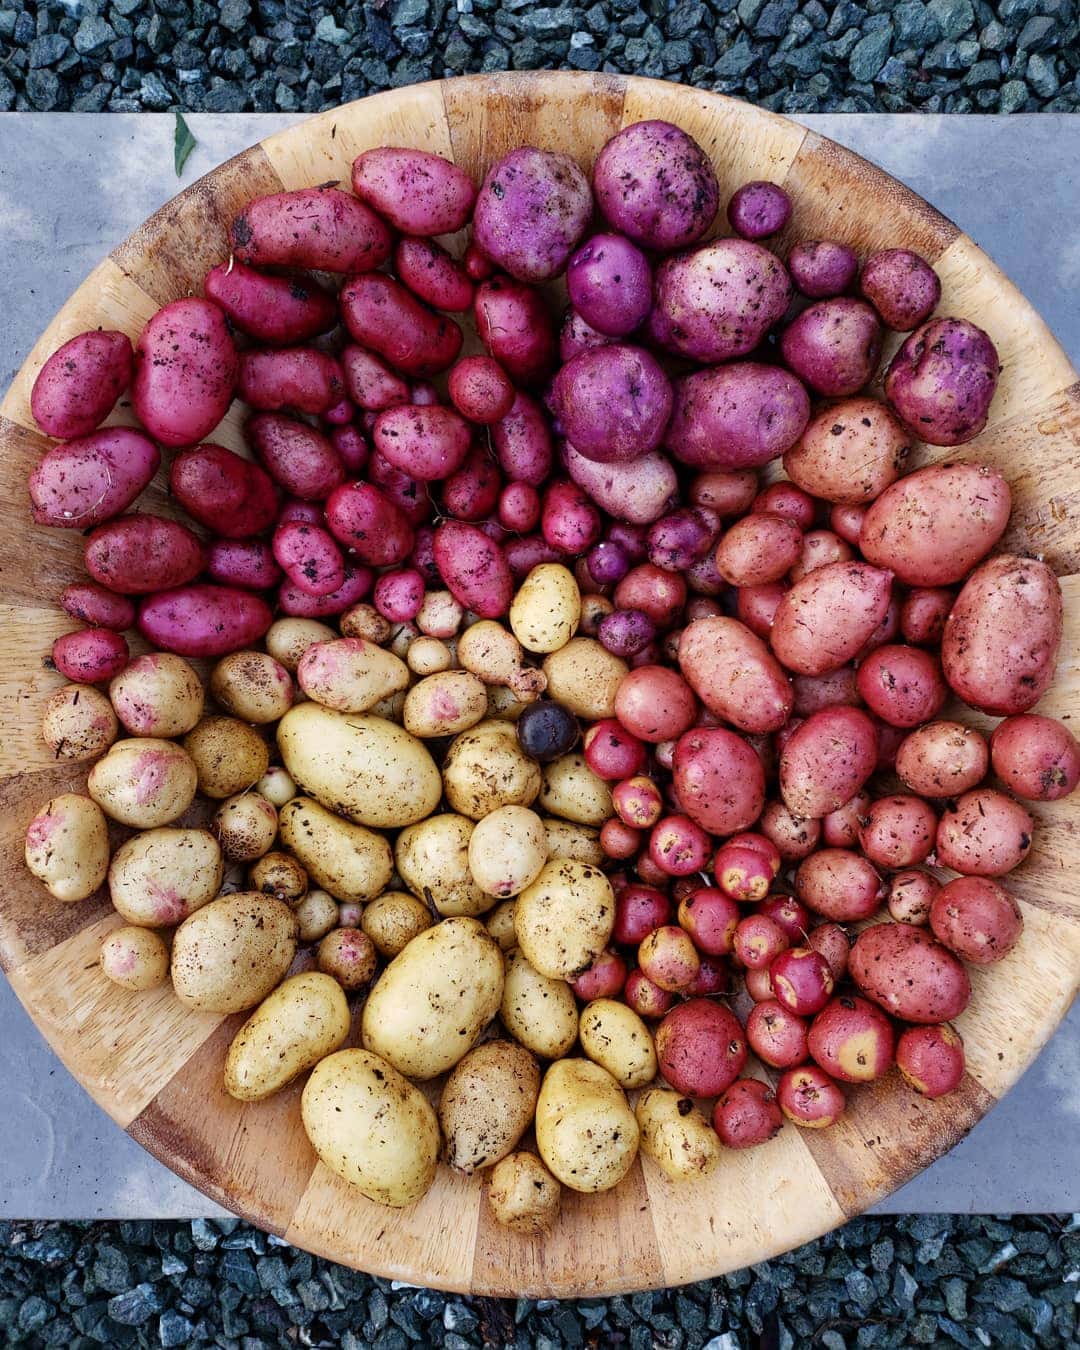
Chitting is the process of encouraging your potatoes to sprout in anticipation for planting. By sprouting them in advance, it gives the potatoes a head start and will result in a more robust harvest!
The chitting process can take 4 to 6 weeks. To chit your potatoes, you may need to first put them in a warm, dark location for a week or two. Around 70 degrees is a good target. This helps them break dormancy – waking them up to allow for sprouting. (This applies to potatoes that are not already starting to sprout. If they are, skip to the following step.) After that, move them into a slightly cooler area with bright ambient light. Not necessarily in a bright window, but somewhere with exposure to decent light. We set ours on a shelf in a spare room across from a large window.
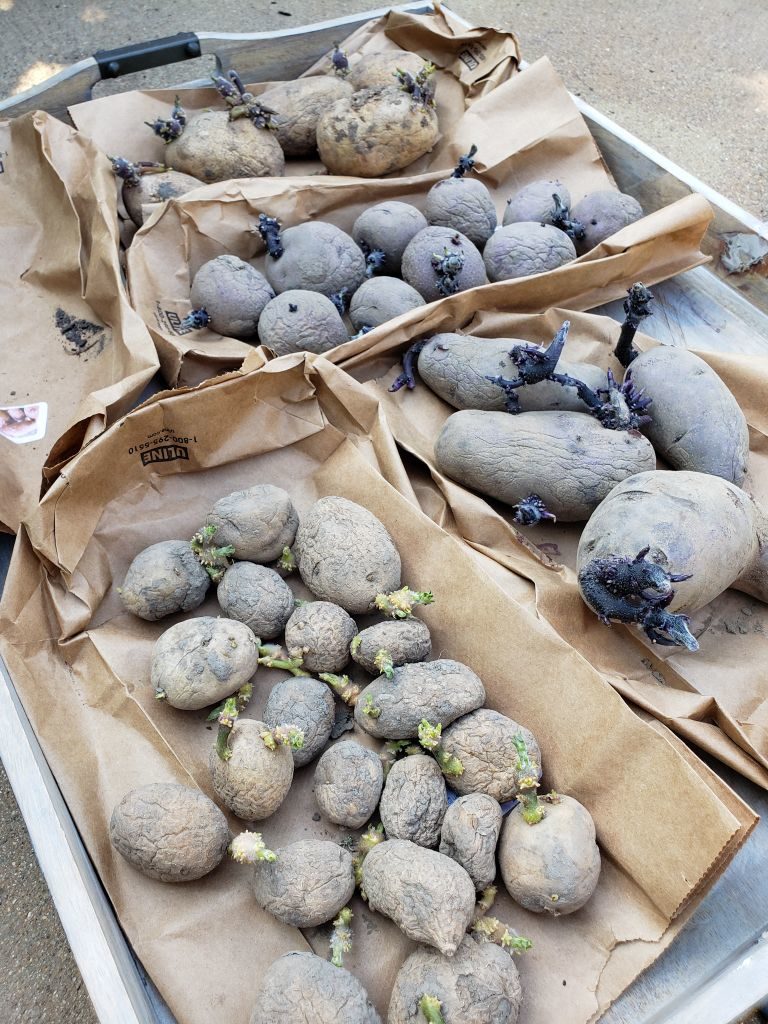
When you move them out into the light, take a look at each spud. Determine which side of the potato has the most eyes. The eyes are the little indentation or nubs along the otherwise smooth potato skin. Those eyes are where potential sprouts will emerge from! The portion of the potato with the most concentrated number of eyes is called the “rose end”. Place the seed potato in a position with the rose end facing up, exposed to light. With this treatment, they should begin to sprout shortly.
Again, if you buy seed potatoes from an online seed company, they very well may come sprouted and ready to go!
Cutting seed to create more
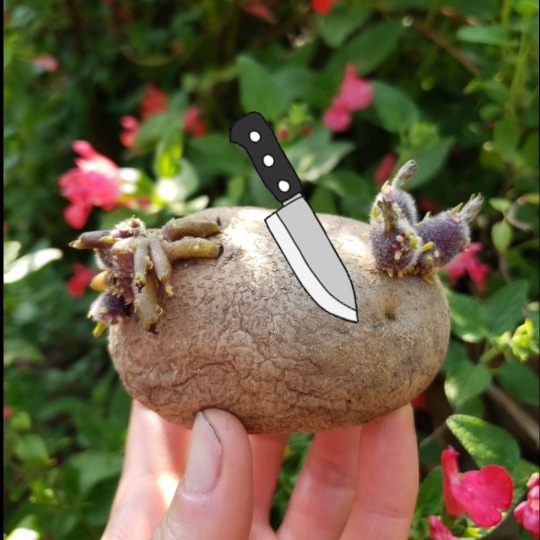
Seed potatoes can be cut into smaller portions to create more seed! This isn’t necessary when the seeds are already fairly small, or if you have more than enough on hand already. However, if your seed potatoes are very large and you would like to get even more seed pieces, you might be able to cut them. I say “might” because this depends on the seed and how many eyes it has.
When cutting up a seed potato, ensure that each new piece will still have at least one or two promising eyes once divided. Using a clean knife, cut the larger seed potato in half (or more, depending on size and eyes). It is important that you do this at least several days prior to planting outside! A week or more is even better. The fresh cut sides need time to dry and scab over before being planted. If they’re planted when wet and exposed, you run a great risk of having them rot in the ground!
Planting Timing
Once your potatoes are nice and chitty, they can be planted outside once the soil temperatures have reached at least 40 degrees Fahrenheit. Another way to determine timing is based on the last frost date for your growing zone. For potatoes, they can be put out as early as two to four weeks before your last frost date. I say “as early as” because you don’t necessarily have to start them then.
In our moderate climate, we are able to start potatoes at various times throughout the year! However, if you live in a place with very hot summers, you will want to start them as early as possible to avoid the hottest part of the summer. Potatoes don’t love extreme heat. We’ll talk more about that soon.
If you aren’t sure about your zone, frost dates, and planting times, refer to the Homestead and Chill planting calendar! If you haven’t gotten yours yet, you can get it immediately via email by subscribing.
Potato Soil Preferences
Rich and Fluffy
The ideal soil for growing potatoes will be rich, full of organic matter, and fluffy. We always add some compost and worm castings in with our potato soil! Avoid high nitrogen fertilizers. Your potatoes will grow large greens but smaller tubers with too much nitrogen present. To help keep the soil from becoming compact, which is not something potatoes enjoy, straw is often used when growing potatoes – to create extra fluff. We’ll talk more about straw below, in the “Care While Growing” section.
Acid
Did you know that potatoes love acidic soil? Yep! Most potting soil or garden soil is closer to neutral or just very slightly acidic, with a pH around 6.5 to 7. In contrast, potatoes prefer a pH range of 4.8 to 5.5 to thrive. To accomplish this, you can amend your target soil with horticulture sulfur. Keep in mind that sulfur is generally slow-release, thus, it can take months for the soil to adjust its pH. Using this technique, planning in advance is required!
A few years ago we stumbled across an organic bagged “Acid Planting Mix” soil by G&B Organics, and have been using it to grow potatoes ever since. The pH is already adjusted for us! Furthermore, it is a perfect texture, and has a ton of other great amendments added too – like worm castings and kelp meal.
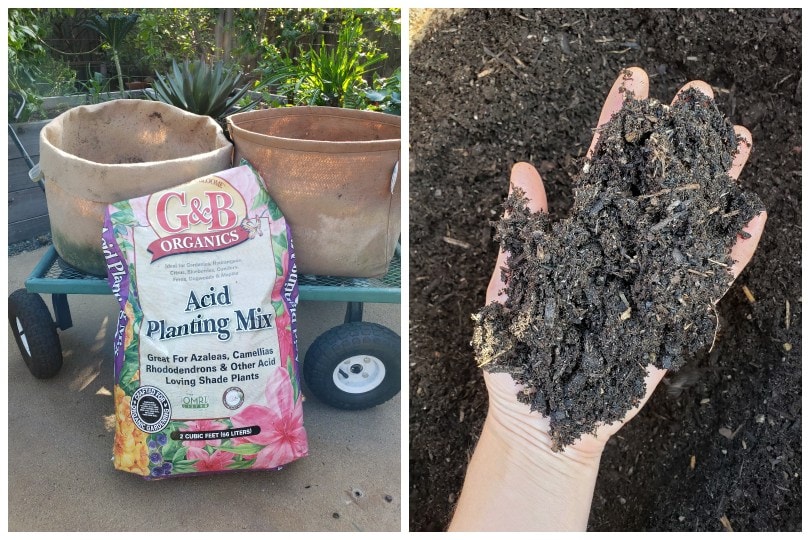
The fact that potatoes grow well in acidified soil is the one of the biggest reasons we do not grow them in our raised beds. Rather than doing a bunch of pH adjustments to the beds, we’d rather give the spuds their own designated happy place. We use the same soil and treatment for our acid-loving blueberry bushes, who are grown in their own wine barrels.
Unfortunately, I believe G&B Organics is only available on the West Coast. We find it at our local Farm Supply. If your local garden center carries G&B soils but not this mix in particular, ask and see if they can order it in for you! Ours does, at no additional cost. For folks who live elsewhere, keep your eyes out for their “Shade Planting Mix” – which is the equivalent product in their Kellogg Organics line. Your local Home Depot or Lowe’s probably carries it.
If you look around and can’t find an acidic soil, don’t stress over it. Plant them anyways! Acidic soil is said to help them grow better and stronger (and be more disease resistant) but I am sure people grow them okay in regular soil too.
Drainage
Potatoes like to be evenly and consistently moist, but never soggy. When overwatered or grown in heavy soil, they could rot! Therefore, the soil you use should be able to drain well, but also have good moisture retention. It’s all about balance. This is one of the many reasons we prefer using fabric grow bags! They’re easy to assess and control moisture, and do not become water-logged easily. If you are using a more solid container, ensure it has plenty of drainage holes!
Planting Your Seed Potatoes
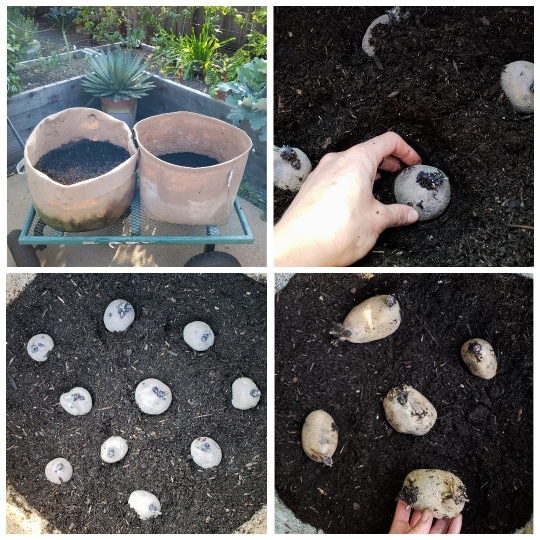
Fill your chosen container about one-third to half-full with the perfect acidified, rich, fluffy soil and compost. The amount will vary depending on the size and depth of your chosen container. The goal is to have enough soil to allow several inches of soil (at least 4-5”) below the seed potatoes, a few inches on top, plus some room to spare to add more soil later as they grow.
Bury sprouted seed potatoes about 3 inches deep in the soil, and about 4 to 5 inches a part. Note that I will put more smaller sized seed potatoes in a bag, and far fewer if they are large. Water thoroughly.
Ideal Growing Conditions for Potatoes
Place your potato container in a location that receives full sun. The ideal temperature range to grow potatoes is 50-80°F. If you live in a climate with very hot summers, consider a location with a little late afternoon shade. Also avoid the hottest spots of your garden, like near a south-facing wall or other source of radiant heat. If you get them started early enough in the season, or grow them in fall instead, this may not be a concern!
Care While Growing
Water
Provide consistent, even, deep moisture. Don’t drown them every day, but don’t let them fully dry out between watering either!
Topping off the container
The foliage portion of potato plants will begin to grow and emerge above the soil line. After they reach at least 6” tall, bury the majority of the exposed green stems with more soil and compost, but still leave a couple inches of the greens exposed on top. Why are we burying the stems as they grow? Because more potato tubers will grow off of the stem that’s buried! Repeat this process over the following several weeks as the foliage continues to grow taller, until your container is full and you cannot add more soil.
When topping off potatoes, we usually add more of the acid planting soil mixed with compost. Sometimes, we add a light layer of straw too. Straw helps keep everything nice and fluffy, the way potatoes like it! If you live an area with rainy summers, I definitely suggest adding a couple “lasagna layers” of straw in with your soil and/or compost to help promote drainage.
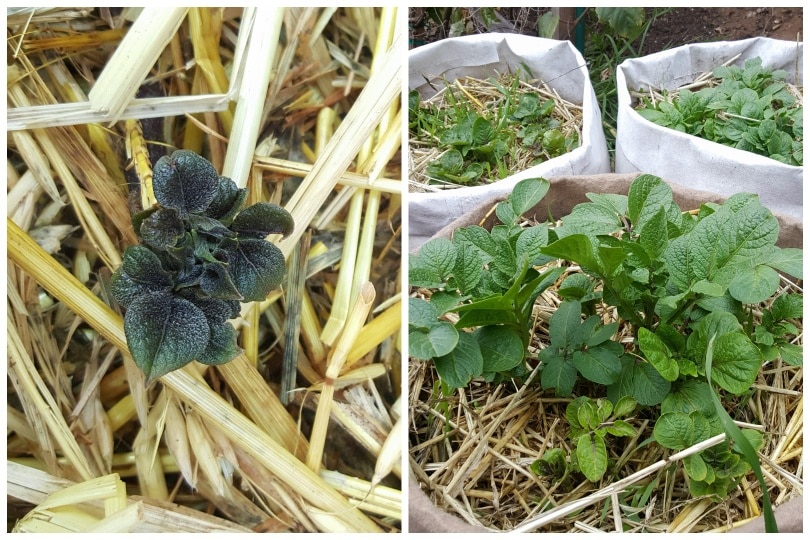
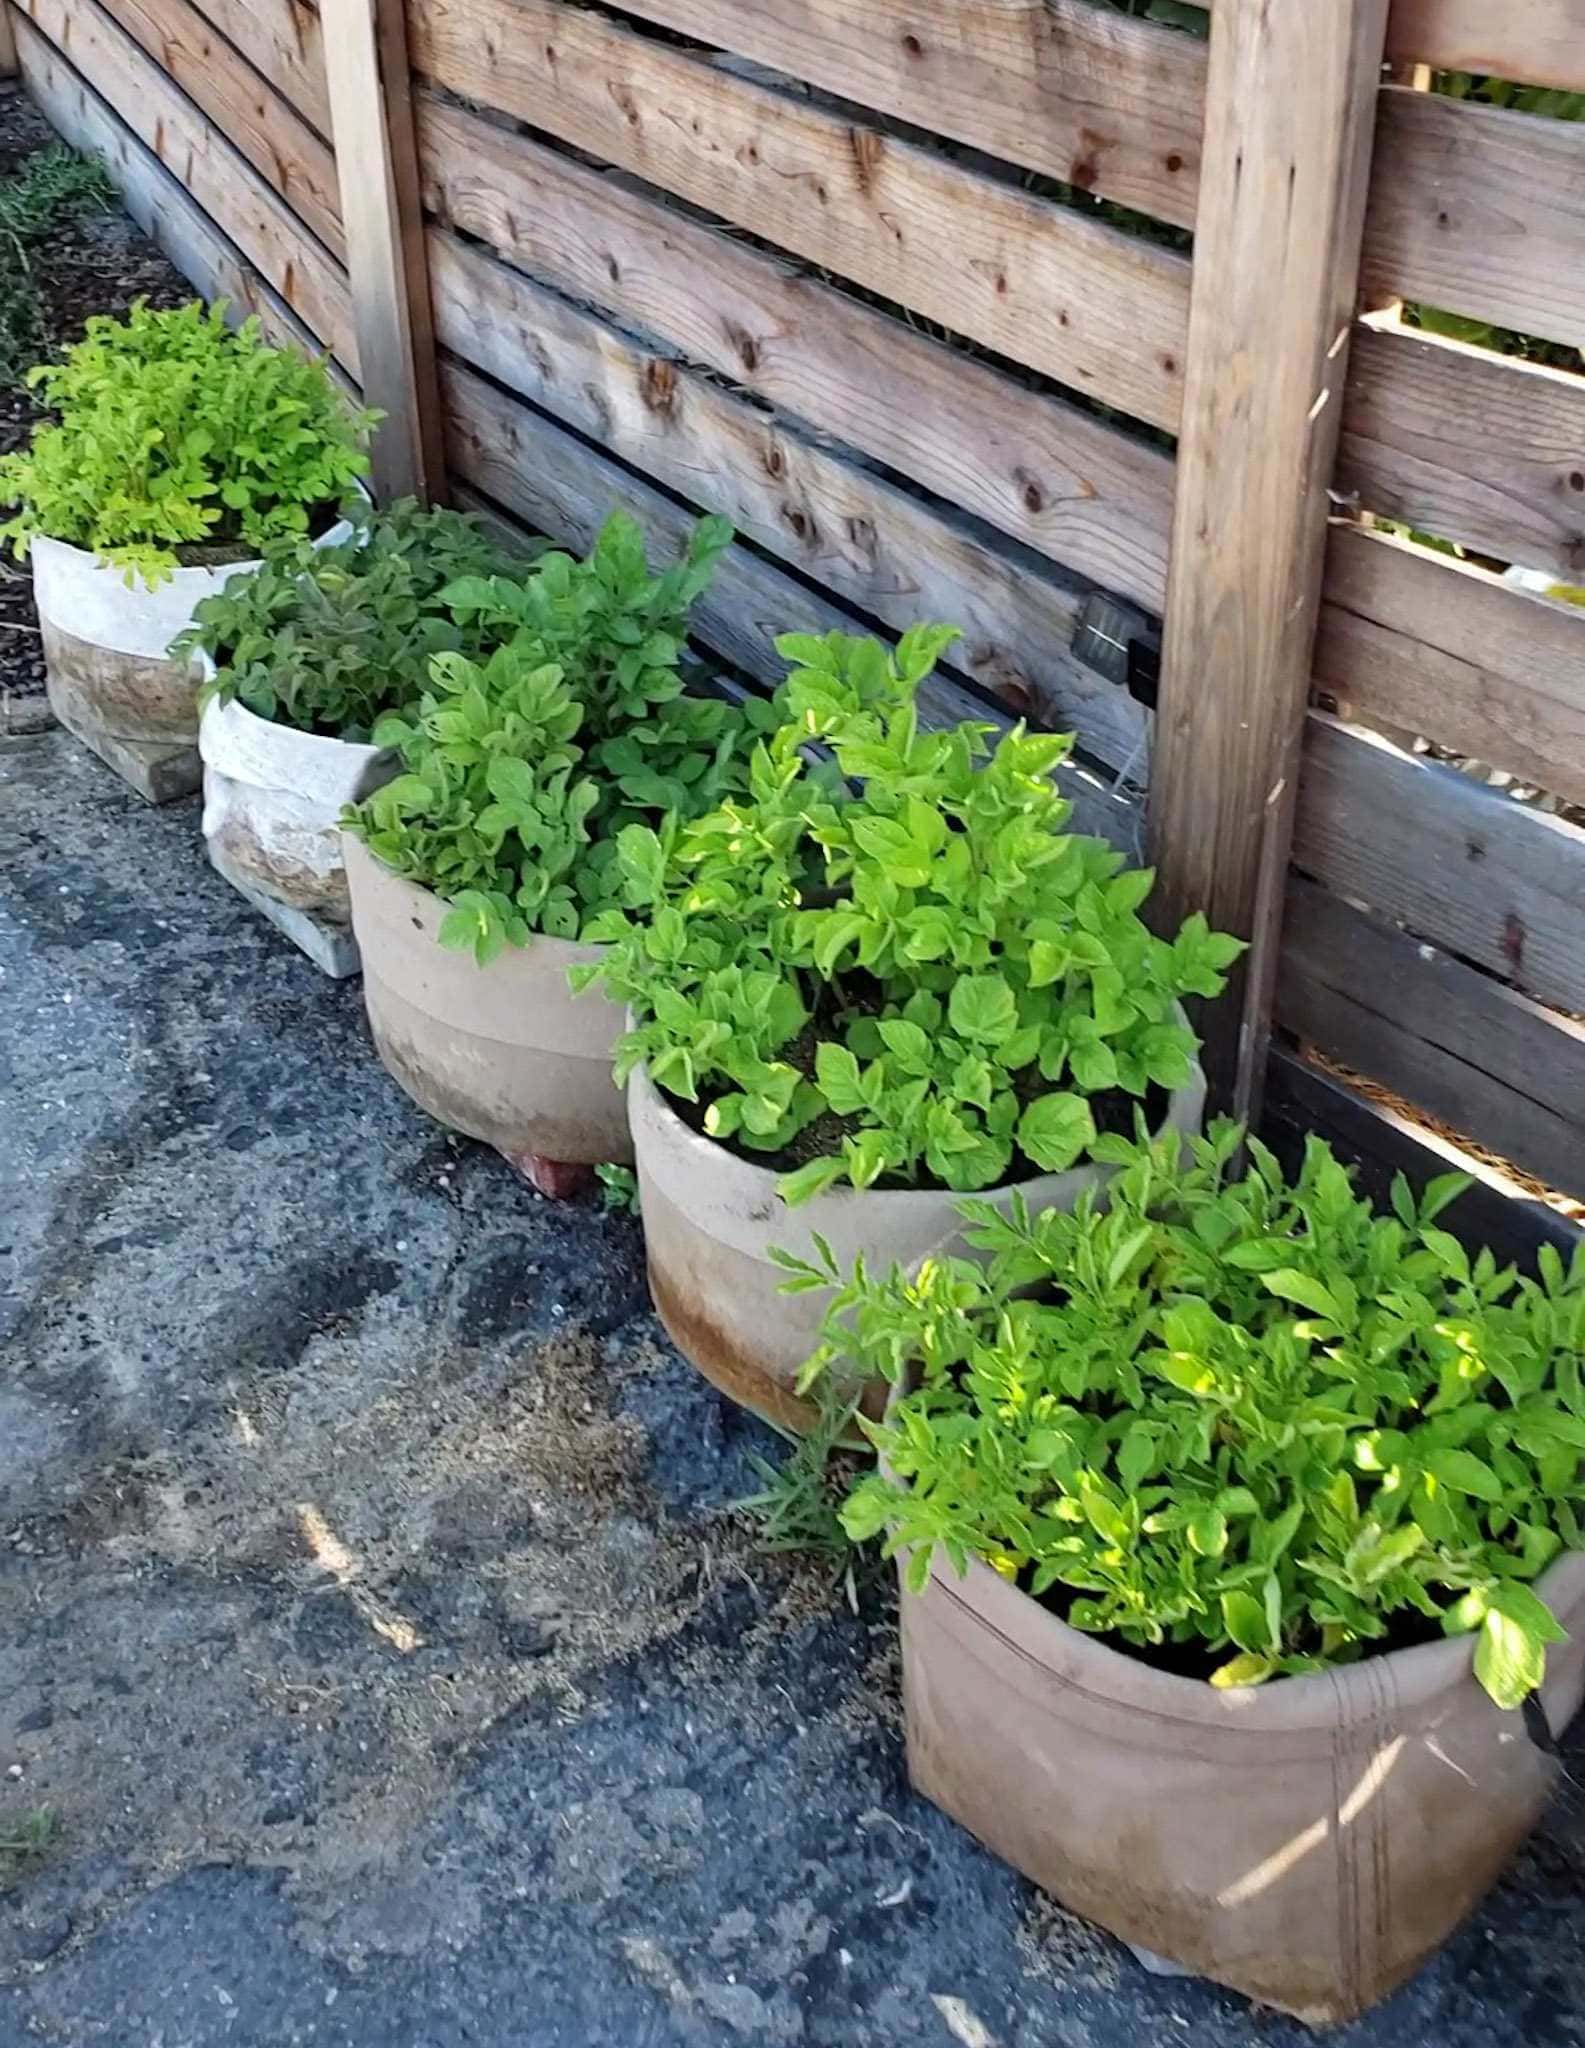
You may be able to tell in the photos that we usually start with our grow bags sides rolled down. This way, as the greens first sprout up while the soil level is still low in the bag, the greens still get as much sun as possible. As they grow and we add more soil, compost and straw, we can unroll the sides of the bags as needed – until the whole thing is full to the brim.
Right: After a good topping off of compost, soil, and straw. The greens were almost a foot tall and exposed prior.
Fertilizer
Potatoes are modestly heavy feeders. Don’t skimp on the compost! We also water them once per month with a dilute seaweed extract, or aerated compost tea from our worm bin. We don’t use all that much “fertilizer” to grow potatoes. As I mentioned, a high-nitrogen fertilizer isn’t recommended for potatoes. However, we may add in a sprinkle of something more mild like kelp meal once or twice while they’re growing.
How to Harvest Potatoes
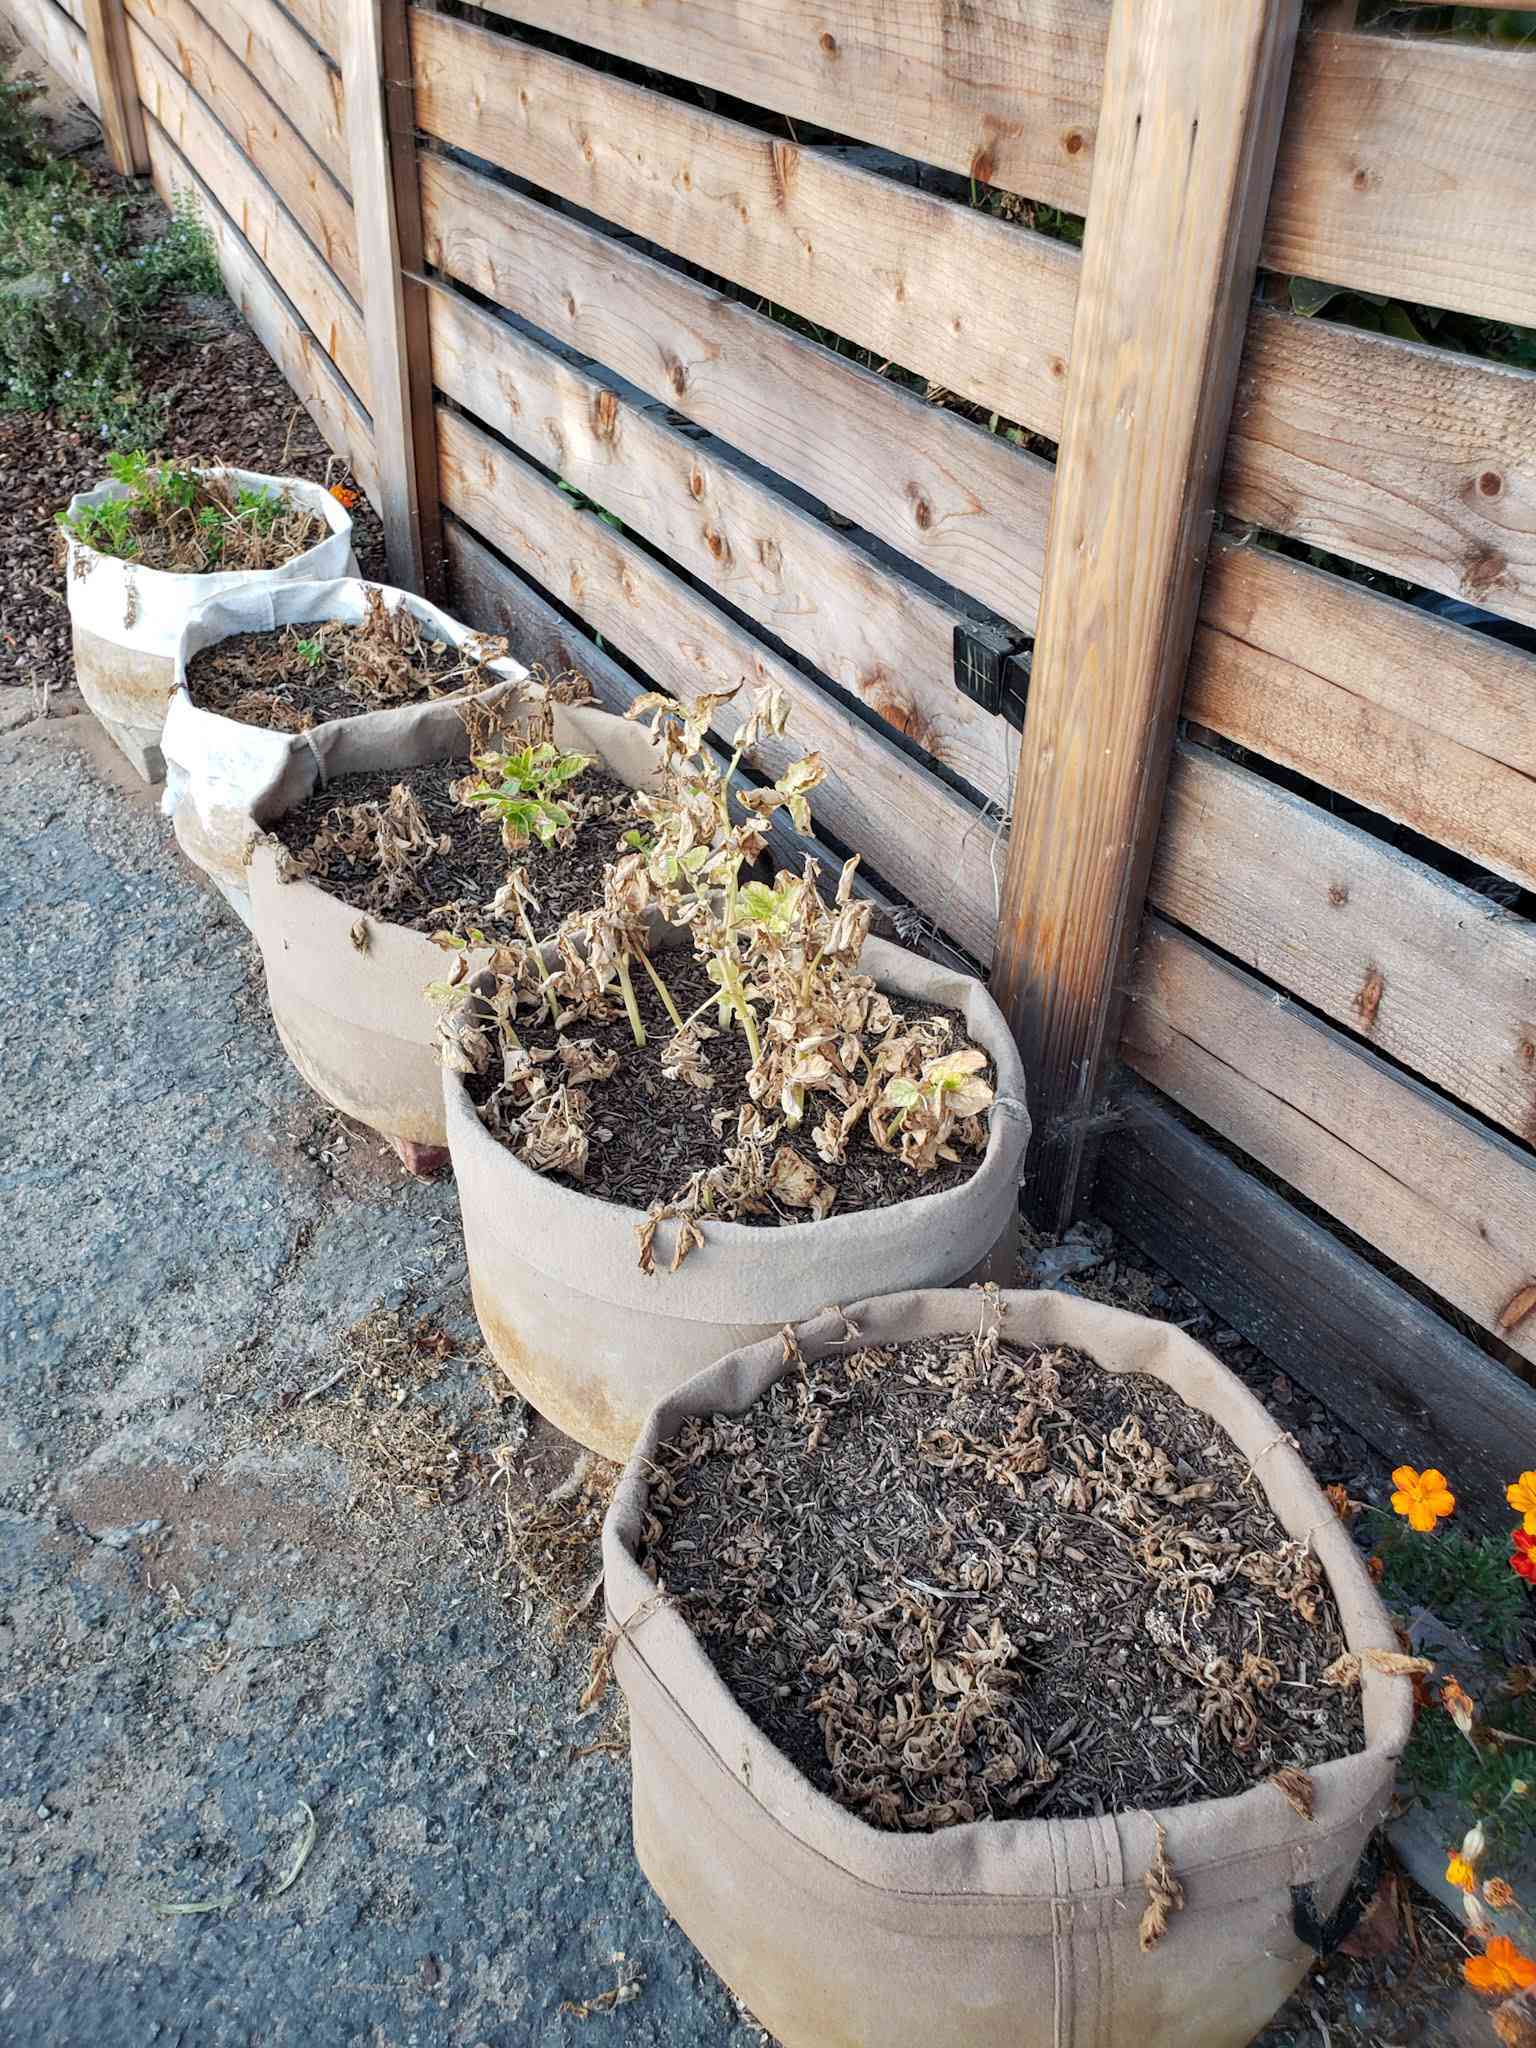
After a few months of good growth, the potato greens will start to turn yellow and then brown, slowly dying back. This is a sign that it is close to harvest time! During the time the greens are withering away, the potato tubers are drawing in the last bits of energy and nutrition from them. Meaning, even though the greens look like crap, the potatoes are still growing. You can cut back water at this time, but wait to harvest until it has been at least 2 weeks after the greens have completely died back.
Potatoes just may be one of my very favorite things to harvest! An additional bonus to growing in containers is that you can just dump them over and start hunting around for spuds! If they’re light enough, that is. We are able to empty our fabric grow bags into a wheelbarrow, making it more comfortable on our backs (hot damn I sound old…) and also easier to dump the soil back into the bags afterwards. This method also reduces accidentally damaging the potatoes, compared to digging them up with a shovel or pitchfork.
Storing Potatoes
To be honest, our potatoes never last long enough to worry about long-term storage. We pop them in a paper bag and store them in a cool dark place, like a spare bedroom closet. They always hold up for a couple months without getting soft. By that time, we have usually eaten them all. However, if you kick butt at growing potatoes and have way too many to store in the fridge at once, check out these tips on curing and longer-term storage from Gardeners Supply!
After all that, the best part is yet to come: eating and enjoying the best potatoes you have ever tasted! If you have never had the pleasure of tasting homegrown potatoes, I am super excited for you!
Here is a video about all how to plant and grow potatoes:
Are you ready to go grow some spuds?
What is your favorite way to prepare potatoes? I am a sucker for pan-fried, or mashed – with garden chives on top. One of our favorite potato recipes is this Roasted Two-Bite Garlic & Herb Smashed Potatoes, perfect for the smaller-than-average homegrown spuds! Or, try this drool-worthy, creamy vegan Potato Leek Soup.
I hope you enjoyed this post, and found it helpful! Please feel free to ask questions and pass it on.
This post is proudly supported by Kellogg Organics.


85 Comments
Ellyce M
Hi Deanna nd Aaron! Thanks for the info–I can’t wait to try my first batch of potatoes. I’m a bit confused on the timing and I’m hoping you have some insight. I’m in zone 9b and I read a few planting calendars that started potatoes in October for zone 9b. Have you done this? Will it actually be growing though the winter?
Aaron (Mr. DeannaCat)
Hi Ellyce, I believe we did grow potatoes over winter or at least for a winter harvest when we were living in zone 10a, potatoes like to grow in temperatures that are 50-80 degrees F so it likely depends on how cold your winter months are. I am sure the potatoes themselves can handle some colder weather overnight (but no hard freezes) as long as it warms up more during the day but if your summer weather is more temperate (average of 80 degrees F or less), you can likely plant potatoes now and harvest before winter sets in. If you do get hot summer weather and unless you really want to grow potatoes this year (or winter), I think you will likely find more success with an late winter/early spring planting of potatoes. Hope that helps and have fun growing!
Joy Valerio
Do you grow sweet potatoes in grow bags?
Aaron (Mr. DeannaCat)
Hi Joy, we have yet to actually grow sweet potatoes but we keep telling ourselves that we need to start! Sweet potatoes just require a longer and warmer growing season than regular potatoes but you can definitely grow them in grow bags or containers all the same. Hope that helps and have fun growing!
Janna Weiss
Hello, friends!
Do you have a source for your straw? Im always Leary to purchase at the feed store as I don’t know how it’s been handled and if there will be seeds.
Thanks!
Aaron (Mr. DeannaCat)
Hi Janna, straw can be hard to come by with any type of confirmation on if it was sprayed or not. In the past we have used straw from a local feed store to build up a hot compost pile and thankfully didn’t have any issues with the final product. Now we typically don’t use straw for growing potatoes because it is less easy to come by for us, Epic Gardening does carry a variety of straw to use as mulch but you may want to reach out to local feed stores to see if they have any information on how the straw was grown as it’s easier to source locally. I am less concerned with the straw containing seeds than I am with the straw being spray with herbicides or pesticides. Hope that helps and have fun growing!
Mary Yahnke
Thanks for all the great information on planting potatoes in bags. Do you use the same soil (with additional compost) for the next year’s planting of potatoes? Any disease issues?
Aaron (Mr. DeannaCat)
Hi Mary, yes we typically save the soil for the following season and re-amend the bags with additional fresh soil and compost upon planting. Last year some of our potatoes developed scab so we didn’t save any of the soil from those bags, hope that helps and have fun growing!
Ema
Thank you for the article; you inspired us to try potatoes in grow bags last season! The only issue we had was that the plants grew beautifully, but never flowered. Rather, they turned yellow and that was the end of that. We did get a decent harvest of tiny potatoes, but I’m wondering what went wrong.
I notice in the photos that you’ve set the bags on some type of blocks? Ours were sitting on stone. I wonder if we should elevate the bags? Maybe drainage would be better? We live in Maine, zone 5A. Thank you!
Aaron (Mr. DeannaCat)
Hi Ema, that’s great to hear your potato plants grew so well last year! Our potatoes don’t normally flower either and the greens dying back is just the plant telling you it is time to harvest. Right now, we just have our potato grow bags sitting on our gravel garden space, since they are in fabric bags, drainage shouldn’t be an issue. I would double check the potato varieties you grew and be sure to grow the right varieties for your climate and growing season, you don’t want to grow potatoes that take longer to grow and mature if you have a shorter growing season. Hope that helps and feel free to reach out with any other questions.
Mariangela
Just read this post as I learned about Huckleberry Gold as the first low glycemic potato and since my husband has some family history that would recommend keeping sugars in check thought this would be a good first potato to grow in bags. Thank you for the detailed post and tips!
Aaron (Mr. DeannaCat)
Good luck and hope you have fun growing potatoes Mariangela, we usually have to grow at least one crop every year, although that usually means 5-7 different types of potatoes!
Terri
Thank you for so many good articles on your website. I am wondering about the safety of the grow bags. I have read that most companies are not open to discussing what the bags are made out of. Is the plastic in the bags a concern to you? I grew potatoes in burlap sacks a few years ago but they did not do very well. Just trying to come up with another option.
Aaron (Mr. DeannaCat)
Hi Terri, do you have raised beds or an in ground plot you can grow potatoes in? Epic Gardening also sells a variety of metal raise beds, one of them being a small round bed that is 38 inches in diameter and 15″ tall which holds just under 10 cubic feet of soil, using the code “deannacat3” will also save you 5% on your order. In regards to fabric pots, unfortunately, most if not all fabric or felt pots do contain plastic in their makeup, it’s not ideal but many grow bags are made from BPA free plastic if that makes you feel any better. However, we aren’t overly concerned with the crops we grow in fabric bags in regards to them being made with plastic. You can give burlap another try even though you had poor results, I would say that possibly moisture retention was maybe an issue with your previous grow as when you use burlap or even fabric grow bags, they will dry out much quicker than when growing in the ground or even raised beds. Unfortunately, when it comes to container gardening, most containers are made of some type of plastic material. Hope that helps and reach out if you have any other questions or concerns, good luck!
Terri Egge
Hello Aaron, we have a no till “on” ground garden. So my beds have borders but no bottom and we have been building up the top soil the past three years. I did not want to take up garden bed space with potatoes so I tried to sacs. The plants grew beautifully but there were very few potatoes. Thanks for the info. I appreciate it.
Aaron (Mr. DeannaCat)
Hi Terri, it sounds like you have an amazing garden space! Did your potato greens completely die back before you harvested them? If not, they may not have had enough time to fully grow, we have also found that some potato varieties do better for us than others so it may have something to do with that as well. Hope that helps and have fun in the garden!
Sara
Thank you for sharing all of your awesome knowledge with those of us who have no clue what we’re doing but are figuring it out and learning as we go. It helps to have a trusted source to turn to! This post clarified so much for me, but I’ve run into something I didn’t expect so before I throw away my seed potatoes and start again… I am in Zone 8 but in southeast-ish Texas where we have lots of humidity and it gets hot fast in growing season terms. My early season red norland seed potatoes have been chitting away getting ready to go into grow bags in the next week or so. I decided to cut some of the larger seed potatoes in plenty of time for them to scab and dry before planting. Two days later, they’re furry. It’s a white/gray fuzz that looks very much like mold. My husband read that we should plant them anyway. That is super counterintuitive to me – I’m not even sure they should go in the compost bin. Is it time to start over?
Aaron (Mr. DeannaCat)
Hi Sara, I think you are fine to plant the cut potatoes as long as they are not completed molded through. Once the potatoes start to sprout, the old seed potato will decompose and rot anyway with time. Hope that helps and good luck getting in a good crop of potatoes before it gets too warm!
Anna Schmidt
You guys are really so great, and I appreciate being able to refer to your blogs for all of my gardening questions. I live up north in Sonoma County, but still in zone 9b. I am just wrapping up my first crop of potatoes and am wondering if there is a method you use for storing your acidic (used) potato soil?
TIA
Anna
Aaron (Mr. DeannaCat)
Hi Anna, thank you so much for the kind words and we love Sonoma County! If you have an outdoor shed or are able to store it in the garage, that may be the best way to keep it. You can either leave your soil in their original containers or dump them all into one large tote or grow bag. When the time is nearing for you to replant potatoes, get all your soil set back up with some good compost and get the soil reinvigorated by planting some cover crops like ryegrass, barley, or oats. When it’s time to plant your potatoes, chop or cut all the cover crop down and turn it into your soil before you plant out your potato seed. Hope that helps and have fun growing!
Hannah Smith
Hi,
Im just starting my potatoes in socal and I’ve read a few things that say not to water until the sprouts emerge above soil as the potatoes could rot? I’m using grow bags and currently watering to keep the soil moist but not soggy, but now I’m worried that my seed potatoes are rotting in there! Do you water during this time?
Thanks for the help!
Aaron (Mr. DeannaCat)
Hi Hannah, it’s good to keep the soil moist but not overly wet, once you see sprouts and the greens continue to grow, you can water a bit more freely. As long as the soil isn’t overly wet, they shouldn’t rot, hope that helps and have fun growing!
Jennifer
Loved the article, and I have my first crop growing well in grow bags as you suggested! I am in the same gardening zone as you and I’m wondering if you will plant a second round of potatoes? According to the planting chart it is possible. I was wondering what type of potatoes you would plant. We have such a warm, beautiful Fall here on the Central Coast I’m thinking there would be plenty of time. Would you use an Early Season, Mid or Late? Thanks and thanks for all the beautiful photos and videos of your garden. So helpful!
Aaron (Mr. DeannaCat)
Hi Jennifer, I am not sure if we will plant more potatoes or not just yet but it is definitely possible to plant more once you harvest in more temperate climates. I would likely stick to the Early or Mid season varieties just to play it safe. Thanks for following along and have fun growing!