

Growing Winter Squash and Pumpkins: The Ultimate Guide
Are you interested in growing winter squash and pumpkins? Hey, me too! In fact, they’ve become some of my favorite crops in the garden lately. Winter squash is fun to grow, delicious and versatile in the kitchen, lasts for months in storage, and come in SO many unique shapes, sizes, and varieties. The plants admittedly do take up a bit of room, but can be grown up trellises to save space – which looks pretty darn cool too!
This guide will cover everything you need to know to grow winter squash and pumpkins from seed to table, including the best time of year to plant them, soil and space requirements, popular varieties, tips on growing winter squash vertically up trellises or in containers, hand pollination, pest control, harvest time, recipes, and more. After reading this, you’re going to want to grow ALL the squash! And you’ll be prepared to successfully do so.
What is Winter Squash
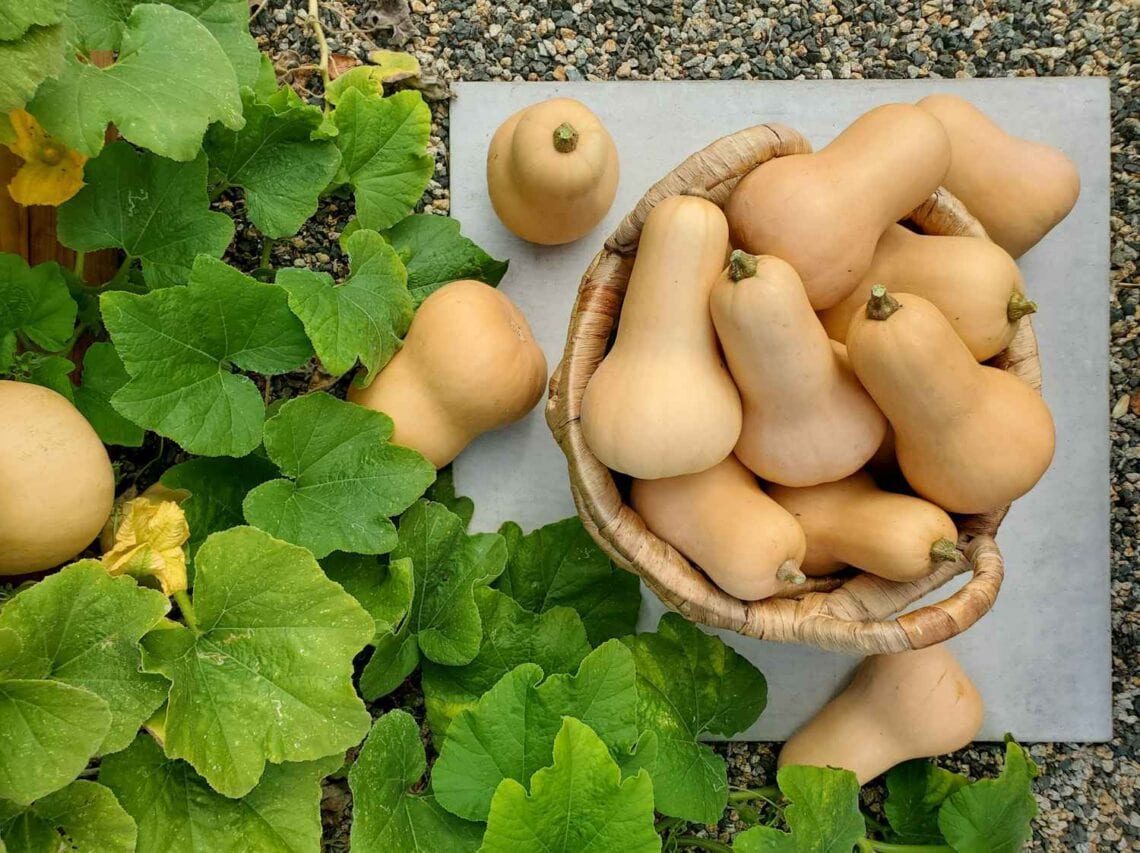
Winter squash is a group of plants belonging to the cucurbit (Cucurbitaceae) family. Examples of winter squash include pumpkins, butternut squash, acorn squash, spaghetti squash, delicata, kabocha, gourds, and more. Often starchy and semi-sweet in nature, winter squash is popularly used in baking (e.g. pies or sweet breads) as well as roasted, added to soups, stews and more. They also make fantastic natural fall decor!
Have you ever wondered what the difference between winter squash and summer squash is, or why it is called “winter squash” at all? Namely, because winter squash is able to store and enjoy through the winter! Hard squash is another name for winter squash.
Both summer squash and winter squash are grown during the summer, but summer squash (e.g. zucchini) is more tender, perishable, and needs to be eaten or preserved soon after harvest. In contrast, winter squash has hard, thick skin and firm flesh that enables it to last in dry storage for many months post-harvest if cured and stored correctly. In fact, most winter squash varieties improve in flavor after a few months of storage.

When to Plant and Grow Winter Squash
Don’t let the name confuse you! Pumpkins and winter squash grow during the warm growing season, just like zucchini and other summer squash. They are not frost tolerant. Winter squash takes a longer time to grow, mature, and ripen – often harvested in late summer or fall. Day to maturity varies greatly with variety, averaging 90 to 100 days.
The best time to plant winter squash is in early spring, after the risk of frost has passed and the soil has warmed up to at least 60 degrees (over 70°F is preferred if direct-sowing seeds). The plants enjoy warm soil and weather, so planting too early can slow their growth. Here on the Central Coast of California, we typically plant winter squash seedlings outside in mid April to early May.
Winter squash grows best when air temperatures are 50-90°F. Established fruit will continue to grow and mature in temperatures up to 100°F. But pollination cannot occur and flowers will drop in hotter temperatures, so new fruit will not set. Therefore, places with mild springs and very hot summer weather (e.g. Arizona, Florida, Texas, etc) should plant out winter squash as early in the growing season as possible (even in late winter). Use shade cloth during heat waves as needed, or frost cloth to protect plants from freezing.

Starting from Seed
It’s easy to grow winter squash and pumpkins from seed! Direct sow seeds outdoors after the last frost, once the soil is 65-70°F. Plant the seeds about an inch deep, and keep the soil consistently moist during germination. We like to cover emerging seedlings with chicken wire cloches to prevent birds or other critters from eating the tender sprouts.
Or, get a jump start on the growing season and start winter squash seeds indoors and transplant seedlings outside instead. Sow winter squash seeds indoors in a fluffy seed starting mix about 2 to 4 weeks before the last frost date. Use a seedling heat mat to keep the soil warm and a grow light to provide ample bright light, and don’t forget to harden them off before transplanting outdoors! (See more indoor seed starting tips here).
HOT TIP: Squash seedlings do not like their roots disturbed (often said to “not transplant well”) so it’s important to not let the seedlings get too crowded, large, or root bound when started indoors. To combat that, we start squash seeds in reusable 4-inch pots or 6-inch pots, and only one seedling per pot. That way, they have plenty of room and do not need to be potted up or teased apart.

Types of Winter Squash to Grow
The most popular types of winter squash include pumpkins, butternut squash, delicata, spaghetti, and acorn squash. Yet there are numerous other kinds, and dozens of unique varieties within each of those categories. For example, Nutterbutter and Autumn Frost are two of our favorite butternut squash varieties to grow. Sugar pie pumpkins are ideal for baking, while varieties like Cider Jack are great for fall decor and carving. Varieties like cinderella and winter sweet squash are both gorgeous and delicious!
Most winter squash grows on long sprawling vines. Vining squash plants are indeterminate, meaning they will continue to grow larger, longer, and continue to produce fruit all the way up until frost. On the other hand, some winter squash are determinate or bush varieties, which stay more compact and bear most of their fruit over a concentrated, shorter period of time (much like zucchini). Bush varieties also tend to produce fewer squash per plant. Be sure to read plant descriptions to understand which type you’re growing!
See this list of 28 awesome winter squash and pumpkin varieties for more ideas and details.


Growing Requirements: Sun, Soil, Water, Fertilizer
- Sun: Winter squash grow best with full sun, or a location that receives at least 6 to 8 hours of direct sunlight per day.
- Soil: Pumpkin and winter squash thrive in rich, loose, well-draining soil that’s been worked with organic matter (e.g. compost). Winter squash plants like mildly acidic soil with a pH of 6.0 to 6.8.
- Water: Water winter squash enough to keep the soil moderately damp at all times – not soggy, not dry. The use of a simple soil moisture meter is a huge help! The larger the plants and fruit get, the more water they require. Use mulch around the base of the plant to aid in even moisture retention.
- Fertilizer: Pumpkin and winter squash are heavy feeders. To aid in robust fruit development, hard squash benefits from fertilizer with slightly more phosphorus than nitrogen (e.g. 4-6-2). Before planting, amend soil with well-aged compost and/or worm castings plus a slow-release organic fertilizer. We also like to add mycorrhizae to the planting hole to support root development. Later in the growing season, plan to feed your winter squash plants once or twice more with a light top-dressing of fertilizer and/or compost tea.

Spacing Requirements and Growth
Plant winter squash in a location with full sun, rich well-draining soil, and PLENTY of space to grow! Winter squash plants tend to get quite large, though the size varies depending on the cultivar and type (bush vs. vining), so check the spacing requirements for the specific variety you’re growing.
Bush varieties stay more compact, great for small spaces. On the other hand, vining winter squash can grow anywhere from 3 to 15 feet long. Even more, a single plant will send off several vines in every direction, not just one single long vine. Winter squash plants also have extensive root systems, and don’t grow well when crowded or with competing plants within a couple feet.
You can grow winter squash in the ground pumpkin-patch style, or in raised beds and allow them to sprawl and spill over the sides of beds. In that case, you may want to place a small piece of cardboard (or other protective material) under squash or pumpkins that are sitting directly on the soil to prevent rot or insect damage. Or, save space by growing vining winter squash vertically up a trellis – explored below.


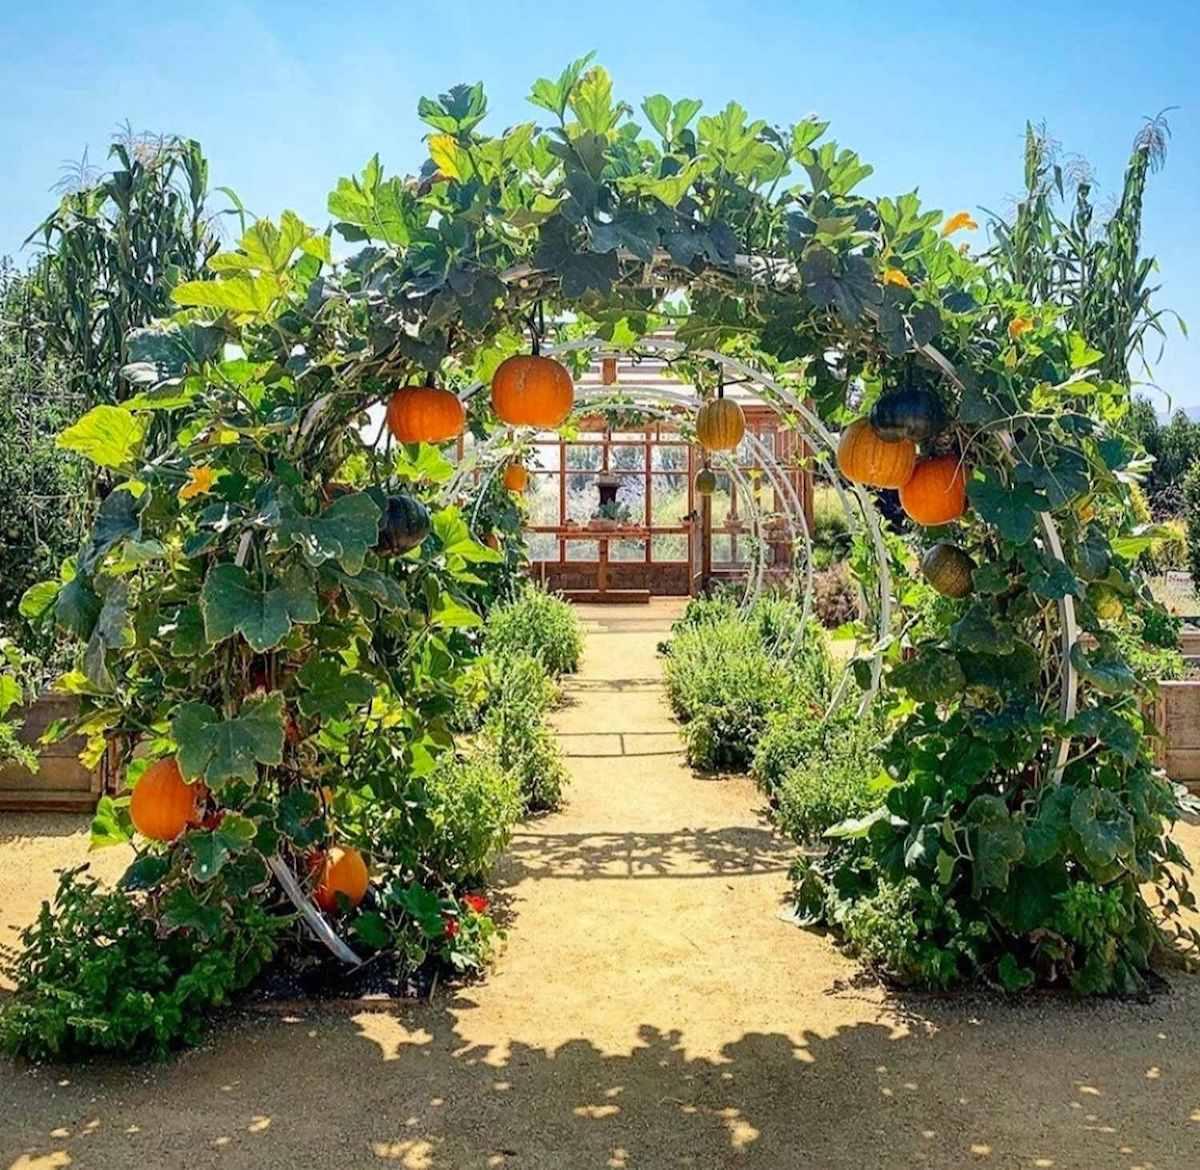
Growing Winter Squash Vertically on Trellises
Vining winter squash are easy to grow vertically up trellises, obelisks, or other support structures. With small tendrils that curl and grasp, pumpkin and squash vines are natural climbers. Winter squash looks especially whimsical and dramatic hanging from arched trellises and arbors. You can make your own trellis with cattle panel or wire fencing, or buy a pre-made arched trellis.
In addition to saving loads of space, trellising winter squash and pumpkins offers a number of benefits. Increased airflow among the foliage reduces the prevalence of disease and pests. Elevating the fruit makes them less susceptible to rot, pests, or discoloration from sitting on the ground. It also makes everything easier to see and maintain. Finally, trellised squash vines can help create shade to grow less heat-tolerant crops below, such as lettuce or other leafy greens.
Yet as the squash become very large and heavy, there is a slight risk that the vines can get damaged or even break under the weight of the fruit. Therefore, some gardeners create slings or other supports to help cradle mature fruit as it hangs. Some clever examples of ways to support hanging squash include using pieces of old t-shirts, panty hose, mesh netting, twine slings, or even these specialized pumpkin hammocks.

Hand Pollinating Winter Squash and Pumpkins
Without proper pollination, small squash fruit will start to grow but then fail to develop and shrivel, rot, or fall off the vine. So, it may be necessary to hand-pollinate winter squash flowers – which is easy to do! Simply collect some pollen from an open male flower and transfer it to the center of an open female flower. We usually use a small paintbrush, though a q-tip works as well. You only need to pollinate each squash/female flower once. See the photos below, and learn more about hand-pollinating squash here.
Don’t worry if your winter squash only has male or female flowers at first. That’s common for young plants; the ratio will even out as the plant matures. Plus, you may not want to pollinate the very first squash or two that appears anyways (especially if the plant is still quite small) since that will make the plant focus its energy on developing fruit instead of growing larger in size first.

Can you grow winter squash in a pot?
Yes, it’s possible to grow winter squash and pumpkins in containers. Yet due to their large size and high water and nutrient demand, winter squash performs best in big pots. Choose a container that is at least 20 to 24 inches deep and wide, or holds at least 15 or 25 gallons of soil. Half wine barrels are perfect! Also ensure the container has plenty of drainage holes, and is filled with high quality potting soil amended with compost. Otherwise, the other growing tips covered in this article apply to potted pumpkins and winter squash too!
Disease and Pest Control
Winter squash and pumpkins are prone to a number of diseases including powdery mildew, bacterial leaf spot, and blight. Powdery mildew is arguably the most common fungal disease that affects winter squash, which appears as irregular white fuzzy spots on the leaves. Mildew isn’t usually fatal to plants, but should still be kept in check. One easy option is to grow varieties that are naturally resistant to powdery mildew. Learn other organic ways to prevent and control powdery mildew in this guide.
A number of pest insects are attracted to winter squash and pumpkins too. The primary culprits are squash bugs, aphids, and the dreaded squash vine borer. Click on any of the pest names to learn how to control them. Some varieties of squash are naturally resistant to pests, while others are highly susceptible. For instance, blue hubbard squash attracts so many squash bugs and vine borers that it’s often used as a trap crop! In contrast, acorn squash, butternut squash and “cheese pumpkins” are highly resistant to squash vine borers due to their hard stems.
Larger critters may also want a taste of your precious winter squash. Birds may go after young seedlings and tender new growth, while gophers are drawn to eating the roots. Deer, rabbits, rats, squirrels, and other rodents may eat the fruit or foliage. To protect plants, consider using hoops and row covers as needed. We use these chicken wire cloches to cover the plants while they’re still small, and durable gopher baskets to shield the rootball of in-ground plants.


Cold Hardiness: Will winter squash survive frost?
Winter squash isn’t cold hardy. Frost will damage the leaves and fruit, and a hard freeze can kill the plant. In an unexpected frost, protect the plants with frost cover, blankets, or other insulating material (though damage could still occur). It’s important to harvest pumpkins and winter squash intended for longer-term storage before frost, because frost will damage their protective rind and compromise shelf life. Hard squash with frost damage should be harvested within a day or two, stored in the refrigerator, and used or preserved within a week.

When to Harvest Winter Squash and Pumpkins
The time it takes for winter squash to mature depends on the variety you’re growing, ranging from 60 to 120 days to maturity. As harvest time draws near, the leaves will start to turn brown and die back. The stem of a ripe squash should also turn more tan instead of green, and the skin will usually change color.
To check if winter squash is ready for harvest, use the “thumbnail test”: gently poke the skin with your fingernail, and if the skin easily pierces or dents, it’s not ready. Once the skin is tough and dense enough to resist puncture by the thumbnail test, it’s ready.
Many gardeners wait to harvest winter squash long past they’re technically “ready”, once the vines completely die back but before frost arrives. It’s best to leave winter squash on the vine to mature as long as possible, where it will continue to ripen, develop in flavor, and improve the longevity of shelf life post-harvest.
How to Harvest Winter Squash
To harvest winter squash, use sharp garden shears to cut the firm stem. Leave a good length of stem connected to the squash, but take care not to cut the vine itself. Avoid breaking the stem off, as this will cause the squash to rot more quickly. If any fruit is cracked, bruised, missing stems, or otherwise damaged, eat those first. Wash off excess dirt, but make sure to thoroughly dry the squash before storage.


Curing and Storing Winter Squash
Though you can eat and enjoy your winter squash at any time, many varieties benefit from additional resting time to ripen off the vine, where they become more sweet and flavorful over the months to come.
Immediately after harvest, spread your winter squash out in a cool, dry, well-ventilated area. Some folks “cure” the squash in a warmer spot (80 to 85 degrees F) for several days before moving it to a cooler location, especially if they feel it was harvested a tad immaturely.
Pumpkins and winter squash store best long-term in a cool, dark, airy location – about 50 to 60°F and 50-70% humidity. We keep ours in a closet under the stairs that stays about 60-65. Avoid storing winter squash in extra-cold damp root cellars or basements. Ideally, keep the squash in a single layer rather than piled on top of one another.
The time winter squash lasts in storage depends on a number of factors: the variety, maturity at harvest time, and storage conditions. Most winter squash should easily last 2 to 3 months, and many much longer. For example, we were eating good butternut squash this May that was harvested the previous October – over 7 months later! Periodically check your squash stash, and use the ones that are getting wrinkled or soft first.


Recipes: How to Prepare and Eat Winter Squash
Winter squash are most often roasted or used in baking, such as pumpkin sweet bread or butternut squash pie. Yes, you read that right – butternut squash pie! Similar in texture and flavor, many winter squashes can be used interchangeably with pumpkin in recipes – especially butternut, kabocha, and hubbard types.
The easiest way to roast winter squash is to cut it in half (from stem to bottom), scoop out the guts and seeds, and roast the halves whole. You can roast them face-up with a sprinkle of seasonings, oil, or butter in the hollow cavity, or roast them flesh-side down. I also like to carefully peel and cut butternut into bite-size cubes or “french fries”, toss them in olive oil and seasonings, and bake them like potatoes.
We also love to use butternut squash in soup, like this creamy roasted butternut squash soup with sage, or add cubed chunks to our favorite kale lentil soup recipe. We also make a killer vegan roasted sugar pie pumpkin 3-bean chili (and often substitute butternut in that recipe too). Or, try our seasoned rice stuffed acorn squash recipe!
Delicata squash has exceptionally thin, edible skin, so peeling isn’t necessary. This makes it especially popular for quick and easy preparation, and even used on salads. Once cooked, spaghetti squash flesh pulls apart into long “noodles” – a fun one for adults and kids alike!
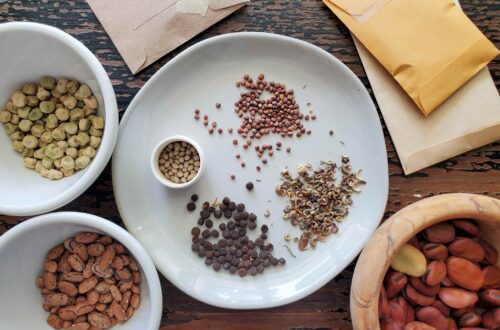
Last but not least, don’t forget the winter squash seeds are edible too! Learn how to make the most crunchy, delicious and nutritious soaked and roasted pumpkin seeds here (or other hard squash).


Preserving Winter Squash or Pumpkin
The best way to preserve winter squash and pumpkin is to roast, puree, and then freeze it. Then use your homemade squash puree in any recipe that calls for canned pumpkin, including in baking, soups, stew and more. See the easy instructions here. Winter squash and pumpkin can also be pressure canned.

Feeling excited about squash yet?
Well friends, I hope you’re feeling as pumped about growing winter squash as I am now. They really are so beautiful and fun to grow – and eat! Not to mention winter squash it absolutely loaded with antioxidants, vitamins, minerals, and fiber. We didn’t even touch on all the health benefits they provide! Please let me know if you have any questions in the comments below, and pin or share this post if you found it useful.
You may also enjoy:
- Squash Sex: How to Hand Pollinate Squash to Reduce End Rot and Improve Yields
- 13 Must-Try Zucchini Recipes
- Freezer-Friendly Homemade Pumpkin Puree Recipe (or winter squash)
- Delicious Butternut Squash Pie Recipe
- Soaked and Roasted Pumpkin Seeds
- Creamy Roasted Butternut Squash and Sage Soup
- Healthy Sourdough Pumpkin Bread Recipe (or Muffins)


10 Comments
Jackie
My acorn squash is overtaking my garden and is about 12 feet long. Is it wise to trim off the ends to keep it from growing any further. I have never had one this prolific.
Aaron (Mr. DeannaCat)
Hi Jackie, you can trim off the ends but that vine will stop growing and you may see a reduction in the number of acorn squash to harvest. You can alway redirect the vines to try and take up less space or if you do want to still trim the ends of the vines, look for an area where another growth tip or vine is growing off of it and trim the main vine above the growth tip so you will still have more plant growth which will lead to more squash to harvest. Hope that helps and have fun growing!
Lisa Ann Mauro
I am new to your site and thought your articles were very informative. However I live in Las Vegas and have attempted to grow a garden for 5 years now. I have paid 3 “experts” to come to my home to share advice on how to help my garden. I have failed at every attempt. And NOW, after taking the advice of some, my established fruit trees are dying off as well. I am at a complete loss. I do work 13 hours 6 days a week so cannot commit a lot of time to the garden but any spare time I may get is dedicated to trying to figure this out. Once daylight gets shorter I will only be able to see my garden on Sundays. Is there any way anyone can help me?
Aaron (Mr. DeannaCat)
Hi Lisa Ann, it is likely very difficult to garden in Las Vegas as it is, even more so if you don’t have much time to dedicate to your garden space. I would first look into your irrigation system and be sure that it is sufficient for what you are trying to do. Drip irrigation is likely the best option so that is the first place to start (that goes for your fruit trees as well), when it comes to your vegetable garden, growing veggies during the middle of the summer is likely out of the equation for most people in Vegas. I would likely switch my growing season around to grow in late fall, through winter and into early spring before the really hot weather kicks in. If you want tomatoes, start them in late winter/early spring and grow short season determinate varieties that my bloom and produce fruit before the hot weather starts, temperatures over 95 degrees will keep tomatoes from setting fruit.
In all, it really depends on what you want to grow but it is best to stick with varieties of vegetable and fruit trees that do well in a hot climate like Las Vegas while also growing in the appropriate seasons. I am assuming June, July, and August are months to avoid trying to grow much in the garden. The other thing is proper drip irrigation and mulch to help maintain soil moisture, we have many articles on drip irrigation and mulch if you want to look into those topics further. Hope that helps and good luck!
Sandy J
I love all the beautiful pictures and the garden is amazing. We are on the Central Coast as well so it is nice to follow your planting dates. The pumpkin trellis is amazing.
Aaron (Mr. DeannaCat)
Hi Sandy, thank you so much for the kind words! The pumpkin trellis is amazing but unfortunately it isn’t ours, although we do hope to build something similar this winter for next season. Do you have any winter squash growing in your garden this year?
Evelyn
Florida 9b here I fought squash vine borers every year until i read an article that shared that moschata squash does in FL.SUCCESS I had been growing the maxima varities. The seminole pumpkin is no fail here but I wanted other winter squash as well.Trying Autumn Frost for the first time this season doing great but our everyday afternoon rains have arrived so will see how it does with the mildews to come. Thank-you for putting out such GREAT info. Well done.
Aaron (Mr. DeannaCat)
Hi Evelyn, thanks for sharing! Good luck growing your winter squash this year and the Autumn Frost is supposed to have a high resistance to powdery mildew so hopefully it holds up well for you. Have fun growing!
Kay
I suppose you can make “pumpkin butter” from other squash too. That freezes well also. Making it from fresh puree will probably take longer than when I use canned pumpkin, but that should be the only difference. I’ve even used pumpkin butter in recipes instead of canned pumpkin (keto-ish egg free pumpkin cake), just reduce the sugar and spices a bit. 🙂
Aaron (Mr. DeannaCat)
Hi Kay, absolutely you can use other squash to make pumpkin butter although some may be better suited for it than others. We love making our butternut “pumpkin” pie and you wouldn’t be able to tell that it isn’t made with pumpkin. Making your own puree definitely takes more time than using canned pumpkin but it is a great way to preserve your harvest if you are growing a lot of winter squash and end up with a bountiful harvest.