

7 Ways To Make Wood Garden Beds Last: Nontoxic Sealer & More
There are many benefits to gardening in raised beds or planter boxes: the improved ergonomics, clean appearance, ability to fill them with quality soil and compost, and it’s easier to block out pests. I love raised beds! Yet one of the few drawbacks is that they don’t last forever (and, they aren’t exactly cheap). So, protect your precious investment and follow these 7 ways to make wood garden beds last longer! We’ll talk about how to seal garden beds, lumber choices, drainage and more.
I’ll admit, we never sealed our garden beds in the past. They’re made from super durable heart redwood, after all! However, once we moved to our new homestead and began building our “forever garden” (and felt the rude awakening of not being in our 20’s anymore during the laborious process) I thought to myself: I want to make these garden beds last a LONG as physically possible.
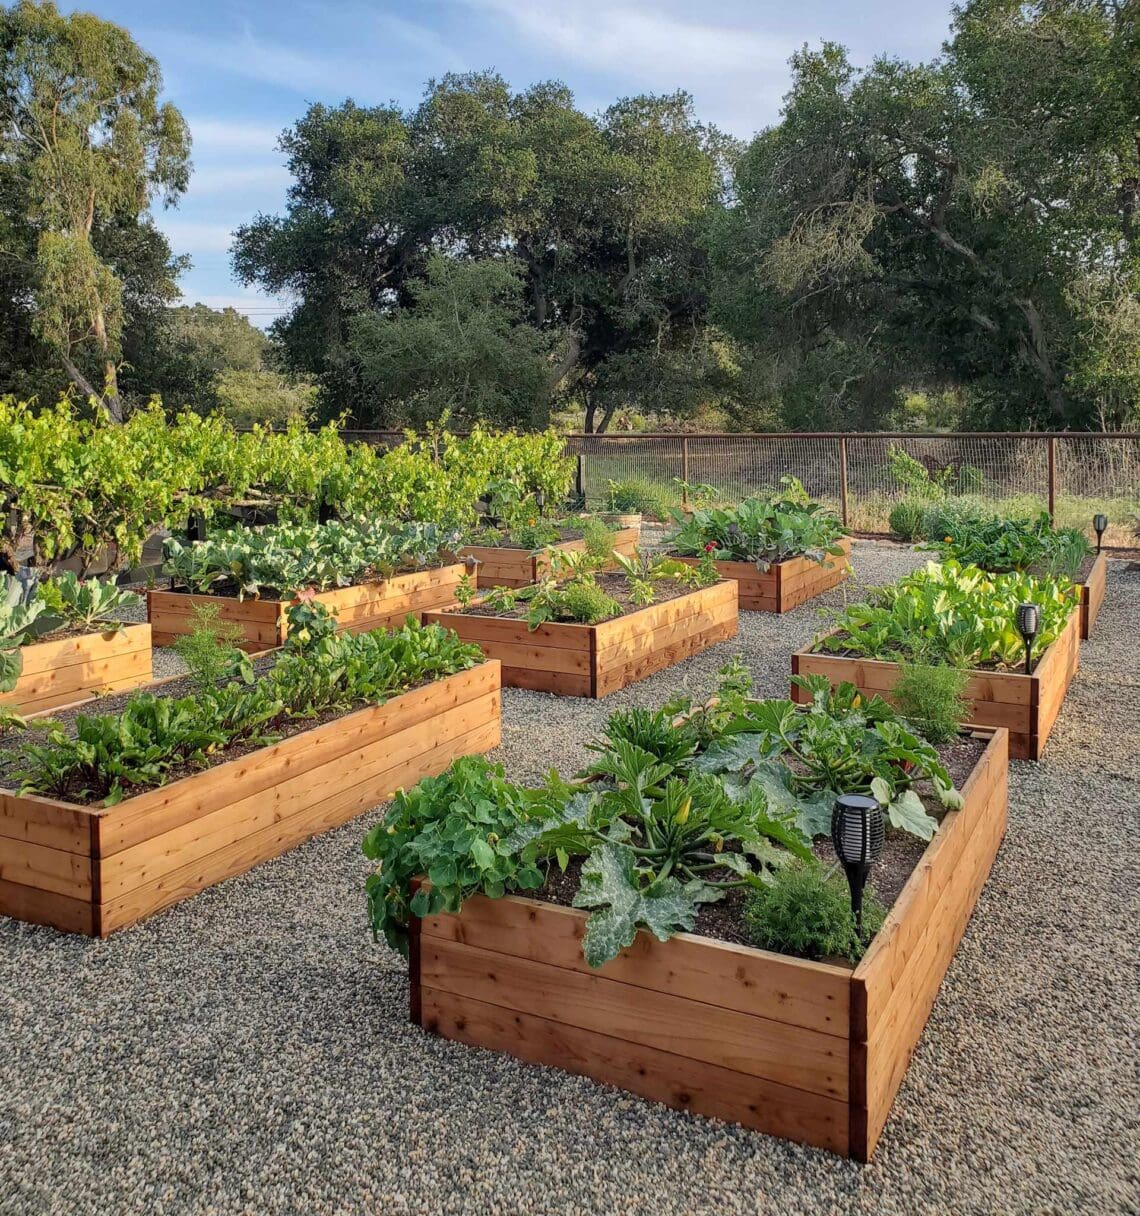
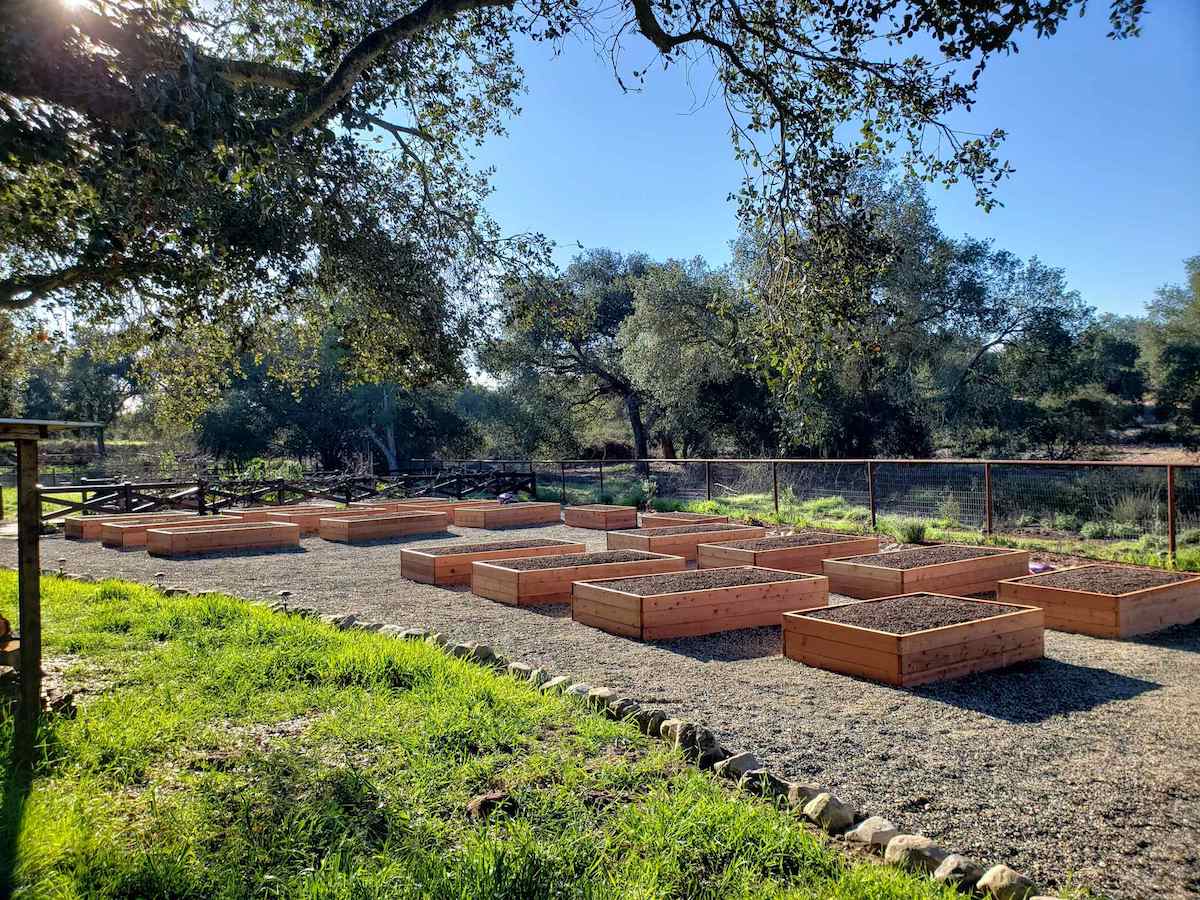
In fact, we seriously contemplated getting some awesome Birdie’s galvanized metal raised bed kits instead. Those things should last forever! (Save 5% with code “deannacat3”). But in the end, my love for the look of rustic wood won that battle, so here we are: we just finished building 19 new redwood garden beds, sealed and siliconed this time. Do it once, and do it right.
After reading these tips, pop over and follow our step-by-step guide on building wood raised garden beds!
WAYS TO EXTEND THE LIFE OF GARDEN BEDS
1) Choose wood that is naturally long-lasting
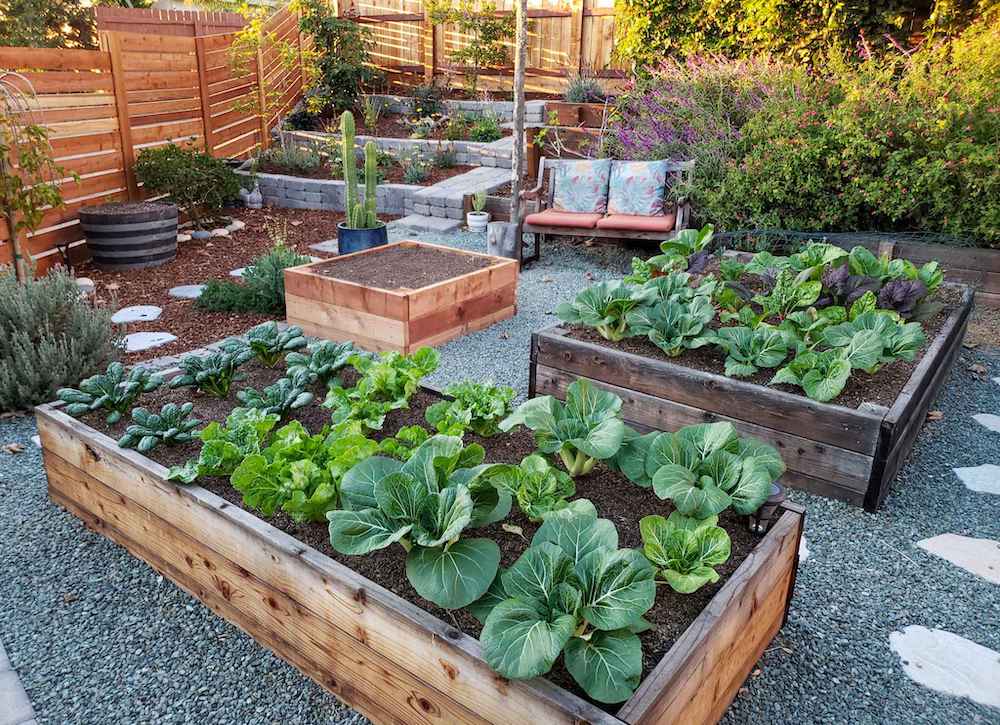
One of the best ways to extend the life of raised garden beds is to use quality, long-lasting lumber right from the start. Cedar and redwood are two excellent choices, as they are both very dense and durable. Thanks to their high tannin content, both cedar and redwood are naturally resistant to rot, mold, and insects – including termites. Heart redwood lumber (what we use to build our raised beds) is even more indestructible than common redwood boards.
Garden beds built from untreated cedar or heart redwood can last well over a decade on their own – likely much longer, depending on the climate and other conditions. The 7-year old untreated heart redwood beds in our old garden are still in excellent condition. I’ve also heard stories of friends’ redwood beds lasting well over 20 years! Then, if you follow the other ways to make garden beds last longer as described below, you can extend their life by several years more.
In comparison, garden beds made of softer woods like Douglas fir or pine can rot out and decay within just a few years. Don’t be tempted to use pressure treated lumber (usually treated pine) to make garden beds last longer either! In addition to containing undesirable chemicals not ideal for organic gardening, the lifespan of treated wood is less than cedar or redwood anyway! Especially when it is in constant contact with soil and moisture – as it will be in your garden.
2) Use wide planks and thick boards
Choosing wide lumber planks is another excellent way to extend the life of wood garden beds. For example, a raised bed constructed out of 2×6” boards will last longer than one made from 2×4”s. Eight, ten, or twelve-inch wide boards are even better! Raised beds are most susceptible to rot in the seams between the boards, where moisture collects and air is scarce. By using wider planks (and thereby reducing the number of seams in the bed overall) it is reducing surface area and places for water intrusion.
The same idea applies to board thickness. While 1-inch thick boards are often more affordable (such as cedar fence boards, which are actually only ¾” thick), the raised bed will not last as long as one constructed with 2-inch thick boards. Plus, thinner boards are more likely to bow or even crack over time under the pressure of heavy wet soil pushing against them. Last but not least, thick 4×4” corner supports will last far longer than using 2×4’s or other smaller wood in the corners.
3) Seal wood garden beds (with non-toxic sealer)
Sealing wood garden beds can help extend their lifespan many years beyond unsealed wood. Applying a sealer will protect the wood from moisture intrusion, mold, and decay. However, you don’t want to use just any wood sealer on your garden beds! Many sealants and stains contain toxic chemicals – stuff you don’t want around your healthy homegrown food and soil.
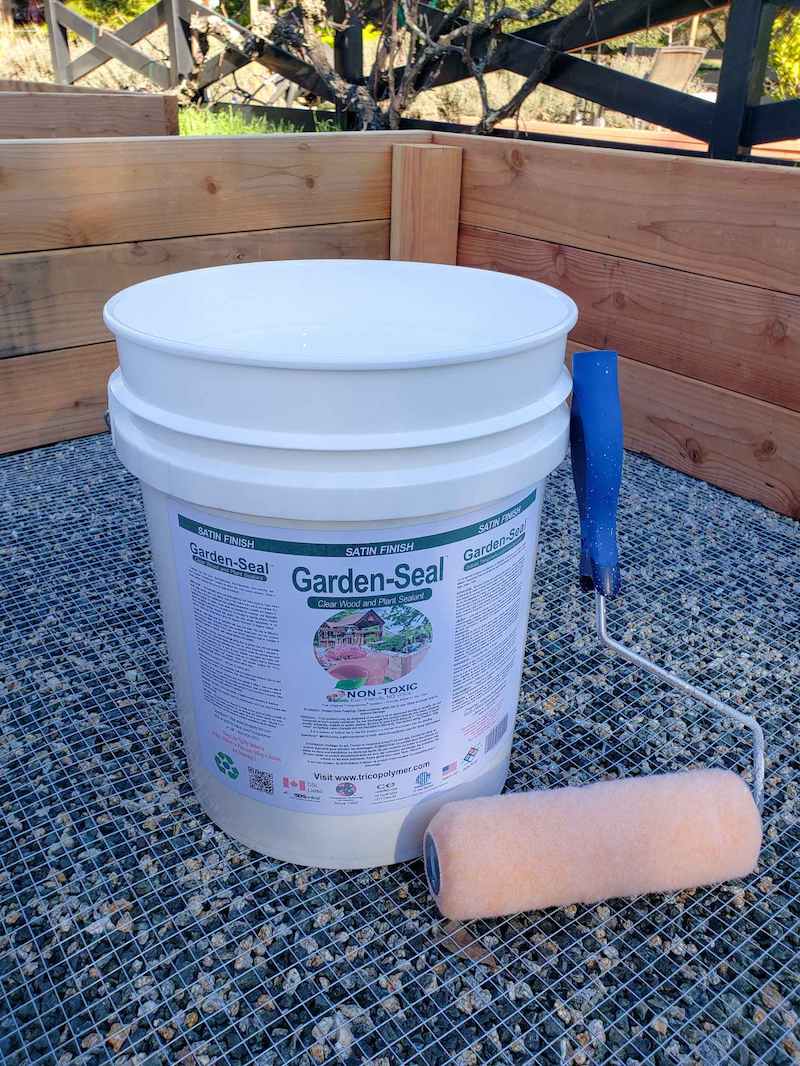
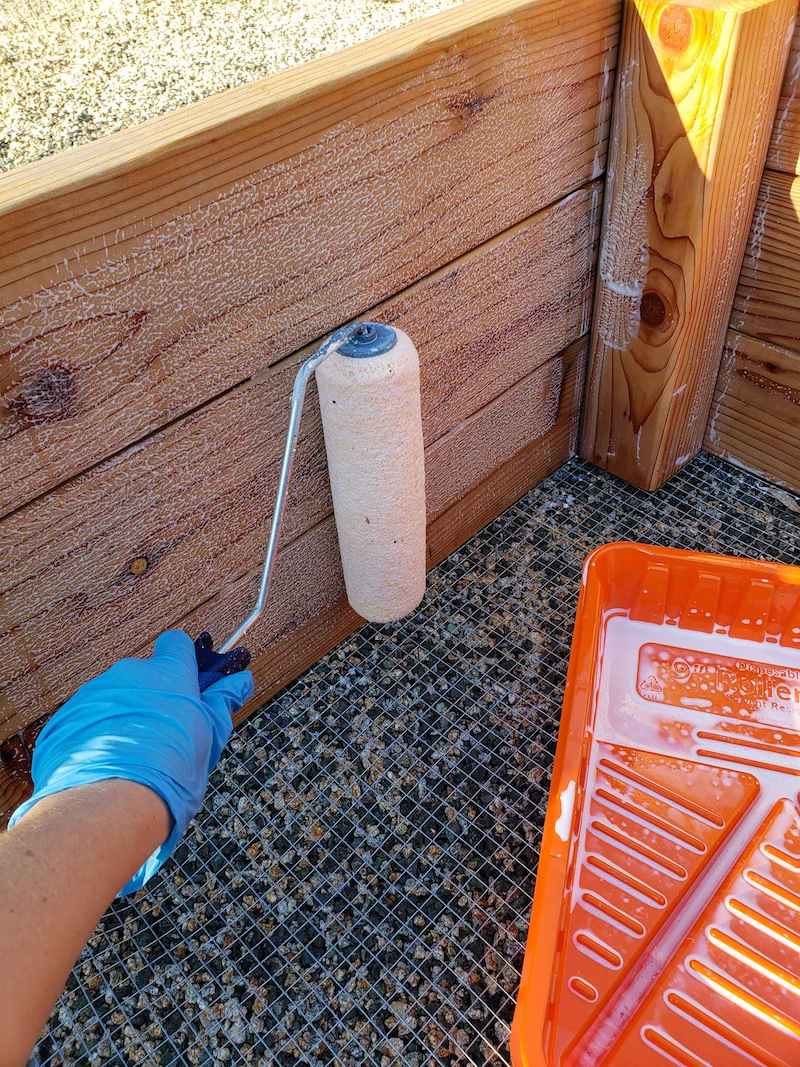
We recently used this nontoxic wood sealer on our new redwood garden beds. If you know me, then you know I do my homework before choosing materials to use in our home and garden! This particular product is food-safe, made in the US, won’t leach, has no VOCs, carcinogens or endocrine-disrupting compounds, and is nontoxic to wildlife. Plus, it gets great reviews!
We ended up applying 3 coats of Garden Seal to the inside of our beds (where rot is most likely to occur) and had enough left over to do just one coat on the exterior. It goes on milky white, soaks into the wood well, and dries clear with a slightly satin finish. However, the third coat inside the beds did leave a bit of a visible residue, so one or two coats for the exterior would be best. Be sure your wood is totally dry before application.
Hope’s Natural Tung oil is another nontoxic option to seal garden beds, though I’ve heard it’s best to reapply it annually – which is why we chose the other sealer. This would be a good option to seal the exterior of garden beds where routine application is possible.
4) Seal garden bed seams
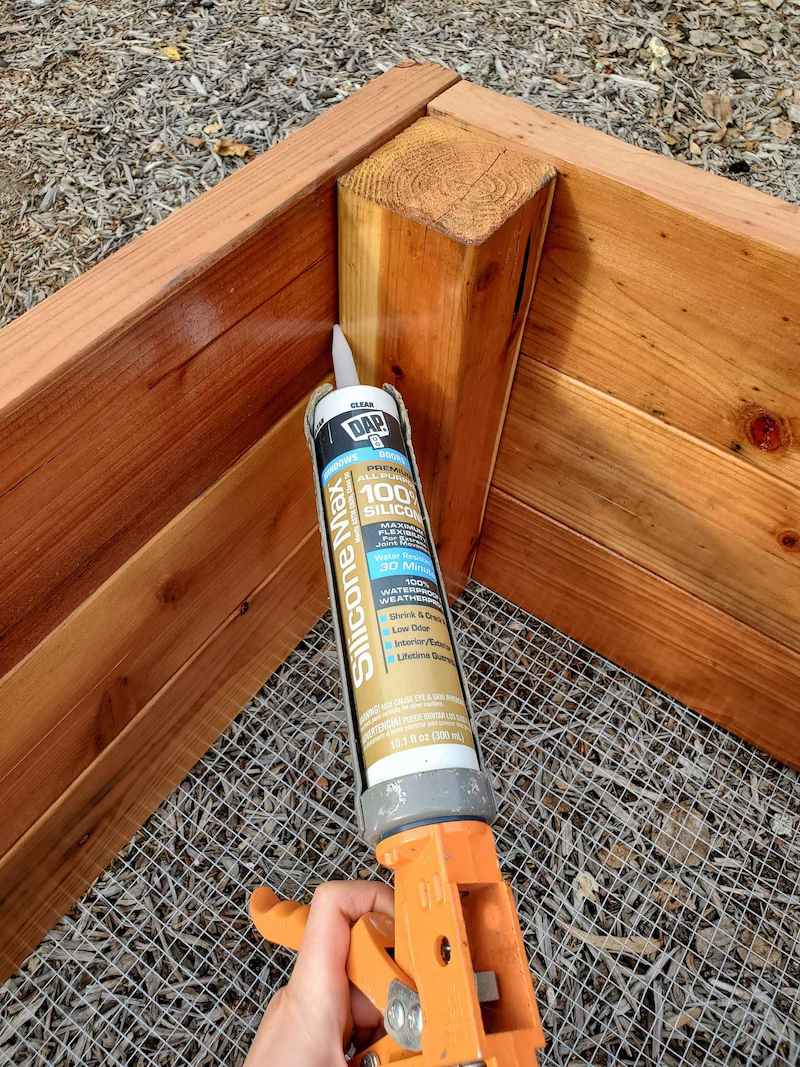
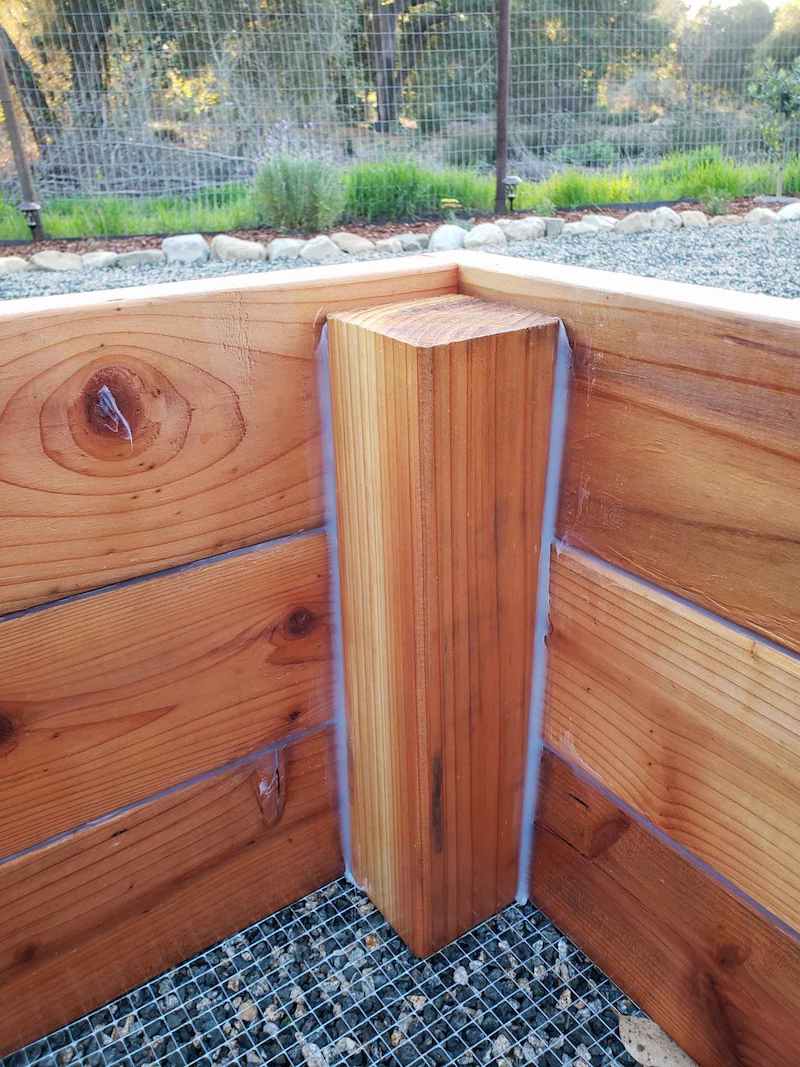
In addition to sealing the wood itself, consider sealing the gaps between the boards. Again, wood garden beds are most prone to decay in their deepest nooks and crannies, including the corners and horizontal seams between the wood. When building our newest raised garden beds, we applied clear silicone to all the seams – which is waterproof, inert, and nontoxic once it dries. My friend Steve has been professionally installing and maintaining organic gardens for over 25 years, and he claims that this single step can extend the life of garden beds by 5 to 10 years!
We used a class 50 premium exterior silicone (or this similar option) to seal our garden beds along the inside seams only. Class 50 silicone is far more durable, flexible, and resistant to temperature swings than lower-rated classes. This is important since garden beds are exposed to varying temperatures, and the wood constantly swells and shrinks with moisture.
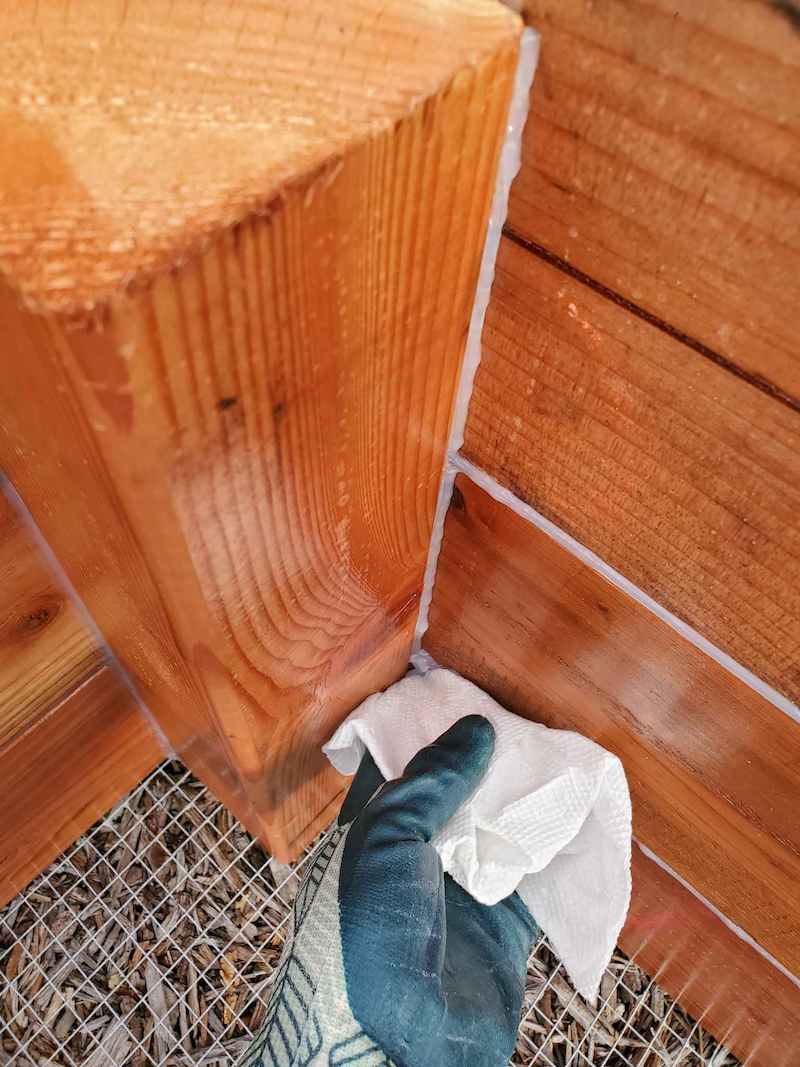
Use silicone to seal garden bed seams just like you would caulk. First, squeeze it deep, thick, and evenly into the cracks. Then while it is still wet, tuck your finger inside a paper towel and gently smooth it out – removing gaps, air bubbles, and excess. Pay special attention to sealing your corner supports! I also added a dab to any open knots, holes or cracks in the bed interior.
5) Reduce wood-to-earth contact
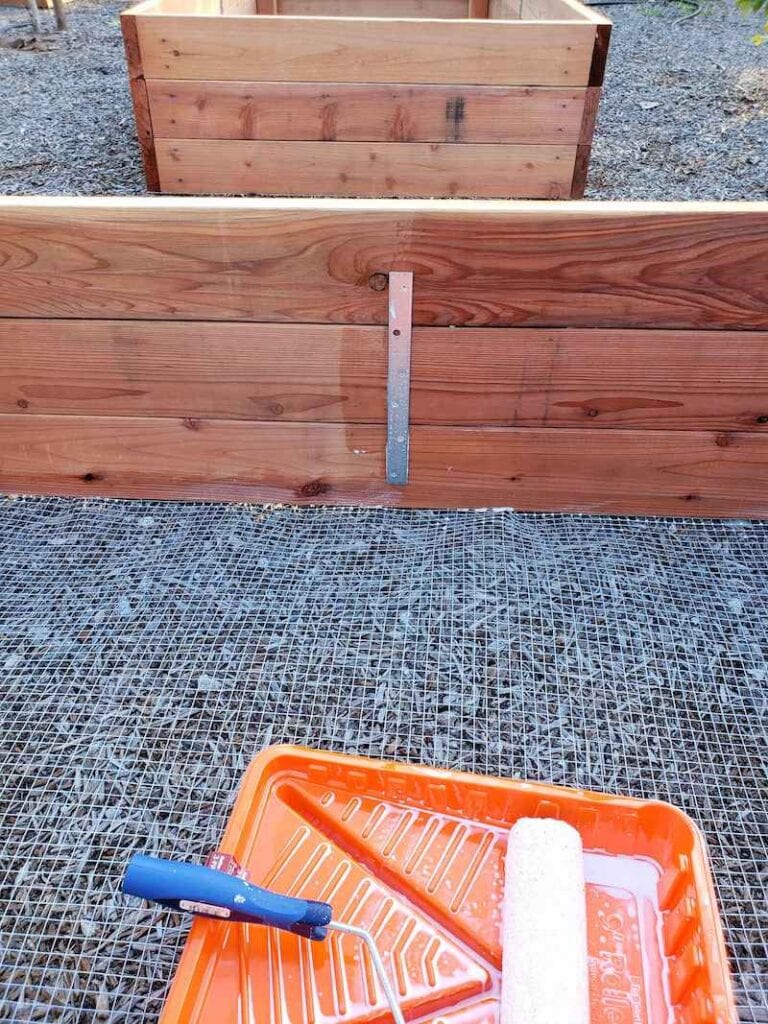
Clearly, your garden beds are going to be full of soil – so a certain amount of “wood-to-earth” contact is a given! Yet beyond their seams, wood garden beds are also quite susceptible to decaying along the bottom perimeter. There, they’re essentially sitting in constant moisture. So, another clever way to make garden beds last longer is to avoid setting the wood right on the ground.
Our raised garden beds are perched on top of a couple inches of well-draining gravel. Because we have a nasty gopher problem, we also have hardware cloth and landscape fabric (permeable to water) below our beds. However, that isn’t to say you can’t have the bottom center area of your beds open to the native soil below if you prefer! I’m just talking about the wood itself.
My pro garden friend Steve installs all his raised garden beds on top of a gravel border, similar to a french drain. To do so, he digs a small trench (about 6 inches wide and deep) and fills it with fast-drying ¾” leach rock. Then the perimeter of the wood garden bed frame sits on top.

6) Shou Sugi Ban garden beds
Shou Sugi Ban is a Japanese wood preservation technique that involves burning or charring wood surfaces. The charring process essentially seals the wood, making the wood more resistant to water and insect damage. Shou Sugi Ban garden beds should last several years longer (or more) than untreated wood of the same species.
To char wood garden beds Shou Sugi Ban style, most folks use a blow torch or propane weed torch. We’ve never done this ourselves, but I’ve heard one drawback is that it does take a lot of fuel and effort. Experts also say it’s important to not burn it too heavily, since deep burns can actually make the wood more susceptible to decay and reduce structural integrity.
This article explains more of the process. This YouTuber also shows his Shou Sugi Ban raised beds here – along with an update showing the inside of his bed 1.5 years after use.

7) Promote good drainage
Good drainage is key when growing in raised beds. Plants prefer fluffy, moist, well-draining soil with plenty of air pockets for exploring roots and beneficial microbes. They don’t like soggy, heavy, compact soil – and neither does your wood! Heavy soils that hold in too much moisture can increase the likelihood of wood decay. On the other hand, raised beds tend to dry out more quickly than in-ground gardens. It can be tricky to achieve the perfect balance!
Fill raised garden beds with soil that is made for containers or raised planter boxes. This article discusses how we create our own soil blend with bulk soil, compost, and an “aeration” component. Aeration additives include perlite, pumice, sand, peat moss, coco coir, rice hulls, or our favorite: ⅜” lava rock. It promotes that ideal blend of moisture retention and good drainage.
Furthermore, never seal off the bottom of your raised beds with impermeable material, such as a plastic lining. You want your beds to drain freely! I also do not recommend lining the wood walls with landscape fabric, even “permeable” and breathable ones. The fabric will hold in extra moisture right against the wood.
Elevated garden beds or those installed on top of hard surfaces (e.g on a patio, driveway or deck) should have plenty of drainage holes in the bottom – just like pots. For instance, we drill at least half a dozen ½” to ¾” holes in the bottom of our wood wine barrel planters.

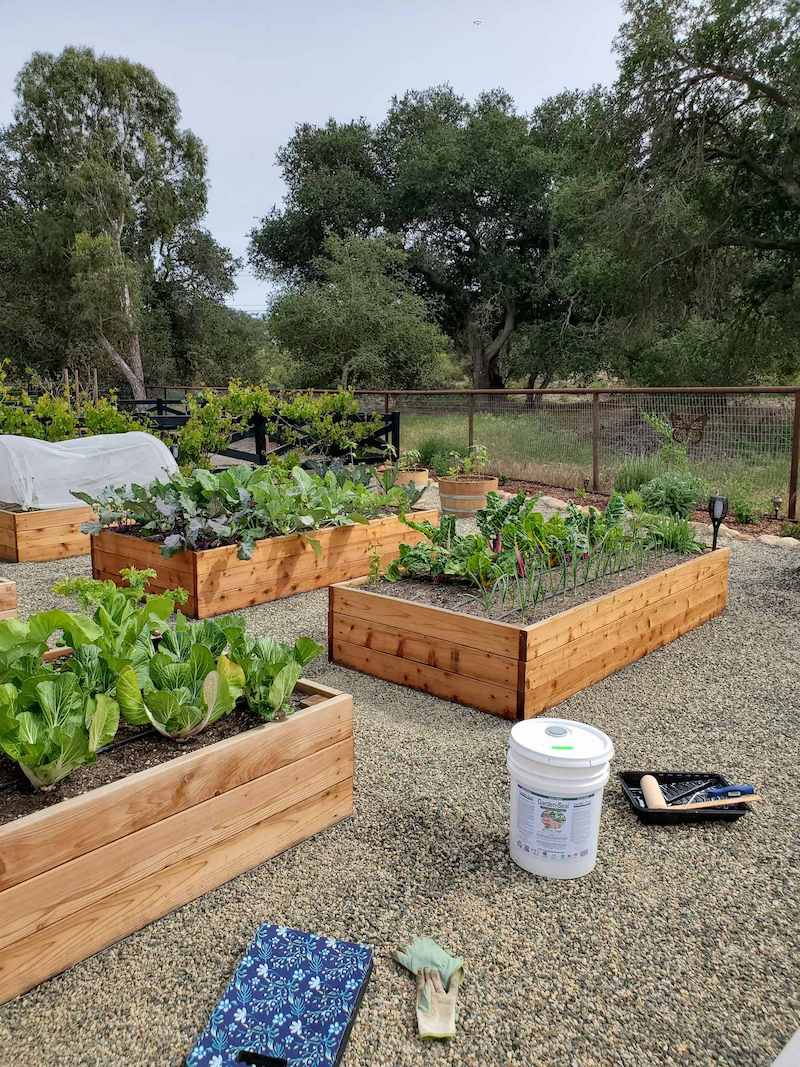
And that is how to make wood raised garden beds last as long as possible!
All in all, raised garden beds are a fantastic way to grow food, flowers, herbs and more. I love their sleek look, and for us, the ability to block gophers from getting inside. I hope you picked up a few new tips to help extend the life of your beautiful raised beds today. If you found this information to be valuable, please spread the love by pinning or sharing this post. We wish you the best of luck in building and preparing your beds – with years of bountiful harvests to come!
You may also like:
- How to Build a Raised Garden Bed: Step by Step Guide (with video)
- How to Fill a Raised Garden Bed: Build the Perfect Organic Soil
- Amending and Fertilizing Garden Beds Between Seasons
- Building and Installing a Raised Garden Bed on Concrete (hard surfaces)
- How to Make a Sturdy and Inexpensive DIY Trellis
- Choosing the Best Materials for Raised Beds: Wood, Metal, or Alternatives


81 Comments
Julie
Hi, can you share with landscape weed barrier cloth you used in your garden?
Aaron (Mr. DeannaCat)
Hi Julie, I believe we used DeWitt 4 or 5 ounce woven landscape fabric and we got it from a local landscape supply store that specializes in irrigation. Hope that helps and good luck!
Jerry T Cargill
I was planning on using Garden Seal on the inside, but considering linseed oil on the outside of my cedar boxes. What is your opinion of linseed oil for the outside of cedar boxes? Thanks!
Aaron (Mr. DeannaCat)
Hi Jerry, you can use linseed oil for the outside of your raised beds but be aware of the exact type you will be applying as they can vary in drying times and some linseed oil needs close to 7 days to fully dry. Check out this article by the University of Georgia as they cover linseed oil as a wood preservative and it seems it can cause mold or mildew growth? Hope that helps and good luck!
Michael
Excellent article post on raised wood bed construction. I’ve also read elsewhere where silicon caulking the seams is recommended and the negatives of using a plastic liner sheet on the inside of the walls. I plan on using a wood sealant on redwood and had not previously run across the non-toxic Garden-Seal. Thank you. What is your thoughts on using landscape fabric on the walls in lieu of plastic sheeting and caulking? One other question if I may, what size grid did you use for gopher wire? 1/2 x 1/2 inch?
Aaron (Mr. DeannaCat)
Hi Michael, yes you are correct about the hardware cloth size, we use the 1/2 inch size. In the past, we built a raised bed planter for a tree to keep on our patio and we did line the bed with landscape fabric, however, it seemed to do more damage than good and at the very least, we saw no noticeable improvement in it making the planter last longer. It seems the landscape fabric held moisture so it may have kept the sides of the planter more wet than if nothing was there to begin with. We have also built raised beds in the past without sealant or caulking and they still last for a long time, these are just extra measures you can take that may make them last longer. Hope that helps and glad you enjoyed the article, good luck with your project and have fun growing!
Lori Hunt
Two years ago I made four raised beds thanks to your helpful directions. I’ve never built anything before and they came out great! Thank you!!! I did not seal the beds on the outside or inside, but want to treat the outsides now. Should I use the same product you recommended (Garden Seal) or is it too late to seal wood that is no longer “fresh?” Thanks again!
Aaron (Mr. DeannaCat)
Hi Lori, so great to hear the raised beds worked out so well for you, good job! I think you can still apply the sealer even though the beds were constructed a couple years ago, I would just try and wipe down the outside of the beds to cut down on the dirt and debris that is on the wood before you apply the sealer. Hope that helps and good luck!
Lori
Much appreciated!