

How to Plant a Tree: Best Practices for Success
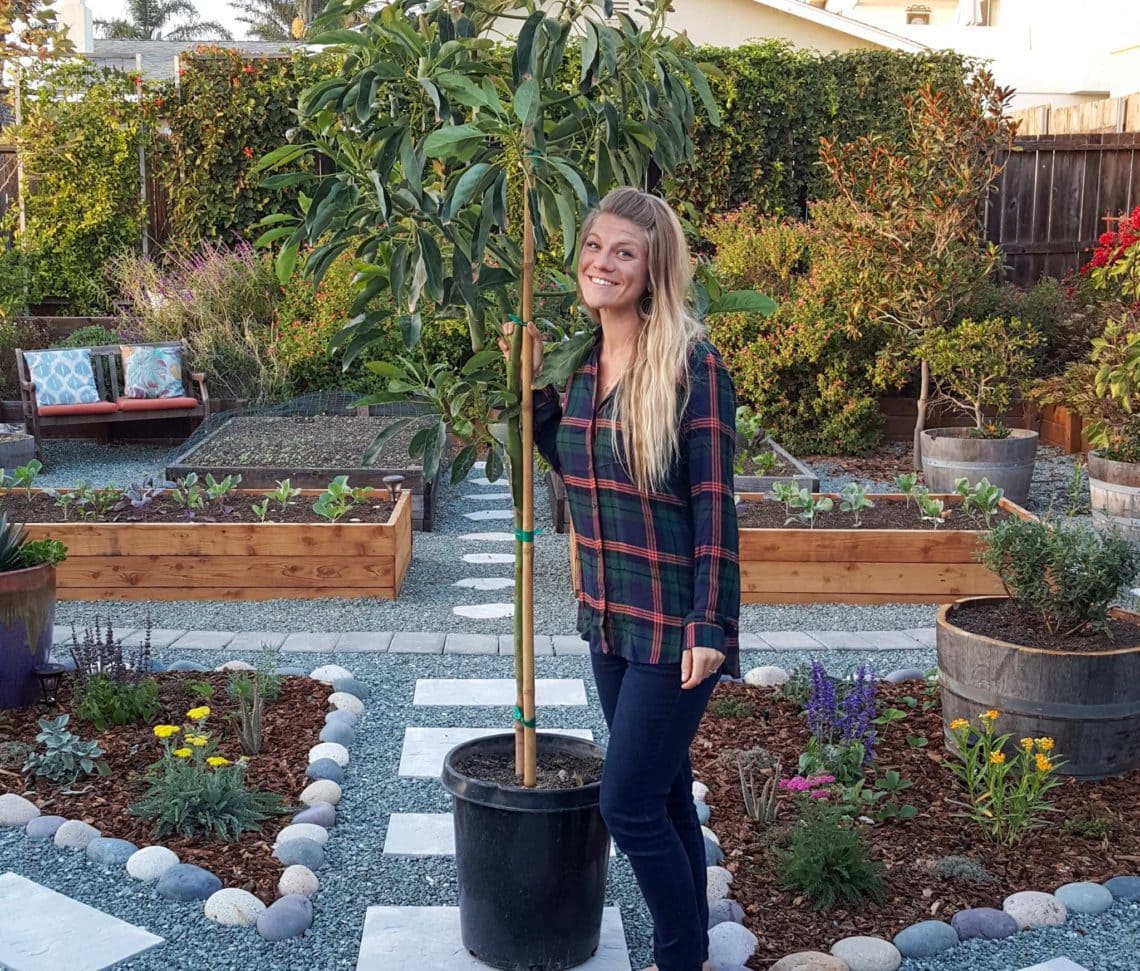
Thank you for your interest in planting trees in your yard or garden! Trees are incredibly majestic and rewarding plants to grow. Whether your intention is to provide shade, privacy, or edible fruit – you can’t go wrong! By planting a tree in your space, you are fostering life, sequestering carbon, and providing habitat for local wildlife! They are literally the “lungs of the earth”, and one of our favorite components in the garden. So much so, we have planted over 20 trees on our modest ~ 9,000 square foot property!
Let’s dig into the best practices to plant a tree – to set them up for success, promote healthy growth, and prevent transplant shock. We’ll explore the best time of year to plant trees, tips for choosing where to plant them in your garden, and go over the step-by-step process of planting a tree – including hole size, soil, fertilizer, and more! I will also provide some recommendations for how to care for a young tree, and how to protect them from burrowing pests like gophers!
Are you still trying to decide what type of trees to plant? Then check out: “How to Choose the Best Fruit or Ornamental Trees to Plant: Climate, Varieties & More”. This article covers common fruit tree requirements such as chill hours and cross-pollination, examples of trees suitable for every growing zone, and other considerations to take when selecting the best tree for your garden and location! I also touch on choosing the right kind of trees to grow in containers.
Today’s tutorial will be focused on planting trees in the ground. I will follow up with an article about how to plant a tree in a container very soon! Because they do need a little different care and consideration.
Ready to start digging?

When is the Best Time of Year to Plant a Tree?
The “best time” of year to plant a tree is going to vary, and depend on many factors. These include where you live (your growing zone), the type of tree you are planting, and also the style of the tree. For example:
- Bare root fruit trees are commonly sold or shipped in their dormant stage during late winter to early spring, and should be planted then.
- If you experience a “real” winter in your area, most fruit trees should be planted in the spring. This gives them more time to get comfy, before it gets nasty out. Remember to choose varieties suited for your zone.
- On the other hand, the most commonly recommended time of year for planting ornamental trees like maples, pines, or other evergreens is during the fall.
- Fall is also an ideal planting time for fruit trees in areas with mild or warmer winter climates – such as Florida, Coastal or Southern California, and Hawaii.
Why does the time of year matter?
The goal is to allow the just-planted tree time to get established during temperate conditions, which helps prevent shock, stress, or possible death! No matter the time of year you choose to plant a tree, it is best to avoid extreme weather – at the time of planting, or on the near horizon.
To plant a tree in the fall, aim for late August, September, or October. Wait until the hottest, harshest part of summer has passed and the weather begins to cool – but well before the ground freezes. With these conditions, the tree can focus on establishing its roots rather than spending energy on new leaf, flower, or fruit development as it would during spring time. The stronger the root system, the bigger and healthier the tree! Water and energy demands are also generally lower in the fall. Those are some of the biggest perks of fall planting.
During the springtime, local nurseries often carry a larger selection of trees to choose from! Because spring-planted trees are just coming out of winter dormancy, they will put their energy into both root and leaf/bud development. Therefore, spring-planted trees may need a bit of extra support (water, compost, mulch, etc) and time to get settled in. This is particularly true if you have hot summer weather.
HOW TO PLANT A TREE
Step 1: Choose a Location to Plant the Tree
First, look around your space and evaluate where a tree would be most happy. For most trees that means a location that is mostly sunny, and with room to grow. However, while important, it isn’t just about the trees wants and needs. We want to make sure that you are happy with the trees location too! Don’t just plop a tree down in your yard without taking a moment to consider the long-term implications.
What will this tree look like in 10 years? How about 20 years? 30 years from now? What is the average size of the tree you’re planting? How fast will it grow? Will it potentially shade out your yard, blocking the sun to your garden? How about its root system? Are they super invasive, risking damage to nearby structures or water lines? Additionally, does it tend to sprawl and spread, or stay more tight and upright?
If you want to avoid casting too much shade on the rest of your garden, locate large trees carefully. If you live in the northern hemisphere, planting them on the north side of your yard will ensure they cast as little shade as possible, as the sun sinks lower on the southern horizon much of the year. This is called a “south-facing” orientation. Keeping smaller trees in the middle of a yard and larger ones closer to walls, fences, or other tall perimeter objects also accomplishes the same goal.
Step 2: Dig A Hole for the Tree
Before you start digging, make sure you are aware if there are any utility lines such as gas, electric, or water nearby. (In California, you can call the dig alter hotline at 8-1-1 for help). Then, put on work gloves, grab your favorite shovel, and get to work! If you aren’t able to dig the hole yourself, don’t be afraid to ask for help. Call on some family, friends, colleagues, or a neighbor that can assist you. Our local nursery even offers a tree delivery and planting service.
The general rule of thumb is to dig a hole that is approximately two to three times wider than the size of the trees current container or root ball. Experts say to not dig much deeper than the container or root ball, and allow it to sit on “undisturbed soil” and prevent settling. If you accidentally dig a little too deep, it isn’t the end of the world. Because our native soil is silty and poor, we often dig our holes a few inches deeper than the container. That way, we can fill the bottom of the hole with higher quality soil for the root ball to sit on – packing it lightly, to prevent undesirable sinking later.
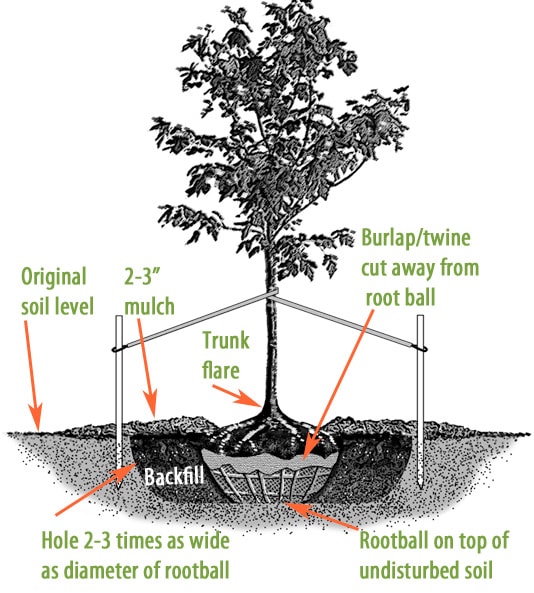
Photo courtesy of Gardeners Supply Co
Step 3: Add a Gopher Basket (Optional)
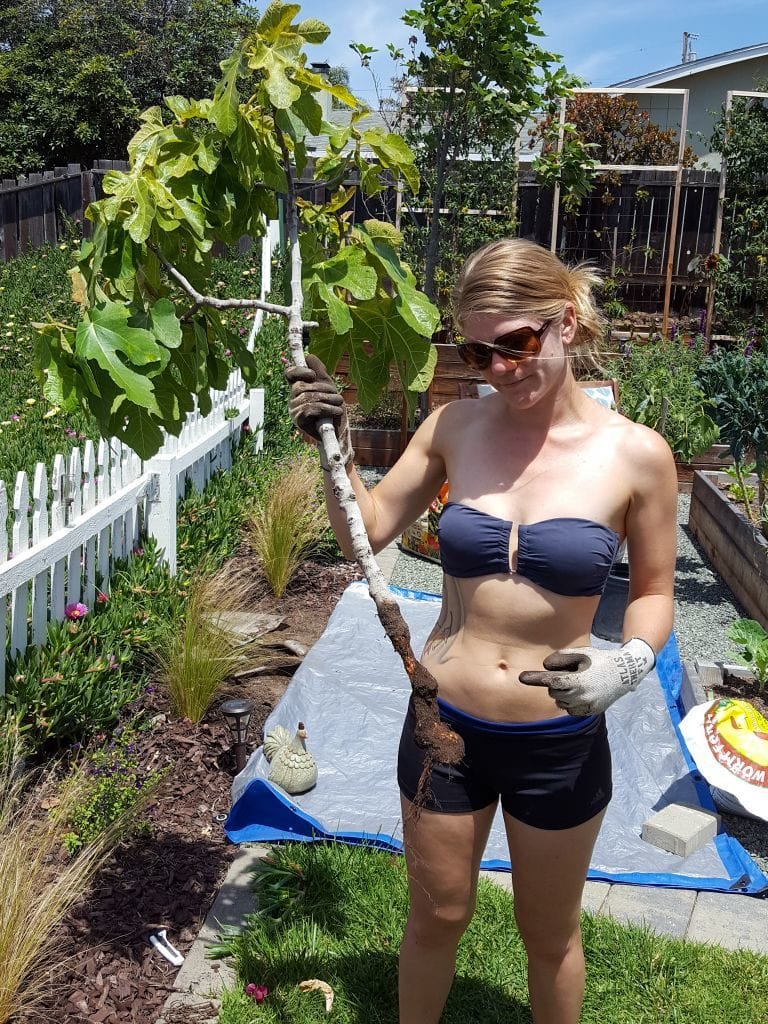
If you live in an area with a known gopher problem (like us), it’s wise to plant a tree with a gopher basket to protect it. This goes for voles and moles too. Gophers love chewing on pretty much all vegetation, but seem particularly drawn to the tender root systems of young fruit trees – and easily kill them in the process! If your garden has only a mild to moderate issue with gophers, you could choose to experiment and skip a gopher basket. See what happens! After some trial and error here, we have realized that most of our fruit trees need baskets to be safe – especially fig trees, which we have several of!
After you obtain or construct a gopher basket, add it to your hole. The upper rim of the basket should stick up at least an inch or two above ground level. This is to prevent those furry, rat-tooth little buggers from popping up, over, and into the basket.
Choosing a gopher basket
Gopher baskets are made of wire material, designed to prevent access and chewing by burrowing pests. The tree is planted within the gopher basket so it surrounds the root ball on the sides and bottom. You can purchase pre-made gopher baskets (like these 5-gallon cages or these 15-gallon ones), or make your own! Ideally, a gopher basket should be several inches larger than the tree root ball in all directions.
Depending on the material the gopher basket is made of, it may degrade with time. For example, pre-made baskets or DIY baskets constructed with chicken wire will eventually break down. This has pros and cons: it allows the roots to escape over time, which allows the tree to grow larger – but also leaves it potentially vulnerable to gophers. Yet as trees mature, they’re usually less susceptible and attractive to gophers, so it may be okay!
On the other hand, gopher baskets from hardware cloth won’t degrade. That means that as the tree grows, the basket may restrict the tree’s roots very slightly. Most of the trees we plant are dwarf or semi-dwarf varieties, or ones we hope to keep on the smaller side anyways, so we are okay with that possibility. Roots will grow through the holes in the wire, but it leaves the core root ball protected forever!
See a more detailed step-by-step tutorial on making and installing homemade gopher baskets here.

Step 4: Place Your Tree in the Hole
Before removing the tree from its nursery container, set the potted tree inside the hole to make sure everything is looking good. After you plant the tree, the top of the root ball and base of the tree trunk should sit just slightly higher than ground level. Assess your hole depth, and adjust by adding or removing more soil if needed.
Next, there are a few ways you can go about removing the tree from its pot. No matter how you do it, do not pull up on the tree trunk to get it out! You may need to massage the container a bit to loosen the roots and soil. A smaller tree can be carefully tipped sideways or even upside down, and gently eased out of the pot.
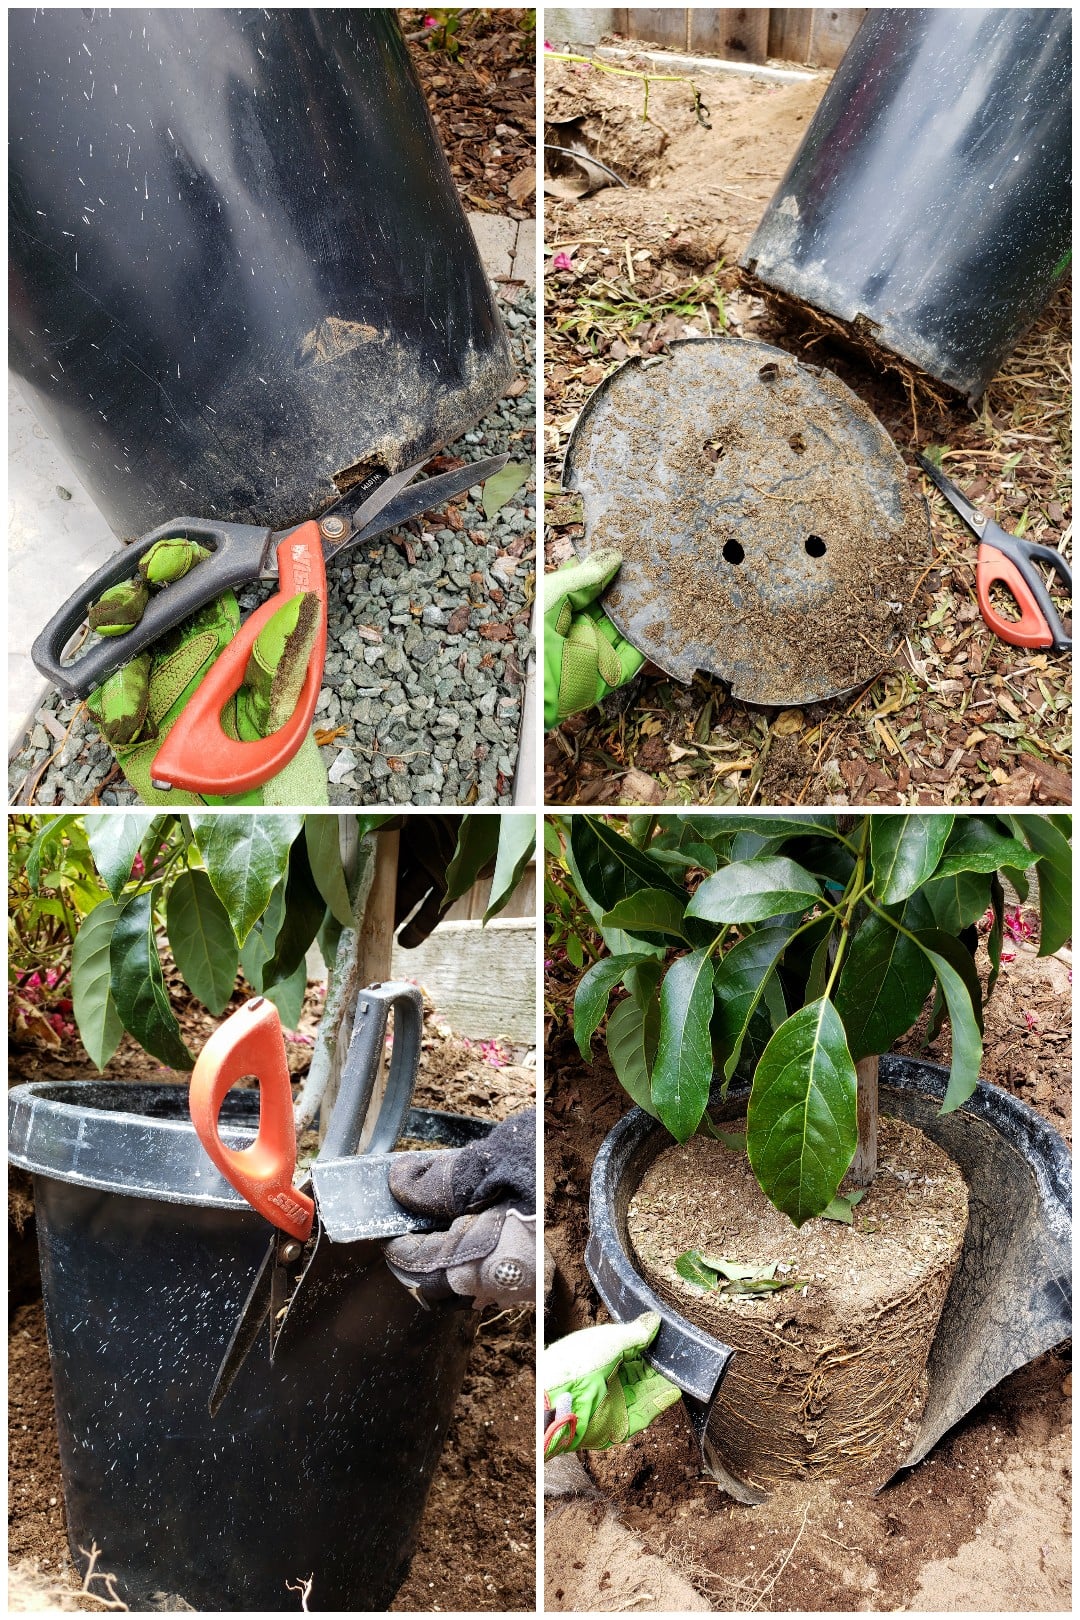
For large, heavy, difficult-to-maneuver trees, we have learned a nifty trick! Cut the plastic pot away! Sure, you can’t reuse the pot this way, but it vastly reduces the risk of accidentally damaging or shocking the tree (or your back). Using strong scissors or shears, carefully cut the bottom of the pot off first. Then set the tree inside the hole. Next, cut down along the side of the remaining pot from top to bottom. Boom! Now you can just peel that sucker away.
Ensure the root ball is centered in the planting hole, and is still at the desired height. If roots are bound and circling around themselves, carefully loosen or cut those ones only, but otherwise try to leave the root ball as undisturbed as possible. Also check to see that the tree is standing straight, and that the main branches are pointing the direction you prefer.
Step 5: Add Soil Around the Tree
Over time, the recommendation for amending soil (or not) when planting trees has evolved. Experts currently say that we should simply backfill the hole with native soil, which encourages the tree to spread into the surrounding similar native soil. The one caveat here is the condition and quality of your native soil… In general, young trees will prefer loose, balanced, modestly rich, well-draining soil. If your native soil is decent, backfill away!
Yet if your soil is overly clayey, silty, sandy, super rocky, or otherwise less-than-ideal soil (like super sandy soil is), you may want to consider adding some rich organic matter such as compost and quality bagged soil into the hole. We always do, but mix the new soil and compost about 50-50 with the native soil.
As you add soil to the hole around the root ball, gently pack the soil into place. Avoid densely compacting it, but fill any voids and pat it down a bit to prevent excessive settling in the future. Check that the tree is still standing straight as you go.
Fill the area to about the same level of the root ball, or just below. Again, do not bury the tree trunk! New soil or mulch touching the trunk may cause rot or disease. Next, use your soil to create a bit of a berm in a circle around the base of the tree. This is designed to prevent runoff when you are watering, and direct the water to the base of the tree instead.

Should I add fertilizer when I plant a tree?
No, do not apply traditional fertilizer to the root ball or planting hole when planting a new tree. Strong fertilizer may shock, “burn”, or even kill the tree! Instead, wait to fertilize the tree until it is well established – at least 8 to 12 months after planting. Even then, we like to play it safe and use mild, slow-release fertilizers that do not risk burning the tree.
In addition to compost, we add some mild and slow-release micronutrients to the perimeter of the planting hole, but several inches away from the exposed root ball itself – mostly intended to enrich the poor native sandy soil around the tree and support future growth. For example, we add basalt rock dust and kelp meal for trace minerals, and worm castings from our worm compost bin. Finally, we toss in a few earthworms (European night crawlers) around the base of all our trees. Those guys will dive deep to continually enrich, aerate, and improve the soil with time!
When space allows, we like to grow fava beans, comfrey, or other nitrogen-fixing cover crops around the wider perimeter of the tree. Those plants help to draw nitrogen into their roots, naturally enriching the soil in that area. Furthermore, as the tree grows, we continue to add natural mulch that feeds the soil. For example, chopped-up fava bean plants, comfrey, borage, compost, and other nutrient-rich organic matter.
Step 6: Mulch Around The Tree
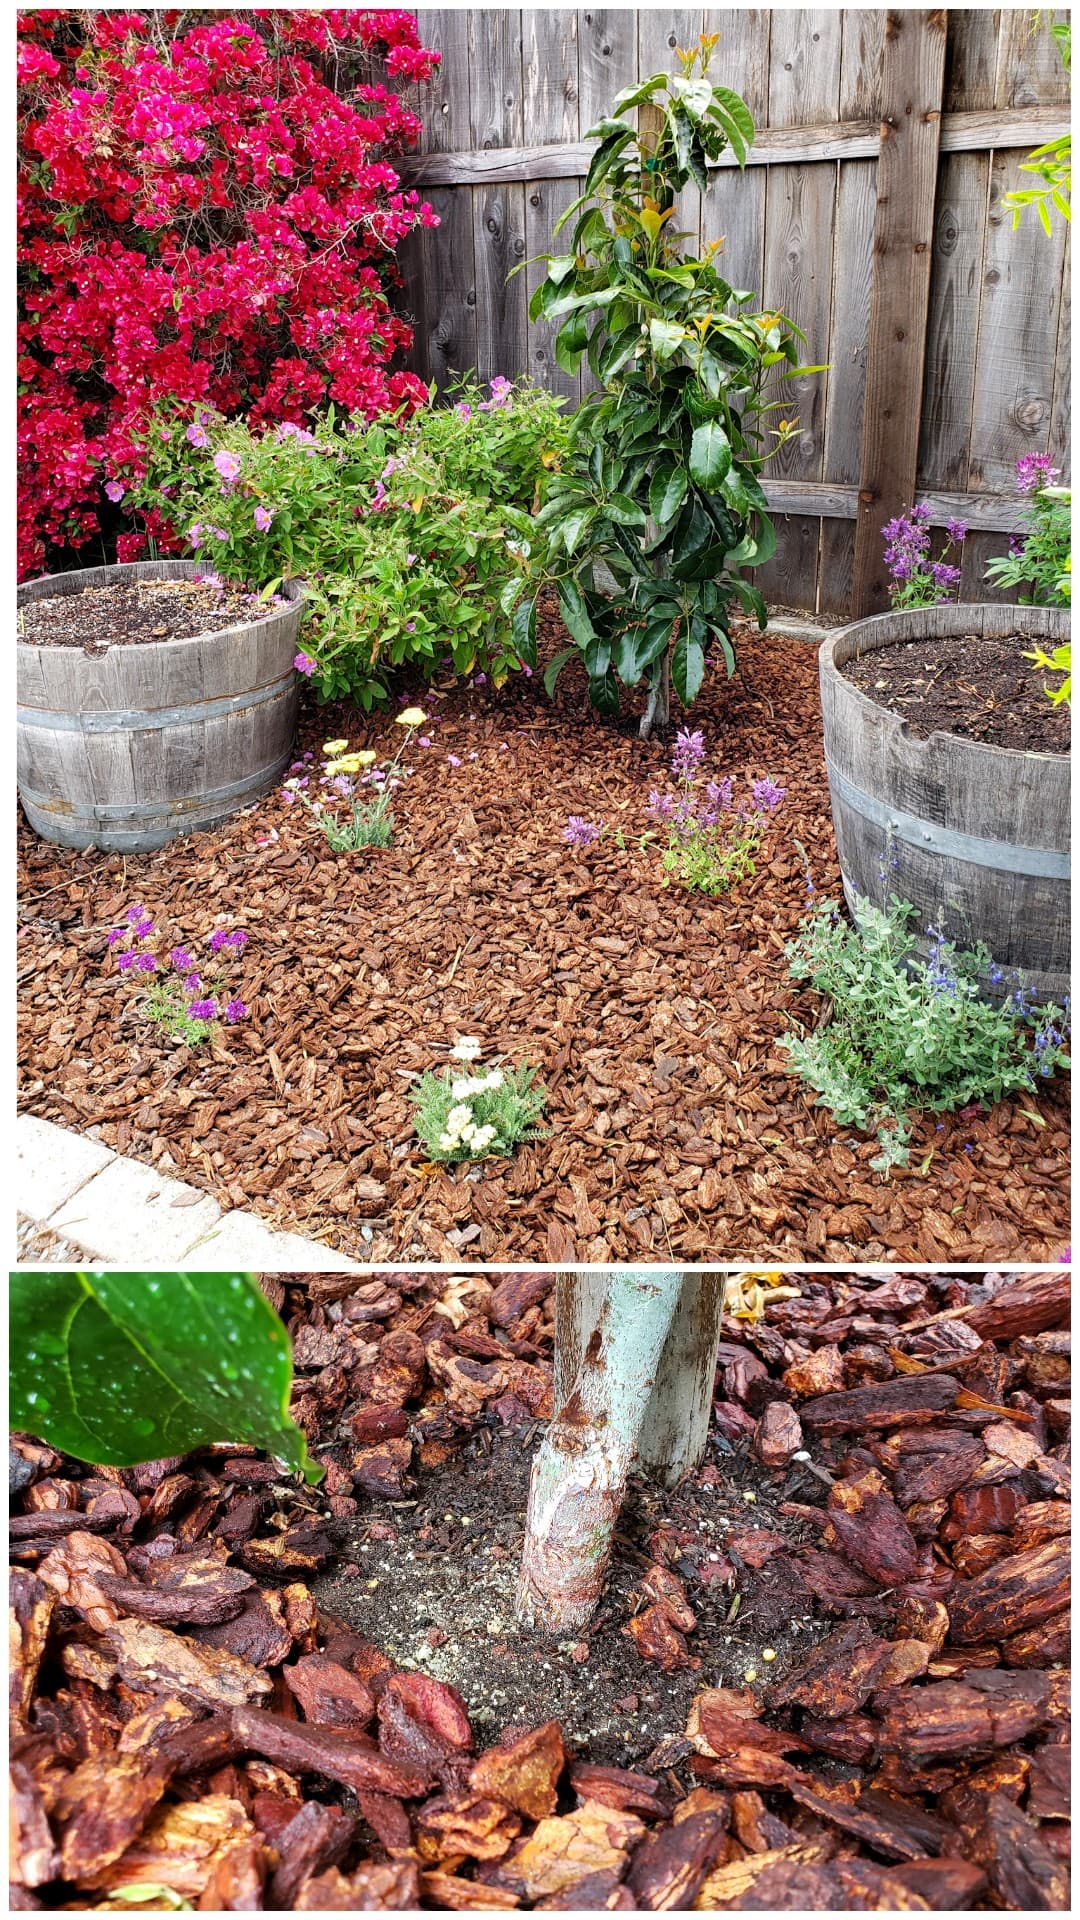
Tuck in your newly planted tree with a cozy little comfort blanket! Mulch makes trees happy. It helps prevent runoff, improves soil conditions, and promotes moisture retention. Add a 2 to 4-inch deep layer of mulch to the top of the soil around the base of the tree, extending at least a couple feet in all directions from the trunk.
We typically use small redwood or cedar bark mulch. Other excellent mulch options include leaf litter, pine needles, wood chips, compost, or other organic matter. As with the soil, avoid placing mulch directly against the tree trunk.
Step 7: Water Deeply
Immediately after planting your new tree, give it a nice long, deep drink. Now is a great time to grab one for yourself too! Wet the entire area that you have dug and disturbed. Allow the water to saturate slowly, and deep enough to reach beyond the bottom of the planting hole – particularly if the soil was dry from the start.
For the first year after planting, young trees will do best if they’re watered well once every 7 to 10 days. The goal is to keep the soil moist, but not soggy. Adjust your watering schedule according to the weather as needed, increasing the frequency in extreme heat. If you’re lucky, rain will reduce your need to water at all during some months! All of our trees are hooked up with automatic drip irrigation and micro-sprinklers that do the work for us. If you need more tips on garden irrigation solutions, check out this article!
Step 8: Provide Support
Not all newly-planted trees will need staking, depending on their size, structure, and location. A little bit of wind and movement can actually help strengthen a plant! However, if the tree is spindly, weak, or your area is prone to high winds or nasty weather, definitely plan on giving it some support. Staking a tree can also help you train it to grow more straight or in a desired direction.
Many trees will come already staked in the center, and you can simply leave it in place. Or, you can choose to provide stakes on two sides of the tree. Once the tree has been in place for a year or two, feel free to remove any stakes.
When attaching the tree to a stake, use a soft tie that will not cut into the trunk. Also, keep it pulled tight in the desired direction, but not tightly wrapped around the trunk itself. Give it room to grow! You can purchase rubber tree ties, or use something like this wide garden velcro – which is what we use!
Step 9: Aloe Vera Treat (Optional)
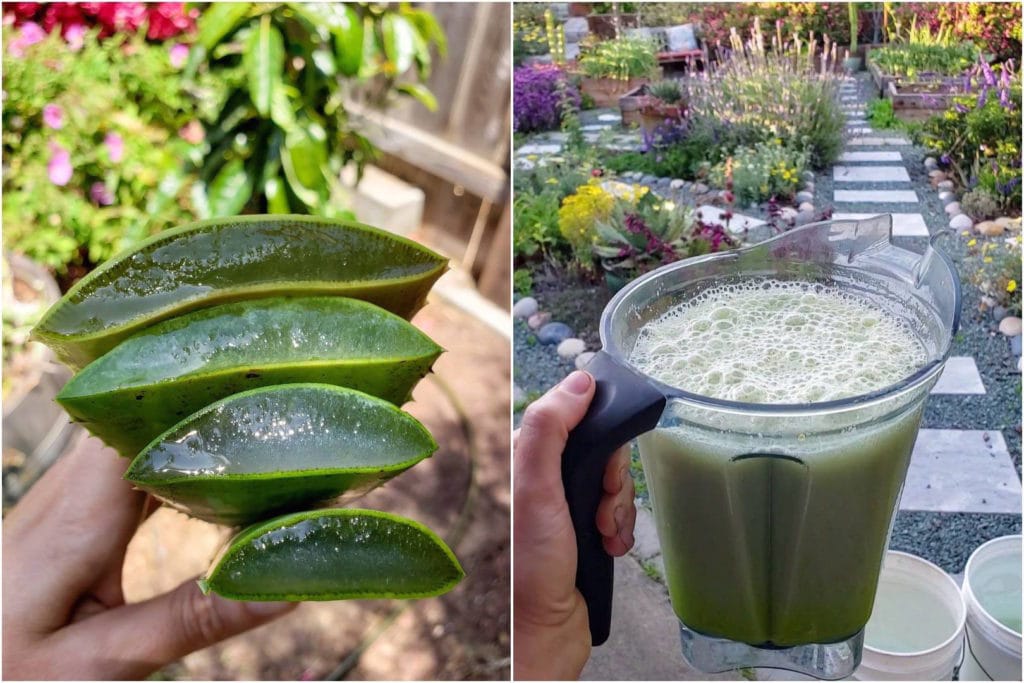
Full disclosure: we spoil our plants. After a we plant a tree, we like to give them a special treat – an aloe vera soil drench! Aloe vera contains plant hormones that help stimulate new root growth, aid in seed germination, and can ease or prevent transplant shock. It also contains a plethora of vitamins, minerals, enzymes and micronutrients that gently feed the plant, and promote resilience and disease resistance! To learn more about the amazing benefits of aloe vera, how to grow it, and how to use it to feed other plants, click here!
To create an aloe vera soil drench, simply blend whole fresh aloe vera leaves with water, then water the tree with it! We usually grab about 3-5 aloe vera leaves, blend them in water, and then dilute that full blender into a 5-gallon bucket of water. A little aloe goes a long way! If you do not have fresh aloe vera, you can also use freeze-dried aloe vera powder. We treat almost all of our plants with aloe at some point in their life, not just the trees.
Step 10: Throw Your Tree A Welcome-Home Party
You probably think I am kidding here, right? Well, take it as you wish, but we totally do this! I am convinced it is good luck. They are a new member of the family and homestead, after all! After we plant a tree, we love nothing more than to grab a festive beverage, turn on some feel-good music, and spend the evening in the garden, admiring our new friend – and hard work!
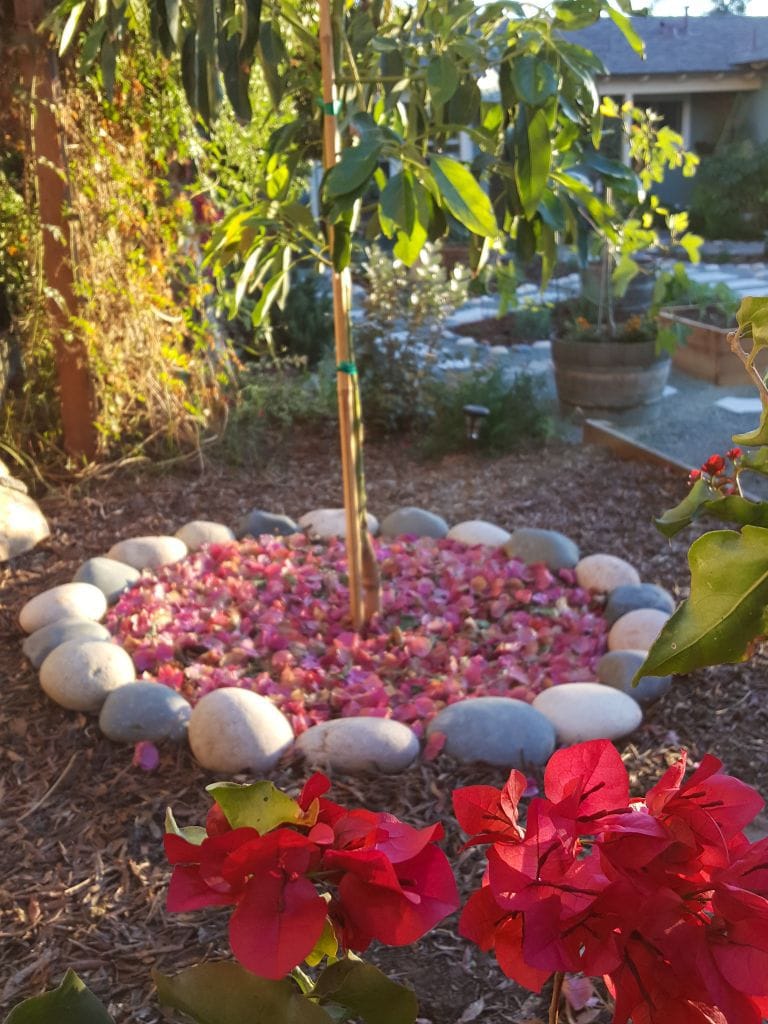
Welcome home, new tree!
If you follow these steps to plant a tree, it should be very happy, healthy, and fruitful under your loving care. I hope you picked up a few helpful tips from this article! I will follow up soon with information about growing trees in containers. Feel free to ask questions below, and share this post! Thank you for tuning in. Happy planting!


17 Comments
Jordan
Hi Deanna and Aaron, I planted a fuerte avocado tree from a local nursery in early spring of this year. All the leaves started to brown, starting from the edges inward, and eventually died and fell off. Looking like nutrient burn from my googling. Another round of leaves were on the way which was great, but now these new leaves are doing the same. I think my watering has been consistent and I don’t think that is the issue. I’ve been told it could be sodium burn, because of my location near the coast in San Diego county. I’ve been told avocado trees have a hard time with too much salt in the soil/water. Have you had any experience with this? Any recommendations? Thanks and I love your site!
Aaron (Mr. DeannaCat)
Hi Jordan, some of what I have read about chloride burn is that it shows up more in fall after the tree has been getting watered with salty water through the spring and summer months. If there is a lot of salt in your soil, regular, deep watering may help it leach or flush out. If you are on city water, you can always look at the water report to see the chloride levels in your water and compare that to what is considered a high range for avocados. Are avocado trees prevalent in your neighborhood? If so, I would be more hopeful about the future of your tree. Another thing with newly planted avocado trees, their leaves can turn brown with inconsistent moisture, they need a little bit of water more often while they are still young. Hopefully your avocado will be able to recover and start putting on some nice new growth. Good luck!
Debbie Parsons
Can I use the worm castings and aloe drench on a Emerald Green Arborvitae tree? I live in MO and trying to grow them for a wind screen. Not looking too good. 🙁
Aaron (Mr. DeannaCat)
Absolutely Debbie, both of those additions are very mild and won’t harm your plants or trees but it will go a long way in improving the plant or tree itself and the surrounding soil. Look into making an AACT for your tree as well and maybe water with that once every week or so. Good luck!
Theo W
Hey Deanna! I have been learning so much from you and your garden. I have pretty much been through the whole website. I love it. I just ordered some bulk soil last weekend, built my raised beds, and planted some trees in the yard! Do you ever use compost tea with fresh transplants? Keep up the good work!
DeannaCat
Hey there! Thanks for being here, and for the awesome feedback! The compost tea that we make with worm castings is so mild that we feel perfectly safe using it on plants at any stage of life – and yes, especially to give a boost to transplants. Our aloe vera soil drench is another favorite for transplants. My only word of caution about compost tea would be that it depends on what kind of compost you’re using for the tea. For example, if the compost contains animal manure and may be a little more “hot” (high nitrogen) I would plan to dilute it and go lighter at first. See how the plants respond and work up from there. I hope that helps!
Maribel Lerma
Thank you for sharing your knowledge with us. I love your garden so much! I just got a Meyer lemon tree and want to know how to plant in the ground and this info was so helpful! I pray that when I do plant it it is happy and fruitful!
Brittany
Great article (as usual)!! Our property came with plum, pear and apple trees! (This was a surprise to us lol what an awesome thing to realize in the spring!) Heading to get another plum tree and maybe a few cherry trees tomorrow and will definitely utilize all of these things! Including the welcome party 😉
DeannaCat
Hooray for inherited and new trees! Throw a big party for them all! Lol 🙂 Thanks for the kind words and for tuning in!
Sioux
You’re articles and the comprehensive info are fabulous. I started rehabbing/redesigning gardens when I was 15 years old. My “knowledge” was intuitive and l guess I can say I lucked out on planting anything and everything. After 50 years, I feel like I’m looking back at myself when I read your instructive “story” steps.
Friends ask me “how to’s” and it is a challenge putting my actions into words. YOUR site and articles with the expanded step by step descriptions and ample tried and true suggestions are now forwarded to those friends.
Thank you for the time and energy you take to offer all of us your experience and knowledge. I’m going to dig out my poor little blueberry bushes that have produced well but sadly languished this past year and start over. Our Grover Beach soil has not been their best friend. They deserve a boost AND a homecoming party🎉
Sarah
I love this post Deanna, my husband and I have only planted two fruit trees on our property so far, but both have wire baskets! Helps so much with our gopher problem!
I do have one question, we recently had a heat wave that took out all the leaves on our young cherry tree. It already has new buds, but my question is, should I leave the dead leaves on the tree to protect any young new leaves as they emerge, or take them off so the tree can have a fresh start? Thank you so much for all your advice and wisdom!
Stephanie
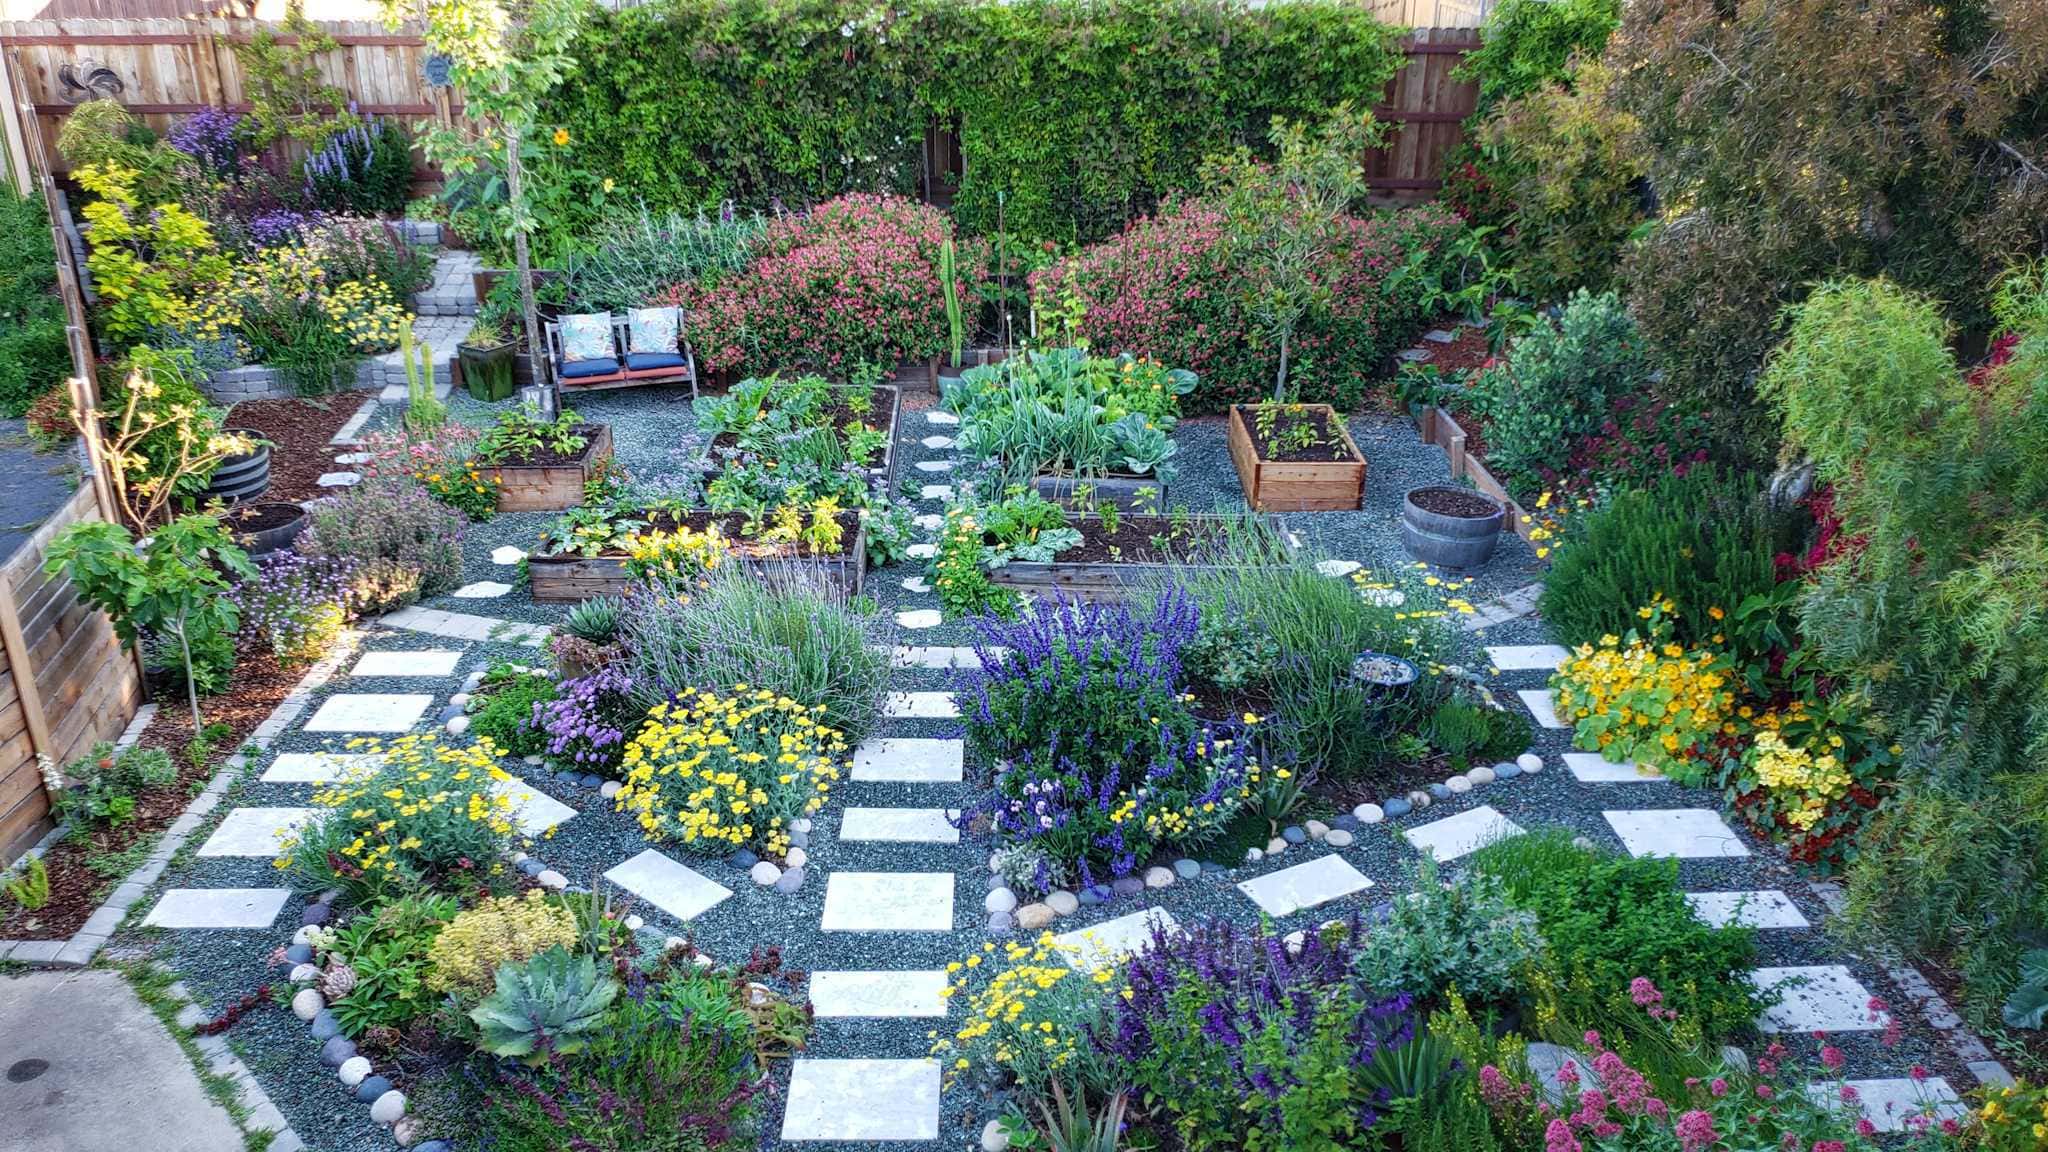
Hi! I just recently found your site and love it!! Your gardens are beautiful. Such a random question, but I love the large square (sometimes rectangular) pavers or stones you have between many of the beds in your front yard garden. Do you know what they are made of or where you got them? Thanks!
DeannaCat
Hi Stephanie! Sorry for the delay in responding! We got those from a local landscape supply company, AirVol Block – we were able to custom order the color and size 🙂 They’re concrete
Lorena
Nice post! I loved the welcome party idea!
Keep the supergood job!
Christina
I wish I had followed the gopher basket instructions. I don’t have gophers, but the moles are effing up the whole bed that my newly planted(last fall) apple tree is in since I had added a bunch of arbor chips to the top of the soil, the worms have been going insane in the area. The soil is already so much richer than it was when we got the place a year and a half ago! But .. the moles are there too. The bunnies also ate most of the bark from around much of the bottom foot of the apple tree before I made a bunny guard for it. Thankfully, trees are pretty resilient and it shas bounced back a bit and produced its first apples this season! Anyway, I didn’t see mention of guarding the trunk of the tree in your guide, so I’d suggest mentioning that for bunny areas.. and calling 811 before digging, assuming they’re in the US and the number works for them. Lol anyway, great guide! I’ll use it when I find the next trees to plant in my yard. 🙂
Stacy G
Great article. I can definitely get on board with the welcome party idea
DeannaCat
Do it! It sort of wraps up the whole special experience in a ceremonious way! Plus, a little wine or beer helps with sore muscles, right? 😉