

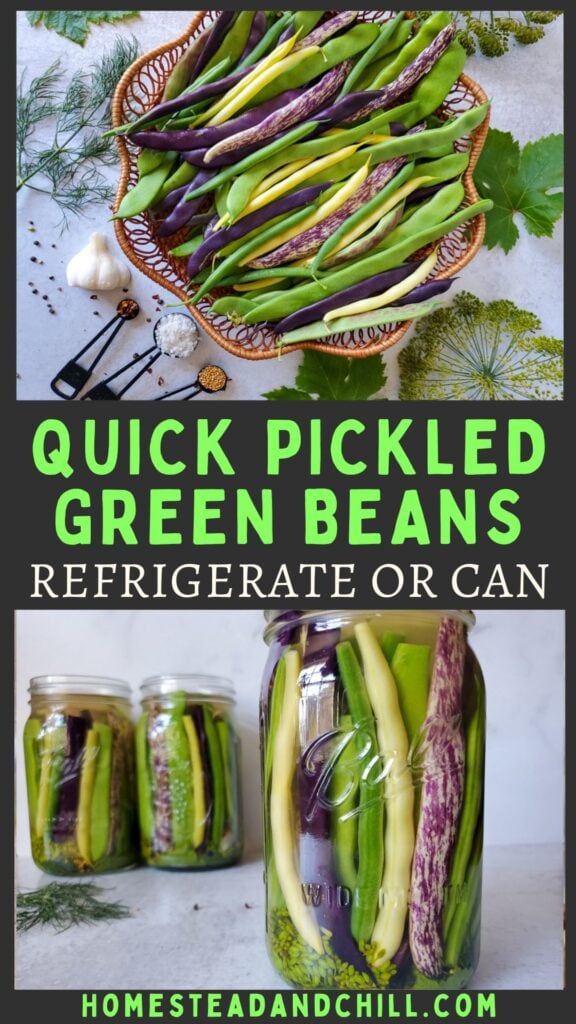
Quick Pickled Dilly Green Beans (Refrigerator or Canning)
If you’re looking for an easy and delicious way to preserve fresh green beans from the garden, look no further! You’ll love our quick pickled green beans recipe. They’re crunchy, tangy, and straight-out-of-the-jar snackable. The most simple and quick way to make dilly beans is as refrigerator pickles, where you can easily make just a jar or two at a time. Yet our pickled green bean recipe is also safe for canning, with instructions provided for both methods below.
Years ago, I also shared our lacto-fermented dilly green beans recipe. I love that they’re full of gut-healthy probiotics! Yet I know not everyone is a fan of fermented foods, or feels comfortable making them at home… so this easy vinegar pickled green bean recipe is just for you! You can also learn how to freeze fresh green beans here.
Now, let’s get picklin’!
Ingredients
Pickling Brine
- 3/4 cup white distilled vinegar
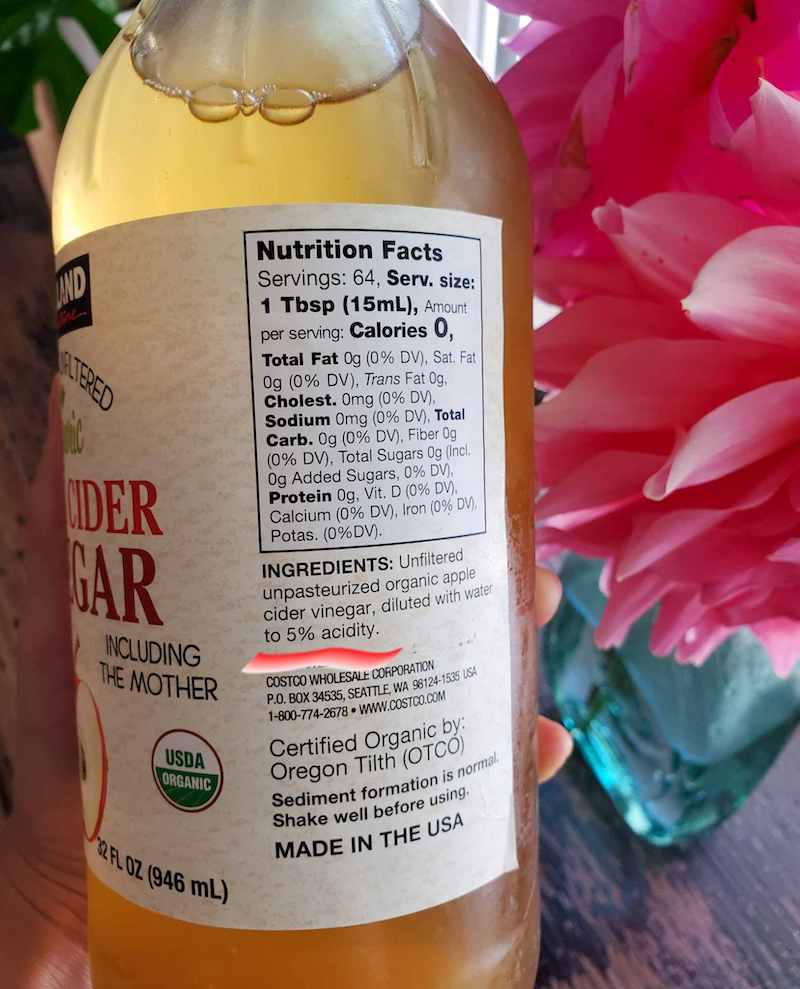
- 1/4 cup apple cider vinegar
- 1 cup water
- 1 Tbsp fine sea salt, kosher, canning or pickling salt – not iodized table salt
- 1 Tbsp sugar (optional)
This will make enough brine to fill about 1 quart jar or 2 pint jars. Scale up or down as needed depending on how many beans you intend to pickle. We often make just one or two quart jars at a time. When it doubt, make a little extra!
Feel free to use all distilled white vinegar if that’s what you have or prefer. I happen to like the slightly more sweet and complex flavor that a dash of apple cider vinegar adds to the mix. However, I don’t recommend making these with apple cider vinegar alone – unless you really like your pickles on the sweet side.
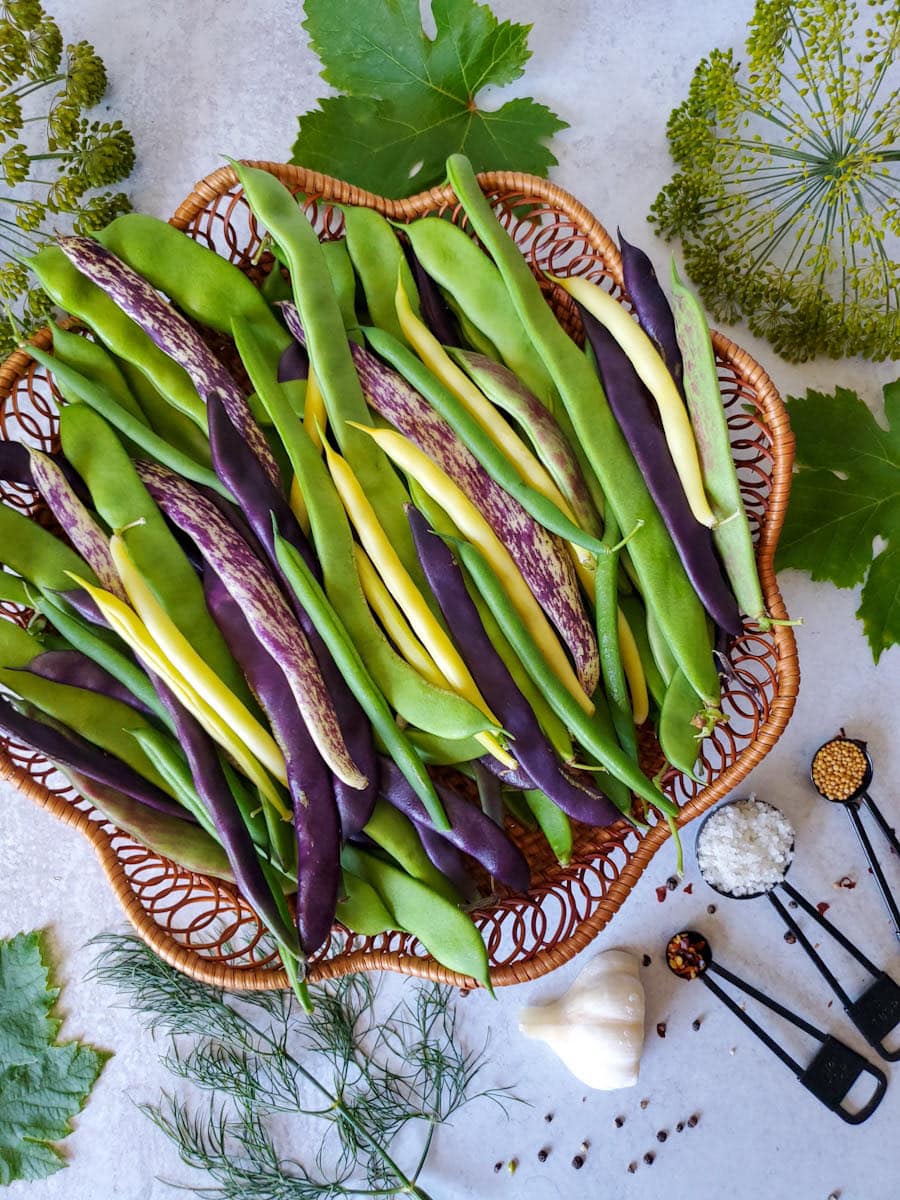
Jar Seasonings
When canning pickled green beans, you should use pint jars (as the National Center for Food Preservation doesn’t have an approved pickled green bean recipe for canning quart jars). However, I usually like to use quart jars to make quick refrigerator pickled beans since I can fit more in one jar and don’t have to trim them as much. So, here are the seasonings for both sizes:
| Ingredient | Per Quart Jar (Refrigerator) | Per Pint Jar (Canning) |
| Fresh dill | 5 to 6 sprigs, or 1 to 2 dill heads | 3 to 4 sprigs, or 1 dill head |
| Fresh garlic | 2 to 3 cloves, peeled and lighted crushed | 1 to 2 cloves, peeled/crushed |
| Black peppercorns | Up to 1 tsp | 1/2 tsp or less |
| Mustard seeds | Up to 1 tsp | 1/2 tsp or less |
| Red chili pepper flakes | Up to 1/2 tsp | 1/4 tsp or less |
| *OR pickling spices | 1 Tbsp | 1 to 1.5 teaspoons |
Can you use dried dill to make pickled dilly beans?
Sure, you can replace the fresh dill for dried dill. Yet since dried herbs are more concentrated and have a stronger flavor than fresh herbs, you’ll want to use less – about 1 tablespoon of dried dill per quart jar is good (or half a Tbsp per pint).
Tips for Canning Pickled Green Beans
- To use this pickled green beans recipe for canning, be sure to maintain the vinegar to water ratio at least 1:1 (equal parts vinegar and water) to keep the brine acidic enough and safe for canning. It’s perfectly fine to slightly increase the amount of vinegar (e.g. add an extra half a cup just to be safe) but do not decrease the vinegar or add more water.
- Also, be sure that the vinegar you’re using is at least 5% acidity. This is very important (especially if boiling water bath canning) since green beans are naturally a low-acid food.
- Before starting, I recommend setting up all your canning supplies (including hot bath water) before prepping the beans, so the water bath is boiling and ready when they are. Sterilize your canning jars in boiling water before adding any ingredients to the jar.
- Otherwise, follow the same process to prepare and pack the jars as outlined below. This will be considered a “raw pack” or “cold pack” pickled green beans recipe for canning – where you don’t cook the beans before canning them.
- If you’re new to canning, learn more of the basics here. See notes below for canned pickled green beans processing time.
How do you make pickled green beans stay crisp and crunchy?
Use the most fresh, firm beans possible to make pickled green beans. Just-harvested from the garden or farmer’s market is ideal! Also keep them stored in the refrigerator immediately post-harvest. In general, green beans tend to naturally stay more crunchy than other vegetables like pickled cucumbers or pickled peppers. Since they’re not cooked or heated, making quick refrigerator pickled dilly beans will also keep them more crisp compared to canned green beans. Pickled beans made via boiling water bath canning will be more crunchy than those pressure canned.
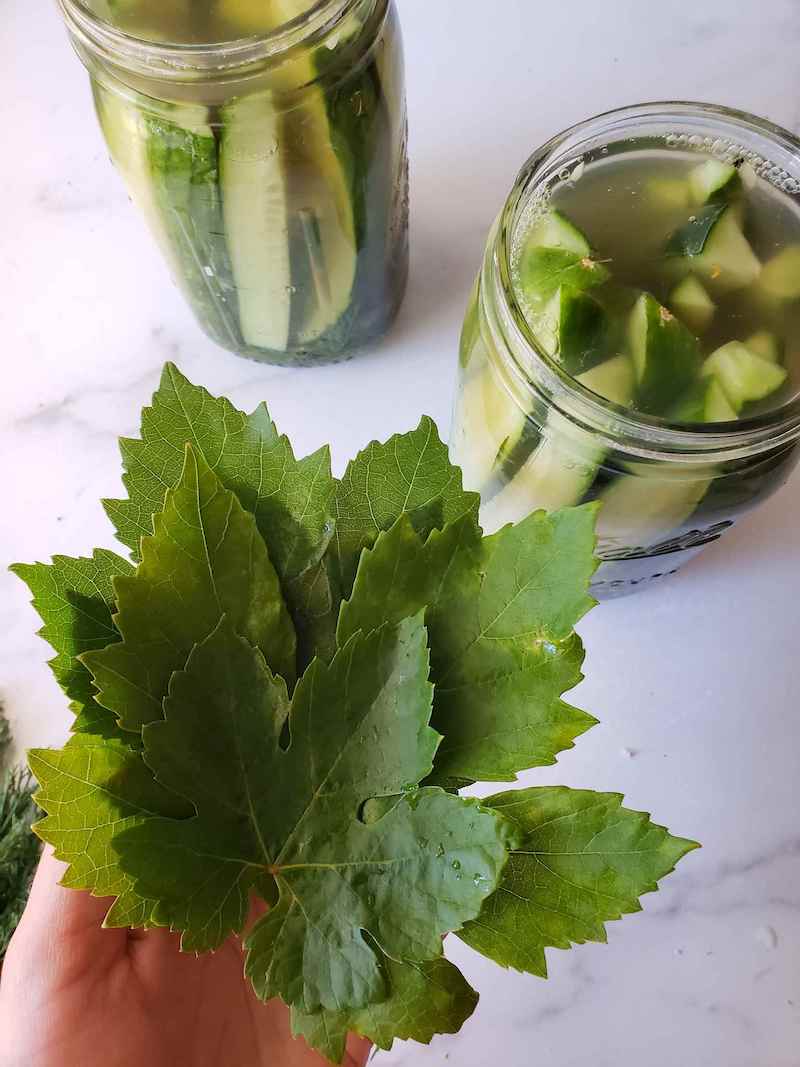
*For additional crunch: add 1 to 2 fresh grape leaves, oak leaves, black tea leaves, blackberry leaves, or other high-tannin edible leaves to the bottom of each jar. Some folks also like to use pickle crisp.
Instructions (Refrigerator and Canning)
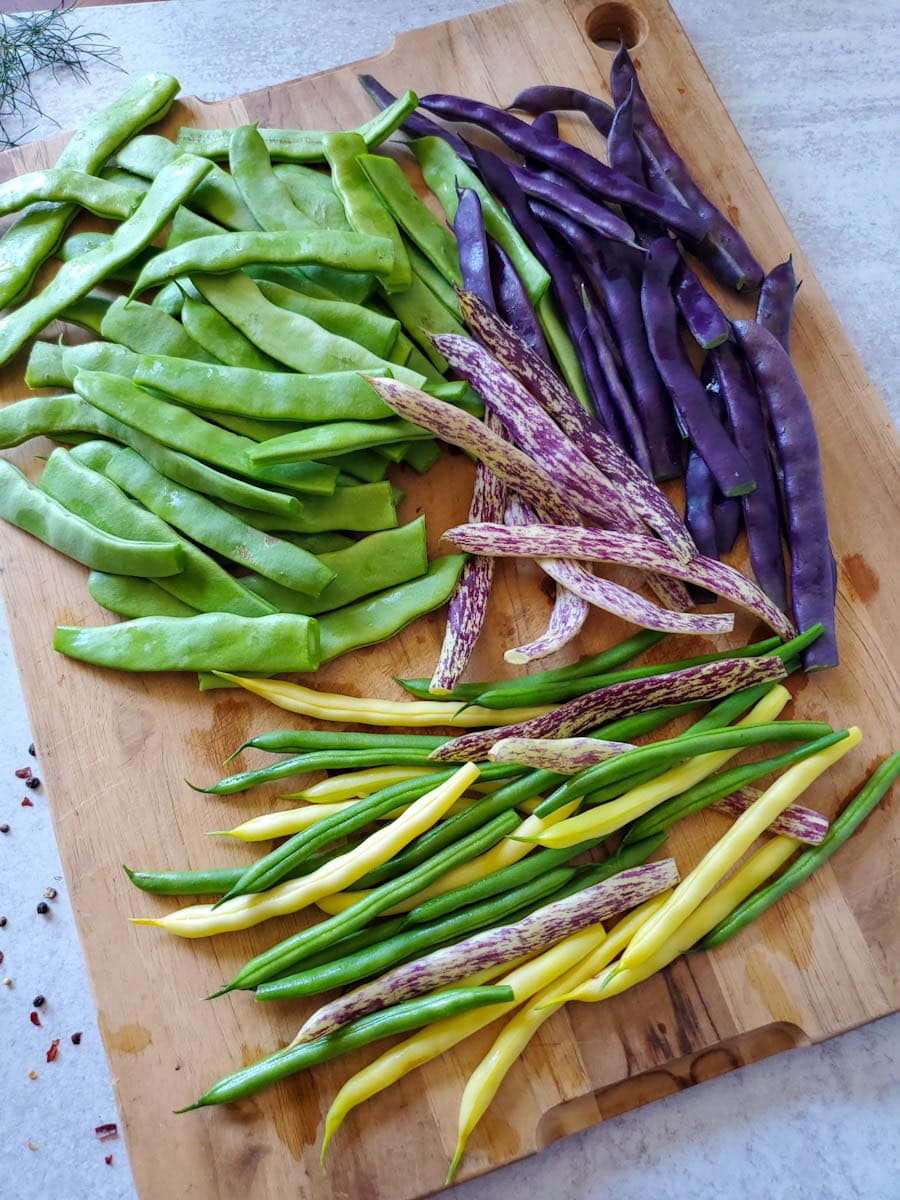
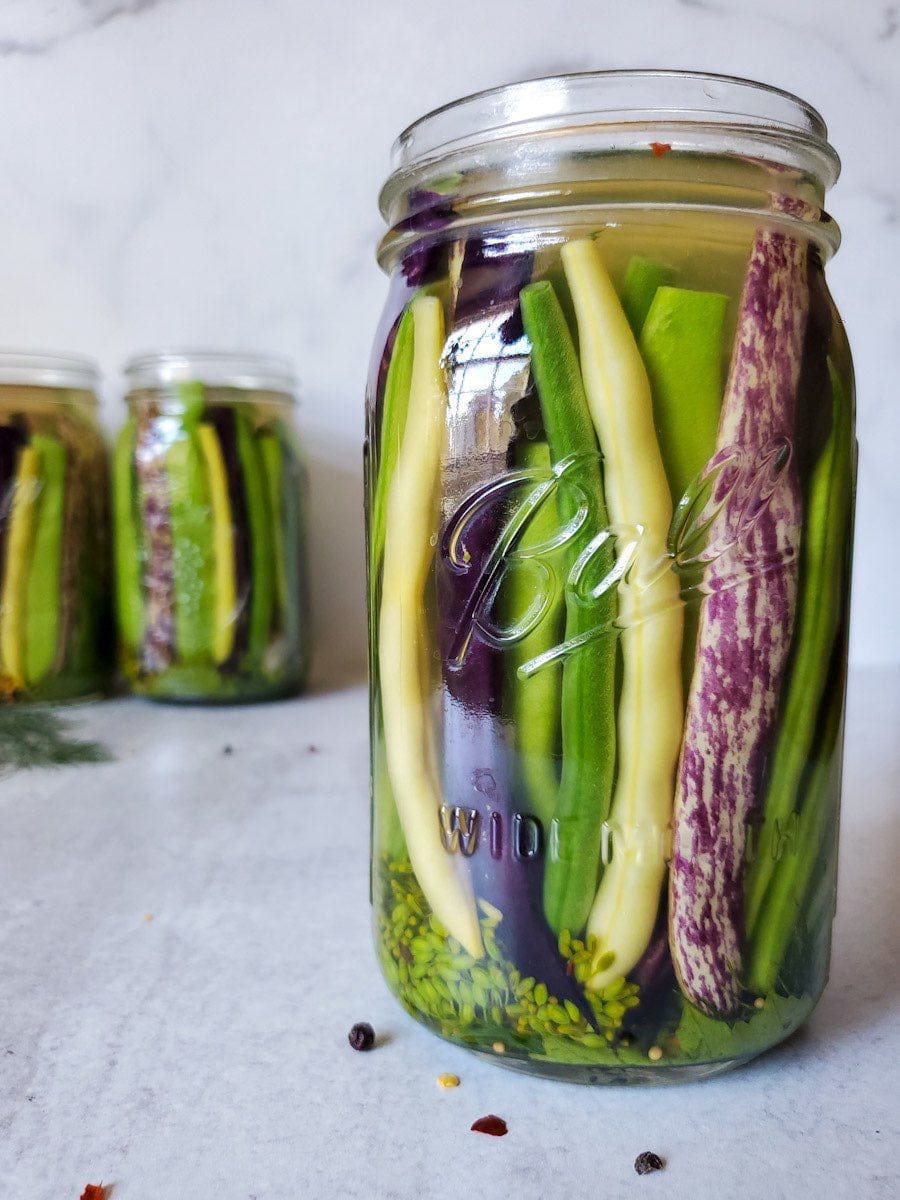
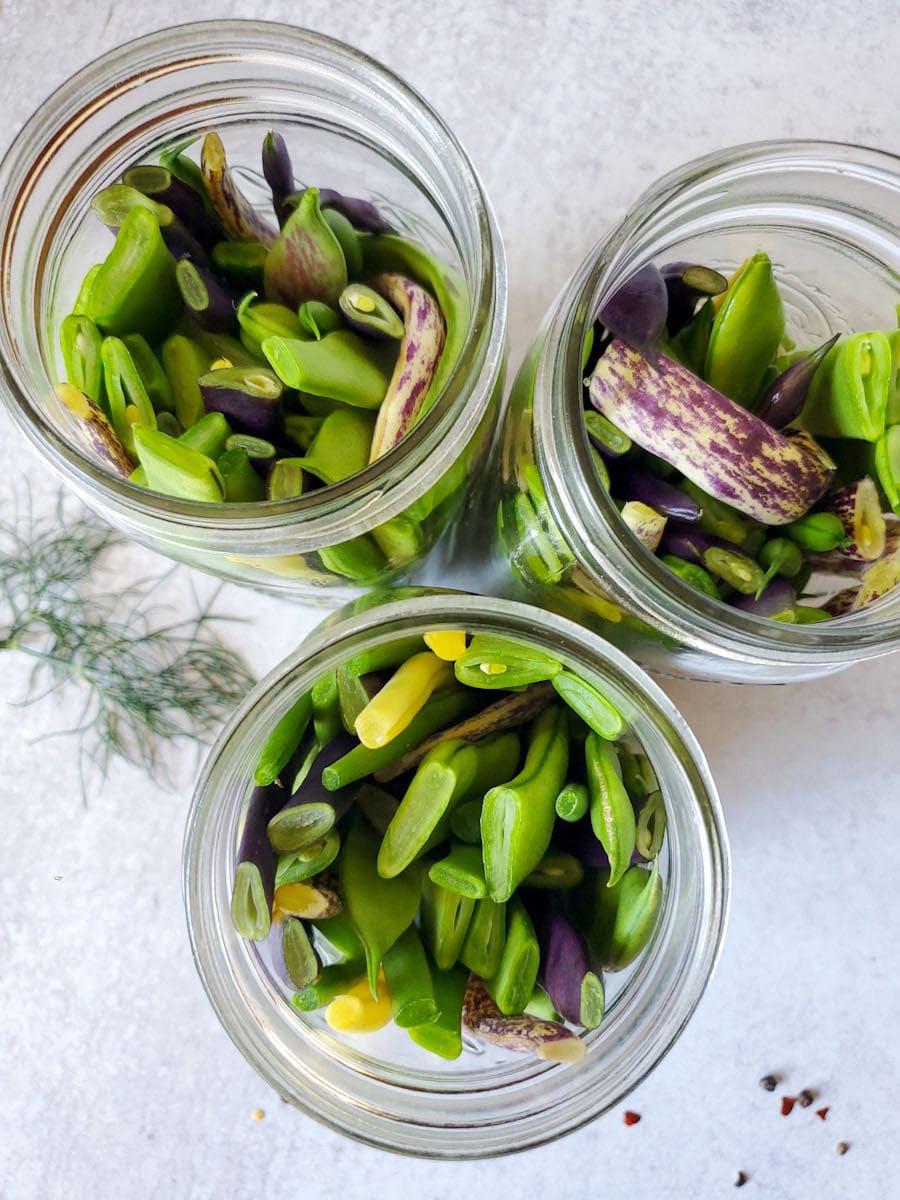
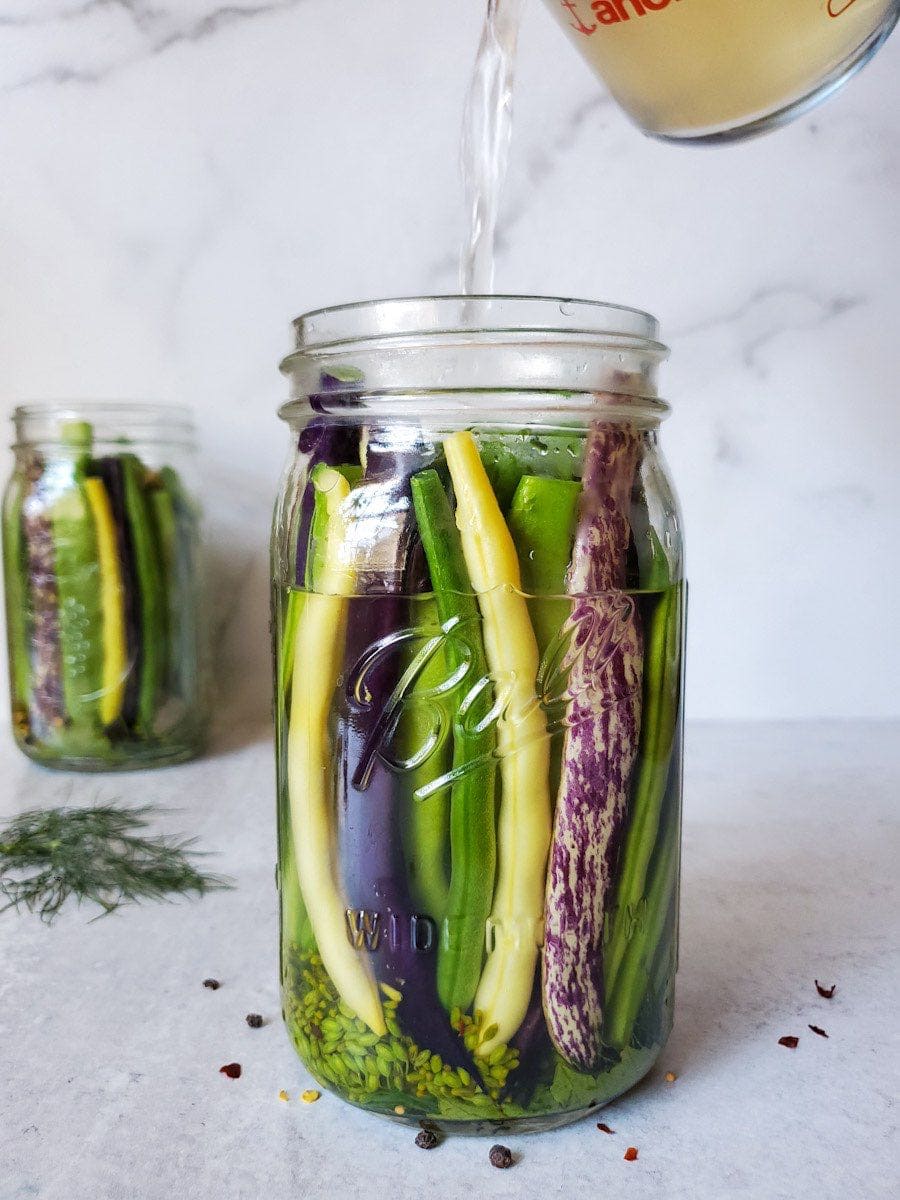
- Begin by washing your fresh green beans, and then cut off the stem ends. If needed, further trim the green beans so they’ll fit in the jar – at least ½ inch shorter than the jar itself. You can also cut them into smaller bite-size pieces if you prefer.
- On the stovetop, make the pickling brine by combining vinegars, water, salt, and sugar in a pot. For the refrigerator method, heat the brine just enough to dissolve the salt and sugar. If canning, bring the brine solution to a boil.
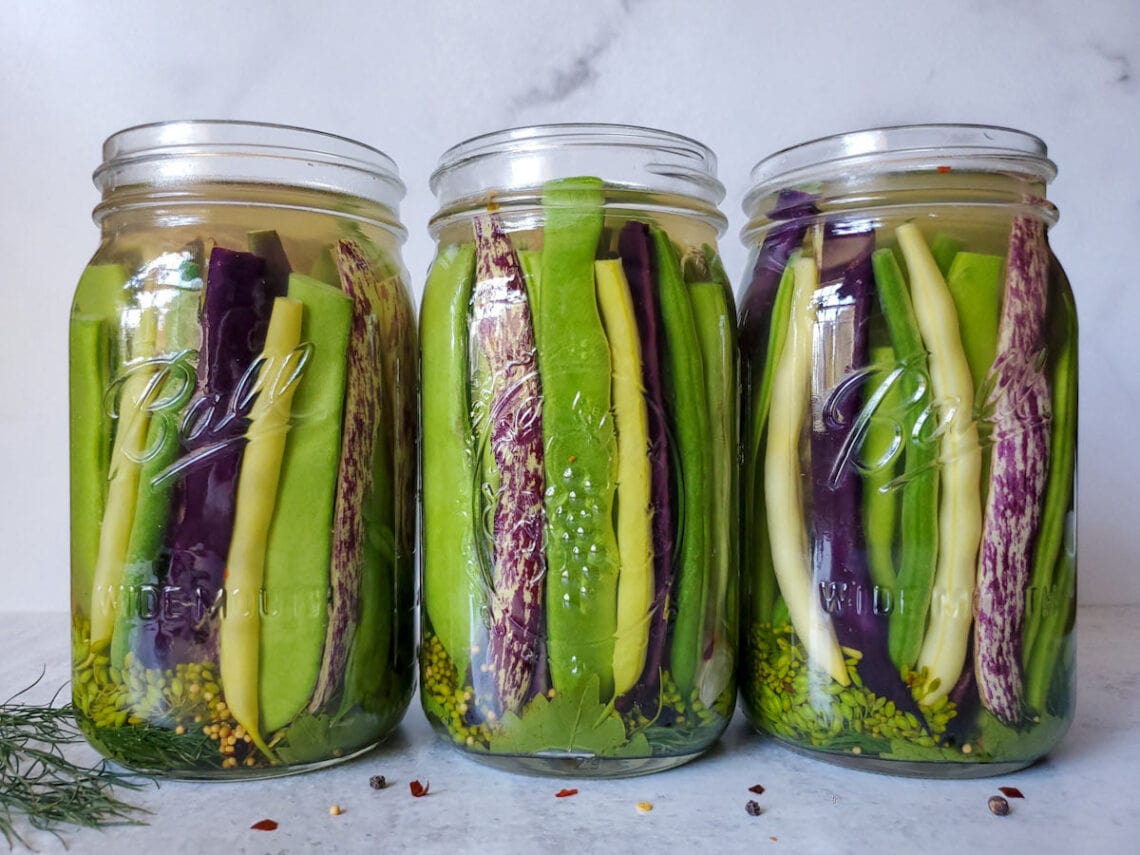
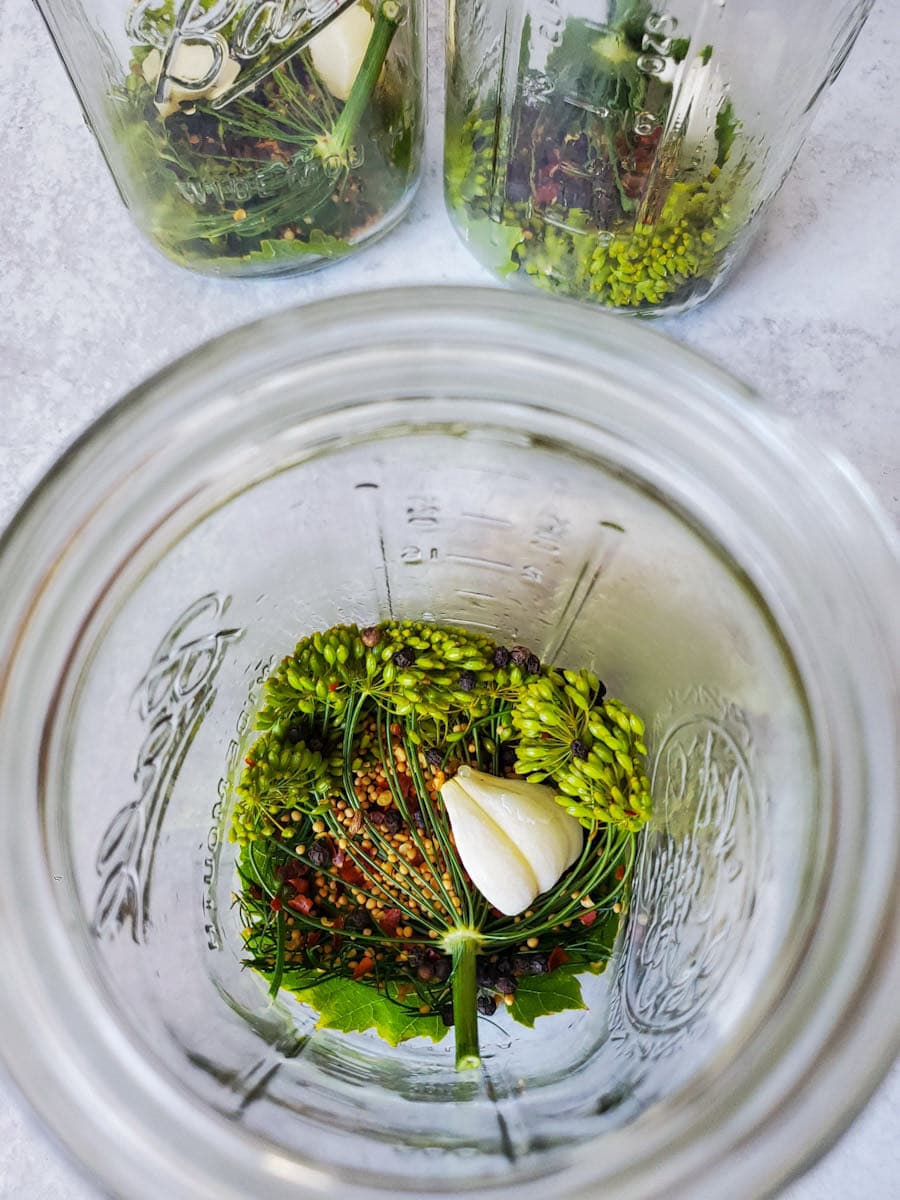
- In the bottom of each clean jar, add all of the other ingredients and spices: fresh dill, peeled garlic, black peppercorns, mustard seeds, red chili pepper flakes, and/or pickling spices. Also add the optional grape leaf (or other high-tannin leaves) now.
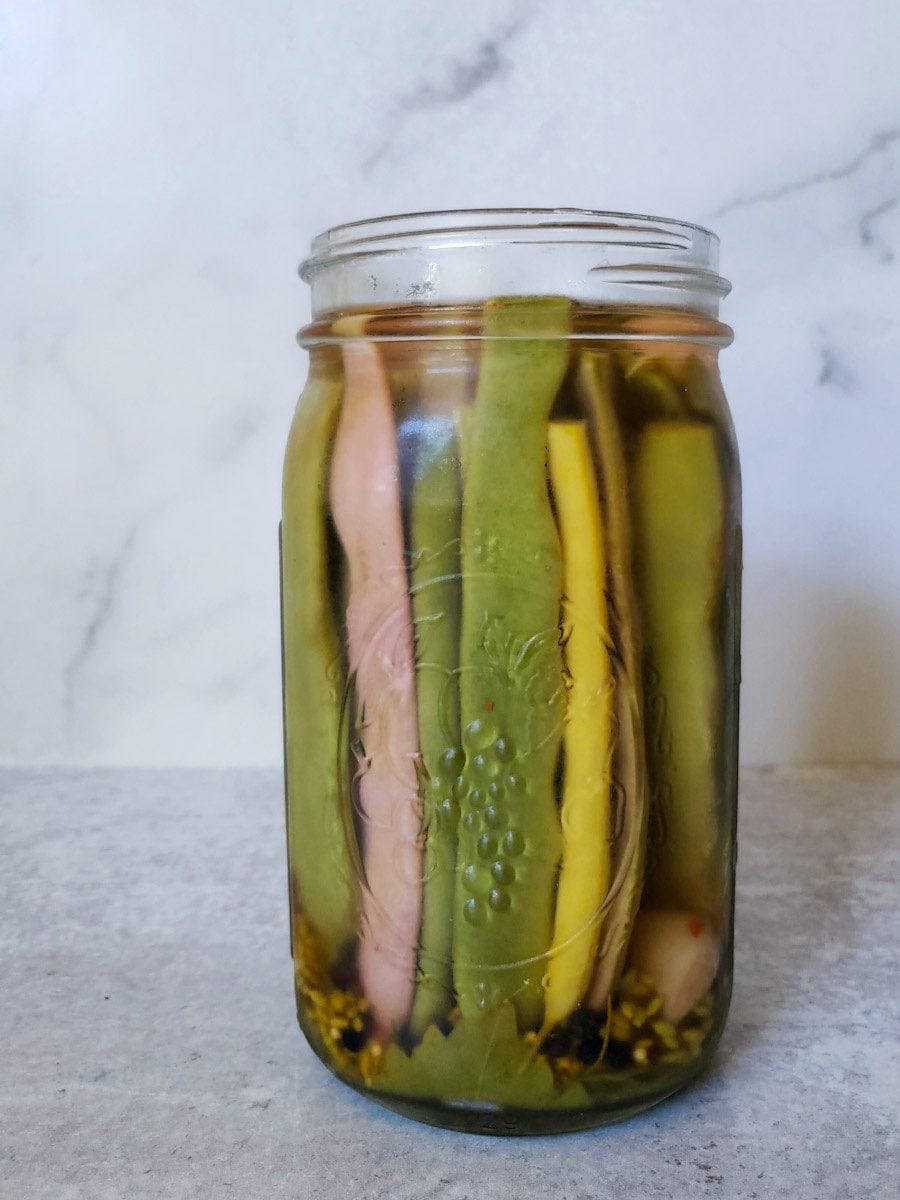
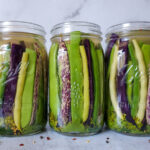
- Pack the jars as full as possible with green beans. Tip: I find it easiest to lay the jars on their side to stack them in there tight!
- To make quick refrigerator pickled green beans, I like to let the brine cool slightly before adding it to the jars of beans – which helps prevent the beans from cooking and keeps them extra crunchy!
- When canning pickled green beans, carefully ladle hot brine into the jars, leaving ½ inch of headspace.
Quick Refrigerator Pickled Green Beans
After adding brine to the jars, simply add a lid and put the jars in the refrigerator. Let them marinate for a few days – 5 days recommended for maximum flavor – and then your homemade quick pickled green beans are ready to enjoy! Keep quick pickled green beans stored in the refrigerator. They should stay good for up to a year, but are best enjoyed within the first few months for maximum crunch and flavor.
Canning Pickled Green Beans
After adding the hot brine to the jars of green beans, wipe the rim of each jar before adding clean, new canning lids. A clean rim is essential for a good seal. Add canning jar rings, but only screw them down to barely finger-tight. Use a jar lifter to carefully transfer the packed jars of beans into the canning boiling water bath. Be sure to use a wire rack inside the canning pot, so the jars aren’t sitting directly on the bottom of the pot. The water in the hot bath canner should cover the jars by at least an inch or two. Add more boiling water if necessary (e.g. heated from a tea kettle).
Once the water returns to a boil, add a lid and process canned pickled green beans as follows:
| Recommended process time for Pickled Dilled Beans in a boiling-water canner. | ||||
| Process Time at Altitudes of | ||||
| Style of Pack | Jar Size | 0 – 1,000 ft | 1,001 – 6,000 ft | Above 6,000 ft |
| Raw | Pints | 5 min | 10 | 15 |
Carefully transfer the hot jars from the canner to a cooling rack, and allow to sit undisturbed for 24 hours, then check seals. You can also remove the rings for storage if desired. For the best shelf life, store canned pickled green beans in a cool dark place, such as the pantry, basement, or root cellar and consume within one year.
How long do pickled green beans last?
About a year. Unopened, canned pickled green beans are shelf-stable and last about a year stored at room temperature. Once opened, store canned beans in the refrigerator and plan to use them within a few weeks, or up to a couple months. Quick refrigerator pickled green beans are best used within 3 months for optimum quality and texture, though they’ll technically stay good stored in the refrigerator for up to a year. Discard if mold or off odors develop.
Ways to Eat Pickled Green Beans
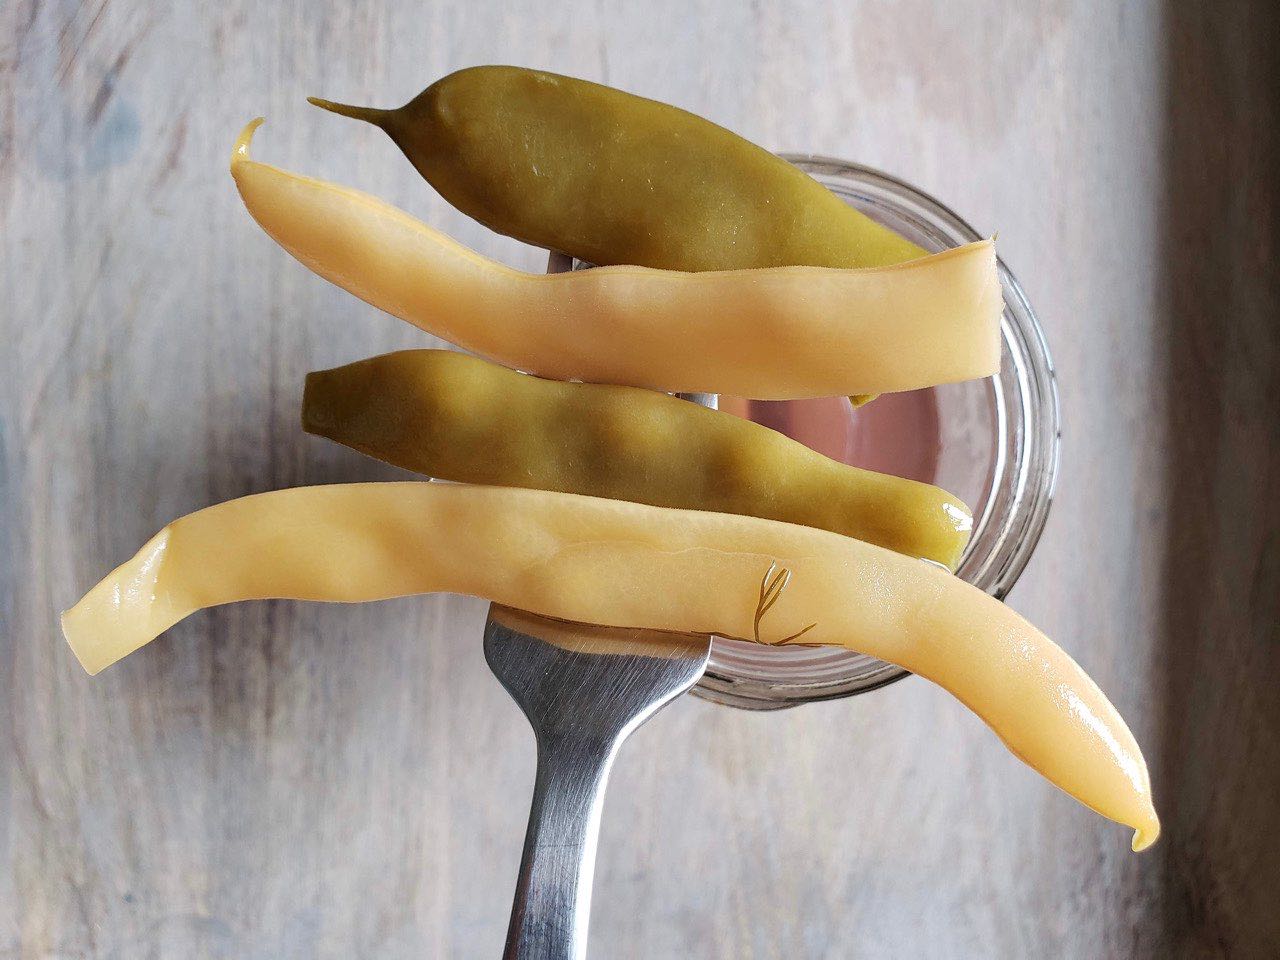
Pickled dilly beans are delicious to snack on – right out of the jar! I love to add them to an hors d’oeuvre plate or charcuterie board with cheese, crackers, nuts, veggies, dips, and other tasty appetizers. They’re also fantastic on the side with a sandwich, veggie burger or tacos, much like a classic cucumber pickle. You could even dice them up into small pieces to add into potato salad, egg salad, or other similar dishes that would welcome a tangy crunch. Pickled dilly beans are always an excellent addition to Bloody Marys too!
And that’s how to make quick pickled dilly green beans!
Well folks, I sure hope you enjoy this pickled green beans recipe as much as we do. If so, please spread the love by leaving and review below or sharing this post. Also please let us know if you have any questions in the comments. Otherwise, have fun and happy pickling!
You may also enjoy:
- Simple and Delicious Roasted Tomato Sauce Recipe (Can or Freeze)
- Crunchy Cucumber Dill Pickles: Easy Refrigerator Recipe
- How to Grow Bushels of Beans from Seed (Bush Beans & Pole Beans)
- How to Make Chive Blossom Vinegar + 8 Ways to Use it
- Roasted Beets with Fresh Orange and Balsamic Vinegar Marinade
Quick Pickled Dilly Green Beans (Canning or Refrigerator)
Equipment
- pint jars and canning lids (if canning) or other glass container with lid (refrigerator)
Ingredients
- Fresh green beans, washed and trimmed
Brine (per quart jar or 2 pints)
- 1 cup Water
- 3/4 cup Distilled white vinegar (5% acidity)
- 1/4 cup Apple cider vinegar (5% acidity)
- 1 Tbsp Fine sea salt, kosher or pickling salt
- 1 Tbsp Sugar (optional)
In-Jar Seasonings (per quart jar, halve for pints/canning)
- 6 sprigs Fresh dill (a small handful), 2-3 dill heads, or 1 Tbsp dry dill
- 3 cloves Fresh garlic cloves, peeled and lightly crushed
- 1 tsp Peppercorns, or less to taste
- 1 tsp Mustard seed, or less to taste
- 1/2 tsp Red chili pepper flakes (or less, to taste) or 1 fresh hot chili pepper
- 1 Tbsp pickling spice blend (use instead of peppercorns, mustard seed and red chili flakes)
- 2 whole Grape leaves – substitute with horseradish, oak, blackberry, or black tea leaves (optional, for maximum crispness)
Instructions
- If canning, prep your canning supplies first – fill and heat the hot bath canning water, sanitize jars and lids, etc.
- Wash the green beans, and then cut off the stem ends. If needed, further trim the green beans so they’ll fit in the jar – at least ½ inch shorter than the jar itself. You can also cut them into smaller bite-size pieces if you prefer.
- On the stovetop, make the pickling brine by combining vinegars, water, salt, and sugar in a pot. For the refrigerator method, heat the brine just enough to dissolve the salt and sugar. If canning, bring the brine solution to a boil.
- In the bottom of each clean jar, add all of the other ingredients and spices: fresh dill, peeled garlic, black peppercorns, mustard seeds, red chili flakes, and/or pickling spices. Also add the optional grape leaf (or other high-tannin leaves) now.
- Pack the jars as full as possible with green beans. Tip: I find it easiest to lay the jars on their side to stack them in there tight!
- To make quick refrigerator pickled green beans, I like to let the brine cool slightly before adding it to the jars of beans – which helps prevent the beans from cooking and keeps them extra crunchy!
- When canning pickled green beans, carefully ladle hot brine into the jars, leaving ½ inch of headspace.
- Pour the brine over the top of the cucumbers until they are completely submerged. If you happen to run out, top off with plain white vinegar if needed.
Refrigerator
- Place an air-tight lid on the jar, and then move to the refrigerator. For optimum flavor, allow the beans to marinate in the refrigerator for at least 5 days before consuming.
- Use within 3 months for the best quality and texture, though pickled green beans will technically stay good in the refrigerator for up to a year. Discard if mold or off odors develop.
Canning
- After adding the hot brine to the jars of green beans, wipe the rim of each jar before adding clean, new canning lids. Add canning jar rings, tightened to only barely finger-tight.
- Use a jar lifter to carefully transfer the packed jars of pickled green beans into the canning pot of boiling water. Use a wire rack so the jars aren’t sitting directly on the bottom of the pot.
- The water in the hot bath canner should cover the jars by at least an inch or two. Add more boiling water if necessary (e.g. heated from a tea kettle).
- Once the water returns to a boil, process the pint jars in hot water canner for 5 minutes (10 minutes if at 1000-6000 feet, 15 mins if over 6000 ft elevation)
- Carefully transfer the hot jars from the canner to a cooling rack, and allow to sit undisturbed for 24 hours, then check seals.
- For the best shelf life, store canned pickled green beans in a cool dark place, such as the pantry, basement, or root cellar. Unopened, canned pickled green beans are good for about a year.
- Once opened, store them in the refrigerator and plan to use them within a few weeks, or up to a couple months. Discard if mold or off odors develop


2 Comments
Mary W
As always, so much good info in the instructions! I do have a question. Fifty years ago I made my dill pickles from cucumbers by adding several cut stems from the dill plant stuck down like a spear of cucumber. Then I added the seed heads to the top. I had been taught that was the best way to get lots of good dill flavor and it worked very well. I did peer down each hollow stem to be sure there wasn’t an insect hiding inside. I never found one but always checked. Now that I’m back canning, I never, ever hear anyone that uses the stems but only the heads. Is that due to new information concerning the stems or just no one bothers anymore? Would love to know but don’t see anyone mentioning this. We didn’t eat the stems but always poked about 4 or 5 into each quart jar. Thanks for the refrigerator recipe as well – my now preferred way for most crunch. Now that I’ve reread what I wrote, I was thinking the stems may make a great straw for cucumber water. That will be my first experiment.
Aaron (Mr. DeannaCat)
Hi Mary, using dill stems as straws sounds like an interesting idea! I think using the dill stems in your pickles is a great idea as they still contain a good amount of flavor, we find the dill heads to be more aromatic but you may as well use the stems as well if you have them, we will have to add some stems to our next batch of pickles and we’ll let you know how they turn out. Enjoy!